Silent-hill-2-enhancements: Help Needed: Specialized Room Adjustments
@Bigmanjapan
Continuing from email conversation here are details about other rooms/areas that could use some love. Some of these have been discussed in the past but will be posted here just to make them easier to find/discuss, if needed:
Hotel Room 312 Chair Shadow (rr91.map)
The chair James sits on while watching the VHS tape doesn't cast a shadow while the cutscene plays. However, both before and after the cutscene the chair has a shadow once more:

Here you can also see a video of the chair regaining its shadow once the cutscene ends:
https://youtu.be/JH109aNOpCA
This is a problem because, without the chair's shadow during the cutscene, we see only James' shadow and during certain parts of the cutscene chunks of his shadow are masked out:


I studied the parts of James' shadow that are bugged/masked out and it seems to actually make an abstract outline of where the chair's shadow should actually be.
And here is a PCSX2 (PS2) screenshot showing that the chair should have its shadow during this part:

If you watch the video link from above, we can see that James' can cast his shadow on the chair _while_ the chair itself casts its own shadow (after the cutscene ends).
Since we know it's possible for the chair to cast its own shadow and the chair can also receive James' shadow, is there then anyway to restore the shadow to this chair during the cutscene?
 Polymega
All 137 comments
FIXED! Prison hallway hole lights (ps53.map)
This one was mentioned before but adding here for posterity: The tube lights in this prison hallway hole room aren't "lit" and instead affected by James' flashlight. When his light is off they're pitch black and when his light is on they're dulled:

Whereas they should always be lit (with no other lighting influencing them) as seen here on the PCSX2 (PS2) version:

Is there a way to restore these lights so that they're always lit?
Polymega
on 7 Nov 2018
The Dormant Mannequin (Woodside Rm 205)
This room is a complete mess and the PC version of this game is trying to do everything it can to ruin the surprise.
However, thanks to you Bigmanjapan, we now know how to darken the dynamic objects in this room before acquiring the light and we can now also fix the pool of blood when both a) quick loading into the room before getting the flashlight and b) if the Mannequin dies on the carpet afterwards.
The last two things to fix? 1) Removing the shine from the mannequin before getting the light (to make the surprise more... surprising) and 2) preventing the mannequin from "flipping" when coming to life if the player quick loads into the room before getting the light.
Now, both of these things aren't _necessary_ to have fixed (the most important bug to fix was darkening the dynamic objects) but, between the two remaining fixes, I'd say removing the shine on the mannequin before acquiring the flashlight is more important between the two.
Why? Because the chances of someone quick saving _then_ quick loading in this particular room _before_ acquiring the light are probably slim. If someone were to enter this room and see a beacon of light off to the side they're very likely to acquire that before doing anything else in this room ("Ooooh! Shiny!")
Because of that, I'd wager many people won't ever experience the mannequin incorrectly flipping from quick loading back into this room. However, removing the shine on the mannequin would be much more beneficial to hide the surprise that awaits them...
If I may ask: Between the two remaining fixes for this room, can removing the shine be the priority and its fixed shared even if the other issue can't/hasn't been found yet?
Polymega
on 7 Nov 2018
Probably unhelpful to point out, but the shadows during that cutscene in the PC version also appear to be darker. Is that an extension of it lacking soft shadows?
 Bullsquiddy
on 15 Nov 2018
Bullsquiddy
on 15 Nov 2018
Is that an extension of it lacking soft shadows?
I'd say that's correct. If/when we find the right person(s) to implement soft shadows I was planning on asking about if the values of the shadows could also be brightened some; as adjusting that would be the time to do so (with someone editing the shadows).
Polymega
on 15 Nov 2018
FIXED! ap18.cam
Bigmanjapan, while in the closet, can the camera be moved to the right to hide the void? With Cheat Engine, changing sh2pc.exe+1B810F8 (float) [Camera Z] to -101390 fixes it.
Ignore; this was an issue with Nvidia cards hiding chunks of the wall when the camera is too close.

Polymega
on 27 Nov 2018
@Polymega
This is how that camera angle looks in my build:

Are you sure it's not something you've done or some other code of Ehanced Edition interfering?
I don't update the build I use for research that often, so my build could lack the code the accidentaly breaks this camera angle. Try using a default build with 16:9 AR hack only to see how the camera angle behaves.
This camera angle is not actually stored in ap18.cam file, it's stored directly in sh2pc.exe.
Some addresses that control this camera angle:
sh2pc.exe+4E0FA8 (008E0FA8) float — tilt with elliptical trajectory
sh2pc.exe+4E0FAC (008E0FAC) float — panning with elliptical trajectory
sh2pc.exe+4E0FB8 (008E0FB8) float — tilt
sh2pc.exe+4E0FAC (008E0FBC) float — panning
sh2pc.exe+4E0FD4 (008E0FD4) float — roll
It seems that there is no X / Y / Z coodrinates for this camera angle, it's anchor point is calculated via several addresses that have elliptical trajectories instead of straight X / Y / Z lines. I've seen such design in Fatal Frame games long time ago. The whole store in the sh2pc.exe thing is probably due to the fact that this camera angle needs to be disabled after the key is picked up and once James steps out of the closet after picking up the key.
Changes to this camera angle could be made via hex injection directly to sh2pc.exe. The addresses offsets are the same minus 00400000 module: 0x4E0FA8, 0x4E0FAC etc There is always a possibility that some other camera angle polls values from these addresses but I highly doubt that.
Interesting that if I save while standing in the closet, then reload, the game will output black screen. One needs to step out of the closet and walk back in to initiate the angle. This suspiciously reminds me of the camera transfer glitch I was getting while running Maria's scenario: https://youtu.be/oZYm5bDslto
Doesn't happen on PCSX2 if I try to use debug save function in the closet and then reload it. Once Cxbx-Reloaded is developed more it will be interesting to see if the bug is present in Xbox builds.
 Bigmanjapan
on 27 Nov 2018
Bigmanjapan
on 27 Nov 2018
Are you sure it's not something you've done or some other code of Ehanced Edition interfering?
This is interesting. On my laptop my camera angle in here looks like yours. Let me go home tonight and re-test this area on my main computer again. Maybe I had remnants of a custom camera adjustment here or something...
Ignore; this was an issue with Nvidia cards hiding chunks of the wall when the camera is too close.
Interesting that if I save while standing in the closet, then reload, the game will output black screen.
Oh wow. From 15 years of playing the PC game I've never quick saved in there to have this happen.
A possible fix would be IF in room ID AND a certain camera angle is active THEN disable quick save feature. But this is under the presumption that we know how to easily disable quick save for a certain area.
However...... I personally think this bug is so circumstantial it wouldn't be worth worrying much about. It could be placed lower on the wishlist of things to fix.
Polymega
on 27 Nov 2018
Better solution would be to figure out why this camera angle only initializes when James steps into the trigger area and not when James is spawned directly on it.
At first I thought that on PC version trigger for that angle is made via a line while on PS2 it's an actual rectangular area. Not the case. PC version's trigger area is also a rectangular one but actually needs stepping into to get activated for some reason.
Bigmanjapan
on 28 Nov 2018
lol! @Bigmanjapan it's another damn Nvidia bug. When I used my Nvidia PC with WineD3D the closet camera looks like yours. When I used my Nvidia PC without WineD3D it shows the void. My laptop (using Intel graphics) also looks fine.
Since there's no easy way to fix this camera let's just ignore this one. It's not that big of a deal when there are other things more important to fix. lol this game hates Nvidia cards...
Ooooh! Actually I bet this is chunks of the wall disappearing due to the already-known Nvidia bug. Okay, yeah, this will eventually be fixed then and the camera angle has been correct the whole time there.
Polymega
on 29 Nov 2018
FIXED! ap88.map
@Bigmanjapan there's a few flat poly planes/textures that should be brightened in this room. It looks either the address that controls its brightness isn't set right or the address to adjust the brightness isn't there to begin with for the PC version:
PC:

PCSX2:

Here's what it looks like from the other side:

Polymega
on 1 Dec 2018
ap88.map
there's a few flat poly planes/textures that should be brightened in this room.
For some reason surface color of that element is controlled via cover-up fog addresses (which is used to create corners shadows indoors):
sh2pc.exe+542C20 (00942C20) byte — Cover-up fog R
sh2pc.exe+542C21 (00942C21) byte — Cover-up fog G
sh2pc.exe+542C22 (00942C22) byte — Cover-up fog B
sh2pc.exe+542C30 (00942C30) float — Cover-up fog front line
sh2pc.exe+542C34 (00942C34) float — Cover-up fog back line
sh2pc.exe+542C3C (00942C3C) float — Cover-up fog intensity
The issue here is that when you bright it up, shadows in the corners becomes brighter too. You can crank shadows down via intensity address but that would mess with the original room design.
Also similar thing happens with prison hallway hole lights (ps53.map). When James flashlight is off, black colour on the lights is also rendered by fog addresses for some reason. It only renders proper texture on the lights when James flashlight is on. I think the prison lights and Blue Creek windows issues might have the same root.


Xbox builds have these issues too.
Bigmanjapan
on 3 Dec 2018
Thanks for looking into this, Bigmanjapan.
If the addresses/functions are missing to make these particular materials/shaders fully illuminated perhaps we may ask @FrozenFish24 to see if he could perform magic on the vertex/pixel shader calls for these particular pieces of geometry? Similar to how the WineD3D wall issues became fixed?
I have no earthly clue if such a thing is even possible or wise to do so... but:
Here's a link to Intel Frame Analyzer screen grabs for both ap88.map and ps53.map:
http://www.igotaletter.com/temp/sh2pc/sh2pc_intel_frame_grabs.zip
There are two versions of each screen grab: One with the flashlight on, and the other with the flashlight off.
For ap88.map here is the geometry in question:

For ps53.map here is the geometry in question:

As you all know by now, I am no programmer. But I was able to incorrectly brighten these geometry pieces by altering the pixel shader code. For the halogen lights in ps53.map:

I changed def c3, 0, 0, 0, 0 to def c3, 1, 1, 1, 1
I know that doesn't help any but it shows that _maybe_ there's something there that can be done?
Polymega
on 4 Dec 2018
Got it working in the Frame Analyzer! Okay, here's what I did:
I captured another scene where the halogen lights worked. In this case, the butterfly room in Woodside Apartments:

I then copied the vertex shader code from this geometry and pasted it directly as-is to the halogen light geometry in the prison:

and the windows for the apartment staircase:

This worked--at least through the Intel Graphics Frame Analyzer--for both versions of each scene: When James flashlight was both on and off.
Here is the code:
    dcl_position v0
    dcl_texcoord v7
    mov r11, c0
    mov r1, c0
    mov oD1, c0
    mov oD0, c0
    mov oT2, c0
    mov oT1, c0
    mov oT0, c0
    dp4 r1.x, v0, c0
    dp4 r1.y, v0, c1
    dp4 r1.z, v0, c2
    dp4 r1.w, v0, c3
    max r11.w, r1.w, c14.w
    rcp r11, r11.w
    mad oFog, c23.y, r11.x, c23.x
    mov oPos, r1
    mov oT0.xy, v7
    mov oD0, c14.w
    mov oD1.xyz, c14.x
    mov oT1, c14.x
    mov oT2, c14.x
So the final question would be to @FrozenFish24 and @elishacloud : Could anything be done with this information to fix these two spots?
Polymega
on 5 Dec 2018
@Polymega, It is relatively easy to replace one shader with another one. Can you show me what the shader looked like before and after you updated it?
 elishacloud
on 5 Dec 2018
elishacloud
on 5 Dec 2018
Yes sir:
Quick Save save file for Prison hallway: sh2pcsave1c.zip
Halogen lights before (they're pitch black like this when you turn off his light and lambert shaded when his light is on):
https://user-images.githubusercontent.com/27395260/48106024-bc80b480-e207-11e8-8532-20540aea4093.png
Halogen lights how they should be after fix:
https://user-images.githubusercontent.com/27395260/48106056-dae6b000-e207-11e8-805f-a12447809ea5.png
Halogen lights original vertex shader code:
    dcl_position v0
    dcl_color v5
    dcl_texcoord v7
    mov r11, c0
    mov r1, c0
    mov oD1, c0
    mov oD0, c0
    mov oT2, c0
    mov oT1, c0
    mov oT0, c0
    dp4 r1.x, v0, c0
    dp4 r1.y, v0, c1
    dp4 r1.z, v0, c2
    dp4 r1.w, v0, c3
    max r11.w, r1.w, c14.w
    rcp r11, r11.w
    mad oFog, c23.y, r11.x, c23.x
    mov oT0.xy, v7
    mov oD0, v5
    mov oD1, c14.x
    mov oT1, c14.x
    mov oT2, c14.x
    mov oPos, r1
Quick Save save file for Apartment Staircase:
sh2pcsave1c.zip
Windows before:
https://user-images.githubusercontent.com/27395260/49322822-114edc80-f4e1-11e8-8c47-2201441b7645.png
Windows how they should be after fix:
https://user-images.githubusercontent.com/27395260/49322825-1dd33500-f4e1-11e8-8ca4-30c81426b9cd.png
Windows original vertex shader code:
    dcl_position v0
    dcl_color v5
    dcl_texcoord v7
    mov r11, c0
    mov r1, c0
    mov oD1, c0
    mov oD0, c0
    mov oT2, c0
    mov oT1, c0
    mov oT0, c0
    dp4 r1.x, v0, c0
    dp4 r1.y, v0, c1
    dp4 r1.z, v0, c2
    dp4 r1.w, v0, c3
    max r11.w, r1.w, c14.w
    rcp r11, r11.w
    mad oFog, c23.y, r11.x, c23.x
    mov oT0.xy, v7
    mov oD0, v5
    mov oD1, c14.x
    mov oT1, c14.x
    mov oT2, c14.x
    mov oPos, r1
I'm pretty much clueless with Direct3D, shaders, etc. but it's worth noting that we only want to update the shaders for these specific pieces of geometry for these particular rooms only.
Polymega
on 5 Dec 2018
For both of these particular rooms, these geometry pieces seem to be the only ones that use their vertex shader codes within the whole room. So if they're overwritten just for when you're in these rooms, it shouldn't negatively affect anything else within the area.
sh2pc.exe+1BB7DAC (01FB7DAC) byte — room index ID
Prison hallway ID: 00000064 (hex)
Apartment staircase ID: 00000021 (hex)
Perhaps the shader can be updated for the overall game but I wouldn't know what else that would affect without play testing the whole game.
The updated shader code can be found at the bottom of this post: https://github.com/elishacloud/Silent-Hill-2-Enhancements/issues/63#issuecomment-444334831
Polymega
on 5 Dec 2018
@Polymega
Nice.
Also what's up with the dead Lying Figure being rotated 90 degrees after the Blue Creek bossfight? I've seen it being positioned both parallel and perpendicular to the stairs on PC version.
Bigmanjapan
on 5 Dec 2018
That's a result of quick loading back into the room, similar to the apartment flashlight room. Although this creature never comes back to life so nothing to really worry over.
Polymega
on 5 Dec 2018
I believe the problem is only with one line in the vertex shader:
    vs_1_1
    dcl_position v0
    dcl_color v5
    dcl_texcoord v7
    mov r11, c0
    mov r1, c0
    mov oD1, c0
    mov oD0, c0
    mov oT2, c0
    mov oT1, c0
    mov oT0, c0
    dp4 r1.x, v0, c0
    dp4 r1.y, v0, c1
    dp4 r1.z, v0, c2
    dp4 r1.w, v0, c3
    max r11.w, r1.w, c14.w
    rcp r11, r11.w
    mad oFog, c23.y, r11.x, c23.x
    mov oT0.xy, v7
    mov oD0, v5        ;<--- This line is bad
    mov oD1, c14.x
    mov oT1, c14.x
    mov oT2, c14.x
    mov oPos, r1
Instead of mov oD0, v5 it should be mov oD0, c14.w.
Try with this patch: d3d8.zip
elishacloud
on 6 Dec 2018
I'm envious of your know-how. This works great whenever James' flashlight is on. However, it goes back to "blacking" out the geometry whenever you turn off his flashlight (L key to toggle, by default).
Any chance to make this override _any and all_ functions/calls to this vertex shader so that the geometry is always fully illuminated, regardless of whether or not James' flashlight is on/off?
Polymega
on 6 Dec 2018
Apparently there is a different vertex shader used when the flashlight is off. I had to make some additional changes to that shader also.
Here is the vertex shader used when the flashlight is off:
    vs_1_1
    dcl_position v0
    dcl_color v5
    dcl_texcoord v7
    mov r11, c0
    mov r1, c0
    mov oD1, c0
    mov oD0, c0
    mov oT2, c0
    mov oT1, c0
    mov oT0, c0
    dp4 r1.x, v0, c0
    dp4 r1.y, v0, c1
    dp4 r1.z, v0, c2
    dp4 r1.w, v0, c3
    max r11.w, r1.w, c14.w
    rcp r11, r11.w
    mad oFog, c23.y, r11.x, c23.x
    mov oFog, c14.x        ;<--- This line needs to be removed
    mov oPos, r1
    mov oT0.xy, v7
    mov oD0, v5            ;<--- This line is bad (see above)
    mov oD1.xyz, c14.x
    mov oT1, c14.x
    mov oT2, c14.x
Try this one: d3d8.zip
_Note: I updated the actual vertex shader. This could affect other rooms since I don't know what other rooms use this shader._
elishacloud
on 6 Dec 2018
Beautifully done! Just testing the areas in question everything is working and looking great. Thank you very much for looking into this, Elisha!
Note: I updated the actual vertex shader. This could affect other rooms since I don't know what other rooms use this shader.
Okay, let me play test the game soon, playing through both campaigns to completion once with the flashlight always on and another where it's always off. I'll report back with my findings then.
Polymega
on 6 Dec 2018
FIXED! ap64.cam Adjustment
Hi @Bigmanjapan ,
Can the camera be adjusted to hide this while in the wallet toilet bathroom?

Polymega
on 7 Dec 2018
@Bigmanjapan @FrozenFish24
I may have found something about the Hotel chair shadow glitch while I was researching another shadow area.
But first: Let's talk about the shadow for the grandfather clock in Woodside Apartment:
When your flashlight casts a shadow on the clock it leaves a glitched "outline" of the clock's shadow around it, just like what the Hotel chair seems to be doing:

So I took an Intel Frame capture of this room and saw something peculiar:

The Frame Capture software unfortunately does not capture real-time shadows. So this shadow isn't a dynamic shadow...
But wait! I've seen this before: It's a fake shadow used throughout the game for various assets. It's typically a flat poly plane with a semi-transparent PNG texture that simulates a shadow:


So what does this mean? That fake poly shadow plane is a dynamic object. Because when you move the clock, that shadow (that poly plane) moves with it. And what do we know about SH2 PC? Currently, dynamic objects can't have shadows cast _upon_ them.
So if/when we can figure out how to have dynamic objects receive shadows cast upon them, the grandfather clock's shadow should at least be fixed.
However... I'm not so sure that's the issue with the Hotel chair:
I'm not sure how many areas are like this, but for this room it looks like simple geometry is casted out and that is what determines where/how the shadows will be drawn:
https://youtu.be/OptmHNdQBFs

Be sure to watch the YouTube video above. I'm not sure what this is? There's no shader calls to them? But whatever this is it seems to be what's both casting the current shadow we see and probably also bugging out the chair shadow in the process?
But both before and after the cutscene the chair (which has a correct shadow during these points) has a more "clean" piece of geometry to tell it how to cast its shadow: https://youtu.be/xzWlali5qGk

You can even see part of these poly planes if you angle James the right way:

But during the cutscene I found no instance of such a "clean" piece of geometry to tell the game where/how to cast its shadow.
I could just be speaking nonsense right now but I wonder if the disappearance of that one group of "clean" geometry that defines the chair's shadow being missing during the cutscene is what's causing the issue of its shadow not appearing at all?
Polymega
on 7 Dec 2018
I was curious, since the camera adjustment fixes are intended for 16:9 resolutions, I assume they won't be effective for even wider aspect ratios, i.e. 21:9, 32:9, 48:9 etc.? Is there a way to toggle the camera fixes off in those cases?
 Keith94
on 7 Dec 2018
Keith94
on 7 Dec 2018
That's correct; if you go ultra wide you're still probably going to see clipping through walls even with the 16:9 .cam fixes. To disable them you can remove any/all .cam files from the \sh2e\bg\ folders.
Polymega
on 7 Dec 2018
Thanks!
Keith94
on 7 Dec 2018
@Polymega
Bigmanjapan
on 7 Dec 2018
@Polymega I was looking into soft shadows recently and I worked out that you can get the dynamic shadows to show up in the frame analyzer by removing all the game's textures. Here's a modified sh2e dll that stubs out m_IDirect3DDevice8::SetTexture which might prove useful to you:
sh2e-no_textures.zip
From my limited understanding, the dynamic shadows are created using some combination of shadow volumes (as you surmised), a full screen quad and the stencil buffer. Layered over the static shadows. Perhaps it may be possible to transplant the clean chair shadow volume into the cutscene.

 FrozenFish24
on 7 Dec 2018
FrozenFish24
on 7 Dec 2018
Thank you for the latest .cam adjustment, Bigmanjapan!
This is great, FrozenFish24! Without a doubt this will be useful down the line. Do you know if shaders (I'm guessing the vertex shaders?) are what determine whether or not a geometry receives any sort of shadow on it? Or is that handled elsewhere; something more specific programmed to the game engine?
Polymega
on 7 Dec 2018
I had a mess around and it seems to be something to do with the stencil buffer. By default the door in the Abstract Daddy room won't receive dynamic shadows because it has the STENCILENABLE render state set to TRUE:

Set this to FALSE and it starts to receive shadow:

I'm not sure if this was just an oversight or done deliberately. I'll get it working in-game and see what happens.
FrozenFish24
on 7 Dec 2018
Set this to FALSE and it starts to receive shadow:

This month just keeps getting better! Man oh man, I'm hoping this adjustment leads to something truly great and special! Well done once again, FrozenFish24!
I'm not sure if this was just an oversight or done deliberately.
I'd be willing to bet deliberately so as to also run well on the crappiest of GPUs for 2003's time.
Polymega
on 7 Dec 2018
Okay, can confirm it works in-game too. Now to come up with a better detection mechanism so that we're not stuck white-listing every object in the game :stuck_out_tongue:

Here's the code I used for the door btw:
HRESULT m_IDirect3DDevice8::DrawIndexedPrimitive(THIS_ D3DPRIMITIVETYPE Type, UINT MinVertexIndex, UINT NumVertices, UINT startIndex, UINT primCount)
{
    if (Type == D3DPT_TRIANGLESTRIP && primCount == 200 && NumVertices == 109) {
        DWORD stencilEnable;
        GetRenderState(D3DRS_STENCILENABLE, &stencilEnable);
        SetRenderState(D3DRS_STENCILENABLE, FALSE);
        HRESULT hr = ProxyInterface->DrawIndexedPrimitive(Type, MinVertexIndex, NumVertices, startIndex, primCount);
        SetRenderState(D3DRS_STENCILENABLE, stencilEnable);
        return hr;
    }

    return ProxyInterface->DrawIndexedPrimitive(Type, MinVertexIndex, NumVertices, startIndex, primCount);
}
After further testing it seems the geometry that receives shadows has D3DRS_STENCILPASS set to D3DSTENCILOP_KEEP, and geometry that doesn't has it set D3DSTENCILOP_ZERO. So here's a much cleaner solution that seems to work:
HRESULT m_IDirect3DDevice8::SetRenderState(D3DRENDERSTATETYPE State, DWORD Value)
{
    if (State == D3DRS_STENCILPASS && Value == D3DSTENCILOP_ZERO)
        Value = D3DSTENCILOP_KEEP;

    return ProxyInterface->SetRenderState(State, Value);
}
This will need more testing but it seems to fix at least the Abstract Daddy door and the grandfather clock. Haven't spotted any new issues either after running through the apartments, so fingers crossed.
Here's the dll:
sh2e-shadowfix.zip
FrozenFish24
on 7 Dec 2018


Bigmanjapan
on 7 Dec 2018
Great!! I planned on spending most of my Saturday play testing SH2 PC for Elisha's vertex shader fix anyway so I'll be happy to help you give this a run through as well.
@FrozenFish24 please do send me a message sometime when you can.
Polymega
on 7 Dec 2018
@Polymega Whoops completely slipped my mind, I'll shoot you one now.
FrozenFish24
on 7 Dec 2018
Just some info I came across before I forget about it:
For the Hotel Chair shadow it looks like it may use a form of two-sided stencil:
https://docs.microsoft.com/en-us/windows/desktop/direct3d9/two-sided-stencil
I think perhaps the character models do the same?
For DX9, something called "Precomputed Radiance Transfer" (PRT) could possibly be used for soft shadows:
PRT requires either of the following, but not both:
- highly-tessellated models and vs_1_1
- ps_2_0
SH2 would fall under the first category of that. Although I don't know how high a highly-tessellated model would have to be?:
https://docs.microsoft.com/en-us/windows/desktop/direct3d9/precomputed-radiance-transfer
According to this Valve dev blog, DirectX 8.1 introduced soft shadows so theoretically you wouldn't need to use DX9 to achieve the effect? However, I couldn't find any info about this with DX8.1 so I'm not sure how accurate that statement is:
https://developer.valvesoftware.com/wiki/DirectX_Versions#DirectX_8.1
Probably fully useless for this game but it was published in 2005, close-ish to SH2 PC's release window so maybe some knowledge can be extracted from it:
https://www.gamedev.net/articles/programming/graphics/soft-edged-shadows-r2193/
Polymega
on 7 Dec 2018
@elishacloud I finished play testing the game and I believe everything is good to go with your vertex shader fix for the windows/halogen lights! Great work on this fix!
Reference here: https://github.com/elishacloud/Silent-Hill-2-Enhancements/issues/63#issuecomment-444701621
And here: https://github.com/elishacloud/Silent-Hill-2-Enhancements/issues/63#issuecomment-444727997
Great work again @FrozenFish24 discovering the potential to restore shadows upon dynamic objects! I'll give this a play test soon myself! Something to think about at a later time,--and maybe this is something Elisha would also know?--but would you also know how to tell a specific/individual piece of geometry to _disable_ shadows completely for it?
In this case, it's the window for Heaven's Night:
PC

PS2/PCSX2

From trying to pay attention throughout the whole game as I was playing it recently, this has been the only spot so far that I've noticed shouldn't have a shadow on it.
Lastly, @FrozenFish24 , do you reckon it might be possible to _add_ geometry to a .map file (while using the texture files associated with whatever geometry group you're adding to it)? The file in question would be hp190.map
This would be something I'd do for fun, but even way back in the early 2000's, I always thought that since this fridge has power (it lights up once you open it) you should see a power cord somewhere. I'd love to make a simple power cord coming out of the fridge and snaking away/hiding away behind the furniture against the wall:

If you'd think that'd be possible, would you be able to provide me an OBJ of this mesh group?

If it can't be done no worries and there's no point in trying to force it to work otherwise. (It's not that big of a deal to add; just something fun to do on the side.)
Polymega
on 8 Dec 2018
It is possible to blacklist specific geometry, would you be able to provide a save file for that area? I'd also noticed the TV screen in the apartments probably shouldn't receive a shadow when it's switched on either? Would be nice if there's some generic way we can detect this, I'll look into it.
It should technically be possible to add new geometry with a lot of manual tinkering. I'm willing to give it a go for curiosity's sake. Here's the obj although it might be easier if you use an in-game capture as the basis for your edits because the fridge isn't actually part of the map:
hp190.zip
FrozenFish24
on 8 Dec 2018
@FrozenFish24 thanks again for all the info. To start: I did notice a glitch with the new stencil shadows for dynamic objects: https://youtu.be/7UonECv1ZT4:
This may have something to do with the Z depth?
Here is a Quick Save file of the Heaven's Night window: sh2pcsave1c.zip
I'd also noticed the TV screen in the apartments probably shouldn't receive a shadow when it's switched on either?
Great minds think alike. :) I noticed this a few hours after making my earlier response here. Yes, that also shouldn't have a shadow on it.
Here's geometry for a power cord for hp190.map: hp190_power_cord.zip
And here's what it should approximately look like in the environment:


For the texture file, I used the one that is used by this geometry:

I placed the power cord portion of the UV group in the black void and, for the extension cord, shrunk it down and placed it within a portion of the white/cream texture of the fabric.
The normals should be preserved within the .OBJ file but, just in case they're not, they should look something roughly like this:

Lastly, the model is upside-down as that is how the environments get exported out when I capture them. So here would be the top/bottom for it:

Thanks for looking into this! I'm curious to see what's to come from this experiment. Even though the cord only has 6 sides there's a lot of divisions within it to make smooth-ish curves so the poly count will be on the higher end. And please let me know if I can help in any other way.
Polymega
on 8 Dec 2018
@Polymega
Here's a potential fix for the shadow issue when James is behind other characters. His STENCILPASS render state was set to D3DSTENCILOP_REPLACE by default so I change it to KEEP as well. This also causes him to start self-shadowing but I'm not sure if it's PS2 accurate. I'm still searching for something more robust.

Updated code:
HRESULT m_IDirect3DDevice8::SetRenderState(D3DRENDERSTATETYPE State, DWORD Value)
{
    if (State == D3DRS_STENCILPASS && (Value == D3DSTENCILOP_ZERO || Value == D3DSTENCILOP_REPLACE))
        Value = D3DSTENCILOP_KEEP;

    return ProxyInterface->SetRenderState(State, Value);
}
Binary:
sh2e.zip
I'm making progress on inserting the power cable too, would you be able to re-upload your obj with one of the chairs or something in it's correct relative position to the cable? Just so I can get the size and placement exact. Cheers!
FrozenFish24
on 10 Dec 2018
This also causes him to start self-shadowing but I'm not sure if it's PS2 accurate.
That's PS2 accurate. :) I'm happy you were able to find a fix for that relatively painless!
would you be able to re-upload your obj with one of the chairs or something in it's correct relative position to the cable?
Yes sir, here you go: hp190_power_cord_002.zip
Polymega
on 10 Dec 2018
You guys are awesome. Each time I think you've found a problem that can't be solved you come back with a brilliant solution. Thanks so much for your hard work. I don't have the knowledge to contribute much but if you ever need more people to test things, I'd be glad to help.
 RedPyramidThingy
on 10 Dec 2018
RedPyramidThingy
on 10 Dec 2018
I'll go ahead and say it: I love this team. Elisha, Aero, Bigmanjapan, FrozenFish, Nisto, and more...
I'm personally so damn happy that incredibly-talented folks are out here helping to allow future generations to more easily and correctly experience this game on modern displays/hardware.
Polymega
on 10 Dec 2018
@Polymega Here's a little teaser. Not sure if this will actually work in-game because I don't have a save file for the area, but my script dumps it correctly and SH Level Viewer opens it too.
hp190.zip
Also the game is expecting a Triangle Strip describing the geometry but I've had no luck with NvTriStrip or PyFFI as both just produce a mess of polygons. So the new indices are stored very inefficiently for now (Just a tri list stitched together with degenerate faces). This probably shouldn't affect anything besides file size though. Figured it out, zip updated.
FrozenFish24
on 12 Dec 2018
Here is a Quick Save save file of this room: sh2pcsave1e.zip
Figured it out, zip updated.
This is super rad! Now the fridge, which lights up from having power, actually _has_ power going to it. So bloody cool!!

There's one last challenge to this I didn't anticipate: How to apply a shader to the cord for both when his light is on and off. As otherwise the mesh stays fully black:

Polymega
on 12 Dec 2018

It looks closer to how it should from underneath. I think I must have screwed up the normals at some point.
FrozenFish24
on 12 Dec 2018
Those damn bloody normals... trying to get the last laugh again. Actually, since the room was exported upside down from the SH Level Viewer (and I didn't want to flip it as I assumed that's how SH2 saves/reads the rooms?) and I worked/modeled the cord upside down that would explain why the normals would also probably be upside down. Apologies about that as I think that may be the case.
Polymega
on 12 Dec 2018
Haha, nope it wasn't your fault. Turns out it wasn't the normals it was the strip's winding order being inverted (e.g. defining a triangle's vertices [0,1,2] vs [2,1,0]). Here's the fixed map:
hp190.zip

FrozenFish24
on 12 Dec 2018
How cool is this?! For someone who's new to 3D game formats/APIs you are hitting some major home runs here!! Really, really nice work, FrozenFish24!
Sir, if you're feeling up to it there's one more room that I can think of for the remainder of the game that could use some additional geometry, because right now there's a "void" when looking through the hole to the next room. Would you be interested in looking into one more room?
Polymega
on 12 Dec 2018
It's super cool. Makes me dream of a fully featured level editor.
RedPyramidThingy
on 12 Dec 2018
@Polymega Sure, just get me a save game and your edits and I'll see what I can do :+1:
FrozenFish24
on 12 Dec 2018
@FrozenFish24 Awesome! If you're using an LCD monitor it will make the "void" much easier to see.
Quick Save save file: sh2pc.zip
This is for ap42.map: From the hole that the apartment grandfather clock was covering we see another "void" where the devs didn't think to put a wall. Back in the day they were using CRT computer monitors and, with CRTs naturally having such good black levels, they probably never thought that void would be noticeable on a user's display:


Although, strangely, they did put a wall on _the other_ side of this area where you would pretty much never see it:

Is there a way to either move that wall to the other side or duplicate the wall and place it on the other side? Here's a demo video of me duplicating the wall. It's a bit cumbersome in Maya and my method is very likely not the most practical way of doing things: https://youtu.be/KoqvC_T4wec
I'm more than happy to provide the geometry for this wall similar to the power cord if you'd like (along with a reference-point mesh for sizing/position). Or, if you'd like to take a swing at making the new wall that's cool, too! Just let me know for that!
There are actually two doors on this wall so, we can go the extra mile and include those as well, or just use a "blank" wall similar to the YouTube link above which would also suffice; just so long as there's _something_ there besides a floor that abruptly ends into a black void.
With all that said, I'd love to know your thoughts on the edit.
Polymega
on 12 Dec 2018
Cool, I should be able to manage the edits on my own. I'll take a crack at it tomorrow and I'll try to make it match the actual room as closely as possible.
FrozenFish24
on 12 Dec 2018

Well that was more involved than I anticipated, but I got there in the end :stuck_out_tongue:
I had to fudge the wallpaper and door textures a little, as the one's they use in ap46 don't exist in ap42.
Also, because of the whole "flashlight goes through walls" thing the area is now illuminated when facing the clock, and I wonder if it harms the atmosphere a bit.
Download:
ap42.zip
FrozenFish24
on 13 Dec 2018
I don't doubt this was a challenge! But it looks really, really nice! Great job with this. :) Happily, I'd say this is the last "void" issue within the game that I can think of (the other big one we fixed by changing fog parameters). Thank you very much again for stepping up to the task.
I had to fudge the wallpaper and door textures a little, as the one's they use in ap46 don't exist in ap42.
I wouldn't be concerned over that; it's such a small amount you see through the hole that it's mostly there for illustrative purposes (to show continuity on the other side). So long as it approximately represents the other side it'll fool the mind. After all, Team Silent themselves did this exact, same thing: Make an approximation on the other side just so _something's_ there. And I do think it's cool you can see a smidge of the closet door on the other side at the camera angle before you get real close to the hole (image below).
Also, because of the whole "flashlight goes through walls" thing the area is now illuminated when facing the clock, and I wonder if it harms the atmosphere a bit.
That's a valid statement. For someone who'd be using an LED monitor they'd probably never see that void to begin with (due to good black levels). Although I'd think most consumers still have/use LCD displays and the void would be noticeable to some degree. So it would weigh down to what would someone prefer to see: A wall there or darkness but having the floor end into nothingness.
I'll put your mind at ease by stating the following: All other walls for that area beyond the hole actually have, well, walls! Also, if you go through this hole and look through it (back into the grandfather clock room) you'll also see a wall through this angle that's clear-as-day. Lastly, your flashlight casts a shadow through the hole which will darken the wall(s) and I think it looks super nice and much better than a black void:

The continuity you've added is great and is exactly what Team Silent has done elsewhere, but we can also instruct users to remove this .map file from the \sh2e\ folder if it concerns them.
Oh, and @FrozenFish24 , I sent you an email the other night as well, sir.
Polymega
on 13 Dec 2018
Great glad you like it.
Lastly, your flashlight casts a shadow through the hole which will darken the wall(s)
You're right that does look quite nice actually. I guess the real issue is there are some angles where the cast shadows don't align properly with the geometry, leaving a bright seam. But that affects the floor void too now I think about it.
Oh, and @FrozenFish24 , I sent you an email the other night as well, sir.
Oops hadn't checked, I'll get on that for you now
Edit: Here you go @Polymega
 FrozenFish24
on 13 Dec 2018
FrozenFish24
on 13 Dec 2018
Edit: Here you go @Polymega
Thank you for not taking my head on that. :) The wife says it looks completely perfect now and, you know how it goes: Happy wife, happy life.
Polymega
on 13 Dec 2018
@FrozenFish24 I plan to do a thorough testing of your self-shadow fix in the future, ensuring the effect is used either 100% of the time or if the devs perhaps disabled it during certain cutscenes/rooms (by cross-referencing the PS2 build).
I'm a bit behind on some other things so please be patient with me on this test. I just don't want you to think that your discovery of re-enabling self shadows isn't a big deal 'cause it is!
Polymega
on 1 Jan 2019
No worries @Polymega. Nobody has a better eye for detail when it comes to SH2 than you do, and I'm sure it's not a quick process, take all the time you need. :+1:
FrozenFish24
on 2 Jan 2019
@FrozenFish24 if I may ask for your assistance with adjusting room geometry again? This one will require a little bit of explaining. (@Bigmanjapan tagging you too because of your interest with this one.)
During this cutscene you'll notice the canvas/plastic around the elevator's entrance has spastic "blotches" phasing in-and-out all over it as James first runs into the elevator (pay attention during the first two camera cuts): https://www.youtube.com/watch?v=MlH49MyOvPA
At first I thought this was a shadow flicker glitch similar to the Hotel Room 312 one (which Bigmanjapan has an address to fix that). But when I disabled shadows in the game's options menu the flicking here still persisted.
I believe (90% sure but not fully certain) this is a clip plane issue (two pieces of geometry that are way too close to each other and the GPU's camera clipping projection isn't strong enough to keep them separated when rendering them).
Take a look at this video: https://youtu.be/C4C5HpC5Sv8
I think perhaps when the cutscene plays the camera's projection (FOV) changes which creates the splotchiness we see? i.e. The new projection is too "extreme" to keep these close-together geometry pieces separated.
Here's the offending piece of geometry:

Take a look at how close the edges of this geometry are to the wall--there's practically no gap between them.

Proposed solution:
Assuming this is a clipping issue, simply move that geometry away from the wall by a tiny bit. I'm not sure how far out it needs to be moved to alleviate the clipping but I don't think it'd be too much. This is also an acceptable fix to do because, during the (first and) only two camera cuts where we see this geometry we're looking at it almost dead-on, so nobody would ever be able to tell it's sticking out from the wall any due to limited perspective.
The .map file is hp166.map hp230.map.
Thank you for any help with this!
Polymega
on 4 Jan 2019
@FrozenFish24 the correct .map file is hp230.map. My version of the SH Level Viewer is so sensitive with the key presses that if I even barely tap the Shift key (to filter to the next .map) it'll skip like 3-4 of them at a time! I cycled through the whole hp .map files a dozen times over from the other day and apparently consistently skipped over this particular one!
Polymega
on 5 Jan 2019
It was hp230.map, here's the fix:
hp230.zip
Edit: You figured that out yourself :stuck_out_tongue:, I had the page open without refreshing in a while and didn't see
I had to move it further than I'd have expected to get rid of the issue. Very strange.

FrozenFish24
on 5 Jan 2019
Impeccable timing, sir! I'm currently play testing for your depth bias fix and was 5 minutes away from this cutscene so I was able to kill two birds with one stone. :) Still wrapping up the play test but your .map file fix worked great! You always see this geometry from a front-on perspective so no one will ever know you moved it. :) Great work as usual, FrozenFish24! Thank you very much once again!
Polymega
on 5 Jan 2019
I checked in a fix for the prison hallway halogen lights mentioned here. I updated the two vertex shaders as mentioned here and here.
You can see the code check in at b3d14d0.
Here is the latest build, it fixes this halogen light issue and the one mentioned in #74:
d3d8.zip
elishacloud
on 8 Jan 2019
@Polymega, is the fix created by FrozenFish24 here a good fix? Should I add this code update to the module?
elishacloud
on 8 Jan 2019
@Polymega, is the fix created by FrozenFish24 here a good fix? Should I add this code update to the module?
I'm currently play testing this fix over the course of several days. This is a literal game-changer for the PC version (restoring self shadows) so I'm trying to be as slow, careful, and thorough as possible.
I already have a list of notes made for this fix but still have to test out all the endings. In a nutshell: There will be certain cutscenes/rooms where self shadows (at least for James) will need to be disabled. So this won't be a set-it-and-forget-it fix.
I'd almost possibly suggest adding the fix in, having it deactivated by default, and also not put the fix line in the .ini file for now. That way, others like FrozenFish24, Bigmanjapan, and Aero_ can stealthily add the fix line/activate the fix from the .ini to help with play testing. Then, once everything is good we can simply reveal/include the fix line in the .ini.
This will be a substantial fix akin to the Audio Enhancement project we worked on and I'm anticipating multiple hands will ultimately need to be involved with this one and it'll take some time to perfect.
Polymega
on 8 Jan 2019
Oh, @elishacloud , these fixes are good to go, though: https://github.com/elishacloud/Silent-Hill-2-Enhancements/issues/49#issuecomment-429931243
A concise fix name could be something like FogParameterFix = 1 // Adjusts the fog-of-war boundaries for specific areas to fix visual errors
Polymega
on 8 Jan 2019
Self Shadows
Globally excluding this for certain rooms and certain cutscenes should be very easy. However if it needs to be enabled for some things in a room but not for others in the same room, that can get quite complicated.
I already know how to retrieve the room ID. It should be pretty easy to exclude this for specific rooms if someone can give me a list of room IDs to exclude.
sh2pc.exe+1BB7DAC (01FB7DAC) byte — room index ID
Checking for the cutscene should be similar. Using code from the DisableRedCrossInCutScenes fix _I think_ I can get the cutscene ID. If someone can give me a list of cutscene IDs to exclude I should be able to exclude them as well.
I'll go ahead and add the fix into the code but not the ini file.
Fog Parameter Fix
Yes, I can work on this next. This is going to be a bit more involved than any of the other game patches I have done so far.
elishacloud
on 8 Jan 2019
I'll have those lists for you in the near future (addresses and values). They will affect either the whole room or cutscenes.
It should be pretty easy to enable/disable; either we FULLY disable self shadows or ONLY James' self shadow (which can be done by setting his stencil back to REPLACE).
For the cutscenes it'll be a little trickier: They will only need to be disabled for particular camera cuts then re-enabled as the cutscene continues. We base these camera cuts on the camera's X coordinate on any given cut. You'll be familiar with this once you dip your toes into the FogParameterFix. I'll also have these values for you as well.
Polymega
on 9 Jan 2019
Hi @Bigmanjapan ,
In reference to this post, can the camera at the bottom floor of the elevator for ps67.cam (there is no ps67.cam, perhaps ps66.cam?) be adjusted to reduce how high up the camera can look while in Search mode? This would be to hide the hole in the ceiling:


Polymega
on 21 Jan 2019
@Polymega
The angle is contained in ps66.cam file.
Doesn't seem to be possible to limit the camera tilting up via ps66.cam.
Other way to solve that might be limiting the upper border of dymanic camera tilt value.
sh2pc.exe+1B812E0 (01F812E0) float — dymamic camera tilt
sh2pc.exe+1B812E4 (01F812E4) float — dynamic camera pan
When you freeze those in CE the camera movement becomes stutttered etc because it tries to overcome the frozen value. It should be possible to make the value not go beyond a certain point smoothly via smart code alteration but that's the question to other guys.
Bigmanjapan
on 23 Jan 2019
FIXED!
:confused: Weird camera script for this area... @Bigmanjapan please ignore the post I just made about this.
@FrozenFish24
May I ask for another geometry adjustment? This is either for ps66.map or ps67.map (I believe it's ps66.map between the two.)
At the bottom of the long labyrinth elevator ride you enter a small room with nothing but a door and save point in it. If you load from this save point you receive greater camera control in the room which allows you to look further up... to see a hole in the ceiling. You can see images of this hole a few posts up.
Quick Save save file of this room
May I ask you to place a simple, flat polygon plane that fills this hole and use this texture file for the UV coordinates? (In the SH Texture Explorer for ps66.map it's tex_007)

Polymega
on 23 Jan 2019
@Polymega
I don't think there is a trigger like that.
If I make one or two steps from the elevator and allow camera to float behind James, then I can make it tilt up enough to see the hole. If James stands right next to the elevator entrance, camera can't float behind James which limits it's ability to tilt up.
Same thing happens for me if I exit the room via the door and re-enter it. When you re-enter the door, camera gets positioned right behind James which doesn't happen when a player walks around the room and allows camera to float freely. That unintended positioning right behind James' back allows it to tilt up enough to see the hole above the elevator.
It should be quite easy to change camera position fast enough upon entering the room, so that the player wouldn't notice.
From this angle:

To this angle:

This only solves the door camera angle tho, not sure what to do about the elevator one.
If I mistake something and there is a trigger area, please make a video of it.
Same things happens on PS2 when yo re-enter the room:

Although it does seem that the issue stems from a wrong camera property like it was in one of the hospital patient's room. A camera was set to "outdoors" while it should have been set to "tiny" which makes it more confined / tilt down more.
Bigmanjapan
on 23 Jan 2019
If I mistake something and there is a trigger area, please make a video of it.
No, I don't think you are mistaken. Here is what I think happened for me:
After the elevator ride I _quick saved_ in this room. So every time I _quick loaded_ from the quick save it retained the correct camera property values. However, if I loaded the "Elevator" save file the camera properties became wrong. So whenever I quick saved after the elevator ride it also seems to store the correct camera values, even if I exit the game and re-load the quick save.
I believe this is what was confusing me before. But since some people may load from the traditional "Elevator" save point, they'll still receive the wrong camera properties. So to play things safe, we can simply add ceiling geometry for the room.
Although it does seem that the issue stems from a wrong camera property like it was in one of the hospital patient's room. A camera was set to "outdoors" while it should have been set to "tiny" which makes it more confined / tilt down more.
By chance is that the same issue going on for this room?
Polymega
on 23 Jan 2019
By chance is that the same issue going on for this room?
Yes. Turns out the camera property was not set at all.
The issue should be completely solved.
Bigmanjapan
on 23 Jan 2019
Much love, Bigmanjapan!
@FrozenFish24 please ignore my request. :)
@Storm3000 the issue of a "hole" in the ceiling at the bottom of the Labyrinth elevator is now resolved. You can download Bigmanjapan's fix (one post above) and place it in \sh2e\bg\ps\ . This adjusted .cam file will also be included in the next release of the Enhanced Edition Essential Files.
Polymega
on 23 Jan 2019
Bigmanjapan is on the case! Good stuff.
 AeroWidescreen
on 23 Jan 2019
AeroWidescreen
on 23 Jan 2019
@FrozenFish24
May I ask you to add geometry for the final bedroom cutscenes? This would be for both qp01.map and qt01.map.
In both cutscenes the camera will eventually be higher up, looking down on James and Mary. During this time, we see a magically-floating lampshade:
Leave ending:

In Water ending:

Even back in 2001 this has always stood out like a sore thumb and it'd be nice to see geometry properly added inside the lampshade. Thanks to your amazing skills, we could do just that!


This mesh would sit directly on top of where the current inner stem of the lamp stops:

Files
Geometry (OBJ):
- New geometry only (only contains the new geometry):
- New geometry grouped (contains new geometry + the lamp and rug for size/placement). Note: The carpet in this file is from the "In Water" ending bedroom (qt01.map), if that matters:
Texture (DDS):
The UVs have already been created and placed where they should go. They just need to be linked up to the correct texture file in the .map file. I had to create a light bulb texture and add it to the texture file that holds the rest of the lamp/carpet details:
qt01.map (Leave) texture file: qt01.map_tex_012.zip
qp01.map (In Water) texture file: qp01.map_tex_012.zip

Note:
You've previously modified qt01.map to restore proper vertex normal data. So if adding geometry to this .map file, be sure to add it to the one you've already fixed up. Here is that file again, just in case: qt01.zip
Thank you very much for your help with this!
Polymega
on 27 Jan 2019

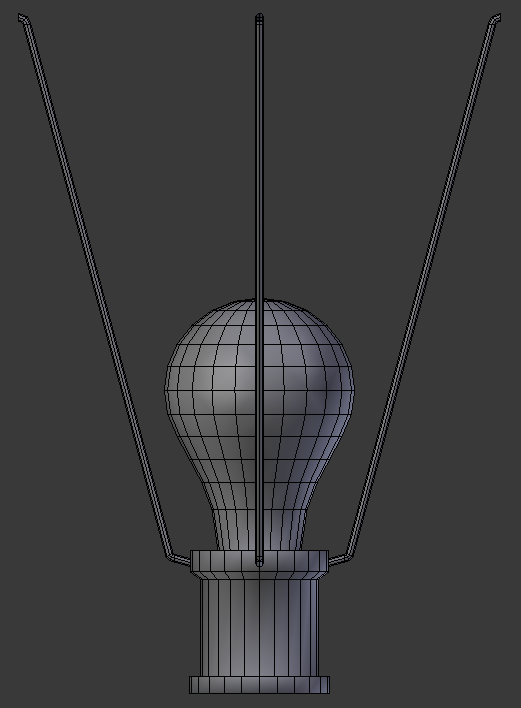 FrozenFish24
on 29 Jan 2019
FrozenFish24
on 29 Jan 2019
As always, I can't thank you enough, FrozenFish24. Please do consider accepting donations in the future as I'd love to send monetary thanks to you as well. :)
I simplified the bulb slightly while I was at it, hope that's okay.
Absolutely. You did a fantastic job with poly budgeting! Well done!!
May I ask another modification from you? In the PC version, the water effects are noticeably more transparent in their textures compared to the PS2 version. I think I may have a fix solution but it needs testing.
Similar to how you made a test .dll for another shader code, may I ask you to create a new test .dll with the following vertex shader code adjusted? Unlike the other attempt at changing a pixel shader for the Hotel windows, the shader code below should only affect the areas we want it to affect and not the whole screen:
dcl_position v0
dcl_color v5
dcl_texcoord v7
mov oD0, c0
mov oT0, c0
dp4 oPos.x, v0, c32
dp4 oPos.y, v0, c33
dp4 oPos.z, v0, c34
dp4 oPos.w, v0, c35
mov oT0, v7
mov oD0, v5
Change the last line from mov oD0, v5 to add oD0, v5, c4.y
Polymega
on 29 Jan 2019
Here you go this should do the job, sorry for not replying to your email by the way I somehow overlooked it.
FrozenFish24
on 29 Jan 2019
Thank you again! May I ask you to confirm the fix is implemented in this test build? Checking in the Intel Frame Analyzer it didn't seem to take effect.
I don't know if spacing matters for the fix to swap out the pre-existing code but here's how the Frame Analyzer feeds out the code (seems to be four spaces before each line):
    dcl_position v0
    dcl_color v5
    dcl_texcoord v7
    mov oD0, c0
    mov oT0, c0
    dp4 oPos.x, v0, c32
    dp4 oPos.y, v0, c33
    dp4 oPos.z, v0, c34
    dp4 oPos.w, v0, c35
    mov oT0, v7
    mov oD0, v5
I don't know if spacing matters
It does, but I added them in myself. Throw us a save game with some water and I'll try and figure out what's going wrong.
FrozenFish24
on 29 Jan 2019
Sure thing, here you go: sh2pcsave2e.zip
Here's an example of what this changes (screen grabbed from within the Frame Analyzer):
Before:

After:

This vertex shader affects more than just water; it also affects puddle splash ripples, the fire/smoke in the Angela Hotel stair room, and more. So I'll do a full play test with this to be sure it's not doing any funny business elsewhere.
Polymega
on 29 Jan 2019
Wow that's really cool!
Here's a working dll:
Release.zip
The issue was, d3d8to9 added some comments to the 5th and 6th lines. So the shader ended up looking like this and not what I was searching for:
    dcl_position v0
    dcl_color v5
    dcl_texcoord v7
    mov oD0, c0 /* initialize output register oD0 */
    mov oT0, c0 /* initialize output register oT0 *
    dp4 oPos.x, v0, c32
    dp4 oPos.y, v0, c33
    dp4 oPos.z, v0, c34
    dp4 oPos.w, v0, c35
    mov oT0, v7
    mov oD0, v5
Yikes!!! Maybe not! Yeesh!
Something else strange: Whenever the water effect "goes dark" any shader codes are gone for it. I checked in the Frame Analyzer and the shader code just disappears. Either way, this proposed solution also makes the fire and smoke cartoonishly thick and the "dust" (?) effects under water way too bright.
Thank you for letting us experiment with that though, FrozenFish24! Back to the drawing board with this one.
Polymega
on 29 Jan 2019
Huh, well that's pretty odd. I'll have a look at this tomorrow too when I get a chance and see if I can come up with anything.
FrozenFish24
on 29 Jan 2019
Do you guys think the water intensity could be changed through the executable (x86 ASM) or is it only possible through shader code?
AeroWidescreen
on 30 Jan 2019
I'm thinking it has to be through the executable?
Because, after testing that .dll, it seems other effects that share this vertex shader code (hotel fire, hotel fire smoke, firearm muzzle smoke, water ripples (on Blue Creek floors), blood pools from enemies, etc) all seem to look correct currently as-is?
I tried reducing the alpha intensity of the actual water texture files but they're saved as .tbn2 format (animated texture files) and my edits aren't reflected in-game for these particular textures.
Polymega
on 30 Jan 2019
@Polymega @AeroWidescreen @FrozenFish24
For the water effect in this particular room:

sh2pc.exe+493F5C (00893F5C) float — red channel on additional bleaks that happen when waves become tall
sh2pc.exe+493F60 (00893F60) float — green channel on additional bleaks
sh2pc.exe+493F64 (00893F64) float — blue channel on additional bleaks
sh2pc.exe+493F64 (00893F68) float — additional bleaks intensity
sh2pc.exe+493F7C (00893F7C) float — red channel on center texture
sh2pc.exe+493F80 (00893F80) float — green channel on center texture
sh2pc.exe+493F84 (00893F84) float — blue channel on center texture
As always, increasing all three by the same amount increases overall brightness/intensity.
sh2pc.exe+493FC (00893F6C) float — water texture Z stretch/shrink
sh2pc.exe+493F78 (00893F70) float — water texture X stretch/shrink
sh2pc.exe+493F74 (00893F74) float— additional intensity?
sh2pc.exe+493F78 (00893F78) float — additional intensity?

sh2pc.exe+494064 (00894064) float — red channel on water texture's outer rim / additional bleaks
sh2pc.exe+494068 (00894068) float — green channel on water texture's outer rim / additional bleaks
sh2pc.exe+49406C (0089406C) float — blue channel on water texture's outer rim / additional bleaks
sh2pc.exe+494070 (00894070) float — water texture's outer rim / additional bleaks intensity
sh2pc.exe+494084 (00894084) float — red channel on center texture (1st set)
sh2pc.exe+494088 (00894088) float — green channel on center texture (1st set)
sh2pc.exe+49408C (0089408C) float — blue channel on center texture (1st set)
sh2pc.exe+494090 (00894090) float — red channel on center texture (2nd set)
sh2pc.exe+494094 (00894094) float — green channel on center texture (2nd set)
sh2pc.exe+494098 (00894098) float — blue channel on center texture (2nd set)
sh2pc.exe+494074 (00894074) float — water texture Z stretch/shrink
sh2pc.exe+494078 (00894078) float — water texture X stretch/shrink
sh2pc.exe+49407C (0089407C) float — additional intensity?
sh2pc.exe+494080 (00894080) float — additional intensity?
If you look around in this memory region, you will find addresses that control waves height, regularity of waves etc I guess it's not important for the issue in question.
For these three rooms:


sh2pc.exe+493AB4 (00893AB4) float — red channel on center texture
sh2pc.exe+493AB8 (00893AB8) float — green channel on center texture
sh2pc.exe+493ABC (00893ABC) float — blue channel on center texture
sh2pc.exe+493AC0 (00893AC0) float — center texture intensity
For these three rooms there is no active addresses (in this region) that can control outer rim color setting or texture shrink/stretch. I guess this whole water effect was made in a slipshod manner. If these addresses are needed, then I'll look for them.
Bigmanjapan
on 1 Feb 2019
Holy cow, you just hit a home run here, @Bigmanjapan! Excellent work/research!
For these three rooms there is no active addresses (in this region) that can control outer rim color setting or texture shrink/stretch. I guess this whole water effect was made in a slipshod manner. If these addresses would be needed, then I'll look for them.
Possibly the only benefit of finding shrink/stretch values for this area would be to better fix these seams, but it's really not that important to find if it's too hard to locate. Even PS2 version suffers from these seams (and on PS2 version they're much more noticeable):

While you're currently researching for this, may I ask you to do the same in the prison, labyrinth, and final boss fight water? These are the other water areas that needs to have their transparency adjusted like what you've done in the alternate hotel.
There's only one area for the prison, but multiple areas throughout the labyrinth. Lastly, the water in the RPT apartment boss fight looks correct as-is so that one doesn't need to be touched. Are there any other water areas I may have forgotten about?


(The water for the prison and labryinth is easier to notice in motion, if you're able to play both PC and PCSX2 version side-by-side.)
@AeroWidescreen when the time comes I can give recommended value changes to match the PS2 version, if you'd like?
Polymega
on 1 Feb 2019
@Bigmanjapan
I guess this whole water effect was made in a slipshod manner. If these addresses are needed, then I'll look for them.
And I noticed that some of these areas use completely different functions for their water effects. I don't understand why it was done like that, it seems really inefficient.
@Polymega
When the time comes I can give recommended value changes to match the PS2 version, if you'd like?
I don't think I need to do anything for this one. The addresses that bigmanjapan are posting are all that's needed, unless you happen to find any side-effects.
AeroWidescreen
on 1 Feb 2019
I meant what the new values should be for those addresses, to better match the PS2 visuals, once all addresses are accounted for for the areas we need them. I can contrast-and-compare to the PS2 version and write down what their values should be per room/area.
Polymega
on 1 Feb 2019
Possibly the only benefit of finding shrink/stretch values for this area would be to better fix these seams
sh2pc.exe+E34F1 (004E34F1) float — water texture Z stretch/shrink (hallway after kitchen)
sh2pc.exe+E34F9 (004E34F9) float — water texture X stretch/shrink (hallway after kitchen)
sh2pc.exe+E3BE1 (004E3BE1) float — water texture Z stretch/shrink (elevator area prior to Venus Tears bar)
sh2pc.exe+E3BE9 (004E3BE9) float — water texture X stretch/shrink (elevator area prior to Venus Tears bar)
sh2pc.exe+E4231 (004E4231) float — water texture Z stretch/shrink (Venus Tears bar)
sh2pc.exe+E4239 (004E4239) float — water texture X stretch/shrink (Venus Tears bar)
Bigmanjapan
on 2 Feb 2019
Mary/Maria bossfight area water effect is controlled via the same addresses that control the effect in the three rooms around Venus Tears bar.
sh2pc.exe+493AB4 (00893AB4) float — red channel on center texture
sh2pc.exe+493AB8 (00893AB8) float — green channel on center texture
sh2pc.exe+493ABC (00893ABC) float — blue channel on center texture
sh2pc.exe+493AC0 (00893AC0) float — center texture intensity
There's only one area for the prison, but multiple areas throughout the labyrinth.
Do you mean the difference water particles during each step or an amplitude of the waves?
At least in Strange Area 2 (hallway prior to the bug room) from what I can see waves on PS2 go a little bit higher in comparison to PC.
Strange Area 2 (hallway prior to the bug room) and Labyrinth sections color channels are also controlled via the addresses above.
sh2pc.exe+E7ED1 (004E7ED1) float — water texture Z stretch/shrink (Strange Area 2)
sh2pc.exe+E7ED9 (004E7ED9) float — water texture X stretch/shrink (Strange Area 2)
Edit;
In my previous post I provided two sets of addresses for central textures for the kitchen area. It seems that the second set of addresses is a leftover from parts of the game where flashlight is still active.

First set of addresses controls visual area outside of the flashlight's spread, second set controls flashlight spread area. The addresses to control colors in Labyrinth sections are the same.
sh2pc.exe+E4D01 (004E4D01) float — water texture Z stretch/shrink (Labyrinth)
sh2pc.exe+E4D09 (004E4D09) float — water texture X stretch/shrink (Labyrinth)
Bigmanjapan
on 2 Feb 2019
Thanks again for all your hard work with this, Bigmanjapan.
Do you mean the difference water particles during each step or an amplitude of the waves?
I mean in regards to it's visual intensity/transparency. Amplitude may also be different, but 100% there's a difference in visuals.
For the alternate hotel water, you made the water texture more noticeable by increasing the intensity (making it less transparent). The same things also need to be done for the other mentioned areas.
It seems to be an issue for just about all water areas for the PC version. For the PC version, the prison and labyrinth water textures in particular almost look completely invisible.
Polymega
on 2 Feb 2019
Sorry, I should have also mentioned that you have your flashlight for these water areas. Some of your previous addresses can also adjust the prison/labyrinth water intensities when the flashlight is not touching those water areas.
But addresses for when the light is touching the water would be needed here to make the water less transparent when the light is touching. If you can place PC and PCSX2 side-by-side you will notice differences.
So essentially the same process as you've done for the alternate hotel water, but for when the flashlight is touching the water in these areas.
Polymega
on 2 Feb 2019
But addresses for when the light is touching the water would be needed here to make the water less transparent when the light is touching.
Try these three for the labyrinth area (and it seems to also work for prison area but the effect is very weak):
sh2pc.exe+493AC4 (00893AC4) float — water effect red channel (flashlight spread)
sh2pc.exe+493AC8 (00893AC8) float — water effect green channel (flashlight spread)
sh2pc.exe+493ACC (00893ACC) float — water effect blue channel (flashlight spread)
This is another second set of addresses for the previous areas which appeared to be inactive due to flashlight not present on James.
Don't forget about using negative values for float types. Usually reasults in darkening instead of brightening.
Bigmanjapan
on 2 Feb 2019
Perfect. Thank you again, Bigmanjapan.
One thing that completely confuses me is why adjusting most .tbn2 files doesn't change anything. For example, I can alter the flashlight lens flare (lens_flare.tbn2) and see changes in-game. If I do the same for something like the Strange Area 2 water texture (gesui01.tbn2) the game acts as if nothing changed.
There are two folders these files are saved under: \data\pic\effect\ and \data\etc\effect\
All files within seem to be identical and, at least for the modified lens flare, it pulls that one from \data\etc\effect\

Polymega
on 2 Feb 2019
One thing that completely confuses me is why adjusting most .tbn2 files doesn't change anything. For example, I can alter the flashlight lens flare (lens_flare.tbn2) and see changes in-game. If I do the same for something like the Strange Area 2 water texture (gesui01.tbn2) the game acts as if nothing changed.
I remember trying to replace the fog texture before, and naturally I assumed it had to be fog.tbn2 or fog.tex since those were the only two fog related files I could find. To make a long story short, I ended up deleting both of those files and the fog continued to work as normal. I gave up after that.
It's highly likely the game doesn't use those files, and if that's the case then where is it getting the textures for the water, fog, and other effects?
AeroWidescreen
on 3 Feb 2019
Frustrated as well some months back, I was convinced the game has these textures (besides the lens flare, apparently?) stored in the main binary. So I removed all .tbn2 files from the game's directory and... The game would hang on launch. So whether or not the game actually uses those files for the textures, it seems to at least call/check if they're there to launch.
They're DTX3 DDS images just like any other texture the game uses, so I don't think it's anything proprietary or that the images are swizzled or such.
Polymega
on 3 Feb 2019
I looked into this issue using an Xbox original console.
Xbox and PC builds are almost identical and share the same useless files. Also if softmodded properly an Xbox original console usually has an option to clear a cache which covers a possibilty of some files being cached (in comparison to a Windows platform).
All files located in /data/pic/effect/ are not called by the executable at all.
All files except for footmark.tbn2 and lens_flare.tbn2 located in /data/etc/effect/ are not called by the executable at all.
Since PC version is mostly an Xbox port, the same remains true for PC version: only footmark.tbn2 and lens_flare.tbn2 are needed to be present.
Nothing else in the Xbox/PC builds left that could contain fog, water and other effects assets which makes it save to assume that sh2pc.exe file contains all the effects.
As for why the useless files are present on Xbox builds at all.
Konami's porting team might have left all the files just in case an executable would want to call something. The same thing happened later on during Xbox to PC porting process when Calver's team left the unused files there just in case: https://twitter.com/DeanoC/status/1047870669067866112
Another scenario might be a failed attempt of Konami's team to parse PS2 files and make an Xbox executable use them directly. Maybe the platfroms were too different. If you use a Nisto's extraction script on any PS2 build, you will see that on PS2 builds there is no /data/etc/effect/ folder at all and /data/pic/effect/ folder has way less files. Meaning a lot of the files were added during PS2 to Xbox porting process but never used.
A simple copy-paste mistake is also a possibility.
Bigmanjapan
on 3 Feb 2019
All files located in [...] are not called by the executable at all. [...] Nothing else in the Xbox/PC builds left that could contain fog, water and other effects assets which makes it save to assume that sh2pc.exe file contains all the effects.
Thanks a ton for looking into this. It was confusing me for the longest time so I'm glad we have final confirmation that only two .tbn2 files are used externally then. At least we can put this mystery to bed, now.
Polymega
on 3 Feb 2019
Instead of softlocking RPCS3 renders red cross dummy image when textures are not found.
Absence of fog2.tex file: https://youtu.be/Y8steoBiCq0
Absence of gesui01.tex file: https://youtu.be/u-0cxZeuRUI
Bigmanjapan
on 7 Feb 2019
gesui01.tbn2 is located in ps.map
This probably means all non-number map files (i.e. ap.map, hp.map, etc) would have these special texture data in them.
Here is the prison water restored to proper transparency.

For this one, I set the white point to 128 instead of 255:

The PS2 (and probably Xbox?) version have a visual glitch for the labryinth water. Even when James' flashlight is off it behaves like it's still on in regards to enemies under water. So this is something the PC version does right!
Polymega
on 12 Feb 2019
@elishacloud
I was able to find where these special .tbn2 files are housed. I adjusted both the Prison and Labyrinth water to good success so those edits will be reflected in a new .map file. However, I cannot do the same for the Alternate Hotel water. While I _can_ change it texture-wise it's still not enough to restore its visuals as they should be. Adjusting addresses are required for these areas.
While there are nuanced differences in the water "intensity" per area in the Alternate Hotel, we're going to use universal values whenever possible that look good across the board, so to speak, so we don't have to also use Room IDs to change them per room.
I'll include the Room IDs below, but they should not be needed when scripting this out.
Play testing will need to be done, but I believe these can be set at the launch of game and left alone after.
SOME ROOM IDs ARE REQUIRED. Sorry Elisha, I forgot some of the addresses below we're changing for the Alternate Hotel water also affect the prison and labyrinth water areas. Room IDs will need to be used per value changes below.
Set on game launch/no room ID check needed:
- Water texture Z stretch/shrink -
004E34F9004E34F1 (float) to 1.75
This affects:
- Hallway After Alternate Hotel Kitchen Water (000000B9)
Set on game launch/no room ID check needed:
- Water color (flashlight off) - R - 00894084 (float) to 100
- Water color (flashlight off) - G - 00894088 (float) to 100
- Water color (flashlight off) - B - 0089408C (float) to 100
- Ripple specularity - R - 00894094 (float) to 255
- Ripple specularity - G - 00894098 (float) to 255
- Ripple specularity - B - 0089409C (float) to 255
This affects:
- Alternate Hotel Kitchen Water (000000B7)
Set on game launch/no room ID check needed:
- Water color (flashlight off) - R - 00893F7C (float) to 125
- Water color (flashlight off) - G - 00893F80 (float) to 125
- Water color (flashlight off) - B - 00893F84 (float) to 125
- Ripple specularity - R - 00893F5C (float) to 64
- Ripple specularity - G - 00893F60 (float) to 64
- Ripple specularity - B - 00893F64 (float) to 64
This affects:
- Staircase After Angela Fire Cutscene Water (000000AB)
When Room ID:
- Strange Area 2 (00000063)
- Labyrinth (00000082, 00000080, 0000007E, 0000007C, 0000007A)
Set:
- Water color (flashlight off) - R - 00893AB4 (float) to 19
- Water color (flashlight off) - G - 00893AB8 (float) to 19
- Water color (flashlight off) - B - 00893ABC (float) to 19
- Water intensity (flashlight off) - 00893AC0 (float) to
255128
When Room ID:
- Elevator Before Alternate Hotel Bar Water (000000B8)
- Alternate Hotel Bar Water (000000B6)
- Hallway After Alternate Hotel Kitchen Water (000000B9)
- Final Boss Metal Staircase Water (000000BB)
Set:
- Water color (flashlight off) - R - 00893AB4 (float) to 100
- Water color (flashlight off) - G - 00893AB8 (float) to 100
- Water color (flashlight off) - B - 00893ABC (float) to 100
- Water intensity (flashlight off) - 00893AC0 (float) to 255
Suggested fix name: HotelWaterFix = 1 // Restores lighting values for the hotel's water
Polymega
on 12 Feb 2019
@Bigmanjapan
Can the boundary for this camera angle be adjusted to prevent the fog from disappearing when oriented in a particular way? This is right upon exiting the apartments:
https://youtu.be/LeHhhIoKzrU
If I were to guess, I'd say this would be cc11.cam
Polymega
on 14 Feb 2019
@Polymega
The issue doesn't stem from the particular angle's camera being too far from the fence. It seems to be the same issue that happens with the disappearing chainsaw wooden log upon James going too far.
A semi solution could be changing that camera angle preset which fixes the fog issue.
This archive contains preset 1 and preset 4 (the default is 3).
Try them, maybe they will do. The most notacible difference is that transition from this camera angle to the next one is more rough.
Bigmanjapan
on 15 Feb 2019
The most notacible difference is that transition from this camera angle to the next one is more rough.
Yeah, I see what you're saying. That rough camera shift is probably more of a concern than the fog disappearing. It may be best to not change the preset here then.
One thing I did notice is that preset 3 (default) sits the highest above is rotated the most parallel to James (which makes the fence look the lowest on the screen):

Perhaps there's a certain vertical threshold from James that triggers near-fog in front of the camera to not render.
Polymega
on 15 Feb 2019
@FrozenFish24
May I ask for your help with another geometry adjustment? This would be for er01.map (the beginning bathroom).
When playing in widescreen we now see a much closer look at the bottom of the toilets when the beginning cutscene plays out... and it doesn't look quite right:

My suspicions were confirmed the other week when I watched a video (maybe a streamer? I can't remember) play the game in widescreen and commented how there was still camera clipping issues when they noticed that part of the toilet; they mistakenly thought that bad geometry was a camera clip issue.
However, that can be addressed!


The UV placements remain untouched.
The amount of vertices/polygons remain untouched.
The only things that have changed are vertex placements for the geometry.
There are two separate, adjusted geometry groups for this file:

The main group is the toilets, and the other group are plumbing rings that are not grouped with the rest for some odd reason. (When adjusting the toilets I had to make the plumbing pipes taller to compensate the change, hence their adjustments as well.)
May I ask you to replace the toilets and their plumbing?
Here are the OBJs:
toilets+REFERENCEWALL.zip
plumbingRings+REFERENCEWALL.zip
The reference wall is the wall that's behind the toilets/plumbing for sizing/placement reference.
Thank you very much for your consideration with this!
Polymega
on 20 Feb 2019
Here you go @Polymega :toilet:
 FrozenFish24
on 20 Feb 2019
FrozenFish24
on 20 Feb 2019
What a beautiful, clean job you did swapping out... dirty, nasty toilets. Thank you, FrozenFish24!
Polymega
on 20 Feb 2019
@FrozenFish24
Can we get a little creative with optical illusions? In ps37.map (Strange Area 2/Prison water hallway) the level abruptly ends right past the jail bars on both ends of the map, something that's easily noticeable:

We can't change the fog parameters to fade this out as there are no fixed cameras in this area to only apply adjusted fog values when looking through the jail bars.
We also can't duplicate the geometry to extend out the hallway because this area uses dynamic water. (As we don't know how to readily extend out water effects.)
But we can create the _illusion_ of the hallway continuing onward by placing some geometry inside this area--slightly smaller than the hallway itself--and adding a black fade alpha to a texture file and apply it on the new geometry:


Which gives us this result:

Files
Here is an OBJ of the new 'black fade' geometry (green group) and the ceiling (white group) for size/placement reference:
OBJ: prisonRoomBlackFade+CEILINGREFERENCE.zip
Edited texture file: ps37.map_tex_002.zip

Thank you!
Polymega
on 22 Feb 2019
Phew... this one was an ass-kicker but I love trying to make the most out of UV real estate. Another geometry adjustment if you'd be up for the task, @FrozenFish24 . When playing in widescreen, and without an adjusted .cam file to hide this window, you see a solid white piece of geometry covering the hole of the window you just climbed through:

Oringally, we moved the camera to hide this. But what if we revert this camera change, remove that white piece of geometry, and add part of Woodside back?


(Yes! I even matched the camera angle/focal lengths and lighting to ensure this would work/look good!)
Not only would this look nicer, but it's also user/player friendly: If they can see the window with outside geometry in it, they'll know/remember this is the window they climbed through (if they ever have to go back in case they forgot something).
If this is something I could ask your help with, @FrozenFish24 , here is what's changed:
- The geometry covering the window must be removed/moved out of the way:

- Here is the new OBJ geometry along with the bed for size/placement reference:
ap64_NewWall_WithBedReference.zip

- Here is the modified texture file. The UVs for the new geometry are already placed where they need to go; the geometry just needs to be linked to this texture file:
ap64.map_tex_012.zip

Thank you always for your consideration on this and the prison post above. I'd love to also know your thoughts if "opening up" the window here would help with user experience for first-timers.
A heads-up: Currently the lighting transition in this area was previously bugged. If you download the latest version of the SH2 Enhancements module this room/area will have proper, restored lighting transition values.
Polymega
on 26 Feb 2019
@Polymega These two edits may take a little while as geometry using transparent textures is stored differently in the map files and my tools do not currently handle this, so will require additional reversing. I'll be busy for the near future but I'll try and get these done for you as soon as I can.
Really nice work on these edits by the way :+1:
FrozenFish24
on 26 Feb 2019
Hi @FrozenFish24 ,
If I may make another request for the list: This is would be for ma85.map.
Using a widescreen camera we can see an empty void on the other side of the wall in the bottom left corner:

This would add sidewalk and street geometry for the area:

The attached OBJ has the sidewalk + street geometry along with a grass plane for size/placement reference:
ma85_streetAndSidewalk.zip

And this following texture image has been updated to support the new UVs/textures. This texture file and the new geometry do not use any alphas:
ma85.map_tex_010.zip

Thanks for your consideration with this!
Polymega
on 11 Mar 2019
@Polymega Annoyingly, the geometry that uses this texture is also stored in the transparent section for whatever reason. I've still not had a chance to look into further reversing yet, but I should be able to find some time soon.
FrozenFish24
on 13 Mar 2019
No worries, friend. I just happened to discover another void there and thought it good to exercise the 3D muscles once more. Really appreciate your work and contributions with everything.
Polymega
on 14 Mar 2019
Hi @FrozenFish24 ,
If I may ask, have you had an opportunity to dig into the .map files more?
Polymega
on 11 Apr 2019
Hey @Polymega
I've not had a whole lot of free time lately so I haven't made much direct progress on this front. But I have been incrementally documenting the format when I can. Most recently I found the bounding boxes used for frustum culling parts of the map, which may be useful at some point.
I'll hopefully be able to get something useful going for you soon. Thanks for your patience :+1:
FrozenFish24
on 14 Apr 2019
No worries FrozenFish24! Take the time you need and, really, this is worth saying again: Thanks for everything you're doing here. You've helped fixed bugs we were completely stumped on which then allowed us to improve many other environments, along with your Direct3D research to fix other avenues. You rock!
Polymega
on 14 Apr 2019
Hi @FrozenFish24,
May I ask of you to swap out some UV placements for the Dog Ending room? Nothing has changed geometry-wise, just the UV positions for the computer wall with the four monitors has been adjusted:
dog_ending_four_monitors_UVs_adjusted.zip
Edit: Sorry, forgot to mention the map name is qp05.map
Thank you for your consideration


Polymega
on 16 May 2019
@FrozenFish24
Thank you so much for everything. We have a few more fixes/adjustments we plan to do before this next release. May I also ask for geometry adjustments to some .map files? I know geometry/textures that are linked to transparent images isn't cracked yet, but I believe the following below aren't tied to any transparent textures (I might be wrong):
:black_square_button: Remove duplicate prison bars for ps85.map
A fan of our project noticed the prison bars have a glitchy effect as the cutscene plays of you finding Maria in the prison cell. I looked into it and it turns out Team Silent accidentally duplicated the vertical prison bars, so there's two instances of the geometry which causes the odd rendering effect (this affects all versions of the game): https://www.youtube.com/watch?v=BRL90l2_uiQ
Can the duplicate geometry of the vertical prison bars be removed for ps85.map?
:black_square_button: Fix bad edge looping for piece of geometry in forest trail
This is one that's only an issue when played in widescreen. The edge loop/edge flow for a piece of the forest trail hill is broken for ca09.map, which results in a stray vertex that isn't connected to any other vertices:


Deleting edges below the offending poly and then connecting that stray vertex to its corresponding neighbor vertex should fix this rendering issue:

:ballot_box_with_check: Adjust UVs for DOG ending monitors
See the post directly above this one for new UV placements. I have a fun idea/plan for this adjustment that will involve the Silent Hill community as a whole. :)
Thank you always :heart:
Polymega
on 5 Nov 2019
Just letting you know I am working on this. Been hitting some road blocks with my scripts though so it might be a little while.
I've finally put them up on GitHub by the way, though they're very rough and not much use to anyone but me at the moment:
https://github.com/FrozenFish24/SH2MapTools
Edit:
Here's one of the problems I've run into in case you're interested. Certain maps use vertex colors for static lighting so I'm currently having to switch my scripts from generating Wavefront OBJ to COLLADA because the former doesn't support vertex colors.
This also means to modify maps like ps85 seamlessly we need to work out roughly where Team Silent placed their light sources, their intensity and somehow bake off that information to each vertex's color in addition to any edits.

FrozenFish24
on 8 Nov 2019
Certain maps use vertex colors for static lighting
I'm sorry. I wasn't aware this was something Team Silent done and how this would add an extra wrinkle/headache to the mix.
Knowing this now, I would assume then, that, indoor areas with no specialized lighting don't have special vertex coloring. That's why adding geometry for places like the indoor Hospital and Apartment rooms was more straightforward.
Whereas the Maria prison cell is "naturally" lit (so vertex colors are used). The same would probably be true for Hotel Room 312, then (using vertex coloring).
Polymega
on 8 Nov 2019
Hi FrozenFish,
Have you had any leeway with the script and the vertex coloring? Is there anything I can do to help? I'm happy and willing to do whatever I can, so long as you can excuse my programming-impaired brain.
Polymega
on 3 Dec 2019
Sorry this is taking a while @Polymega, been a bit busy these last few weeks. Here's the Dog Ending room with the UVs adjusted to tide you over:
qp05.zip
I've implemented most of the changes I need to support vertex colors and I've got the edited geometry ready to export so I should have the others done for you in the next few days.
FrozenFish24
on 4 Dec 2019
No worries, friend. We're hoping to include up-scaled, properly-fitted main menu, save screens, and maps for this next update as well, so there's no imminent deadline for anything at the moment.
Thanks for the adjusted UVs for qp05. With that adjusted, would you mind casting your vote? :)
https://twitter.com/WhereAllBegins/status/1202322711676116993
If I may recap the additional earlier requests, plus one for Hotel Room 312, to have everything recollected:
:black_square_button: Add "fade out" geometry to prison sewer room
:black_square_button: Add street geometry for outside Baldwin Mansion
:black_square_button: Add apartment geometry outside of Blue Creek window
We can then revert the camera position to default for this area to re-show the window. This'll also help visually guide new players for the game, to let them easily see that's the window they came from and that they can go back through it, if they need to.
Also, with the advent of vertex coloring, can all geometry outside the window/window sill have a vertex color of 255 (full brightness)? The idea would be to hopefully prevent James' flashlight from having any influence on this new wall (because his light will shine _through_ the current room's wall due to the general limitation of the game engine).
:black_square_button: Replace low res 2D fence with 3D model
For Hotel Room 312 (rr91.map), can the flat geometry that makes up the low res 2D fence texture be removed and replaced with a 3D fence model instead?
Given the importance of the cutscene that plays out here--and how prominent this fence can be during the cutscene--it'd be ideal to have it look nicer. The heavy pixelation from the flat texture makes it a bit distracting, otherwise.
Attached is an OBJ of the 3D fence. I didn't include a "reference" piece for size/scaling as it's probably pretty intuitive how it should fit. The new 3D fence shares/uses the same texture file as the original 2D fence:
:black_square_button: Final request
It's easier to verbally explain this one so I made a video for you and sent the link to your email. Thank you <3
Polymega
on 4 Dec 2019
Cast my vote and checked out your email. Nice edits as usual, you're very talented!
I've still not RE'd the whole "geometry with transparent textures" thing sufficiently so several of these might take some time. Otherwise I'm on it!
In regards to the Blue Creek Window, I don't believe any areas where you can use your flashlight have vertex color-based static lighting. I imagine we could just exclude your wall like we do the TV Static/Heaven's Night Windows (though this may also exclude the window frame and shutters).
FrozenFish24
on 5 Dec 2019
I don't believe any areas where you can use your flashlight have vertex color-based static lighting
Ah, that makes perfect sense. I think I even hypothesized that previously but forgot (which is why it was possible to edit previous areas as you've already done).
I imagine we could just exclude your wall like we do the TV Static/Heaven's Night Windows (though this may also exclude the window frame and shutters).
True! Also, another hail Mary idea I had was to set the normal angle for the outside wall to an extreme angle to help make the wall bright.
But before worrying about any of that, I'm hoping the light source that's already plugged into this room by the game will brighten that outside wall for us automatically, so we don't even need to worry about it.
My only potential fear is, due to game engine limitations, James' light will shine through the wall onto the outside wall, making it look a little odd:

My hope is if the outside wall is full brightness, the flashlight's light can't influence that wall's brightness any further.
Polymega
on 5 Dec 2019
Making progress on the transparent geometry front:

FrozenFish24
on 15 Dec 2019
That blood pool is the prettiest blood pool I've ever seen because it inspires progress and hope! 😍😍
Polymega
on 15 Dec 2019
Hi @FrozenFish24 ,
Exciting times are ahead as we hope to release the next update sometime next month! (Hopefully no later than mid-to-late February.) Have you had any opportunities to experiment more with the .map files?
Polymega
on 20 Jan 2020
@Polymega I'll admit I've been burnt out since my last post from staring at hex dumps and the obtuse layout these files have. But my enthusiasm has recently returned and I was planning to do some more work on it this week.
If I'm unable to get my tools working universally, as I'd like, I should at least be able to have your map files done by Feb :+1:
FrozenFish24
on 20 Jan 2020
I'm sorry about the burn out. And it's completely understandable. Virtually no detailed documentation on these formats just leaves you in the dark, and frustrated. And then you got folks like me being starry eyed, just to compound it.
Thank you for the update, and your patience with the whole situation. Seriously though, no worries about pushing the work off until an update after this one. I'm more concerned about you and your long term enjoyment working with the project.
But hey, I don't know how often you check your email, but I sent you something cool to start off your week. :)
Polymega
on 20 Jan 2020
Related issues
 Storm3000
·
3Comments
Storm3000
·
3Comments
 Psycho-A
·
16Comments
Polymega
·
8Comments
Storm3000
·
10Comments
Polymega
·
10Comments
Psycho-A
·
16Comments
Polymega
·
8Comments
Storm3000
·
10Comments
Polymega
·
10Comments
Most helpful comment
Here you go
lightbulb.zip
I simplified the bulb slightly while I was at it, hope that's okay.