Cura: [4.6.1] Misaligned seam on curved surface
Application version
4.6.1
Platform
macOS 10.15.5
Printer
Anycubic Chiron with 0.8mm nozzle (also happens with another printer)
Reproduction steps
- Generate an STL from a cylindler in F360 selecting high poly (issue is most noticeable with this setting)
- Configure cura with following settings:
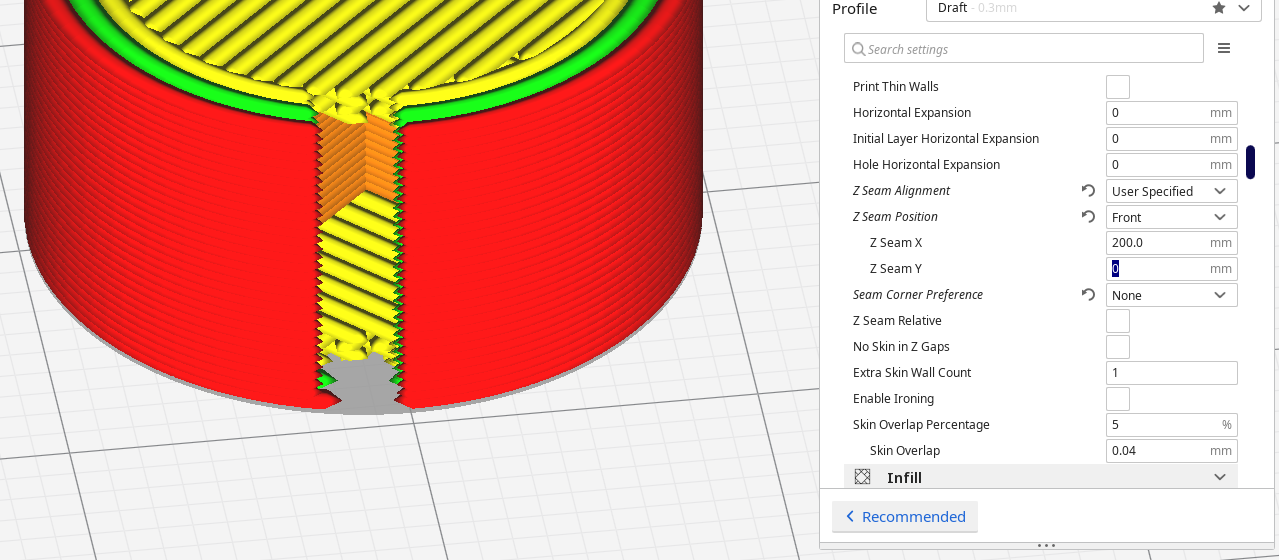
Z Seam Alignment = User Specified
Z Seam Position = Front
Seam Corner Preference = Nonce (changes behaviour a bit, but not critical) - Slice
Screenshot(s)
Note: I've enabled coasting to make the seam alignment visible in the screenshot

Actual results
The seam is not vertically aligned, it moves around a bit.
Expected results
The seam should always start at the exact same point, producing a seam vertically aligned on the Z axis.
Project file
Cyl_high.3mf.zip
Log file
Not a crash
Additional information
I'm trying to precisely position the seam so I can tweak the geometry and avoid it causing clearance issues on parts with tight tolerance.
I believe this bug is somehow related to the curve being approximated in the STL file as multiple faces, but I can't see why it would behave like this.
 marcoburato
All 7 comments
There are three aspects to this, why this is happening:
Cura will always place the seam on a corner. Your model is not a cylinder but an approximation of a cylinder.

There are some diagonal edges there, which can become the closest vertex too. This makes it shift around a bit.
Secondly, compounding with the first, is that Cura will reduce the resolution of your model in order to allow the printer's CPU to keep up with planning in the moves during high-resolution curves. You need to reduce the setting values for Maximum Resolution and Maximum Deviation to achieve a better result.
Thirdly, there are two vertices which are equally close to the point you indicated (200,0) since the face that is closest to that point is equally spaced around the X axis. If the diagonal vertex is removed due to the maximum deviation setting, it can still choose one or the other arbitrarily.
It should also be mentioned that the coasting on the initial layer is shorter because the layer height and line width are higher. A shorter line results in the same volume then. It'll align on one side, but not on the other.
This seems to be expected behaviour to me, from what I can see.
 Ghostkeeper
on 6 Jul 2020
Ghostkeeper
on 6 Jul 2020
As a developer, I've found myself in this position too. It's technically not a bug, because the program does what it was supposed to do, but it is from the user perspective because the result is not the expected one and is inconsistent.
Regardless what we want to call it, I reckon it's something that could be improved.
Unfortunately, from what you say, it seems like this would not be a straightforward job.
I suppose Cura could simplify the model first, by replacing adjacent coplanar triangles with quads, then pick the leftmost vertex if multiple ones at the same distance exist. It would be an arbitrary choice, but at least if would be consistent.
marcoburato
on 6 Jul 2020
Cura reduces the resolution in 2D only. Doing that in 3D is hideously complex, as you're dealing with sets of triangles in no particular order, which can be arbitrarily linked together or may even just not be linked together, or may be supposedly joined together but not really due to rounding errors when the file was saved. Some edges are important and some aren't, which is not necessarily solely dependent on their angle or their length. One vertex may be unimportant and a candidate for removal, but its adjacent faces may be important on the other side and adjusting only part of a face requires adding in new vertices which increases the resolution again. In general, CuraEngine will try to approach every problem in 2D if at all possible since there are way fewer edge cases to think about. There are algorithms to do this in 3D (like Blender's Decimate) but it's very complex and provides fewer guarantees on how long the 2D edges end up in the end.
In 2D, the colinear edges are combined, allowing for up to 5 micrometres of rounding error. However there is a catch to that because the resolution of the polygons is reduced at the same time, one of the two colinear edges may have been combined with another edge that is not colinear.
Currently in the face of a tie it'd consistently chose the first vertex it encounters which is the one more towards the clockwise direction, as seen from above. However since vertex coordinates are rounded (to limited precision in the file and later to microns by CuraEngine), if the line isn't vertical you'll still have 1 micrometre rounding errors which would still make it arbitrary. It would need some fuzzing, i.e. to compare all vertices to see if they come within 5 micrometres of the best result and then choose from among those. And like I said before, it can still remove one or the other vertex in the tie due to the reduction in resolution.
Ghostkeeper
on 7 Jul 2020
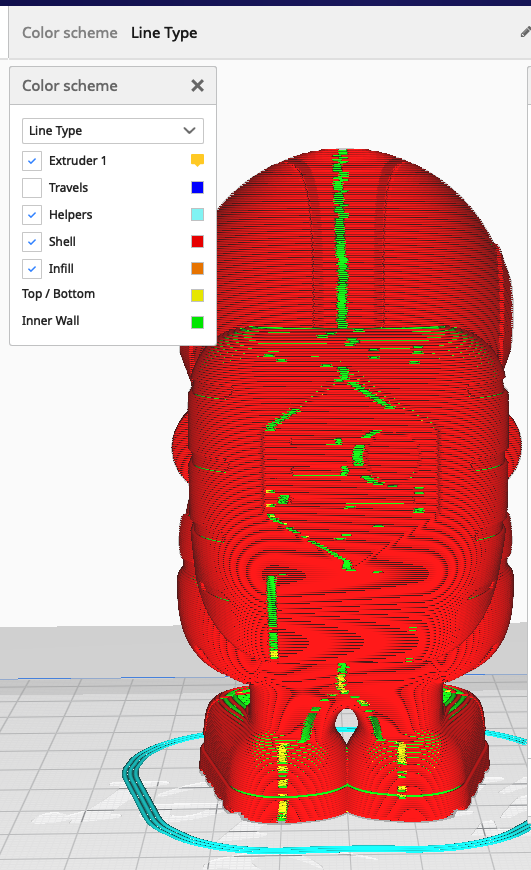
FYI, my cura builds feature an "exact" seam mode that places the z-seam on a plane that cuts through the layers and doesn't constrain the z-seam to fall on a vertex on each layer. So this is what I get when I slice your project...
If you wish to try it out, you can find my builds at https://www.dropbox.com/sh/s43vqzmi4d2bqe2/AAADdYdSu9iwcKa0Knqgurm4a?dl=0. Please read the README.md file there before using.
To enable the exact seam mode, you must use the user specified z-seam style with the seam corner preference set to none (just like you have in your project file).
 smartavionics
on 7 Jul 2020
smartavionics
on 7 Jul 2020
Here's another example, a low-poly cat with the z-seam slicing through the facets...
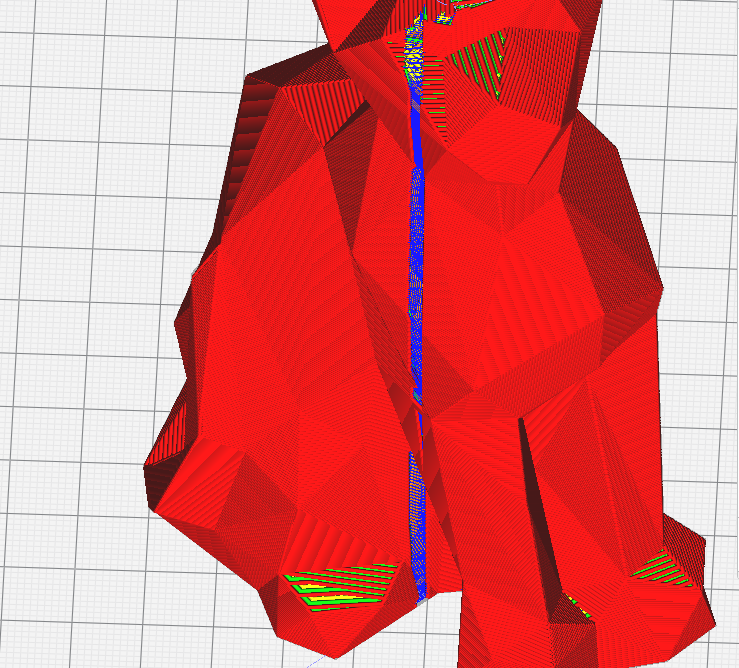
Obviously, with that model, the ultimate z-seam solution would align the seam with the edges of the facets but that's not the topic of this issue.
smartavionics
on 7 Jul 2020
Ah, that looks like a good solution. IMHO, that's exactly what one would expect to happen for a manual seam placement.
marcoburato
on 7 Jul 2020
@smartavionics This is exactly what should happen if I set the seam to Back and set the seam corner preference to none. In Cura 4.8.0, this does not work. It still keeps sticking the seam to corners... (coasting enabled to show the seam). it's infuriating, to say the least. Think I will try your build.
 drelich
on 21 Nov 2020
drelich
on 21 Nov 2020
Related issues
 konvoj
·
3Comments
konvoj
·
3Comments
 rudowinger
·
3Comments
rudowinger
·
3Comments
 probonopd
·
3Comments
probonopd
·
3Comments
 timherrm
·
3Comments
timherrm
·
3Comments
 muhammadelmogy
·
3Comments
muhammadelmogy
·
3Comments
Most helpful comment
FYI, my cura builds feature an "exact" seam mode that places the z-seam on a plane that cuts through the layers and doesn't constrain the z-seam to fall on a vertex on each layer. So this is what I get when I slice your project...
If you wish to try it out, you can find my builds at https://www.dropbox.com/sh/s43vqzmi4d2bqe2/AAADdYdSu9iwcKa0Knqgurm4a?dl=0. Please read the README.md file there before using.
To enable the exact seam mode, you must use the user specified z-seam style with the seam corner preference set to none (just like you have in your project file).