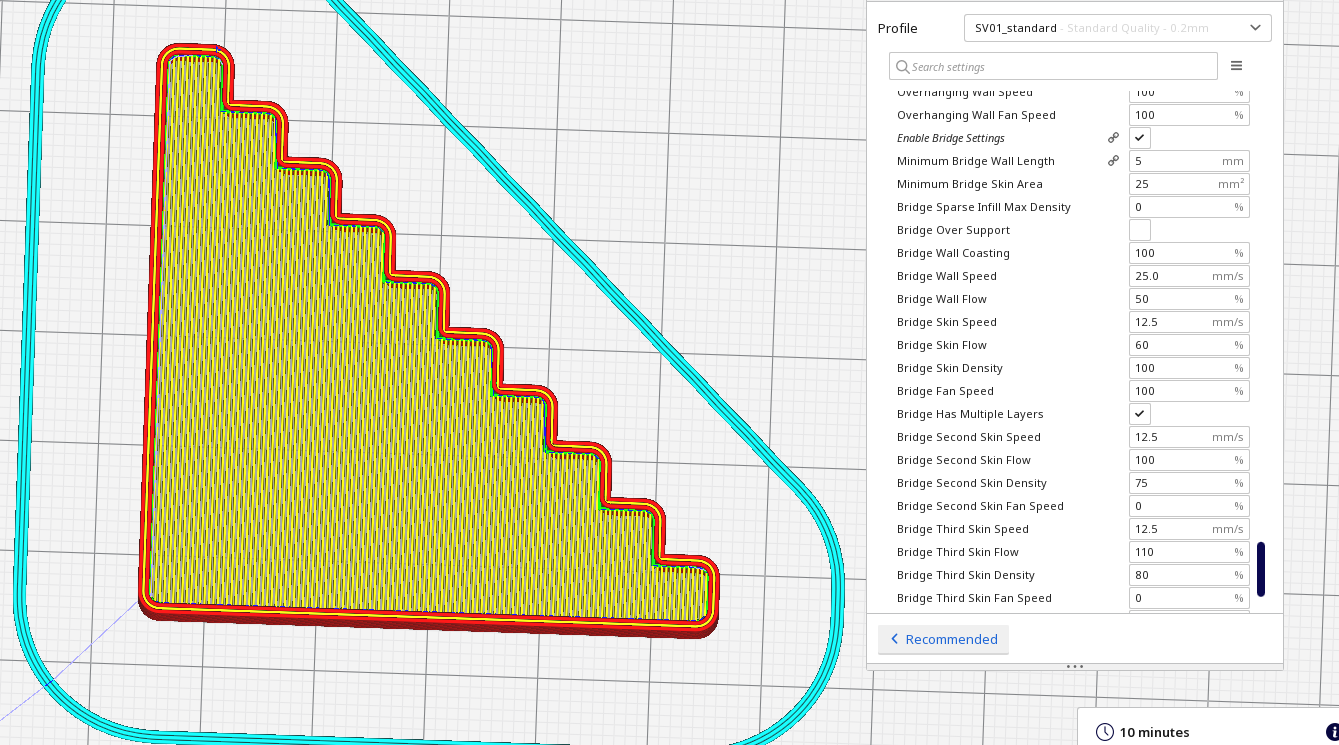
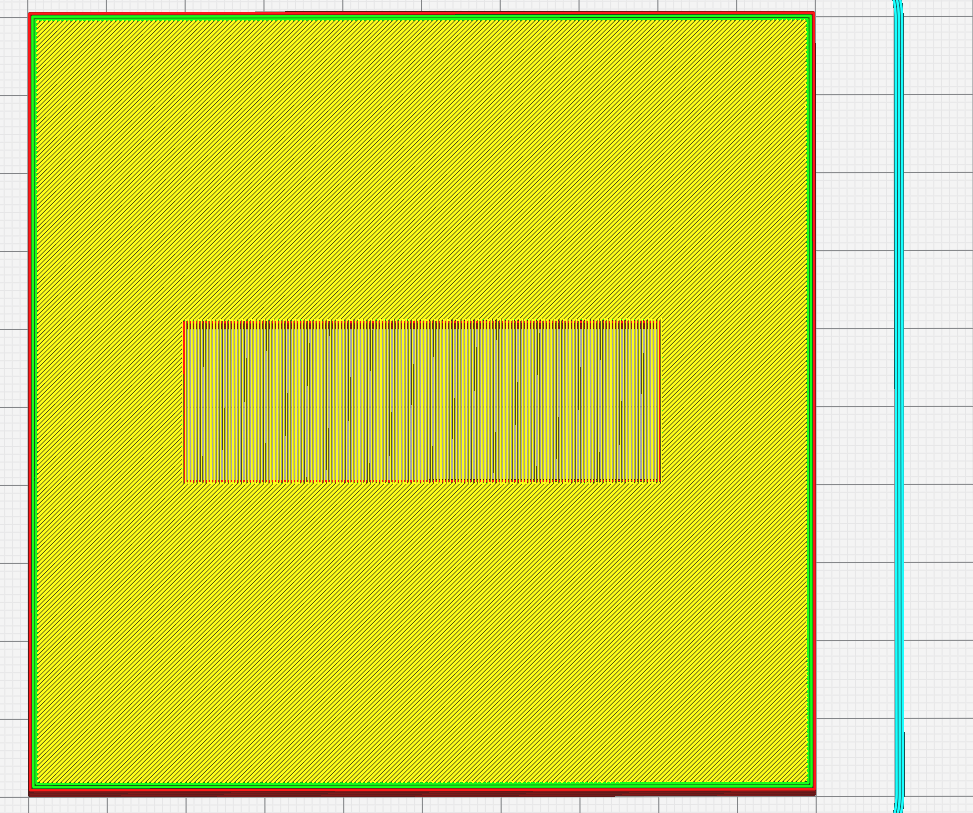
Pics shows it all. How can I slice to make it test diminishing bridge lengths?
Application version
4.4.0
Platform
Mint 19.3+Cinnamon
Printer
Aycubic DELTA, nope, not an i3 ;)
Reproduction steps
Load.stl from here https://www.thingiverse.com/thing:2614805
Screenshot(s)

Actual results
A 45 degree Bridge
Expected results
A Linear Bridge test
Project file
https://www.thingiverse.com/thing:2614805
 FlailAway
All 15 comments
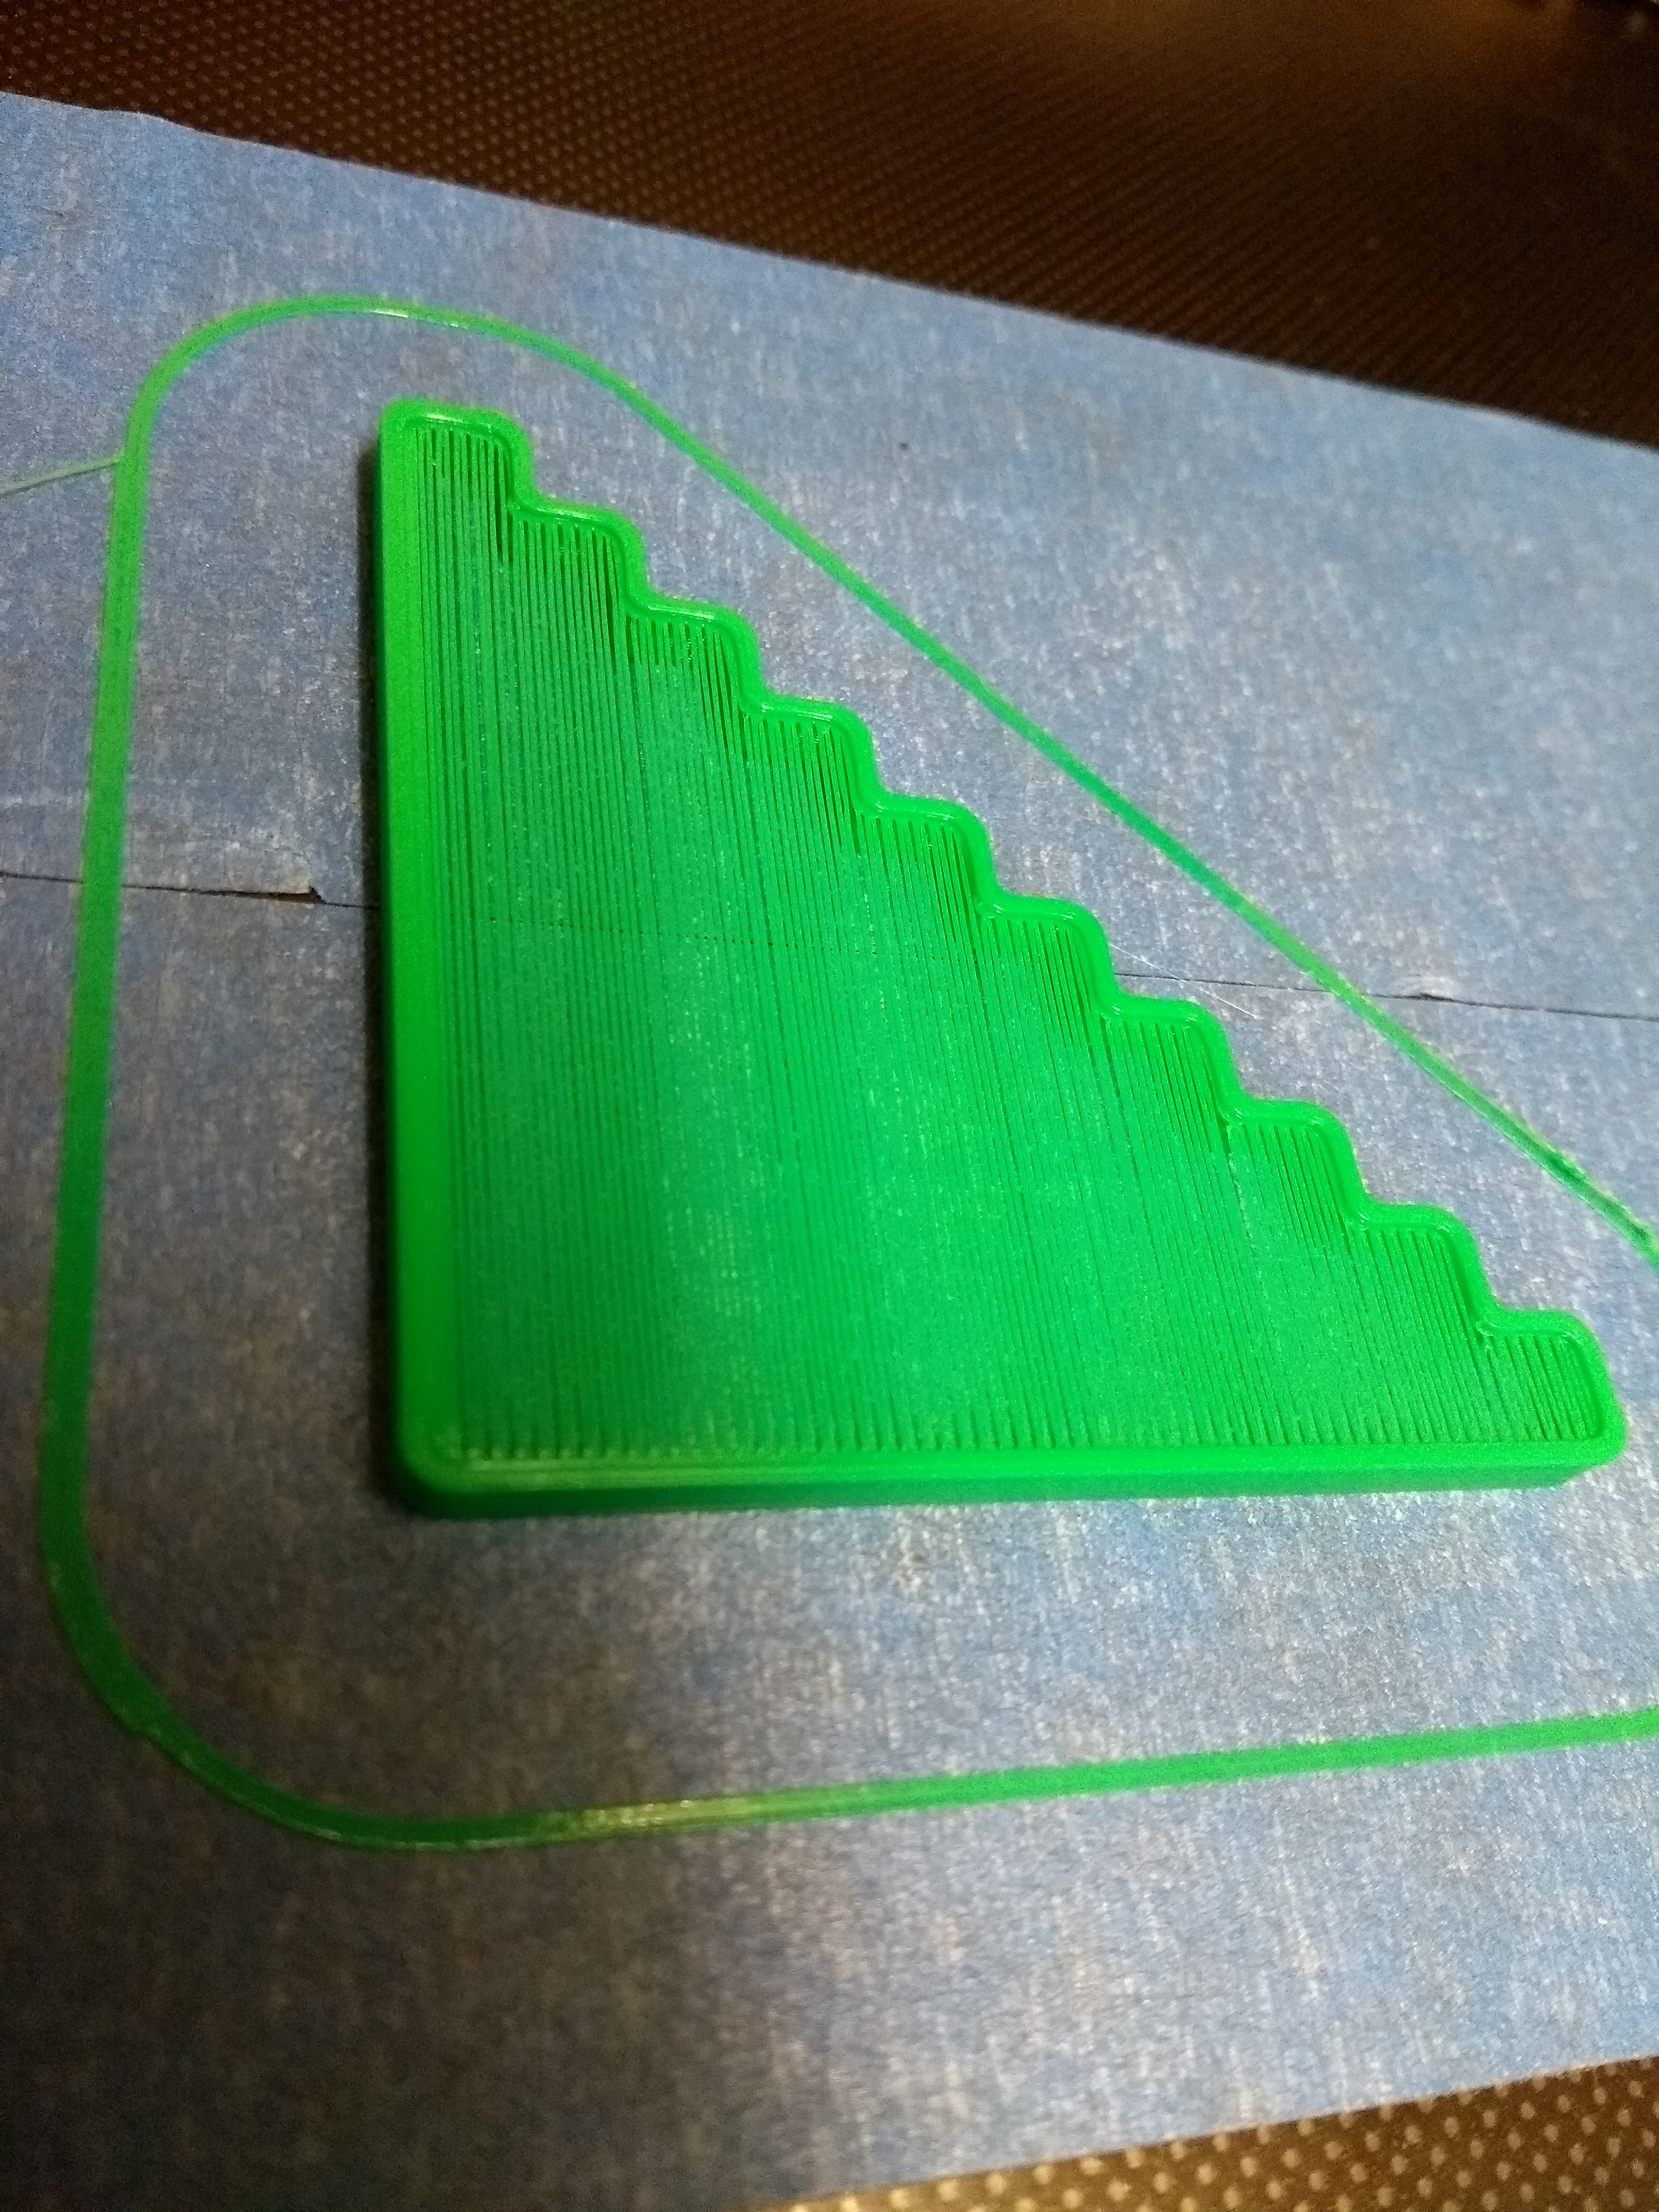
I sliced it using my current Cura which treats bridge skins differently from the UM build and it does what you would expect...
Just printing it now on a SV01, it's looking a lot nicer than the image on the thingiverse page, I'll take a photo...
In my testing when I implemented the bridging, I found getting a decent first bridge layer was quite easy, the hard bit was getting the next couple of layers to adhere and not make the first layer droop.
A better test piece would have a thicker top surface that would require 2 or 3 layers.
 smartavionics
on 11 Dec 2019
smartavionics
on 11 Dec 2019
Just had a thought, you have enabled the experimental bridge settings, haven't you?
smartavionics
on 11 Dec 2019
Thanks, so what did you do to get it to print that way? I just tried printing and while it did an OK job, it is at 45-deg.
Can you suggest a better test piece then?
FlailAway
on 11 Dec 2019
From memory, I don't think that 4.4.0 will align the skin lines optimally even when the bridge settings are enabled. I think you need to install one of my releases to get that. You can find my releases at https://www.dropbox.com/sh/s43vqzmi4d2bqe2/AAADdYdSu9iwcKa0Knqgurm4a?dl=0. Please read the README.md file there.
smartavionics
on 12 Dec 2019
There's also 'Top/Bottom Line Directions'. Just fill in [0] (including the brackets) and it should do what you want. (Even in the 'normal' versions.)
 rburema
on 12 Dec 2019
rburema
on 12 Dec 2019
Actually, that should be [0,90] so the directions alternate with the layers.
smartavionics
on 12 Dec 2019
The angle of the bridge lines is based on the direction of the longest edge of the bridged area. I'd expect that to be the correct direction in your case (one of the two anyway). However it seems to not detect bridges at all from your screenshot.
 Ghostkeeper
on 12 Dec 2019
Ghostkeeper
on 12 Dec 2019
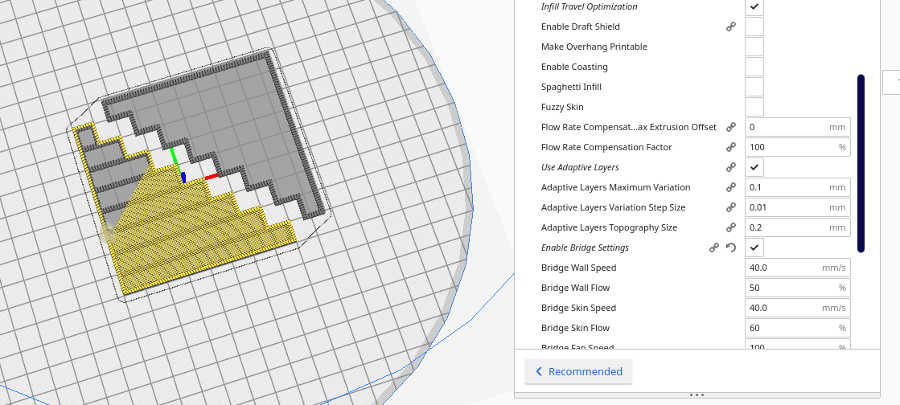
@Ghostkeeper: Yup. But using [90,0] in the 'Top/Bottom Line Directions' seems to solve that even with Bridge settings turned off. I drew my own and tried running walls between each step but without [90,0] it still did diagonal across the walls!
@smartavionics: I have not downloaded your updates as I am trying to see where it is at, right now, so for now I will stay with 4.4.0 as I can get the slicing in the correct direction. I assume by setting your Bridge settings on, I will also be able to use the speeds etc. The pic is with 'Top/Bottom Line Directions' set at [ ]. When set with [90,0] it is slicing correctly with or without but the Bridge settings.
FlailAway
on 12 Dec 2019
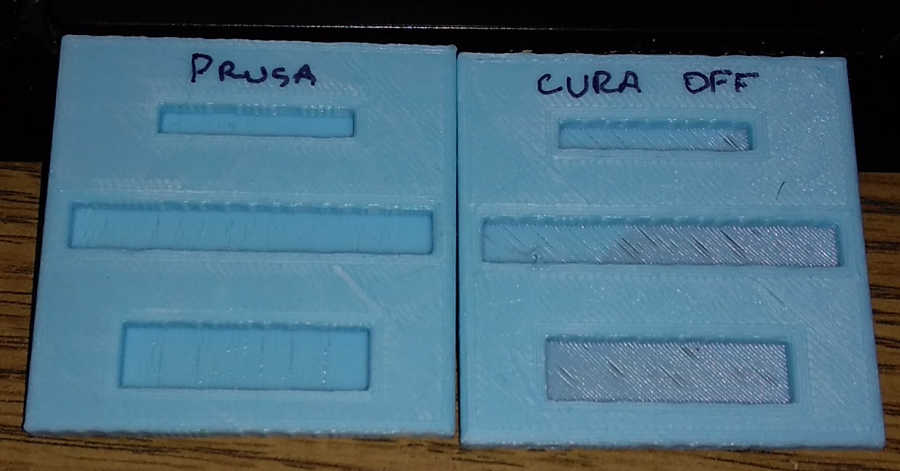
Just created a better test more indicative of an actual need for a bridge. It is a square solid block with 3 pockets open from underneath. The thickness is 5mm and the pockets are 3mm deep and it is definitely not seeing them as pockets. Prusa on the other hand sees them as pockets and bridges across the shortest side.
Not sure if this helps, but, see the pic, with Prusa, vertical bridges were done individually while the surroundings were handled as infill. The Cura version just does a full cover diagonal (or lines if I set [90,0] so pretty clear it is not seeing stuff as a Bridge. That "off" is with bridging off and when "on" it honours the speeds etc of SmartAvi stuff, so that is good.
ETA: Note that my printer is a delta and Prusa does not have an optimized profile for deltas as Prusa doesn't have deltas, so this print is with my optimization from scrtach, for the delta.
FlailAway
on 12 Dec 2019
You need to use my release to get the skin lines going straight across the bridges like the Prusa example does.
smartavionics
on 12 Dec 2019
My Cura release segments the skin into bridge and non-bridge regions and prints the non-bridge regions at the +/- 45 angles and prints the bridge skin areas aligned as you would expect...
smartavionics
on 12 Dec 2019
I think this issue occurs because the bridging routine in Cura currently works by calculating the angle between of the centres of each part that the bridging area rests on. Since the shapes that were reported in this issue all contain just one part that the bridging area rests on, there is no direction then and it won't adjust the bridging lines' directions.
To resolve this we'd need a different approach to get an angle. Breaking it up into pieces gives the same problem but only localised then.
Ghostkeeper
on 13 Dec 2019
Just use my builds and it will do what you want. If it doesn't, raise an issue at https://github.com/smartavionics/Cura/issues.
smartavionics
on 13 Dec 2019
Dropbox is a PITA if you do not have an account. I'll pass until it is in the next nightly release of Cura as I do not want to try and keep track of where issues are reported. If'n it ain't on Cura's Github, I'll never see it.
FlailAway
on 13 Dec 2019
Dropbox is a PITA if you do not have an account. I'll pass until it is in the next nightly release of Cura as I do not want to try and keep track of where issues are reported. If'n it ain't on Cura's Github, I'll never see it.
As you wish. However, you will have quite a wait until this feature (partitioning of skins into bridge and non-bridge regions) appears in a UM release. That's because it hasn't yet been submitted as a PR for their consideration and then when it is submitted it will probably take 6 months or more for the PR to be evaluated at which point it may get thrown out anyway.
smartavionics
on 13 Dec 2019
Related issues
 DmitryBychkov
·
3Comments
DmitryBychkov
·
3Comments
 rudowinger
·
3Comments
rudowinger
·
3Comments
 Liger0
·
3Comments
Liger0
·
3Comments
 wi1k1n
·
3Comments
wi1k1n
·
3Comments
 ferociousdiablo
·
3Comments
ferociousdiablo
·
3Comments