Creating an issue to track the upcoming TS80P.
So anything said here is speculation at the moment 😁
My current understanding I have pieced together is that it is possible to just add support for the USB-C to the current TS80 build. I believe it is a USB-C interface attached to I2C, so expecting adding support shouldn't be too hard as will only require handling its configuration.
My plan is to acquire a TS80Pas soon as possible and get to work on the firmware side.
I have tried and we are not getting schematics _soon_ (will eventually exist apparently).
I'll update this top message as things happen.
Try to keep on topic in the comments 😆
Edit 13/06/2020:
My unit has arrived, and I'm looking into support carefully now.
Looks like quite a few small changes (few resistors have changed), so will need to re-calculate some of the equations as well.
Not 100% sure if will make a different FW build, or if make TS80 firmware auto-detect.
USB-PD is just as complex as I remember it, still a bit of work here to go I'm afraid :(
USB-C
Edit 28/07/2020
Beta firmware is out, hopefully this works a fair bit better for everyone.
ROM space is a bit tight so still will probably do some cleanup before deploy but want feedback on PD.
 Ralim
Ralim
All 270 comments
Ohhhh ... how I have been waiting for this! 👍 😁
Mine arrived yesterday!
I am looking forward to this becoming my # 1 soldering iron!
- Although this thing is better than its predecessor regarding heat-up time and max temperature (Might be even more, I am no expert to evaluate this), I do not like the new 'sliding-handle-piece-thing'.
- And I noticed the silicone USB-C to C cable being a bit stiffer, than its counterpart from good old TS80.
- I do not know much about the internal of an USB-C plug, but it looks like there are missing some pins.
Nevertheless I think you (and everyone contributing to this) are going to make this thing even bigger than its predecessors including the TS100.
a big THANK YOU in advance
kind regards
 discip
on 23 May 2020
discip
on 23 May 2020
@discip Ah awesome :)
Yeah I'm not sure what i will think of the metal handle slide. I wonder if it will fit in the older TS80 plain case if you prefer its style? (I'm only guessing)
I'm sort of expecting that, it would have extra conductors in it i guess :| Still should be better than the ones i have here 😁
I would expect it to be missing the USB3.0/ high speed data pairs as they would be useless. There are USB-C plugs I often use that only have the USB2.0 pins fitted as they are much easier to solder. Possible its that style of connector.
I'm hoping mine will turn up soon. Once it does expect me to start poking at its support 😀
Ralim
on 23 May 2020
@Ralim
Good evening,
thank you for your instant reaction.
Good news: The original TS80 sleve fits perfectly onto the new TS80P because the housing is exactly the same! (Because of the fact, that I do not like the slightest wiggle in the tip I am holding directly onto the 'muffler' (dissipator) and that way the tip is even shorter, which I prefer as well. So the most logical call was to replace the new handle with the approved one.)
Don't get me wrong I am happy to be provided with such an elaborate piece of equipment, but the first thing that came to my mind, was about eDesign having used lower quality wiring. Later on I considered the extra mass for extra power would add to the stiffness.
One more thing about the accuracy of fit of the cable plugs: It is very tight!I just thought distributing the 'power' onto as much wires as possible, would get the job done even better. 🤔
I am looking forward to this, almost impatiently. 😅
regards
discip
on 23 May 2020
Well I've retired! All the virus stuff has given me the opportunity to jump ship on very good terms.
With that in mind I wont be upgrading, because now I have virtually no need for portability - my existing kit will do. I still have about 20Kg of lead solder so I won't be needing more than 340c either.
Interesting to see the new kit - looks even more like a weller. If I've got the right end of the stick isn't USB3 already compatible with PD?
I thought if you use a QC3 device with a c to c cable it naively uses all 6 lines because the controller doesn't need to make provision for backwards compatibility with earlier usb standards.
As I understand it (if I do!) the USB3/QC3 and PD aren't in competition they are (and always have been) compatible, you just get given lower voltage\current if you plug qc3 into PD.
"Traditional" USB C to USB A qc cable converts 6 wire to 4 wire while C to C uses 6 wire comms and can talk to PD even if it cant take 12v.
 whitehoose
on 24 May 2020
whitehoose
on 24 May 2020
@Ralim
Good evening,
due to the fact, that I got an US wall plug, although I need an EU wall plug, I have to buy one myself.
But as you most likely know, there is an huge amount of wall plugs to choose from.
My focus is to get a reasonably small, well build (quality wise) and not to pricey one.
But there is more, I want to consider, before spending the money.
Regarding the specs of the unmodified TS80P, its max power draw amounts to 30W.
Since I am not familiar with the internals of the iron and its specific capabilities and considering the fact, that your firmware "overclocked" the power draw of the original TS80, I am wondering, if you think about doing the same to the TS80P? (Do you already know, if it is possible to push the limit without compromising the device? I am really all about, not shortening the life to this beautiful piece of art. 😍)
I hope you got my point. 😉
Since there are plugs providing up to 65W of power, but these are somewhat monstrous regarding its size, but also ones with 30W, I am wondering if the latter ones are sufficient, regarding the 🎆✨upgrades 👏🎆 you are planing to provide. 😁
thank you in advance
kind regards
discip
on 28 May 2020
@discip
Indeed this is a good question.
By back of the envelope calculation, I think it will peak at around 32-34W. So I would lean towards a 35W or 45W small charger if you can pick up one easily locally. However, the firmware will keep the current ability to limit power, so even a 30W will probably be totally acceptable.
I have a 30W adapter here that I have totally pushed to 35W (gets a bit warm, but its done it for like 2 years now). So there is probably some room in there too.
I would pick either 45W/35W/30W depending on size and ease of picking it up :)
If the USB-C solution they have used works as I _expect_, then the iron can query for what limit to use, so it should "adjust" to match the adapter.
Ralim
on 29 May 2020
@Ralim
Good afternoon,
here are some pictures, which, I hope could be helpful.
These are the specs of the wall plug:

This depicts the pins of the top and bottom of the same side of the power cable:

This shows the pins, top and bottom, of the irons inlet:

This is obviously the top side of the PCB:

And here is the corresponding bottom:

This was really not easy to achieve. Especially taking the pictures of the USB-C sockets / plugs was some tedious work.
Nevertheless, I hope you could use these. 😁
regards
discip
on 29 May 2020
Glorious!
These are highly appreciated.
I'll probably dig into these more in the coming days, but already those confirm most of my thoughts which is excellent.
Looks like a dedicated USB-C PD IC, so compatibility should be good 😄 .
Those USB-C plugs are like I thought, no high speed signal pairs (USB3/thunderbolt).
Pins present:
- GND
- VBUS
- USB2.0 pair
- CC pins
- SB
- Vconn
Which is great as it looks like _any_ USB-C cable will work, nothing "special" other than the nice silicone outer.
Interesting to see PD+QC on the same plug on the adapter as, as far as I know, you not "meant" to do that 😂 .
Ralim
on 29 May 2020
@Ralim
That's great! 👍
discip
on 29 May 2020
Look forward to. My TS80P got into trouble, something went wrong while trying to change the bootup picture. It seems I accidentally messed up the firmware. When connected to a power source, the soldering iron does not work - only the default bootup picture lights up and nothing else happens. When connected to a computer, I see a virtual disk, the boot module for updating the firmware works, but there is no hex file for TP80P to flash it. A huge request - as soon as you have a soldering iron, lay out first of all the native firmware. Thank!
 Hmurik
on 4 Jun 2020
Hmurik
on 4 Jun 2020
Mine hasn't arrived yet but when it does ill definitely be racing to get a tester firmware up.
You could possibly contact miniware for a firmware for what came on the iron originally. But if not ill try and dump it as well in the meantime for you.
Ralim
on 5 Jun 2020

What is this port protection? OVP protection or what? I cannot figure it out. The iron is around $80 on banggood especially now if you preorder it. Is it good idea to order it right away during the discount or wait a bit for few pcb revisions in case there are hardware flaws?
 DjordjeMandic
on 5 Jun 2020
DjordjeMandic
on 5 Jun 2020
I would be guessing that its just the OVP protection in the USB-C interface being used for marketing?
In the past there hasn't really been PCB revisions (other than the "upgraded" clone irons that are missing protection circuitry).
Ralim
on 5 Jun 2020
contact miniware
I sent a letter to miniware while they are silent. As soon as there is some result I will inform.
Hmurik
on 5 Jun 2020
@Ralim
Sorry but I have to ask again, do you think this one would work for the TS80P?
ps: What do you think about GaN technology in general, do have any experience in this field yet?
I read in some comments, that some seem to produce noise, compared to conventional technology.
thanks in advance
regards
discip
on 5 Jun 2020
I have a GaN charger (2USB-C/100W, 2QC/18W). Works wonderfully for all my USB powered equipment. Haven't received my TS80P, yet, but should be here in the next couple of days. I'd expect it to work fine with that charger. From my limited experience, I can absolutely recommend GaN technology.
 gutschke
on 5 Jun 2020
gutschke
on 5 Jun 2020
@Discip.
Really it's back to square 1, As things stand, taking what happened when the 80 launched Its possible that a wallwart that works with an 80 won't work with an 80p or vice versa, the only way to know for certain is to try... or if Banggood or Ali are bundling - buy the wallwart they're using.
Hopefully the manufacturers have learned and improved their kit to expand the list of compatibility - but certainty ... only when you have one plugged in making the iron melt lead can you say yes for certain.
Small with big currents and voltages is never going to be a good idea - it also depends on your standing voltage. The US use 110v, you can virtually lick the prongs to test them - but UK, EU and Aus uses 240v - that will give you a very hard slap if you extend your tongue, it will even ump the wall to get to you - with 240v you need physical separation and ideally big air gaps between tracks to ensure safety.
I have a 5.2Kw 5v supply I bought from work - it still only delivers 18w to my ts80 - total overkill and would be a waste of money if I'd bought it just for the iron, Ohms law is tough - don't be tempted to over spec power (but you need a bit of wriggle room) - everyone lusts after the 1.21 Gw model - but if you're not time travelling it's just a waste The pixies only move at their own pace, unless you change the parameters of the path they won't speed up.
whitehoose
on 5 Jun 2020
@discip By my eye that looks like it will work 100% fine. Its USB-PD spec compliant, it has the 12V option, and it has adjustable voltage (which is nice). I see no reason against it.
I've only used some GaN chips, and for all of the power applications I have used them in they have worked _perfectly_ no noticable issues at all. So i wouldn't be worried about it. If there are issues with the charger its probably due to _other_ stuff :joy: .
At least PD is a fairly good spec, so they all should work :)
Ralim
on 6 Jun 2020
@gutschke
Thank you!
@whitehoose
Thank you for your advice regarding safety and high voltages.
@Ralim
Thanks, that sounds very promising, I think I am going to try the above mentioned one.
discip
on 6 Jun 2020
Today, firmware for a soldering iron has become available for download:
http://www.minidso.com/forum.php?mod=viewthread&tid=4085&extra=page%3D1
I was able to solve the problem with my soldering iron - it works great!
Hmurik
on 8 Jun 2020
I fully understand having a life away from stuff like this. I am just wondering about progress on this.
 brencerddwr
on 17 Jun 2020
brencerddwr
on 17 Jun 2020
@brencerddwr
Your welcome to ask :)
Indeed I _do_ have a life :sweat_smile: But I have also spent a few hours on this so far; where I'm at is:
Working:
- Accelerometer
- Tip PWm
- Handle raw ADC measurements
- QC3.0
- OLED
Not yet working:
- USB PD
- Handle temp sensor
Have been focusing on the USB-PD and its just a nightmare to debug with the setup in the iron; I have ordered a breakout board for the FUSB302 chip inside the iron; but also will continue to test it as I have time.
Handle temp sensor is odd; not sure if they have moved the pin or changed something in the schematic. Will most likely need to trace the connection to figure that one out; but should be fast.
Main reason its a pain is that the FUSB302 is just a PHY so it doesnt actually contain any of the logic for talking to the power adapter; that all has to be done firmware side.
Ralim
on 18 Jun 2020
@Ralim
Thanks for looking into this.
I got my TS80P as well. Looking forward to use the boost function :)
Regards from Germany
 denimjeans
on 18 Jun 2020
denimjeans
on 18 Jun 2020
@Ralim, when you get to the point of the USB PD and handle temp sensor working, I would be willing to beta test for you. If I understand correctly, since it uses DSU to update firmware, it should be almost impossible to brick my TS80P.
brencerddwr
on 18 Jun 2020
I'm excited that PD is implemented in software. In the long run, that should give a lot more flexibility. But in the meantime, it's just a lot of extra work.
On the other hand, I suspect that an initial release without PD would still be useful. Even if only QC is enabled, the device could be used. Features would be a little limited, but that's OK for beta testing.
gutschke
on 18 Jun 2020
@gutschke it depends. It gives more flexibility in negotiating the PD parameters, but at the same time the firmware is going to need extra space in the STM32's flash.
If I remember correctly, the TS80 used the same STM32F103T8U6 MCU as the TS80P, so the amount of the flash memory is the same, but TS80P is going to need PD logic implemented.
STM32F103T8U6 has 64KB flash. Current TS80 firmware size is 36KB + 16KB for the DFU bootloader. This leaves "just" 12KB. Some of it is also used for storing user configuration (probably not very much).
I hope @Ralim finds a way to fit everything there :).
BTW I've just received my TS80P, so when there's anything to test, count me in.
 yawor
on 23 Jun 2020
yawor
on 23 Jun 2020
Few interesting facts:
- TS80 doesn't work with a USB-C to USB-C cable - even the one packaged with TS80P.
- TS80P does work with both USB-C to USB-C, as well as USB-C to USB-A cables.
- I've been able to power TS80P with an original 45W PSU for my Dell XPS 13, but the voltage doesn't go higher than 9V - probably because the PSU supports 5, 9, 15 and 20V only, so the iron negotiates a voltage not higher than 12V.
- I've been able to power TS80P using a C to A cable from QC3.0 wall charger and QC3.0 Xiaomi Mi Powerbank 2 - the same I use with TS80. On @Ralim's firmware, the TS80 uses 12V from the wall charger and 9V from the power bank. The stock 1.23 firmware of TS80P shows 9V and 7.7V respectively.
- The TS80P US wall charger packaged with TS80P works ok. Banggood even attached a EU/US plug adapter (without even asking for it). I don't know if this is because of the plug adapter or the charger itself, but when plugging it into a wall socket (230V) it causes quite a spark in the socket. Doesn't happen with most of my other chargers and equipment. I've already ordered another 45W PD wall charger with EU plug instead.
yawor
on 23 Jun 2020
- I've been able to power TS80P with an original 45W PSU for my Dell XPS 13, but the voltage doesn't go higher than 9V - probably because the PSU supports 5, 9, 15 and 20V only, so the iron negotiates a voltage not higher than 12V.
- I've been able to power TS80P using a C to A cable from QC3.0 wall charger and QC3.0 Xiaomi Mi Powerbank 2 - the same I use with TS80. On @Ralim's firmware, the TS80 uses 12V from the wall charger and 9V from the power bank. The stock 1.23 firmware of TS80P shows 9V and 7.7V respectively.
Yes, it seems that the stock firmware does only some protocols on QC/PD.
As there are a couple different handshake-protocols for handling voltage and power, I think you just have to get the best combination. For example my powerpack (random aliexpress) does only provide 9V for the TS80P on the USB-C port, but 12V on the USB-A PD port, although 12V on USB-C would be possible.
Update: Supported handshake protocols on the stock wall charger: (the green ones) 
 mik-at
on 23 Jun 2020
mik-at
on 23 Jun 2020
@yawor
The wall wart Banggood supply is fine .... they bundle it so it's guaranteed to work, the problem is plugging it in to a non chinese supply.
I'd guess the adaptor you've been given is the standard adaptor everyone bundles with everything. The front accommodates every plug type in the universe the rear is area dependant - they simply screw on an appropriate set of prongs suitable for your country.
Its a good idea - but the front and back rely on the pressure of plugging something in to make contact. You'd (and anyone else on the ts80P train) intending to use the included adaptor would be wise to test the continuity of each pin - I usually lift the back flap of live and neutral to ensure a bit of contact pressure. and I've used my original for about 18 months without drama.
Another option is to open the wallwart and solder a lead onto the PCB connection and fit a decent plug.
The main criticism is the earth continuity (or lack of) but so many things these days are double insulated and come with either a 2 pin euro or US connector or a couple of 100 mm of twin in reality you don't need earth except in the UK to open the socket's gate

whitehoose
on 23 Jun 2020
@whitehoose it's even simpler, with only US socket on one side
I've opened it and pushed out the contact wings a little to have better contact. The electrical connection seems to be good, but the charger itself slide out quite easily, without much force. Also to be honest, I'm a little scared of the US type plugs, especially when they are connected to 230V. It's easy to expose live connection when the plug slide out of the adapter of this type a little.
yawor
on 23 Jun 2020
Gawsh! That wouldn't work in the UK but it looks well made for 2 pin - and country or region specific too. Our home electrics are very safe but foreign adaptors for it are death traps.
whitehoose
on 23 Jun 2020
Can confirm it looks like the stock firmware only does P2.0 for 9/12V. Doesnt seem overly smart.
Trying to get a working implementation of 9 & 12V for PD 2.0/3.0 including PPS (lets you do discrete voltages).
Still working on debugging it and suffering from the janky setup i need to break out SWD from the USB-C.
Have got handle temp working I _think_ so may have a non-pd test firmware sooon (work is busy atm as well).
Ralim
on 25 Jun 2020
I'm looking at purchasing a T80P. According to what I can find, standard USB PD voltages are 5V, 9V, 15V and 20V. However, the TS80P runs at 12V. Most of the chargers I find also just specify the max. amperage for 9V and 15V. Typically, there is no 12V listed in the charger spec. I don't trust their charger (but the cheaper kit without the charger doesn't include the USB silicone cable, duh!).
So is the TS80 really limited to 12V? And will it fall back to 9V if the charger doesn't support 12V? (EDIT: according to a comment above, it will fall back to 9V on a dell charger which doesn't support 12V
 skoehler
on 25 Jun 2020
skoehler
on 25 Jun 2020
@skoehler the stock firmware negotiates highest possible voltage available, not higher than 12v. Like I've mentioned in one of my previous posts, I've been able to power TS80P from an original USB-C power supply for my Dell XPS 13, which doesn't support 12v, but iron has been able to negotiate 9v.
yawor
on 25 Jun 2020
I'm just confused why they didn't support 15V or even 20V. Maybe the tips can't handle that much power, but they could have limited the power to the tip by limiting the PWM duty cycle. I am hesitating to buy one because of this weird compatibility issue which could have been avoided.
skoehler
on 25 Jun 2020
I believe the tip has a resistance around 4.5Ω. If permanently connected to 9V, that'll draw 2A, which chargers generally can do. At 12V, it would draw just over 2.5A (depends on variation in actual resistance). That can actually result in some chargers cutting off power for over-current. And at 15V, it would draw more than 3A. but that's outside of the spec for USB-C. Things only get worse when going up to 20V, where the iron would draw about 4.5. Funnily enough though, for some power supplies, that's again within spec (some devices support higher currents in combination with higher voltage).
With PWM you can bring down average current, but you'd still need to filter the signal so that peak current doesn't exceed 3A. I am not sure how good the hardware is about doing this filtering. The higher the PWM frequency the less filtering is needed.
In practice, this could mean that some power supplies are perfectly happy with powering the iron at 15V, even if things are slightly outside of the official specs, whereas other power supplies won't even work at 12V. And this could also vary from one tip to another, as the difference in resistance might just be enough to push the power supply into over current. It could also depend on whether the soldering iron used PD or QC to negotiate power output, as they have different current limits at the same voltage.
gutschke
on 25 Jun 2020
I've received today a BlitzWolf 45W PD charger (BW-PL4). According to information printed on the brick it supports:
- 5V/3A
- 9V/3A
- 12V/3A
- 15V/3A
- 20V/2.25A
This is almost the same as the charger bundled with TS80P - this one also has 18V/2.5A.
I also have 4 different tips:
- TS-B02 (received with TS80P)
- TS-D25 (received with TS80)
- TS-BC02
- TS-J02
I've noticed a different behaviour depending on which tip is plugged in and which charger is used. Below table shows following info: Power displayed in settings, voltage displayed in settings, Power displayed when heating, Voltage displayed when heating
The power displayed in settings can't be changed when connected to PD charger (it can be changed on QC3.0 like in TS80), it seems to be calculated from negotiated voltage/current right after connecting power. I've reconnected power each time I've replaced the tip.
tip | Bundled charger | BlitzWolf
-- | -- | --
TS-B02 | 33W, 12.1V, 29.8W, 11.7V | 31W, 11.7V, 28W, 11.4V
TS-D25 | 22W, 9.12V, 19.2W, 8.8V | 20W, 8.85V, 18.5W, 8.6V
TS-BC02 | 28W, 12.1V, 25.8W, 11.8V | 26W, 11.7V, 23.6W, 11.5V
TS-J02 | 31W, 12.1V, 28W, 11.7V | 30W, 11.7V, 26.4W, 11.4V
It seems that the bundled charger is quite good actually. BlitzWolf is rather good charger, but it's a little behind. What's interesting is that the TS-D25 tip is not able to be powered with 12V on TS80P. I've even tried powering the iron with one of the other tips first and then changing to TS-D25 while plugged in. It still shows ~12V in settings, but it drops to 9V when I start heating and stays at that level after that.
I hope this is going to be helpful in some way. The TS-D25 was my favourite tip before I've ordered TS-BC02, which I'm using now most of the time. It would be great to have all of them working on 12V on TS80P. It worked without any issues on TS80 with @Ralim fw.
--edit--
If I calculate this correctly, these are average resistance values for each tip type I have:
- TS-B02 - 4.6 Ω
- TS-D25 - 4 Ω
- TS-BC02 - 5.5 Ω
- TS-J02 - 4.9 Ω
yawor
on 25 Jun 2020
I just received a TS80P I ordered a few days ago! It came without a charger so I ordered this one from Amazon (to be delivered later today)!
The specs on it say it supports PD 12V/3A, so once I get it and manage to run a few tests I'll report back my findings.
 pedrolamas
on 26 Jun 2020
pedrolamas
on 26 Jun 2020
@gutschke and @yawor are on the money.
I do intend to just "enable" 12V ignoring tip resistance at least initially.
While their smart system is neat to detect resistance and therefore derive the voltage; it chews up flash space and isn't massively helpful.
Goal is to support 9V + 12V. Can confirm that the peak current of 15V will trip some chargers and will also kill the TS80(P) eventually.
If I get PPS (PD3.0) working then that allows 100mV control of the output so should be possible to have a mode to allow for tweaking voltage up or down a bit too.
Ralim
on 30 Jun 2020
I tried to load "logoin.bmp" several times on my ts80p. Now there is no free space on the soldering iron - 0 bytes free. I tried to reflash (with current version v1.23)- it didn't help. How to fix this problem?
 Zeescez
on 9 Jul 2020
Zeescez
on 9 Jul 2020
I tried to load "logoin.bmp" several times on my ts80p. Now there is no free space on the soldering iron - 0 bytes free. I tried to reflash (with current version v1.23)- it didn't help. How to fix this problem?
It could be that the filesystem is corrupt. Have you checked it?
skoehler
on 9 Jul 2020
It could be that the filesystem is corrupt. Have you checked it?
chkdsk did not find a problem. 8 kB - total, 1 kB - in 2 hidden files, 7 kB - in 5 files.
Edit: while typing this message, I tried to format volume, windows returned error. But also when i reconnect cable, it suggested me to fix errors. now I have 8 kB - total, 1 kB - in 2 hidden files, 1,5 kB - in 5 files, 5,5 kB - free.
Zeescez
on 9 Jul 2020
Status update is that basic PD2/3 is working (not PPS) for SRC devices (not try.SRC like powerbanks - WiP).
So about half of power banks will work and most laptop chargers from what I have tested so far.
Need to shrink code size somehow in a few spots to get it to fit nicely and then will put up a _very_ beta build.
Code needs a chunk of cleanup in general too I think 😅
But progress _is_ being made, just PD is a pain to debug 😁
Ralim
on 22 Jul 2020
As promised, here is the _very alpha_ release.
This is probably going to be a bit hit and miss on PD support, I need to setup a better debugging setup and continue testing.
TS80P_Alpha.zip
This _should_ work otherwise, however naturally I'm expecting a fair share of bugs.
Ralim
on 23 Jul 2020
@Ralim
First and foremost THANK YOU for the effort you put into this! 👍
And ... as you might have expected _the first_ _this does not work_ and _that does not work_ calls are in the line:
topic | status
-|-
Sleep timeout | only Off is selectable
Shutdown timeout | only Off is selectable
motion sensor | no sign of life
I do not know for sure, because I have no equipment for measuring this, but the iron negotiates with the stock charger for 'only' 10.3V ~ 21.9W is that the expected behavior (I hope it is a hit!)?
ps: One, a bit, of topic issue I ran into recently:
I bought this charger and I have to admit, that this seems to be a decent device, judged by its looks.
Unfortunately it sparks every single time you plug it into the wall socket. Except for the situation, when you plug it out and in again within the next approx. 5 seconds.
Are you familiar with such issues?
Do you know an easy solution for this? Solder something (capacitor?) in between the prongs?
thank you in advance
kind regards
discip
on 23 Jul 2020
@discip I have the same charger (though my has a UK plug) and I too like the results with it, but I have not noticed any sparking issues with mine!
Could you have a faulty one?
pedrolamas
on 23 Jul 2020
Thank you for the firmware!
Im getting the same bugs as discip, also on Advanced Options after Pulse Power is an selection which just says "ok" 2 times, and when you select it you can change some setting from 21.0 up or down.
Also, tip temperature is wrong. Shows 0 after calibration.
Also also, according to my ruideng USB meter its getting ~11v in from my essager qc3 charger when heating, but the iron shows ~10v
 akselii
on 23 Jul 2020
akselii
on 23 Jul 2020
@PedroLamas
I do not know, if this is a faulty one, but I read, that someone else had the same issue, so I assume, that it is built like this.
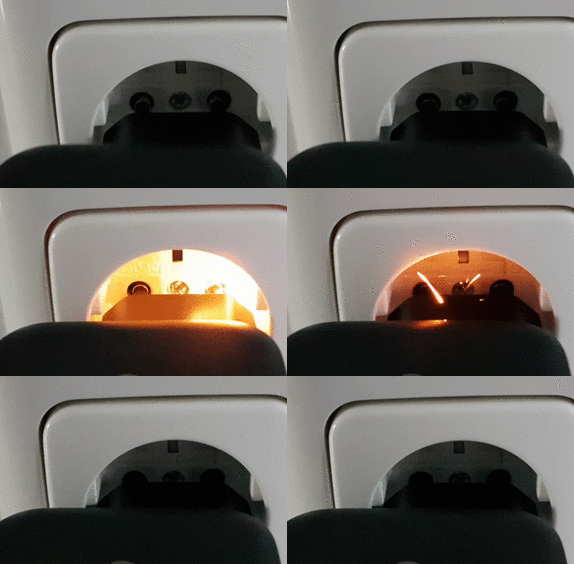
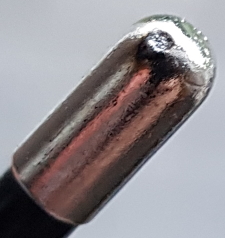
Could it be, that it better plays along with the US voltage?
discip
on 23 Jul 2020
@discip I have no idea, but here in the UK though the plugs are quite different (they have a tighter fit), the voltage is the same as in mainland EU! 🙂
pedrolamas
on 23 Jul 2020
Aha,
Looks like I have two issues to chase, one being that I must have used an out of date translations file (broken menu) and also that I need to double check calibration of the input voltage reading. Miniware shuffled resistor values around a bit so might require a tad more tuning.
Will get back to you with more information sooon :)
Ralim
on 24 Jul 2020
@discip
You have a couple of possibilities - lots of sparks either capacitor or inductor - unfortunately you have both in the input of a switched PSU.
if you ignore the sparks - does it work?
If you unplug and immediately apply a short to live and neutral pins on the PSU using a screwdriver with a well insulated handle (carefully!!!) do you get a spark?
There should be a discharge resistor and a smoothing capacitor on the primary winding to stop this - if either has died that would do it
or
It could be something deeper in the plug shorting the secondary.
In all cases the only way is to open it up and look for scorch marks which will invalidate any guarantee - and if you spot it - they are always a pig to fix.
Assuming its new - send send it back immediately cause whatever it is - that degree of sparking isn't good and you could kill other delicate electronics with the spikes it is causing.
If you just can't help yourself open it up but usually they make it impossible to do that without using a dremmel and a hammer - so don't expect a good outcome other than knowing why
whitehoose
on 24 Jul 2020
I am the proud owner of a new TS80P, and just flashed the TS80P_Alpha.zip firmware. I'll report anything I find, but also let me know if there's anything specific to test.
 AEFeinstein
on 25 Jul 2020
AEFeinstein
on 25 Jul 2020
Just flashed the Alpha-firmware, the iron now "boot-loops":
The miniware logo is shown briefly, then the screen turns off, then the logo is shown again. Sometimes it reaches the main menu, just to turn off again.
 nikscha
on 27 Jul 2020
nikscha
on 27 Jul 2020
@nikscha
Don't panic you should be totally fine to go back to the stock firmware.
Could you tell me what power source you were using for that?
Currently still debugging this issue and trying to figure out what exactly makes the fusb302 act up.
Ralim
on 27 Jul 2020
I tested the "stock" supply, my laptops usb-c pd charger and my laptops usb-c port. All 3 chargers yield the same behavior.
After trying (didn't work) to flash the original TS80 firmware (couldn't find TS80P, could you help me out?), I flashed your aplha again, this time the "boot loop" is slightly different, see this video. One thing to note as well is that the iron also crashes in DFU mode (also shown in video), holding the lower button for quite a while eventually lead to it staying in DFU mode.
Edit: the usb-c PD charger does only 5 or 20 volt
2nd edit: tested with my PD powerbank (ZMI QB820 20000mAh), its still boot looping but I can now briefly see the menu. Video
nikscha
on 27 Jul 2020
Ts80p firmware:
http://www.minidso.com/forum.php?mod=viewthread&tid=4085
skoehler
on 27 Jul 2020
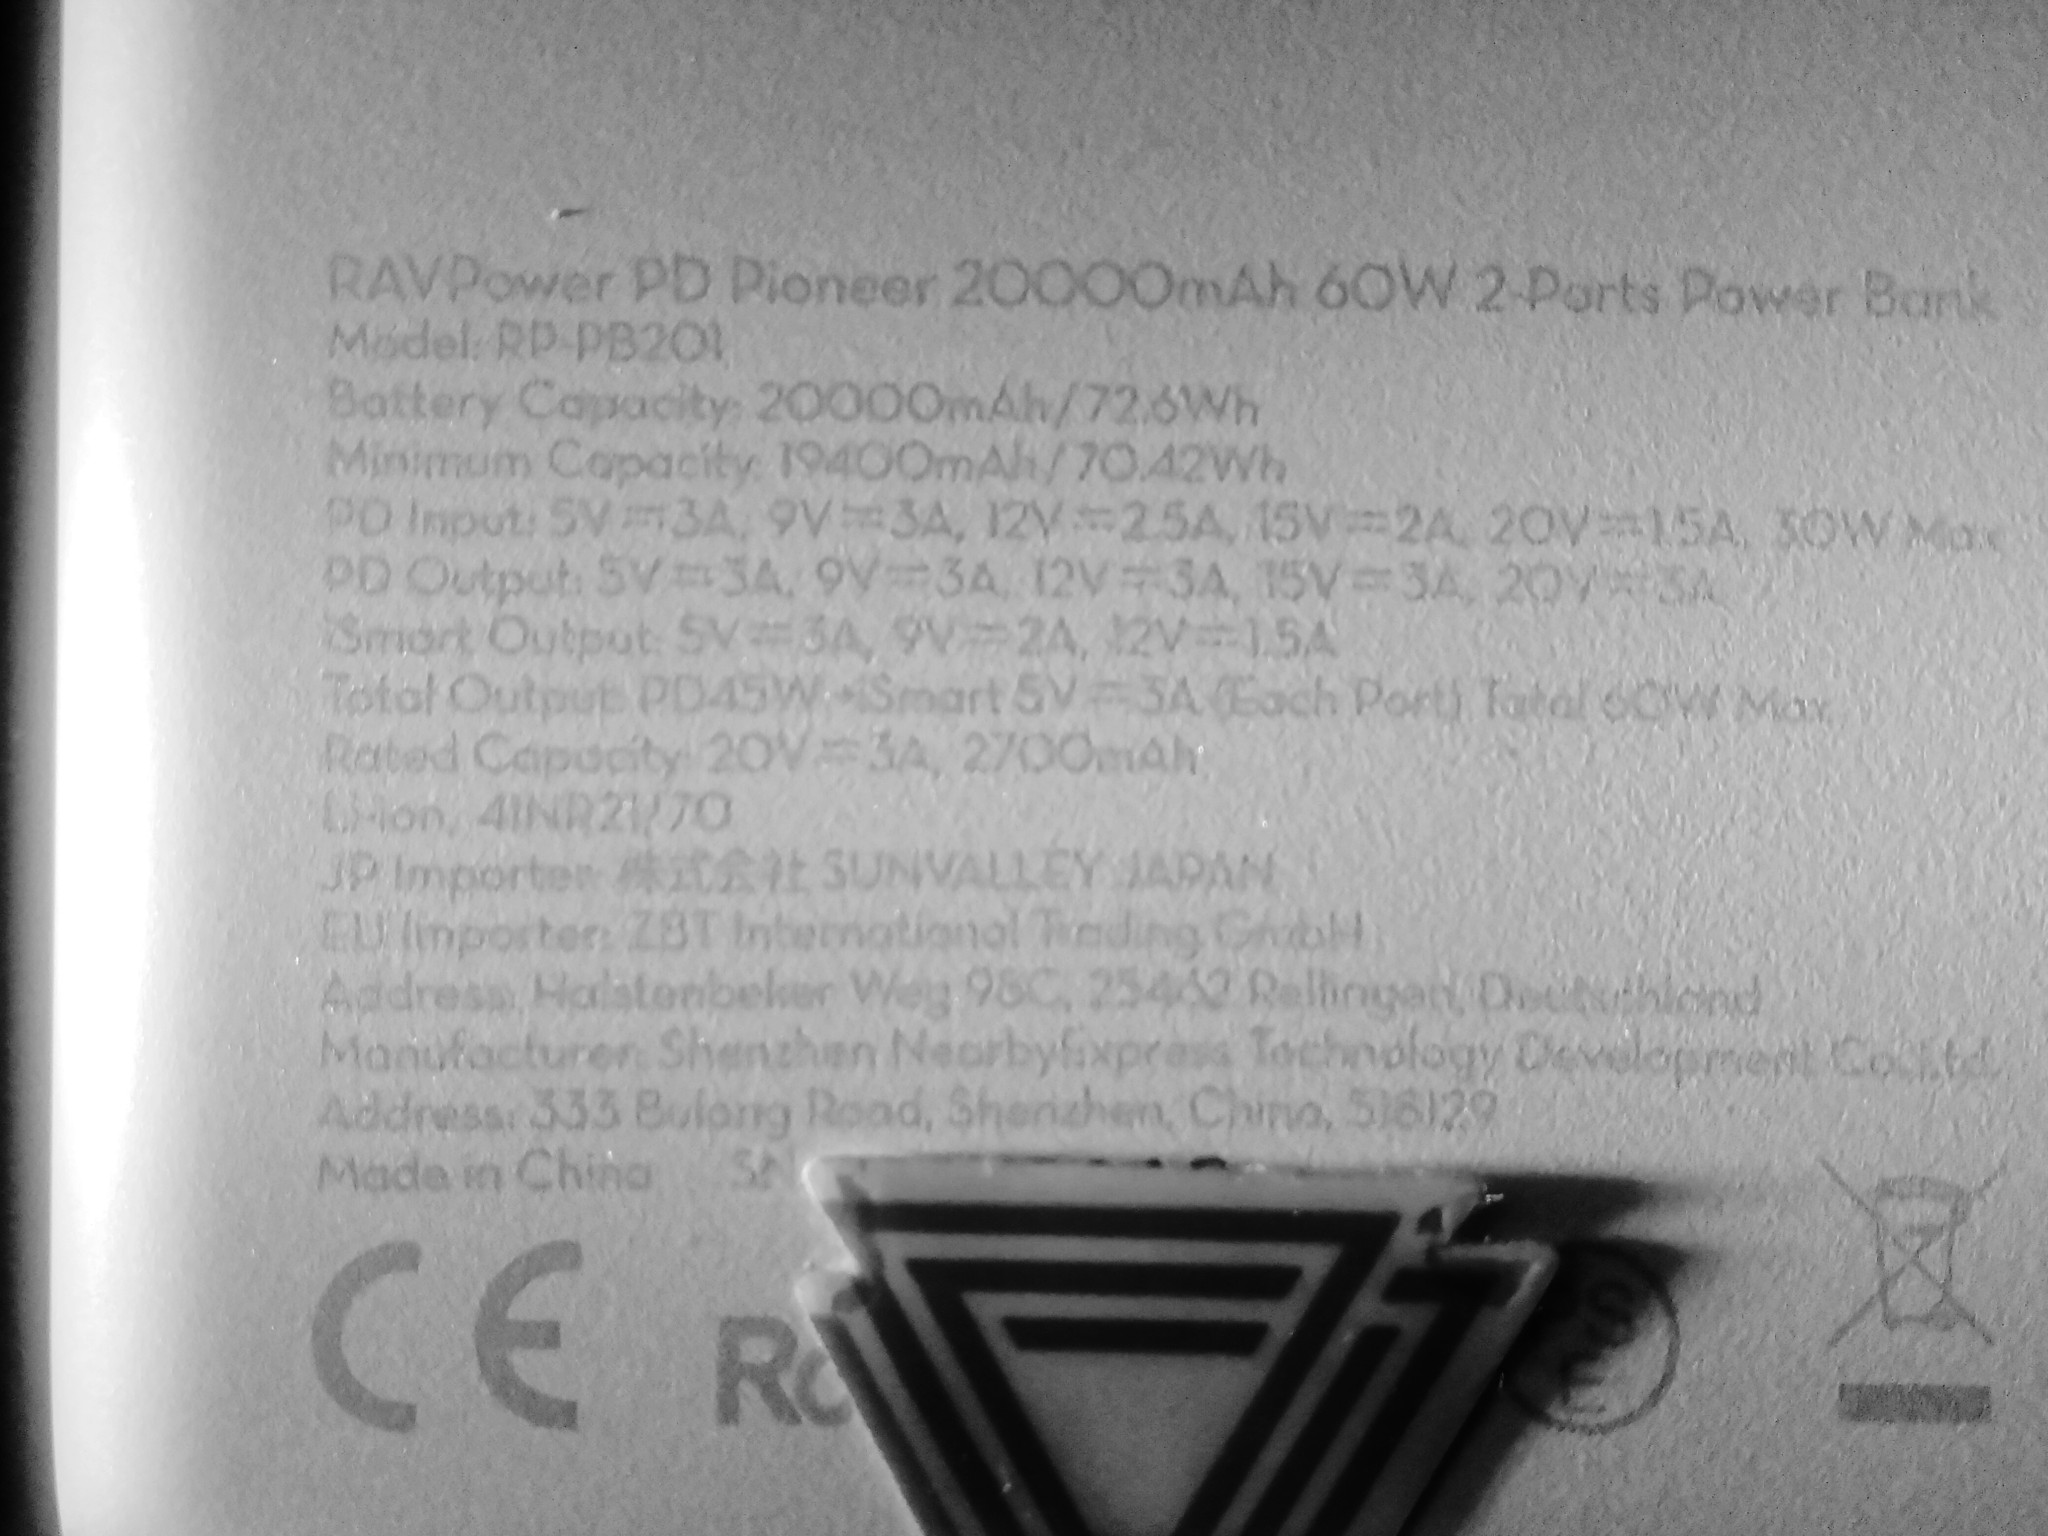
Thank you Ralim for the ALPHA firmware, and your support for our TS80Ps. I have a RAVPower PD 20000 mAh battery pack.
The TS80P will boot and be ready to go on the USBa iSmart port, but not on the PD USBc port with the AlphaFW.
I have the TS80p set to 12v on the AlphaFW. Plugging into the PD USBc port the TS80P will boot loop. Using a USBa to USBc cable on the iSmart(USBa port) the TS80P will boot and work running AlphaFW.
I then flashed the stock v1.23 FW and tried it in both ports and it boots and heats up fine. I then just flashed back to the AlphaFW as it is already more user friendly than stock.
I am using a RAVPower 20000mAh 60W 2 Port power bank.
 iamLEEROYJENKINS
on 28 Jul 2020
iamLEEROYJENKINS
on 28 Jul 2020
Hello everyone.
I'm jumping in - dwelled forever on TS80P vs TS100.
Finally went with the TS100 - but PSU-less.
What's the current goal here?
As I understood - stock FW max power is 18W: 9V@2A on QC3, and 30W: 12V@3A (maybe actually 2.5?) on PD 2.0.
Is the goal to get 12V working on QC3 mode too?
 NDR008
on 28 Jul 2020
NDR008
on 28 Jul 2020
Hello,
Next updated test firmware.
Changes:
- Bunch of testing of the USB-PD side of negotiation
- -> Should work with more devices, but curious to know models of anything that doesnt work
- -> A non working device will look like a boot loop. Dont panic!
- Should have fixed the input voltage reading calibration
- Should have fixed menus now
If you can please do a settings reset in the advanced menu would be ideal (to make sure you are using updated default calibrations).
Bootloop
If you get stuck in what looks like a bootloop on some devices and want to jump back to stock firmware you can either:
- Hold down front button and it should stop looping after a while
-OR- - Use a usb A -> C cable which bypasses all PD and should work totally fine.
Things to test
- General iron use
- Does PD work for you
- If you have QC devices; does QC work for you
- If you have means to check calibration of tip temp, that would be interesting to know
- Do all menus work for you
Ralim
on 28 Jul 2020
Quick test with the stock PD charger that came with the soldering iron seems to show correct volts.
Selecting 9v or 12V from the settings does not work on the stock charger, its getting 12v no matter which setting.
On my QC charger selecting between 9v or 12v does work, and seems to work as intended.
Power limit works on both chargers, at least it looks like it does. My ruideng meter did show the wattage not being very stable but i think it would average at about the 10w that i tested.
Tip temperature still 0 at room temp, i think i did see it flash room temp for a split second on first boot. I did a factory reset.
Sleep and Shutdown timeout settings are stuck at Off and motion sensitivity setting resets back to 0 if you change it and then reboot the iron.
akselii
on 28 Jul 2020
Nice work!
All power sources from last time work now, but I found another power adapter (PD) that doesn't work. Its a small Apple power brick
Voltage selection (9/12v) also doesn'work for me
Also, currently the minimum power limit is 2W, can we get 1W as well? I am pretty sure I can run the iron from my phone then :D
nikscha
on 28 Jul 2020
# | topic | status | additional
-|-|-|-
1 | Sleep timeout | only Off is selectable | after first reset some values appeared
2 | Shutdown timeout | only Off is selectable | after first reset some values appeared
3 | motion sensor | still no sign of life | seems to be related to Sleep timeout being Off ; works with stock FW
3.1 | Motion sensitivity | reads 0 after reboot | as mentioned by @nikscha
4 | Display orientation | Automatic does not work | may alslo be related to Sleep timeout being Off 😵🤔🤨🤪
5 | negotiation for 9V | does not work | as @akselii mentioned: always 12V are displayed ; culprit seems to be PD since QC works
6 | tip temp | reading 0°C | culprit seems to be PD since QC works
discip
on 28 Jul 2020
I would love to test but I am getting .ERR when I attempt to flash the latest beta.
 LiraNuna
on 29 Jul 2020
LiraNuna
on 29 Jul 2020
Thank you @discip.
New beta.
Changes:
- Should fix Accelerometer detection being disabled 🤦
- Hold off QC negotiation until PD has either worked or timed out (Prevents some chargers that break spec and do both on one port getting confused).
With the voltage negotiation, I implemented the PD code to actually check what current the adapter advertises and match that (roughly, I allow a slight "over power"). So this means that if you plug into an 18W adapter it will only do 9V, but if you plug into ~25W+ it will jump to 12V. _I felt_ this was nicer in that it was "hands off" and does what you want. Could look at overriding this using that menu selection as well but not sure whats "best". For _me_ I prefer 9V on QC since all my QC stuff is low rate (~18W) and my PD is the higher powered stuff.
But I want anyone's opinion on this 😀 1000% open to discussion on what people prefer.
@nikscha
I'll have to try and get my hands on one of those to figure out what I've got wrong.
Does it just fail to negotiate (ie it stays at 5V) or does it reset (looks like boot loop) ?
@LiraNuna
All of the usual crap with miniware's bootloader still applies. 😢
Try short file name; double copy; different usb port etc 😢
Ralim
on 29 Jul 2020
Accelerometer works now, as does sleep and shutdown timers.
Tip temperature shows 10c at room temperature (about 26c right now), no matter if im using the stock PD supply or QC.
Gonna try out a lenovo laptop PD power supply tomorrow at work.
Regarding the voltage negotiation, I think your implementation is pretty nice. But i also do like having as many options as possible.
akselii
on 29 Jul 2020
Thank you for your work.
My test with the RAVPower PD Pioneer (Model: RP-PB201) was successful and the 9V and 12V modes seem to work.
But my Lenovo 65W charger (Model: ADLX65YDC3D) results in the "bootloop" and briefly shows the 5 on the menu before looping again.
Interestingly on my Notebook (T480s) it can only get 5.2V and sometimes it loops 2-3x before showing the menu.
 revol
on 29 Jul 2020
revol
on 29 Jul 2020
Tested out a lenovo laptop charger and an asus one, both just show the miniware logo for a split second and then repeat.
akselii
on 30 Jul 2020
@akselii
Can you tell me model numbers and I'll ltry and get my hands on one of them for testing
Ralim
on 30 Jul 2020
Asus one is Chicony A18-045N1A
Lenovo is ADLX65YCC3D
Please note that I wont be using these power supplies with the iron, Im just testing these since I have access to them at work.
akselii
on 30 Jul 2020
Finally got it to flash successfully (Don't know why it took so many tries!). I mainly focused on C-to-C PD power with various wall chargers and power banks.
- https://www.amazon.com/dp/B082SV4J38 - Bootloops on C-to-C / Works A-to-C (12V)
- https://www.amazon.com/dp/B07GBXMN78 - Works C-to-C (12V)
- https://www.amazon.com/dp/B07YFN376L - Works C-to-C (9V)
- HyperJuice 130W - 100W port will boot loop exactly twice then fallback to 5V, 60W port will bootloop forever
- https://www.amazon.com/dp/B08B62B63Q/ - Works C-to-C (12V)
- Alster+ PowerHub - Works C-to-C but at 5V on both C ports
- https://www.amazon.com/dp/B079Z4RHZZ/ - Works C-to-C (5V)
- https://www.amazon.com/dp/B08CKJCHLX/ - Works C-to-C (9V)
As others have mentioned, the temperature reading seems off by tens of degrees centigrade even after calibration.
LiraNuna
on 30 Jul 2020
@LiraNuna So you could not get to 12V on Baseus 65W in both C or A?
What is interesting ist he Baseus 65W can only do 12V @ 2.5A according to the description on USB A.
But the Baseus 45W can do 12V @3A on both C and A (not simultaneously).
Did you get 12V in PD or QC mode?
I wonder if the bootloop is because the Baseus momentarily cuts power as it switches protocol....
So - which PSU is know to work at 12V btw?
NDR008
on 30 Jul 2020
@LiraNuna My experience with Baseus 65W https://bit.ly/30XpSlE
C-to-C works on 12V only (no matter what I choose in settings, I had also bootloops problem but it can be fixed by flipping cable --on way it is looping other works fine)
A-to-C everything works. You can choose between 9 and 12.
Also temperature is off.
On Video I am using C-to-C cable, showing bootloops, voltage selection, and wrong temperature (room was 24°C)
https://photos.app.goo.gl/bpsqPxXC3TvhoTDp7
 Stovka
on 30 Jul 2020
Stovka
on 30 Jul 2020
charger | watts* | volts* | sparks | stock FW C-C | stock FW A-C | @Ralims FW C-C | @Ralims FW A-C | additional
-|-|-|-|-|-|-|-|-
stock | 33 | ~12.06 | NO | works | works | works | works
P38-PD61W | 32 | ~11.84 | MIGHTILY | works | works | bootloops | works | Seems to be equivalent to the CHOETECH mentioned above, since its sparks as bad!
RAMPOW RBA07 | 32 | ~11.95 | SLIGHTLY | works | works | bootloops | works
@Ralim
I do not know why, but the options S & O in Auto start do not work, because its starts heating without the accelerometer being triggered.
* Readings of the stock FW.
p.s. Does anyone know a single port wall charger, capable of delivering ~60W, relatively small in size, EU plug, GaN tech and most important which does NOT SPARK.
discip
on 31 Jul 2020
@discip I use this one (for now with stock firmware) and have no sparks, whatsoever.
 Arthur-de-Partuur
on 31 Jul 2020
Arthur-de-Partuur
on 31 Jul 2020
So, I hope to get my TS80P soon (tomorrow or Monday...)
And I ordered this charger - 65W Baseus
But I wish now that i had ordered this instead.
Might return the amazon one.
Reason is - the 65W can only do 2.5A on USB-A and 3A on USB-C.
The lower power chargers seem to be able to do 3A on both USB-C and USB-A...
NDR008
on 31 Jul 2020
@dicip
Think laterally. There are lots of bogus wall warts of all shapes and sizes and unfortunately varying qualities and often with sparklies. Banggood supply a presumably decent one in some of their packages and the posters here will I'm sure recommend something good that you'd imagine that is likely to work.
Laterally there are lots of 5, 12, 18, 24, 36 and 48v Switch mode LED power supplies available that come with incredible current ratings a 24v 240w (10A) unit costs just £15 then invest in a qc3/pd adapter for a couple of quid (I'd also include a buck dropper ust in case. Then if you use xt60 connectors, you have the option of buying a s4 lipo to convert your workshop kit to a portable regulated power brick.
I've just assembled a lab PSU that also powers my old-school TS80 A 48v 750w switch mode supply feeding two buck regulators one gives me a pretty accurate power supply the other powers my Iron, dremel and pcb drill. In the unlikely event I need to, I can unplug the AOKoda QC3 controller and connect it to one of my lipo packs and go portable.
All in it cost less than £30.
By under-driving a big beefy PSU I doubt the magic smoke will make an appearance any time soon, everything runs nice and cool however hard I've driven it so far. And the footprint is only about the size of a paperback.
whitehoose
on 31 Jul 2020
@whitehoose You can power it directly with any suitable power supply(without QC or PD converter). It is working just fine even more reliably avoiding voltage negotiation. You can use any kind of adapter to USB-C. For example I added USB socket to my lab power supply( vin to +,gnd to -, D+ shorted with D-). Now I can easily power anything USB enabled including TS80P. Only downside is that you have to pay attention before plugging USB devices(due potential over voltage).
Powering TS80P with 12v directly -> https://photos.app.goo.gl/s2WEVPzhuTTyNwK8A
@NDR008 I have same charger Baseus 65W and it is drawing about 2.6A max at 12v on both USB-C or USB-A. I havent notice any difference between ports. Only sometimes on USB-C port it is doing bootloops. USB-A is working fine for me.
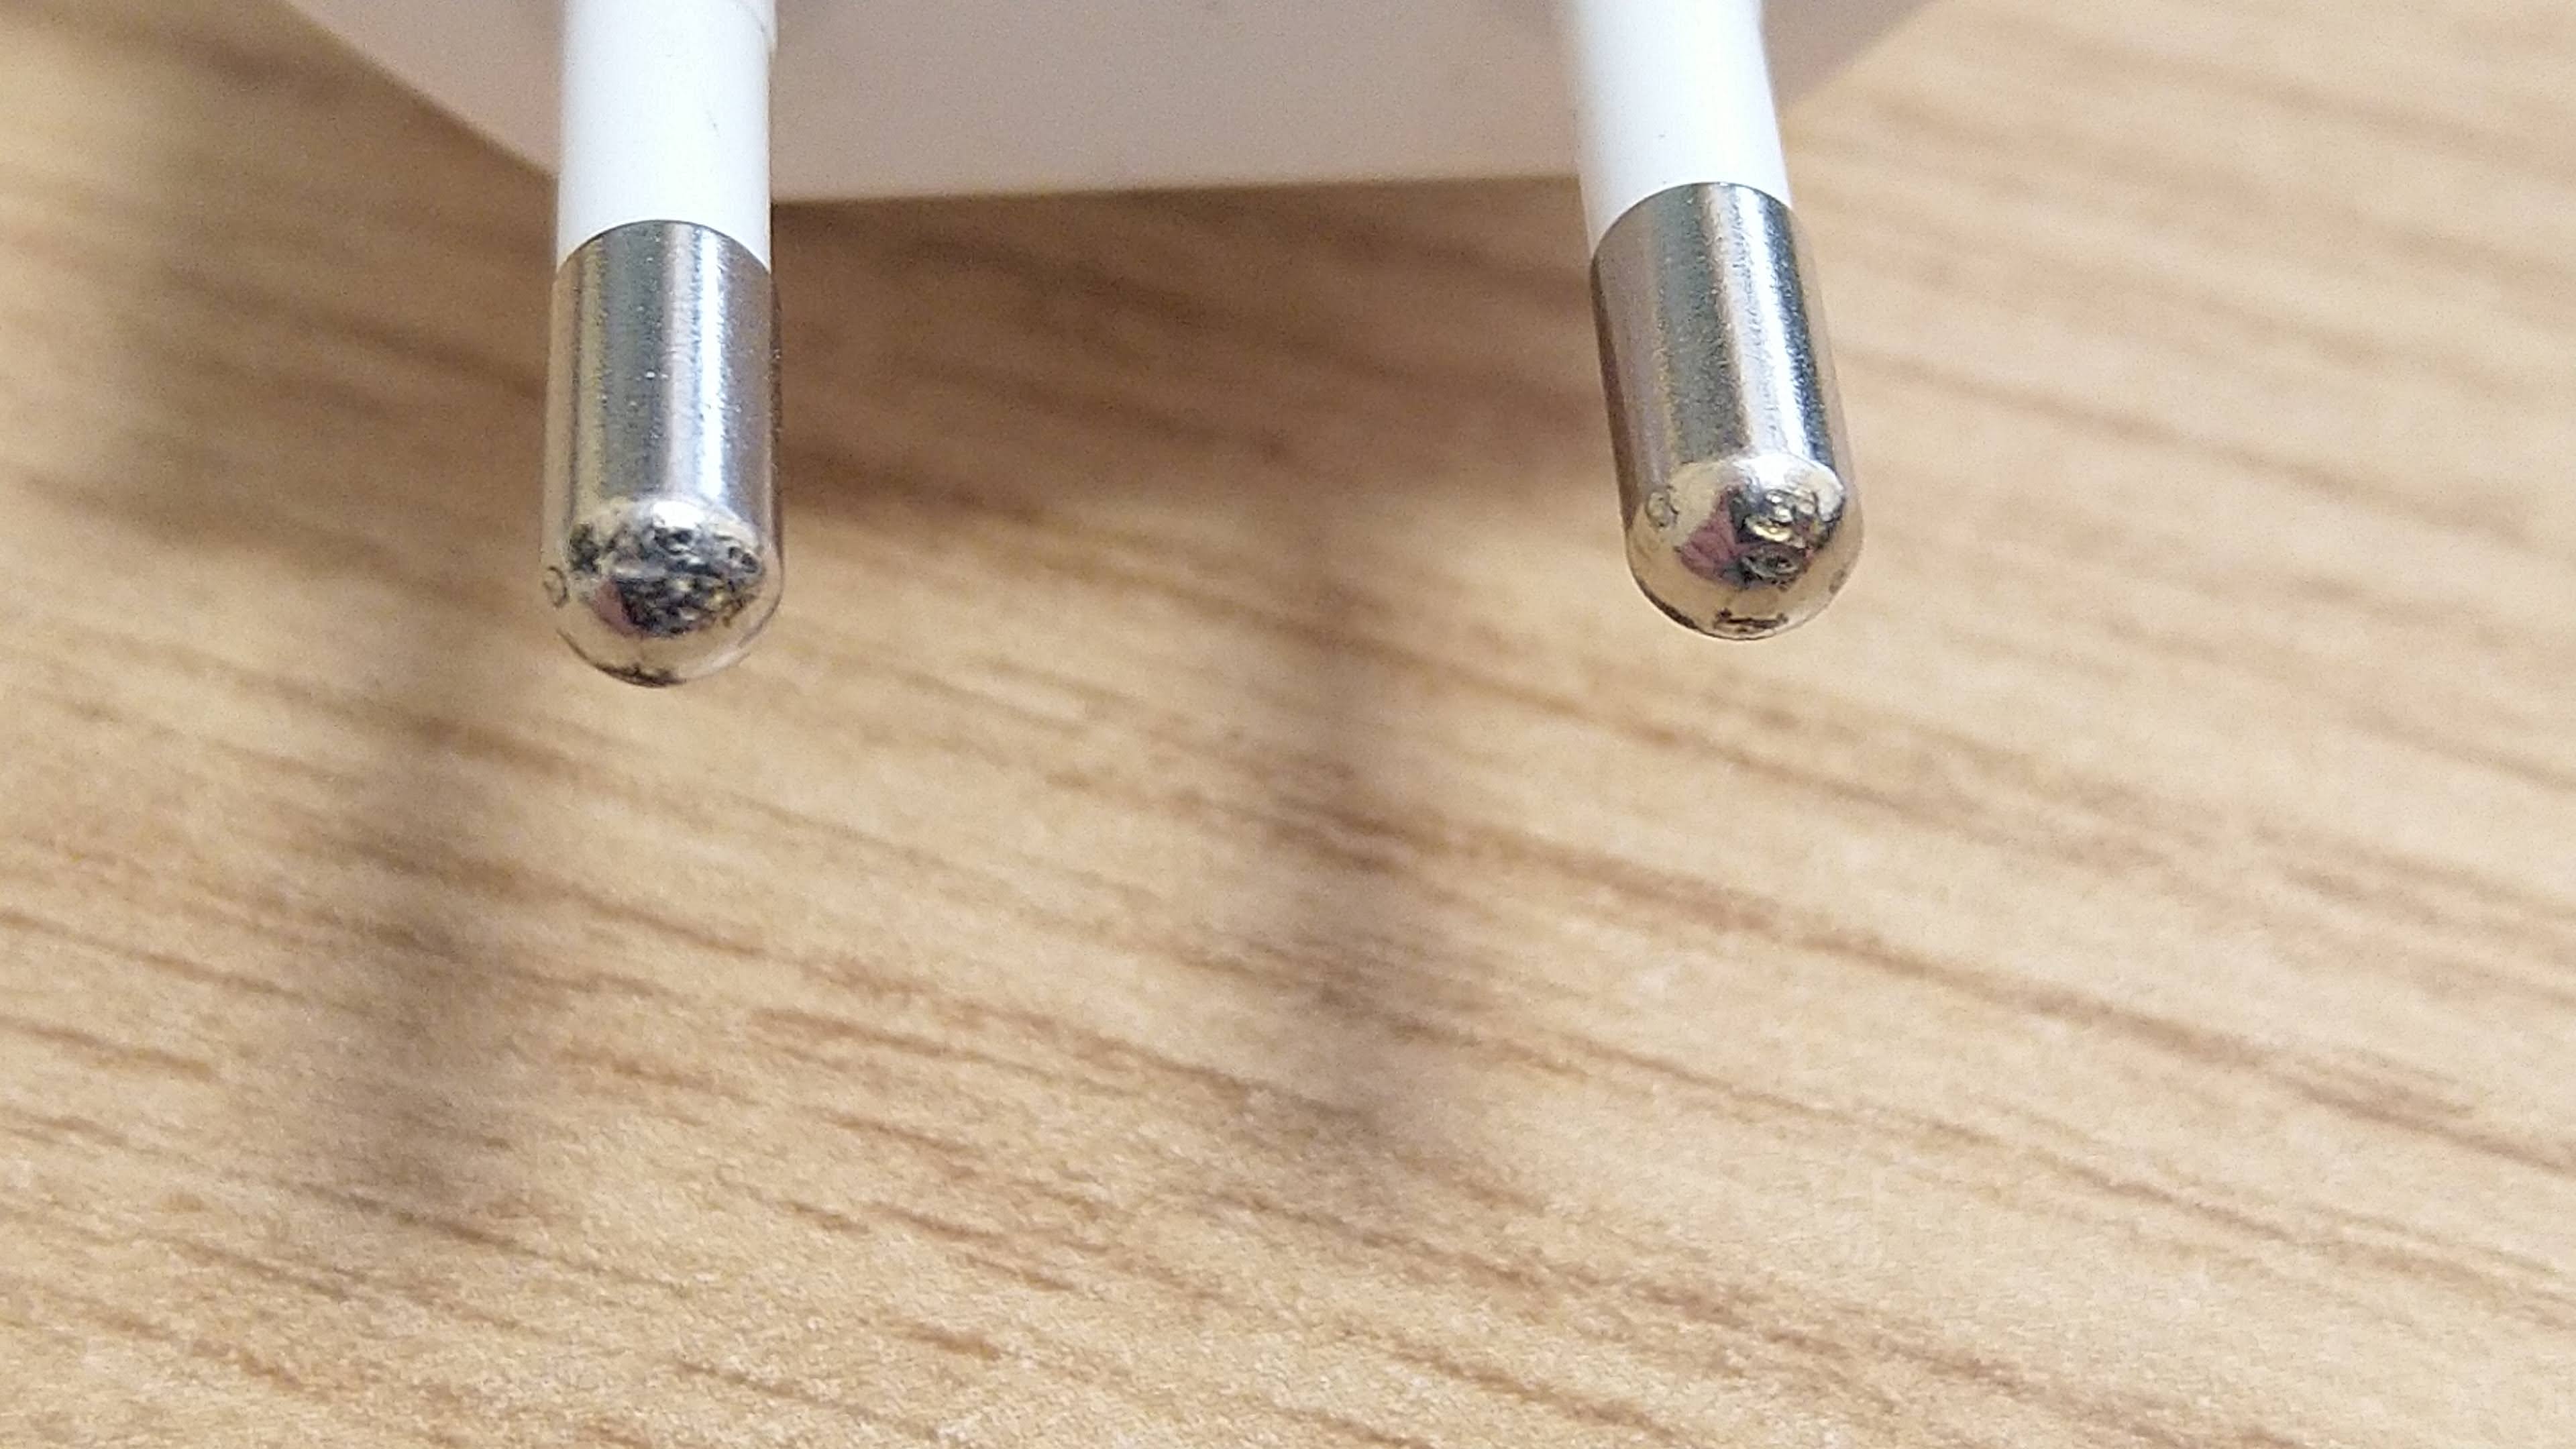
@discip Baseus 65W is definitely not charger for you. Sometimes it sparks like crazy(I have 238V in outlet). Even gave me a shock once when I touched pins immediately after unplugging :D. I am guessing there are some big capacitors on input that don't discharge fast enough.
Stovka
on 31 Jul 2020
I think there must be something that makes building 240V power supplies much more difficult. Anecdotally, I have expensive professional brand-name devices that run on 100-240V. They work perfectly uneventfully on 110V. But whenever I plug the power cord into a 240V outlet, there are sparks. So, this issue doesn't just affect cheap no-name consumer electronics. In fact, the device I am talking about is made by a major European company. So, you'd think they should be used to designing for 240V.
gutschke
on 31 Jul 2020
@whitehoose You can power it directly with any suitable power supply(without QC or PD converter). It is working just fine even more reliably avoiding voltage negotiation. You can use any kind of adapter to USB-C. For example I added USB socket to my lab power supply( vin to +,gnd to -, D+ shorted with D-). Now I can easily power anything USB enabled including TS80P. Only downside is that you have to pay attention before plugging USB devices(due potential over voltage).
Powering TS80P with 12v directly -> https://photos.app.goo.gl/s2WEVPzhuTTyNwK8A@NDR008 I have same charger Baseus 65W and it is drawing about 2.6A max at 12v on both USB-C or USB-A. I havent notice any difference between ports. Only sometimes on USB-C port it is doing bootloops. USB-A is working fine for me.
@discip Baseus 65W is definitely not charger for you. Sometimes it sparks like crazy(I have 238V in outlet). Even gave me a shock once when I touched pins immediately after unplugging :D. I am guessing there are some big capacitors on input that don't discharge fast enough.
Damn... then back to the supplier it will go...
Btw, can the TS80P even use more than 2,5A @ 12V?
NDR008
on 31 Jul 2020
@NDR008
Yea I thought long and hard about that option. I decided to answer Discip as a new proud 80p daddy who having paid for PD would want to use it - by the book (at least for the time being). Been there done that, got the Tshirt
When I got the old 80 I resolved to use the thing as mini intended - and use QC3 controlled power - boy was that a brutal lesson!!!! Being an Iron and not a phone with Li-ion batteries - I didnt notice any real advantage.
Now I have to admit, for me It's a lesson learned, I won't be dancing to the qc3 tune - it's why I decided to put together the PSU like I did - the buck regulator allows me to chose my own voltages, I've never wanted/needed 12v or <9v - the work I do doesn't require it - (I understand the penalties and dangers of incinerating components and lead beyond the mfr's spec).
- I already had the AOKoda so it's not an issue either way - if nothing else it protects the iron from mischievous pixies.
I've always been suspicious of CQ3, PD and questioned the need to fit an iron with a processor. The 18 months I've used a TS hasn't convinced me that I was mistaken in that belief - I don't feel deprived or disadvantaged in any way or that I failed to make a decent job during the previous 50 years I used a standard iron.
It's why I decided not to get a 80p .... or to buy one of the 100 clones - I've tried an 80 for well over a year - and I honestly can't think of anything good to say about the kit. Its ridiculously over priced for no advantage I can see. A straight iron with a direct heat bit gives the same results without any of the heartache that goes with power management.
So I've basically sacked QC3 - from now on I'll be using 9v fixed on my TS80(no "P") - or (more likely) I'll be using my 60w solder station with hot air. And the 80 will sit in the drawer for 90% of the time. I don't want to drone on - and not having a drone or RC car ... and now I'm retired, I have little need for portability. I have better Irons on my bench.
whitehoose
on 31 Jul 2020
Yeah, to be honest, I was for months trying to decided between the TS100 and TS80P.
I just felt that a TS100 is better deal except for the tip to grip length... so I went with TS80P (P to have the highest power option).
But I felt, adding a USB connector even a PD/QC negotiation chip on a TS100 connector would be easier than making the TS80P run off anything you want... but then again, I would MAINLY (like 100% in the foreseeable future) use it at my desk, 1 good PSU would be enough...
But I got 2 PD laptops and 2 Samsung 10/Note10, so... investing in PD / QC chargers is not a big deal here, but the sparks is...
NDR008
on 31 Jul 2020
OOPS - I REPLIED TO @NDR008 who was quoting Stovka's replies.
Sorry - not that I don't want to talk to ndr008 :grin: But should give Stovka credit he's due.
I think I already said to discip that Ideally the most valuable part of a PSU is the clearances they allow to keep hi and low voltage areas apart. The discharge resistor is as important as physical separation from a safety POV esp with 240v users - the extra voltage difference amounts to 1/8" separation remember it's v SQUARED /r so an double the volts but a big increase in pixies and why you need to be cautious how much power you try to pile into that little old iron. Like the enterprise - she''ll no take it Jim.
whitehoose
on 31 Jul 2020
@NDR008 yes it can use more than 2.5A. Current is proportional to the voltage provided to the iron. At 11.7V it is doing about 27wats(http://shorturl.at/tJNQZ), at 12.8V its about 33wats(http://shorturl.at/pABEZ). This brings the question how much could be TS80P “overclocked”. I don't want break mine so I will leave testing for others :D. I am Guessing 13 maybe 14 volts should work fine. I wonder if @Ralim could exploit this in his firmware maybe using QC3.0 or PD3.0 PPS to step up voltage little bit more. Choosing discrete voltage would be awesome feature.
Stovka
on 31 Jul 2020
@Stovka Maybe my use of the word "use more than 2.5A" was wrong, I understand V=IR, but this is a closed loop device,
From what I understood, it was spec'ed to be a 30W device, which at 12V x 2.5A.
So I guess when we say 32W, it is in tolerance of how / where we measure the voltage or current.
My wondering point was - even on stock, does the closed loop software ever allow beyond 2.5A - say for short-term transients?
Also is that 12.8V occurring due to the poor tolerance of the PSU? Is that the result of a negotiated 12V condition?
NDR008
on 31 Jul 2020
@NDR008 I think current is dependent only on resistance of the tip and the voltage. Not the firmware. If you provide 12V to the iron there will be about 2.5A If you provide 11V there will be less and If you will connect iron to 13V there will be about 2.7A. You could go higher a get larger current thus larger power. But at some point over voltage protection will kick in and iron wont work or a you will damage the iron.
12.8V was coming from lab power supply there was no negotiation. My point was to demonstrate difference in power when you connect TS80P to 12V that has slight udervoltage(11.7) or uvervoltage(12.8).
Stovka
on 31 Jul 2020
@Arthur-de-Partuur
@discip I use this one (for now with stock firmware) and have no sparks, whatsoever.
Thank you for this hint.
After processing all the input I got recently, especially the content provided by @whitehoose (Thank you as well!), I think the option you choose might be the best, despite the extra ~10mm in length.
discip
on 31 Jul 2020
Thanks for this Firmware!
PD works for me with a PowerBank from RAVPower with these specs:
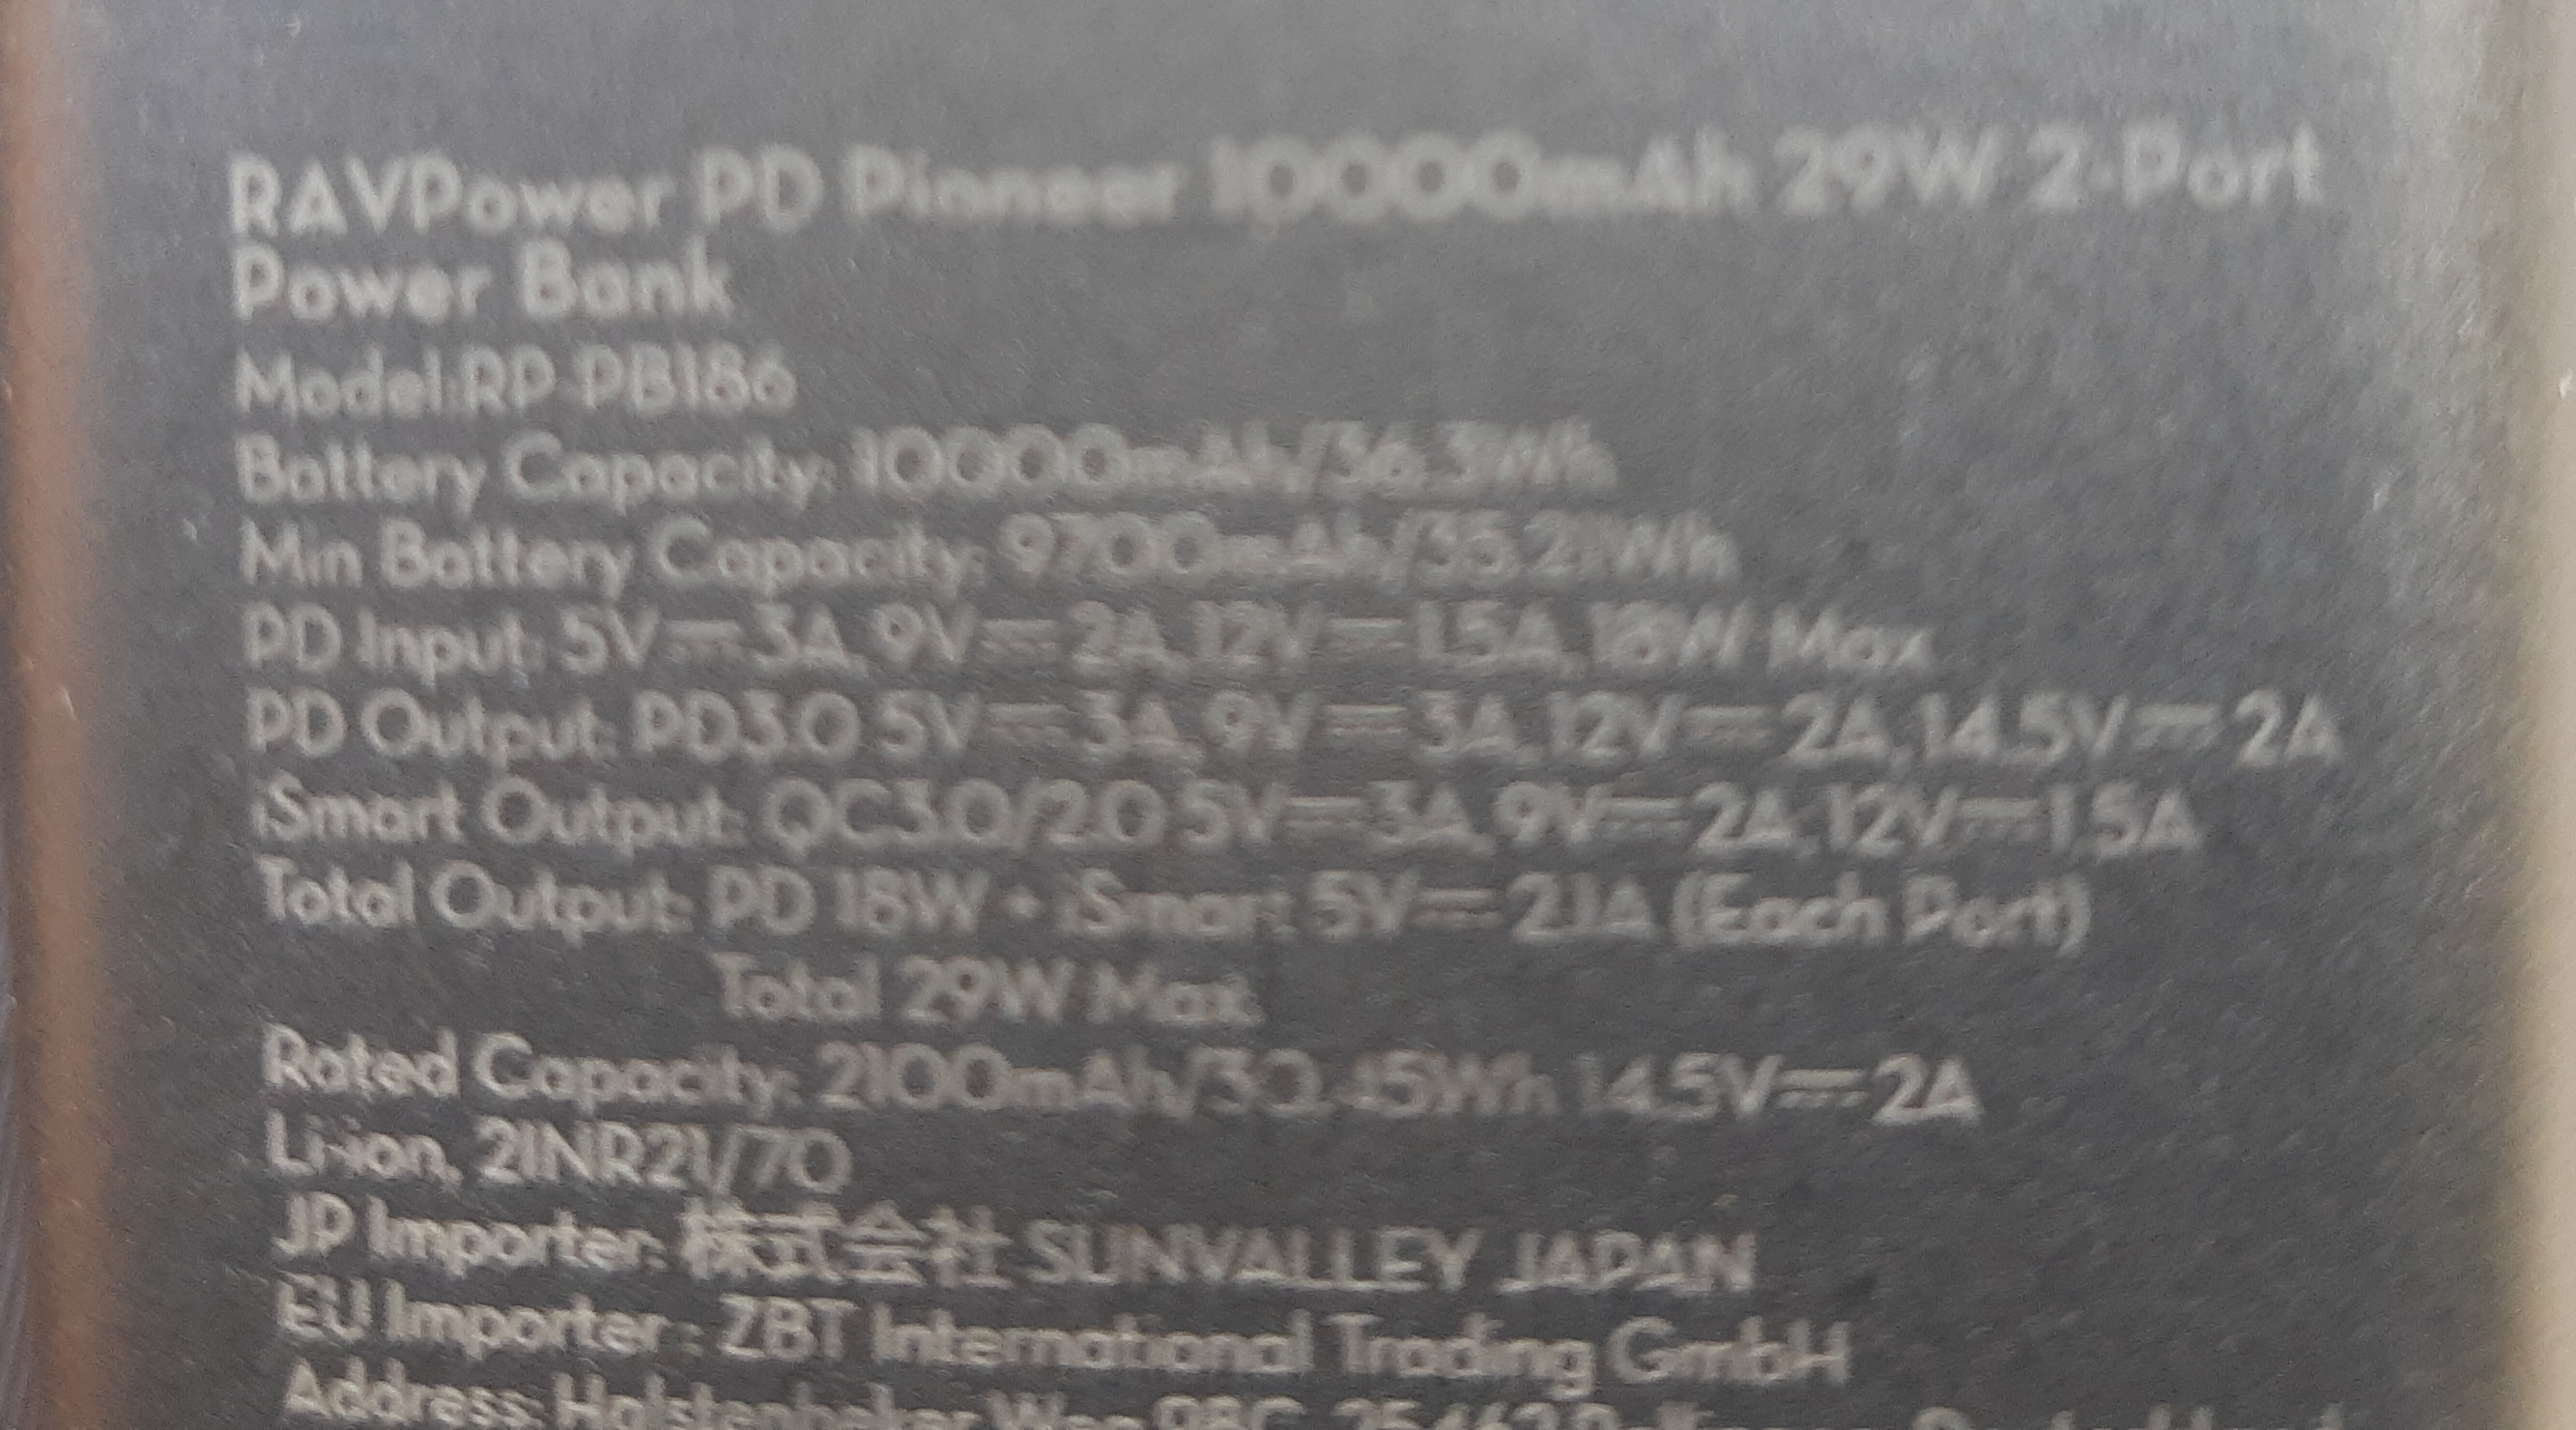
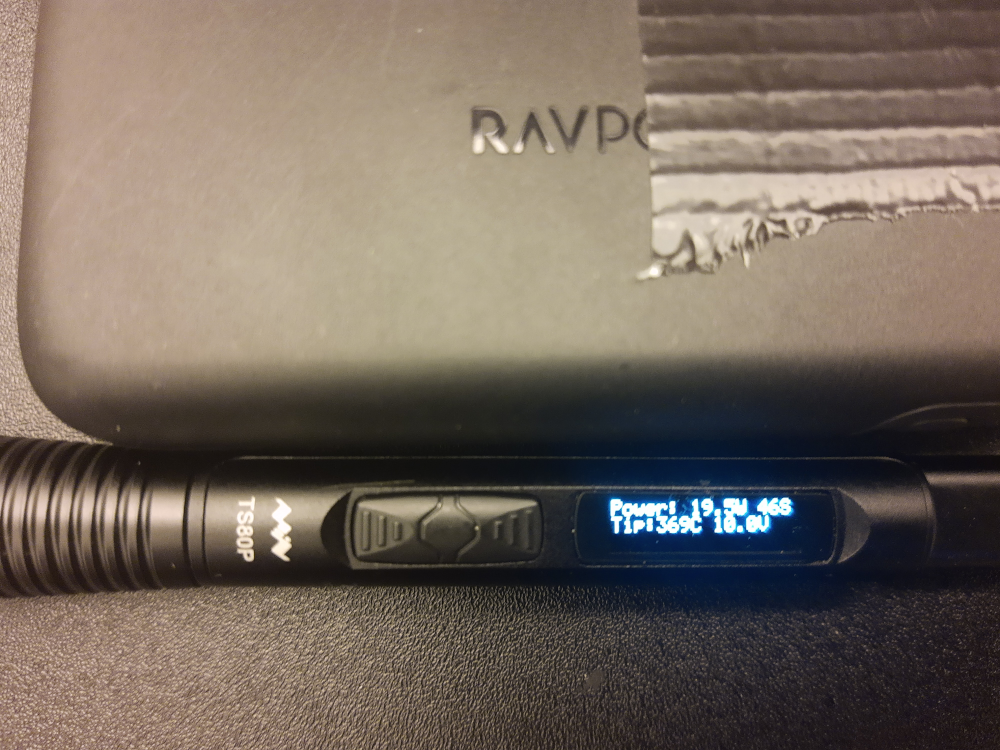
I get up to 19W with it:
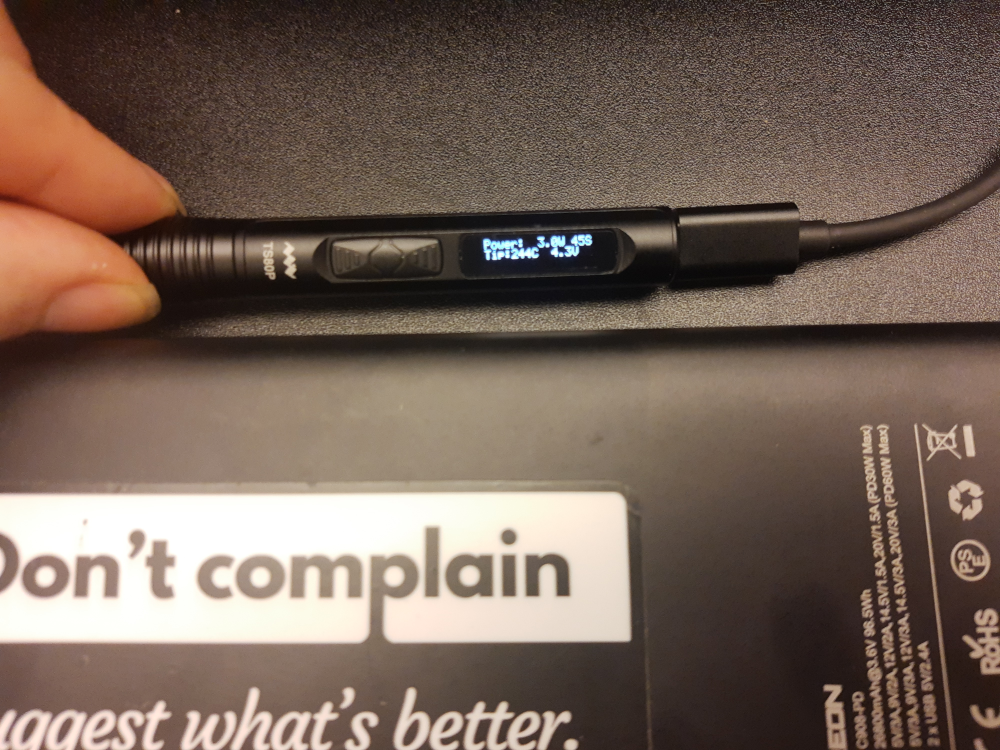
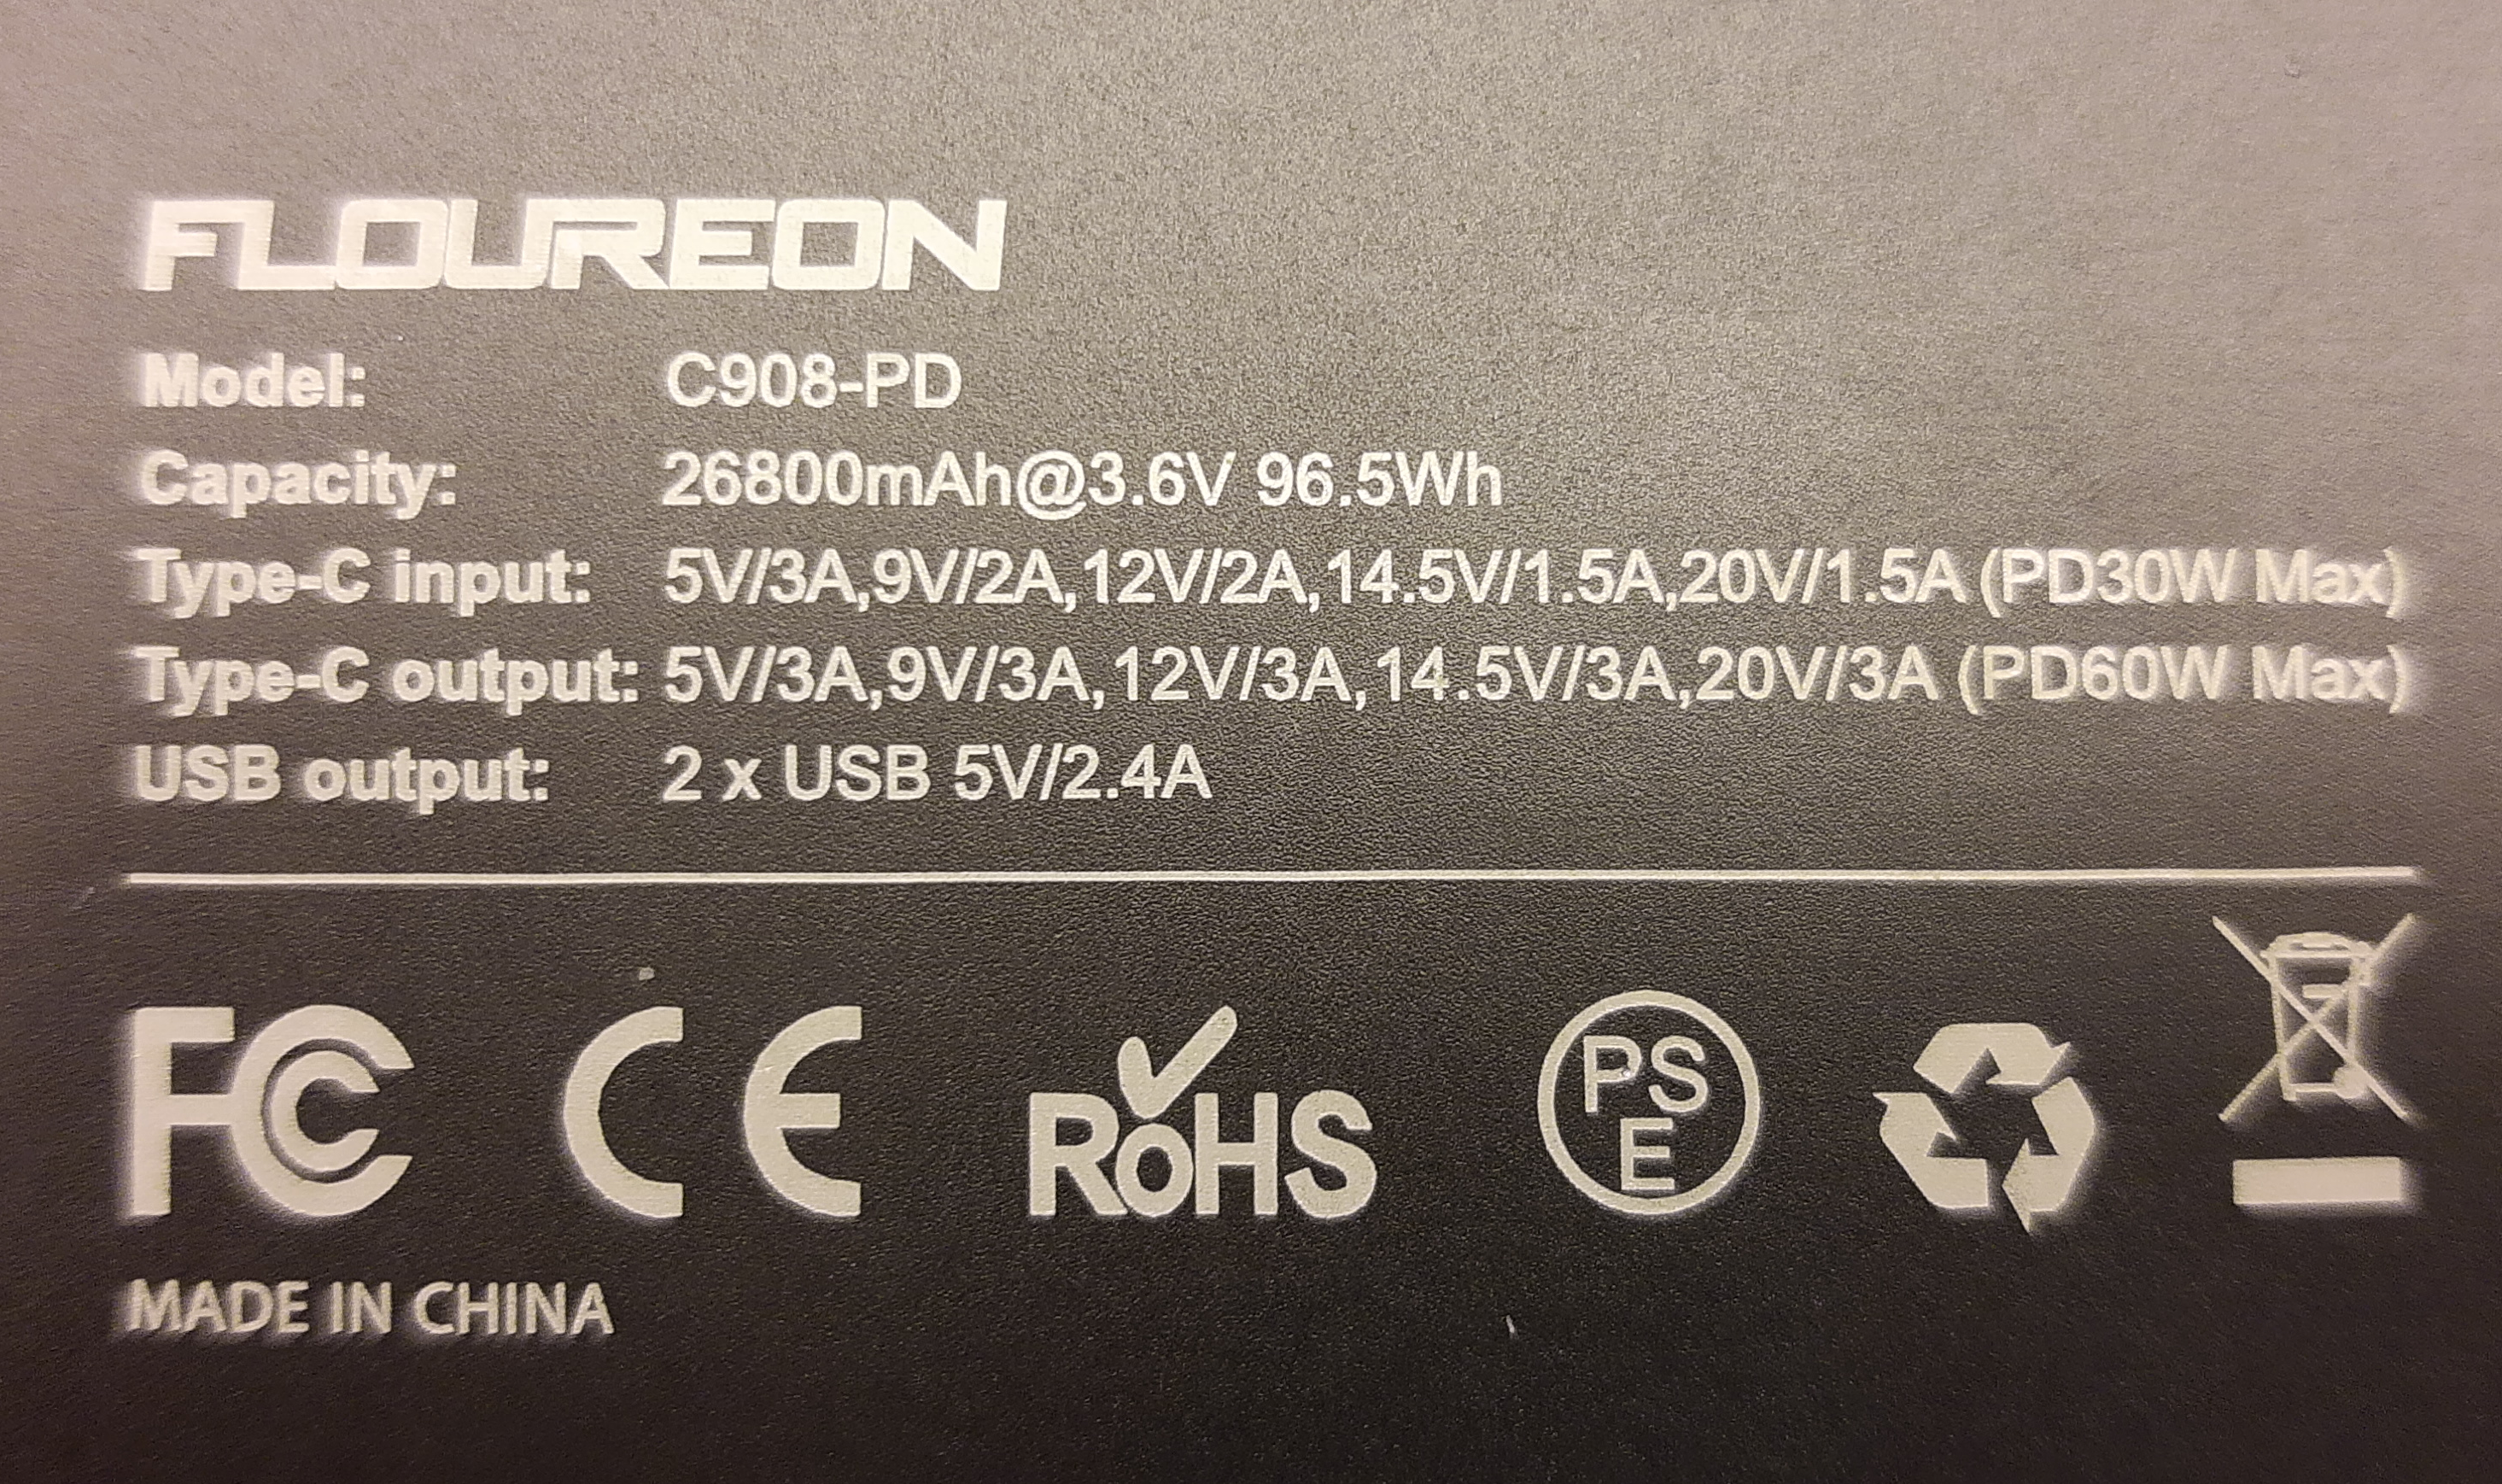
But with another PowerBank it only handshakes to 5V - that PowerBank reached 30W with the original FW (btw anyone has the original firmware HEX?)
 ligi
on 1 Aug 2020
ligi
on 1 Aug 2020
@ligi
Here you go!
discip
on 1 Aug 2020
@discip thanks!
here with the original firmware on the same PowerBank:
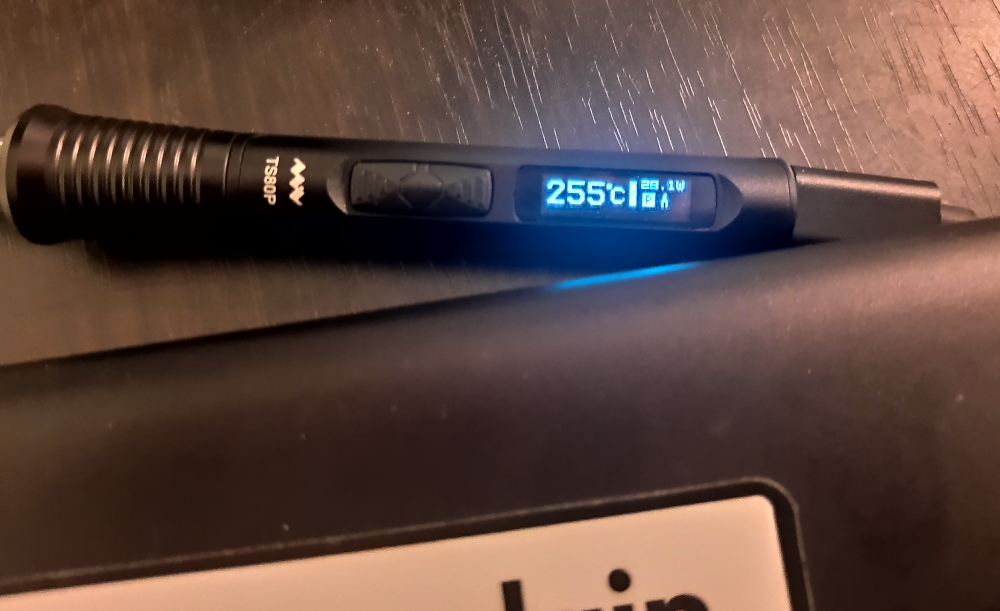
And FWIW: with the original FW I am not able to use the iron on my phone or my laptop. But with the firmware here I am!
ligi
on 1 Aug 2020
I got a Mophie 3XL and it seems to work okay with the TS80P on original FW.
https://medium.com/@MacSources/mophie-powerstation-usb-c-3xl-external-battery-review-mac-sources-36bbb5cf5067
 sparky1968
on 1 Aug 2020
sparky1968
on 1 Aug 2020
I tried uploading the beta2 firmware but I keep getting this error : "Error 0x800701B1: A device which does not exist was specified"? Now, when I plug my iron in, it gets stuck on the miniware logo and my computer does not recognize it. What did I do wrong?
 KoolAidKid
on 2 Aug 2020
KoolAidKid
on 2 Aug 2020
Alrighty,
I picked up one of the Lenovo chargers and after a bit of testing this now works on all of my previous supplies _and_ the Lenovo.
This is "Beta3" : TS80P_Beta3.zip
Only changes are to the PD algorithm itself.
_Hopefully_ this helps with the chargers that were bootlooping before.
If this gets a good thumbs up of chargers working I'll tackle any remaining issues 😅
Note: Quite possible that voltages / power levels are reading _slightly_ wrong. I haven't validated the defaults perfectly yet 😁
If you are reporting non-power issues if you could include the readings from your debug menu would be swell (i.e for temps being wrong).
You _shouldn't_ need to reset your settings after flashing this one.. I hope :)
Ralim
on 2 Aug 2020
@KoolAidKid
What OS are you using? Sounds like a partial flash.
If you hold down the front button it should still enter DFU where you can try again.
Try using the usual hits in this repo such as double-copy && renaming files etc. Otherwise possibly try a different pc im afraid :|
Ralim
on 2 Aug 2020
Got it working on my macbook, not sure what the issue was !
On Sun, Aug 2, 2020 at 2:31 AM Ben V. Brown notifications@github.com
wrote:
@KoolAidKid https://github.com/KoolAidKid
What OS are you using? Sounds like a partial flash.
If you hold down the front button it should still enter DFU where you can
try again.Try using the usual hits in this repo such as double-copy && renaming
files etc. Otherwise possibly try a different pc im afraid :|—
You are receiving this because you were mentioned.Reply to this email directly, view it on GitHub
https://github.com/Ralim/ts100/issues/630#issuecomment-667635317, or
unsubscribe
https://github.com/notifications/unsubscribe-auth/AECP3JOE3SRTA6ZWMQISPFLR6UB4VANCNFSM4NHYDSSQ
.
KoolAidKid
on 2 Aug 2020
I tested the vast assortment of batteries and chargers I have and could not find bootloops! However, it seems that some devices produce a double reboot before settling on the proper voltage. I am guessing this is known/expected? If not, I could record a video of it and logs if needed.
Note: Quite possible that voltages / power levels are reading slightly wrong
I thought this was intentional in a way. It seems that reading of 4 = 5V, reading of 8 = 9V and 10 = 12V. I'm a pretty new user of the TS80P and I'm unfamiliar with this custom firmware.
LiraNuna
on 2 Aug 2020
@Ralim Perfect, now it works on my ZMI QB822 power bank with C-to-C cable(stock firmware does not). It negotiated 12V and it is slightly overloading the power bank. Would be nice to get voltage selection going so I can change it to 9V. Great work, thank you.
Stovka
on 2 Aug 2020
Beta3 on Anker PowerCore+ 26800 PD shows 12.2V when powered via USB PD port (same voltages as the bundle charger). The PowerCore+ specifications read: "PD Output: 5V = 3A / 9V = 3A / 15V = 2A / 20V = 1.25A", does the iron negotiate 15V down to 12V?
 ldezem
on 2 Aug 2020
ldezem
on 2 Aug 2020
Thanks! Beta3 works better for me on both power-banks. Now they both go up to 30W - now I can stay on this firmware - thanks for the update!
ligi
on 3 Aug 2020
On linux I had to mount it as vfat rather than msdos for it to flash successfully.
 ColinKinloch
on 3 Aug 2020
ColinKinloch
on 3 Aug 2020
I've tested my power supplies and they all work properly - exactly like they worked on stock firmware:
Blitzwolf BW-PL4 (45W PD) - 12V 30W
Xiaomi Mi PowerBank 2 (18W QC3) - 9V 18W - it shows 5V first and switches to 9V after few seconds (probably the PD timeout @Ralim mentioned)
Dell PD power supply for XPS 13 (45W PD) - 9W 18W - the PSU doesn't support 12V at all, it supports 9V and then 15V
I've noticed that the low temperature is quite off. If tried touching the tip when the display showed ~18°C and it definitely was hotter than that (it had to be still at least 40). I don't have a way to check the temperature of the hot tip.
@ColinKinloch AFAIK msdos fs driver supports only FAT16 and supports only 8.3 file names. Except for some specific use cases it shouldn't be used. The vfat supports both FAT32 and long file names and is overall better.
yawor
on 4 Aug 2020
Btw guys - is the original firmware available somewhere? I assume we can always flash back the original if so? (I want to give my iron a test drive this weekend) :)
NDR008
on 4 Aug 2020
Btw guys - is the original firmware available somewhere? I assume we can always flash back the original if so? (I want to give my iron a test drive this weekend) :)
TS80P APP V1.23 is available here and the update process is the same as with the beta firmware:
http://www.minidso.com/forum.php?mod=viewthread&tid=4085&extra=page%3D1
ldezem
on 4 Aug 2020
Question; with the latest Beta3, is the motion sensor now "awake"?
Arthur-de-Partuur
on 4 Aug 2020
I tried changing the supply voltagre from 9V to 12V and it kept pulling 9V. Also the aspect ratio on the screen seems to be off. a portion of the ui is off screen
 ThomasVermeersch
on 5 Aug 2020
ThomasVermeersch
on 5 Aug 2020
I just tried Beta3 with This charger:
Heating works fine as well as 9V or 12 V power choice (dispay shows 11.8 or so)
Motion sensor works
Calibration shows 1660 in the calibration manu, just after calibrating. The tip temp in the display shows 0 degrees. I have no means of measuring the tip, althoug I am quite sure that it is not 0 as it is room temperature (about 30degrees at the moment...)
Question @Ralim; Will this code now be merged in the main branch?
thanks for all the effort, by the way!
Arthur-de-Partuur
on 8 Aug 2020
I just tried running beta3 on my fresh TS80P and, when using my MacBook Pro's (up-to-96W) USB-C PD charger the unit power-cycles repeatedly. Every ~3-10 seconds, it powers off and back on. With the stock firmware or the unmodified current stable release TS80 firmware, this was not occurring. If I can provide any other information for debugging, please let me know!
 sdaitzman
on 11 Aug 2020
sdaitzman
on 11 Aug 2020
@sdaitzman
Hmm, apple could be a hard one to test for this.
I'll need to see if I can get my hands on an apple charger to see what it's freaking out about :'(
@Arthur-de-Partuur
Did you do the calibration when everything was cold? You shouldn't see 0 degrees :/
Ralim
on 13 Aug 2020
@Arthur-de-Partuur
Did you do the calibration when everything was cold? You shouldn't see 0 degrees :/
Sure! "Cold" is an overstatement as we're struggling with a heatwave and my little workshop is _slightly warm_ but let's call it "unheated"... Right after pressing "calibration" the display briefly shows 1660 (-ish)...
Arthur-de-Partuur
on 13 Aug 2020
I've managed to install the "beta3" firmware after I initially experienced the same problem as @KoolAidKid where my Windows 10 PC wasn't able to properly upload the firmware file to the iron and was giving me an "Error 0x800701B1" error. I had to use a different device to upload it, a Chromebook in my case.
My iron actually also displays the same 0 ℃ "cold" temperature as @Arthur-de-Partuur. And this is after I calibrated the iron tip in the menu. My ambient temperature is also around 30℃ right now.
But when I measure the operating temperature of the tip with my Hakko thermometer clone it seems alright. Strangely though, I've set the temperature target at 295℃ but it maintains a temperature of 300℃. It displays 300℃ and the thermometer measures it close to 300℃.
 KoopsF
on 15 Aug 2020
KoopsF
on 15 Aug 2020
Hey guys!
Thanks for bringing us this awesome firmware (that I use on my TS100 since years) to the TS80P. I tried the beta3 firmware and can confirm all the issues mentioned above:
- After calibration, the tip temperature shows as zero (or 1-2 degrees) when at room temperature
- There is a few pixels that show on the right side in the menu for some items, which should probably not be there
Otherwise no problem to copy the firmware from my mac. Using the macbook pro charger, I get only 9V at 3A but this is normal, as the device only supports 20.2V or 9V (only 3A), but not 12V. @sdaitzman check the side of your charger, to see if it's also the case for yours. It restarts 2-3 times when I plug it in, but then works as expected until I unplug.
 beeb
on 16 Aug 2020
beeb
on 16 Aug 2020
@beeb the pixels on the right you're talking about is a menu position indicator (like a scroll bar). It's easier to notice how much more options there is in the menu section you're in.
yawor
on 17 Aug 2020
@beeb how many watts is your charger? Mine is the 96W MBP 16" brick
sdaitzman
on 17 Aug 2020
For those having calibration issues:
Could you please provide the readings RTip CTip Chan from the debug menu?
Trying to figure out why your running into this issue :)
Ralim
on 17 Aug 2020
forgive me, new here, and to this type of iron, how do i hit the debug menu?
 neovarsis
on 17 Aug 2020
neovarsis
on 17 Aug 2020
@neovarsis
Ah, that would help :laughing:
If you power up the iron and go to the main screen (ie before you enter soldering mode or the iron), then hold the B button (on nearest the screen) it should show a different menu. Then you can use the A button (nearest the tip) to scroll through.
Ralim
on 17 Aug 2020
okay, here goes nothing.
Rtip 1497 through 1530 ish bounces around give or take 15 points or more?
Ctip 00
CHan 0
neovarsis
on 17 Aug 2020
Aha!, so that explains why calibration was breaking something; CHan should not be 0 deg C, but your tip itself is reading fine for ~20 C+- a few or so.
Can you try doing a settings reset and then checking to see if after settings are reset CHan reads as non-zero ?
Ralim
on 17 Aug 2020
Factory Reset via the menu on the iron, done.
CHan and Ctip still 00 and 0 respective
neovarsis
on 17 Aug 2020
@neovarsis
Weird, that sort of indicates that the handle NTC isn't reading correctly. Can you confirm your iron is a TS80P (not TS80).
I may need to build a debugging build that shows the raw adc reading for the NTC to help check this :\
Ralim
on 17 Aug 2020
its a ts80p, it takes the manufacturers newer ts80p firmware just fine, it has TS80P written on it near the button, and it hass the larger coned out handle portion towards the tip.
neovarsis
on 17 Aug 2020
@neovarsis
All good; just checking since if you did flash this to a TS80 you would see the handle temp be wrong.
Ralim
on 17 Aug 2020
@beeb how many watts is your charger? Mine is the 96W MBP 16" brick
@sdaitzman Ah ok mine is 87W for the MacBook Pro 15'' Retina 2019.
@Ralim
RTip = 1450-1550
CTip = 30 / 00
CHan = 290 / 0
The values initially show up as 30 and 290, then they become zero quickly (within a few seconds).
beeb
on 17 Aug 2020
looked mine up again now, when i first power it on.
Ctip = 01 now
CHan = 00
After i get into the settings menu, both drop back down to 00 00
neovarsis
on 17 Aug 2020
On closer inspection I see that my Apple USBC PD supply indicates the following PD outputs:
- 20.5V at 4.7A
- 15V at 3A
- 9V at 3A
- 5.2V at 3A
sdaitzman
on 17 Aug 2020
@Ralim
RTip = ~1500
CTip = 00
CHan = 0
Tip=TS-B02
Again. the operating temp measures fine with my Hakko FG-100 clone.
BTW, thanks for making these custom firmware's
KoopsF
on 17 Aug 2020
Is the operating temp correct at any temperature? If so, good to know that i can use this firmware even if it shows room temp at 0c.
akselii
on 17 Aug 2020
@Ralim I've had CHan value of ~500 right after plugging in the power (the iron wasn't used for few days), without a tip plugged in. After plugging in the tip, it showed correct temperature of ~25°C for a moment and then went quickly to around 4°C. I've checked CHan again and it changed to 0. It stays at 0 even after power cycle. I've unplugged the iron for few minutes but the CHan still stays at 0 with or without the tip being plugged in. Factory reset also doesn't have any effect.
The CTip value oscillates around 550.
yawor
on 17 Aug 2020
@akselii the operating temperature seems to be alright. Only lower end of the measure seems to be off. As I've mentioned earlier, when the tip was cooling down and the display showed ~18°C, the tip definitely was still hot to the touch, probably at around 40-45°C - so be careful when handling the tip on cool-down.
yawor
on 17 Aug 2020
@Ralim am I understanding correctly there's no external crystal anywhere on the TS80? Is it present on TS80P? I had to comment out clock initialization in Arduino IDE sketches otherwise it hangs. By the way, finally managed to run Arduino sketches on TS80 and probably on TS100 as well, kind of breakthrough :) see https://github.com/joric/ts80player/wiki/STM32duino
Video:
 joric
on 18 Aug 2020
joric
on 18 Aug 2020
@joric
Miniware has not fitted a crystal in _any_ of their irons. So if you want to make a build that works with their bootloader, you just need to do nvic and flash offsets + init clocks correctly :)
Ralim
on 18 Aug 2020
@Ralim have you tried enabling USB mass storage without a crystal? Can't for the love of god make it work. Is there a special prescaler, I'm assuming iron runs and 64 MHz but there's no 1/33 divider to set 48 Mhz for the USB. I'm mostly trying to fix this file for the board that doesn't use NUCLEO_HSE_CRYSTAL define: boards_setup.cpp. Sorry it's a little bit off-topic but maybe you would have an idea. Bluepill with HSE works just fine. Also posted here: https://www.stm32duino.com/viewtopic.php?f=3&p=4066
joric
on 23 Aug 2020
@Ralim have you tried enabling USB mass storage without a crystal? Can't for the love of god make it work.
Using the clock configuration GUI in CubeMX you can easily verify that you can take the HSI (8MHz). At least for the F103, the HSI is unfortunately divided by 2 before it goes to the PLL. The PLL can then multiply that by 12 to create 48MHz. Both SYSCLK and USB will then be 48MHz. Unfortunately, the USB Prescaler 1.5 cannot be used, as the PLL cannot multiply by 18. Then we could have both 72MHz SYSCLK and 48MHz USB.
skoehler
on 23 Aug 2020
@skoehler thanks a lot, I did as you said, used f_cpu=48000000L, BOARD_RCC_PLLMUL RCC_PLLMUL_12 and RCC_USB_SYSCLK_DIV_1 and it worked perfectly.
joric
on 23 Aug 2020
Can we reach a higher temp with this?
NDR008
on 24 Aug 2020
@NDR008
The maximum temp is ~= 450C due to both electronics design (how much the op-amp can read to) and also what point the metal of the tip starts to fail. These are all standard tips and so going above 450C will dramatically shorten life of the tip (to less than hours often).
So no it doesn't go any hotter than other irons :)
Ralim
on 25 Aug 2020
I believe the manufacturer rates the TS80P with up to 400°C only. So if the Ralim firmware would go up to 450°C, that would be an improvement. That's how I understand the question by @NDR008
skoehler
on 25 Aug 2020
@skoehler so It raises it to 450? :)
NDR008
on 25 Aug 2020
@NDR008
The firmware raises the limit to 450C, but your device may not reach that limit as it will limit you to the limit of the ADC.
You can typically get to 430-450C depending on unit to unit variance.
Note that, operation above 400C is not good for tip longevity and may (most likely will) lead to an early death.
Ralim
on 25 Aug 2020
Bummer, I always thought that TS80 was limited to 400 due to power input,
but with the TS80P and/or your firmware since we can get 30W, we could
reach 450 like th TS100...
I recently was trying to remove solder with solder-wick, and the TS80P
struggled with so much heat soak from the wick :(
On Tue, 25 Aug 2020 at 08:46, Ben V. Brown notifications@github.com wrote:
@NDR008 https://github.com/NDR008
The firmware raises the limit to 450C, but your device may not reach that
limit as it will limit you to the limit of the ADC.
You can typically get to 430-450C depending on unit to unit variance.Note that, operation above 400C is not good for tip longevity and may
(most likely will) lead to an early death.—
You are receiving this because you were mentioned.
Reply to this email directly, view it on GitHub
https://github.com/Ralim/ts100/issues/630#issuecomment-679837284, or
unsubscribe
https://github.com/notifications/unsubscribe-auth/AIKWRWSJQ4XWMIR6AZ3L4JTSCNM47ANCNFSM4NHYDSSQ
.
NDR008
on 25 Aug 2020
@NDR008
At 400C you are running quite hot, what you most likely have is not a temperature issue but a thermal conductivity one.
If you have a good thermal connection between your wick and board but not between your iron and your wick, then no matter how hot the tip is, its not getting through to the wick to heat it up.
If you were having a temperature / power limit one, then you would see the iron screen showing a low temp (<320C) and thats the iron failing to maintain temp as your loading it with a larger thermal drain than it can put it.
Conversely, if your screen is showing you like 400C, then in _theory_ your tip is at 400C, and so you may not have a good contact to what your trying to heat up :sweat_smile:
Ralim
on 25 Aug 2020
I recently was trying to remove solder with solder-wick, and the TS80P struggled with so much heat soak from the wick :(
are you sure it is power and not the tip? For me changing the tip to a chisel tip really improved heat-transfer for the T80P
ligi
on 25 Aug 2020
Yeah, I also think the tip heat mass might be the issue, at soldering jobs,
350 with lead-free works perfectly. Love to solder something with (even if
I have not done much).
You know, that regret of not getting a TS100 kicks in when you look at TS80
tip prices :P
On Tue, 25 Aug 2020 at 09:24, ligi notifications@github.com wrote:
I recently was trying to remove solder with solder-wick, and the TS80P
struggled with so much heat soak from the wick :(are you sure it is power and not the tip? For me changing the tip to a
chisel tip really improved heat-transfer for the T80P—
You are receiving this because you were mentioned.
Reply to this email directly, view it on GitHub
https://github.com/Ralim/ts100/issues/630#issuecomment-679853090, or
unsubscribe
https://github.com/notifications/unsubscribe-auth/AIKWRWWONVGJWP5AZOMVOALSCNRLRANCNFSM4NHYDSSQ
.
NDR008
on 25 Aug 2020
Does anyone have any suggestions for ~10,000mAH battery packs? None of my past battery packs were PD so decided it's time to get one to work with my 80P. However I've now purchased two separate Anker packs that are PD compatible and both supports 9V 2A but neither of them work with 80P on stock firmware. The iron boots up but as soon as it tries to heat up the screen shuts off and eventually reboots.
 chilicoke
on 25 Aug 2020
chilicoke
on 25 Aug 2020
ts80p best wattage possible is 12v ~2.5 so you need a pack that does usb pd out of that or better yet higher which isnt that common
This one works great for me
https://www.amazon.com/gp/product/B083N9HVBL/ref=ppx_yo_dt_b_asin_title_o04_s00?ie=UTF8&psc=1
PD Output: 5V/3A, 9V/3A, 12V/3A, 14. 5V/2A, 15V/3A, 20V/3A, 60W max.
 jacobrosenthal
on 25 Aug 2020
jacobrosenthal
on 25 Aug 2020
Ah I see, I somehow remembered 80P can do 9V/2A+, my battery pack does do 12V1.5A but guess 80P doesn't like that.
That one you linked looks like a great pack for full time portable soldering or laptop charging, unfortunately I'm just looking for something smaller to charge my phone 95% of the time and for those odd moments where I need to solder portably.
Thanks! 👍
chilicoke
on 25 Aug 2020
Just wanted to check, is the beta firmware stable enough for normal use?
 4nthonylin
on 26 Aug 2020
4nthonylin
on 26 Aug 2020
I've found the beta3 firmware to be stable for normal use. Actually the stock firmware would sometimes reboot when waking up but the beta3 fixed this issue for me.
ldezem
on 26 Aug 2020
Thanks for the comment! Flashed the beta 3 firmware and it works great. I noticed that with stock firmware, it would complain about low voltage for my PD power supplies. Using the beta 3 firmware has resolved that. I can even use my computer usb port to use the soldering iron albeit slowly 😃
Can't wait for more features to be added and things tuned. I did notice that the temperature readings were also ~10C off. I think a power meter would be great to have in the simple screen. Maybe the option to toggle between power and voltage and/or a thin bar depicting the total power usage.
4nthonylin
on 27 Aug 2020
I finally had a chance to install beta-3. The tip reads low for the ambient temp.
I also get an error when I plug it into my computer and do not have a drive mount. Should I see a small drive?
With the original firmware and a usb-c to usb-c cable it does not show up as a drive, with usb-a to usb-c it does show up.
With Beta-3 usb-c to usb-c it does not show and no error, with usb-a to usb-c windows give the error below.
Error from windows device manager:
Windows has stopped this device because it has reported problems. (Code 43)
A request for the USB device descriptor failed.
brencerddwr
on 27 Aug 2020
Has anyone had a chance to test the latest release with a Ravpower PD Pioneer 10000?
If it works with that power bank I'd be ready to buy the iron, so I've been a bit eager.
Here are the PD profiles it supports:
5V 3A
9V 2A
12V 2A
14.5V 2A
I'm guessing it would work with 12V 2A? I'm not sure if it's worth the work but if I end up getting one I can take a look at the hardware and see if the iron would be happy on 14.5V as well.
 zainahm3d
on 1 Sep 2020
zainahm3d
on 1 Sep 2020
The unit requires 12V at > 2.4A for it to negotiate 12V, so you will be limited to 18W at 9V if that is the actual advertised profile of the power bank. (Its a 30W iron).
15V is in the territory of "most likely will break something" as that's pushing ~50W into a tip and circuitry only rated for 30W.
Ralim
on 2 Sep 2020
Just got my first TS80p in the post, powered up using my usb c power pack which supports boost charging and all I get is a screen full of dots.
Is this a know issue or have I got a faulty unit.
Thanks for any input on this
 Paul-80
on 4 Sep 2020
Paul-80
on 4 Sep 2020
@Paul-80
If you hold down the front button while connecting it to a computer it should enter DFU mode and show this on the screen.
If it still shows dots it could be faulty. Otherwise it may just have not been loaded with valid firmware.
Ralim
on 4 Sep 2020
Thanks for the reply
I have been playing around trying different power supplies and the bizarre thing is if i power it from a 5v power bank, most of the time it comes on, just not enough power for it to heat but if I try 9v or 12v I get the screen of dots
So connected it to my bench supply set to 5v and it comes on, then if I winder the voltage up to 12v it then heats fine.
I did manage to get it into DFU mode and put the latest firmware on but that made no difference.
Thanks
Paul-80
on 4 Sep 2020
That indeed is strange.
To confirm, which firmware are you using (official or this one?)
Ralim
on 4 Sep 2020
Its the official one v1.27
Paul-80
on 4 Sep 2020
If you have time it might be worth trying this firmware (latest release) to see how it acts since I can't really comment on the official firmware 😅
Ralim
on 4 Sep 2020
Got a 60W inateck charger supporting 3A all the way up to 20V, fails with official SW, starts at 12V then resets ts80p an draws 5V. Assuming PD compatibility issue?
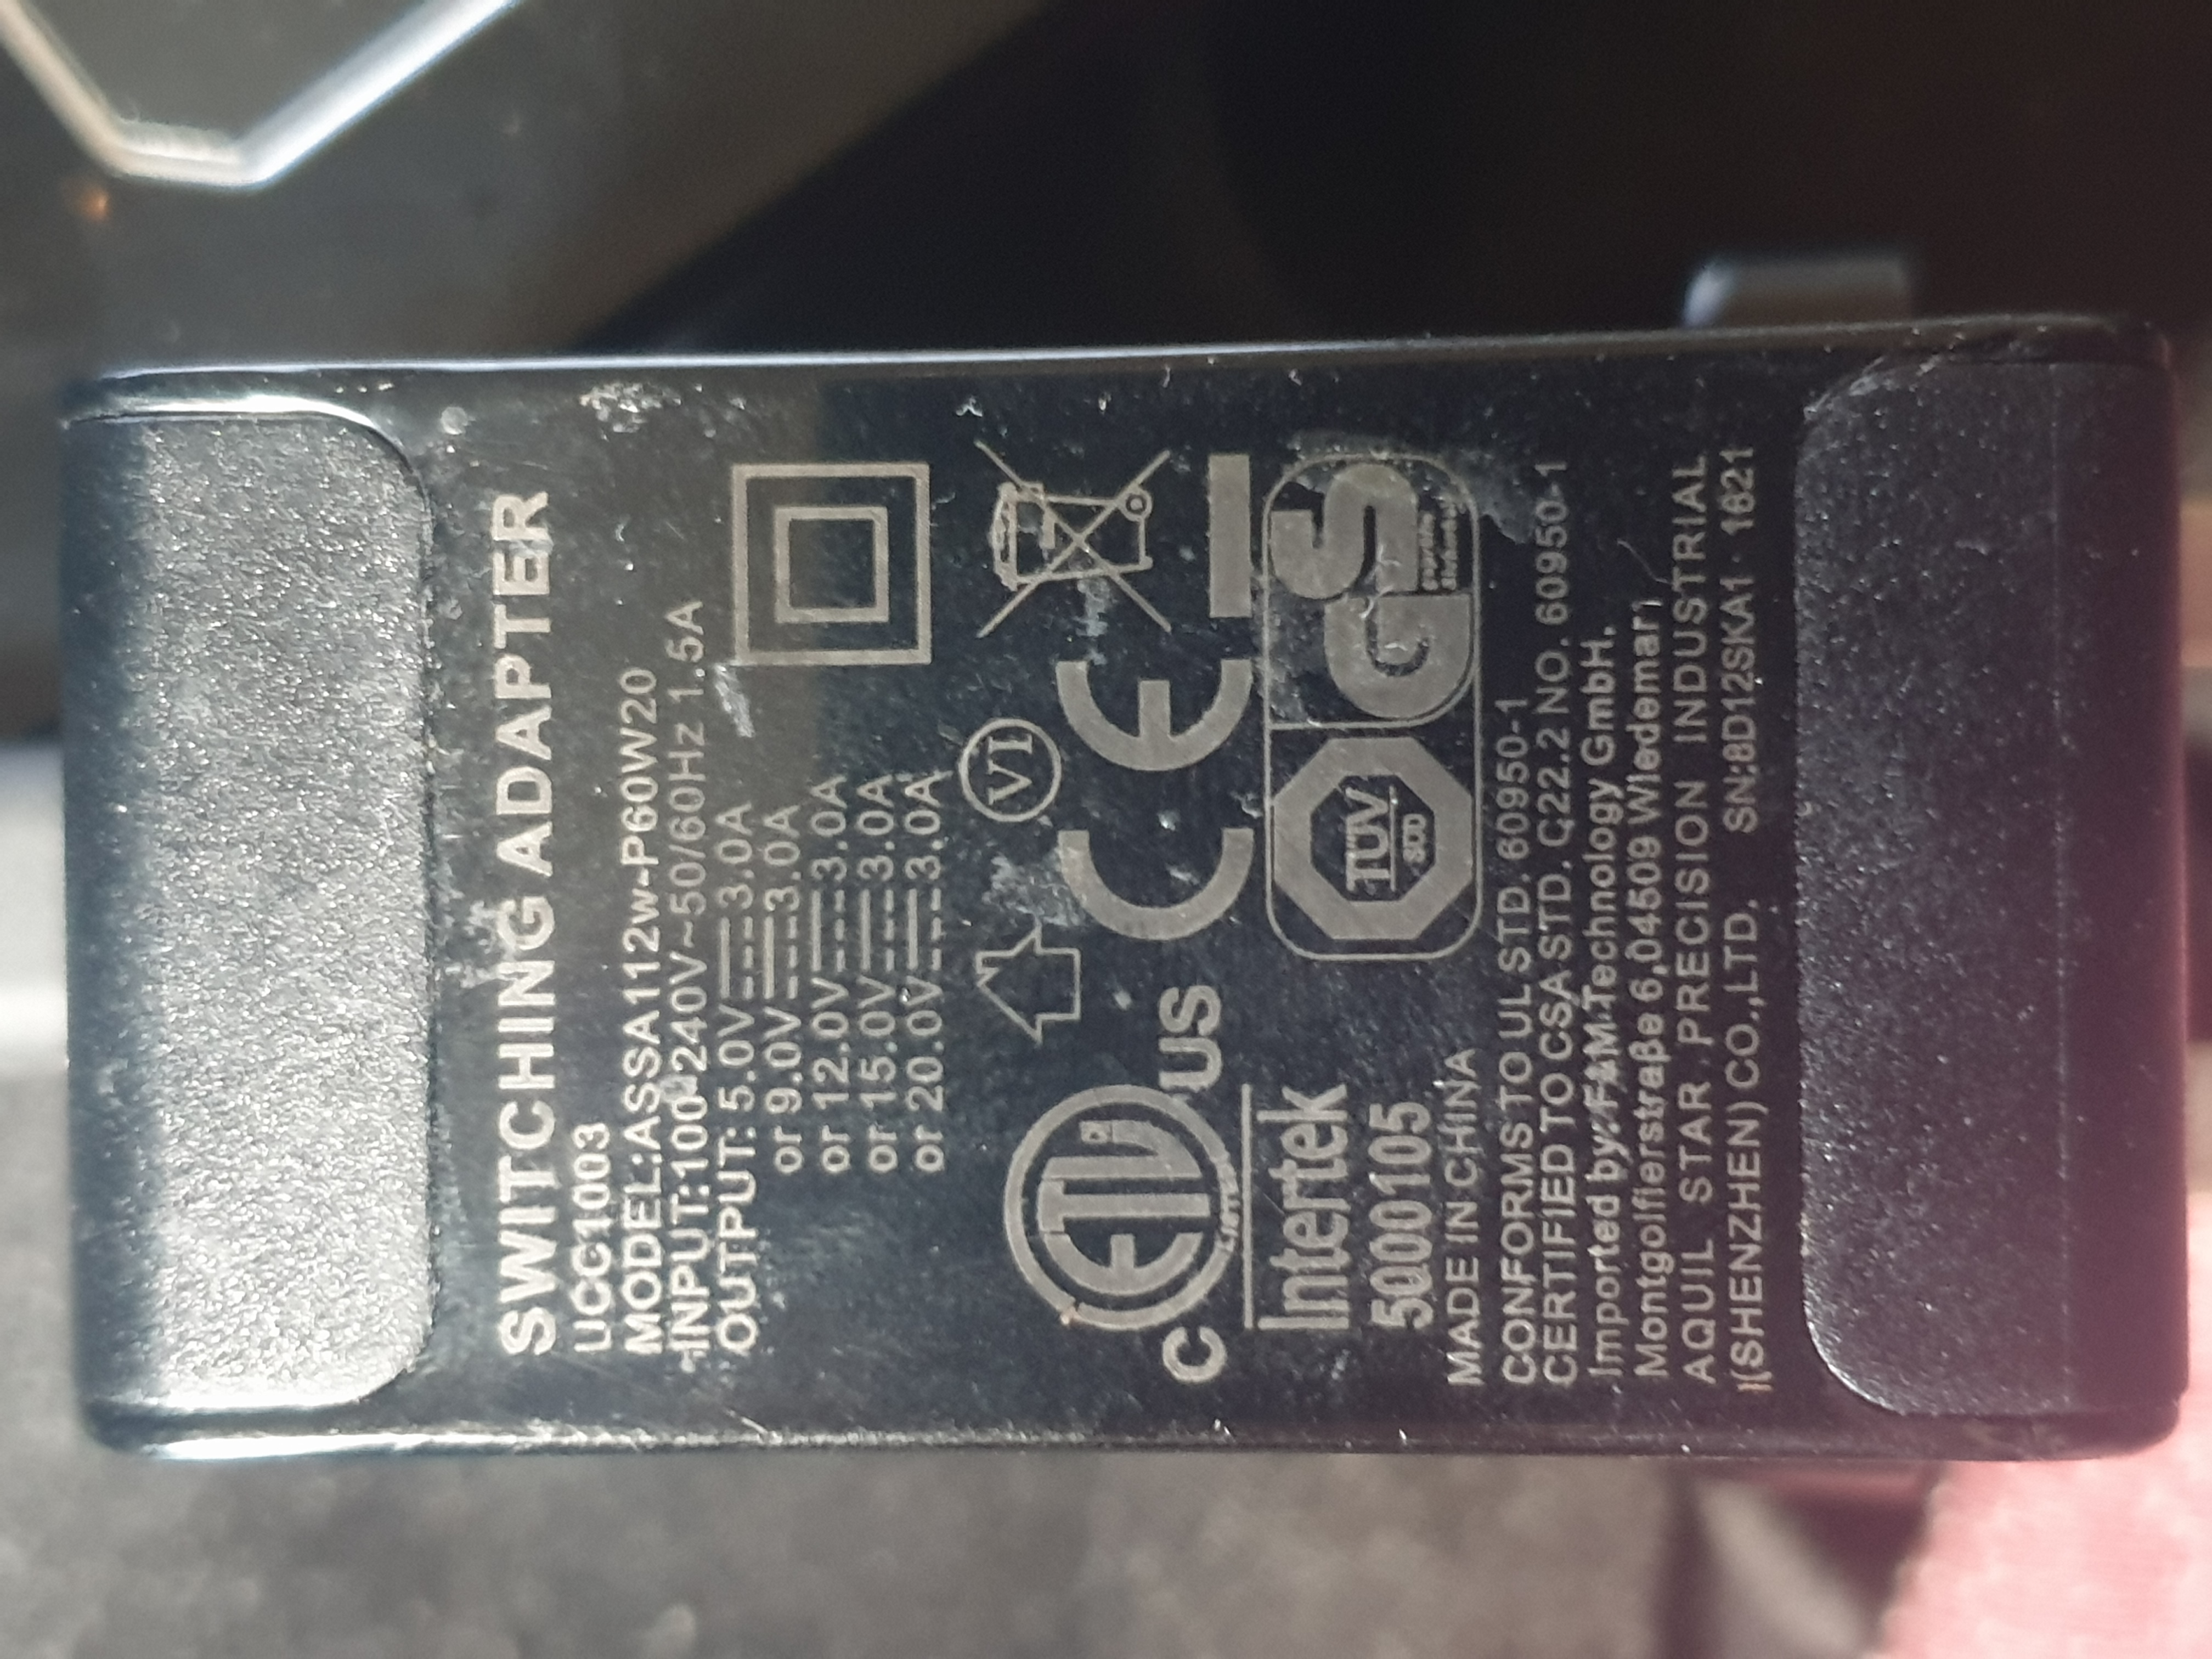
Are we at a stable beta build yet (near unbrickable)?
 tyeth
on 5 Sep 2020
tyeth
on 5 Sep 2020
current beta is more stable than the OG firmware. Much more power compatible as well.
neovarsis
on 5 Sep 2020
Yep I agree, I was having issues with the stock firmware recognizing PD and constantly getting low voltage. Beta3 firmware solved that issue and has made the iron a lot more user friendly.
4nthonylin
on 6 Sep 2020
Thank you very much to you both, I'm well happy with official 1.23, but
mine came with an EU charger in kit, so just the old charger and
powerbanks to worry about. This gives me faith that all may be solved
soon/now.
On Sat, 5 Sep 2020 at 23:22, Anthony Lin notifications@github.com wrote:
Yep I agree, I was having issues with the stock firmware recognizing PD
and constantly getting low voltage. Beta3 firmware solved that issue and
has made the iron a lot more user friendly.—
You are receiving this because you commented.
Reply to this email directly, view it on GitHub
https://github.com/Ralim/ts100/issues/630#issuecomment-687670477, or
unsubscribe
https://github.com/notifications/unsubscribe-auth/ABTBZ452QF45NXOKNX324A3SEK2YRANCNFSM4NHYDSSQ
.
tyeth
on 6 Sep 2020
Indeed I feel it is more stable then the official firmware :)
I have a pr to merge after some more testing that should help improve that even more :)
Ralim
on 6 Sep 2020
Curious what testing remains.
Also on a side note you mentioned the 15v being near 50w and the circuitry designed for 30w, I also read somewhere from miniware that a component maxes out at 15v so risky, did I misunderstand, and is current negotiated with pd along with voltage?
tyeth
on 6 Sep 2020
@tyeth
Gooood question, I put it up as an early release earlier on today (about an hour ago)
For me it works on all of my power supplies here, though on one it blinks once then negotiatiates. I _think_ this is just a quirk of the this adapter but keen to hear more.
I dont know of an usb PD adapters that support current limiting. All they do is advertise you are allowed X Amps at Y voltage, and then you can pick Y voltage. So for the TS80P, its designed for 12V in mind so a few things break if you go much higher than that :)
I believe one of the step downs is near max at 15V, and you are over the current rating of the mosfet and the traces on the board.
This is why the firmware will only neogitate 9 or 12V, but also why for PD it picks whichever option _does not_ exceed the current of the tip. (thresholds here)
For testing is mostly a game of my testing to make sure it negotiates 10 out of 10 times on two powerbanks and 4 wall adapters I have here. :)
Ralim
on 6 Sep 2020
Can somebody lay down some guidelines on which USB PD power supplies should be supported? What revision of PD should we look for? 2.0 or 3.0? What about QC and Co?
I know some power supplies can serve pretty much any voltage. The power supplies can actually adjust the voltage in 1V or even smaller steps when asked to. Is that supported in PD 2.0 or 3.0? Or must the device specifically state that it supports 12V? What requirements does the Ralim firmware have in terms of power supply standards?
skoehler
on 6 Sep 2020
My reccomendation is PD 2 or 3, [email protected]+.
Make sure it does it say 12V.
If you can, avoid QC.
Try and buy decent quality ones and you should be ok.
The iron will use 12V if it advertises 2.5A or more.
If not I'll will fall back and use 9V if it advertises 2A or more.
Ralim
on 6 Sep 2020
@Ralim
Unfortunately one of the 'previous' issues is back again:
If used in PD - mode the iron seems to only negotiate for 12V, because if 9V is selected in the 'detailed idle screen', still 12V is displayed.
discip
on 8 Sep 2020
@discip
This is by design.
The iron negotiates PD as per the PD adapters advertised current capabilities.
Since for PD we know that the adapter can do the power we don't need a special mode for forcing 9v.
Ralim
on 9 Sep 2020
Ah! Ok.
My bad.
Thank you.
discip
on 9 Sep 2020
@discip what @Ralim said is also true for the stock firmware. The 9/12 V setting is only for QC. If you connect to PD, it's not even possible to manually change this setting in stock - it only displays what voltage is being supplied from the charger.
yawor
on 9 Sep 2020
@Ralim
Could this be implemented into your firmware the same way, it is in stock, as dedcribed by @yawor?
discip
on 9 Sep 2020
Hey guys, I've just gone through your entire thread, I'm glad there is a team working on improvements.
I recently got my TS80P in the mail, I've just used it now for the first time in trying to update the firmware.
For some reason, when I try to transfer my 1.27hex file, it disconnects the device from the computer, not allowing me to do the update. I've tried USB C to USB C and USB A.
Sincerely,
Beyond
 Beyond246
on 9 Sep 2020
Beyond246
on 9 Sep 2020
The bootloader can be quite finicky. It's nothing that you can do much about. The bootloader never gets upgraded, so you'll always use the version that the manufacturer first shipped.
Sometimes, changing computers or operating systems can help. If that isn't possible, then copying the file twice without deleting it in-between is occasionally helpful. Or maybe copying it and then renaming. It really all depends on what the host computer does when it tries to write the file. And there aren't any guarantees what will and will not work.
And whatever you do, make sure to disable any anti-virus software. It can break things in random ways.
If you search online, there are various thread where people talk about problems with flashing and the various work-arounds that might or might not help.
gutschke
on 9 Sep 2020
I appreciate the detailed response, but unfortunately I think you slightly misunderstood my dilemma, the file itself doesn't even get 1% transferred before the TS80P disconnects from the PC and reconnects in an unreadable state.
I tried googling for quite a while, this thread was the closest I came.
I do agree that possibly changing PCs may help, I even tried using different transferring programs, I'm currently on Windows 10 Enterprise LTSC.
Beyond246
on 9 Sep 2020
@Beyond246 I believe expected behavior is for the transfer to complete very quickly (like, potentially just a fraction of a second) and for the bootloader to then almost instantly unmount itself. Then, after a short pause, if you remount it, you can find a file with the same name as the firmware with a new extension. If the extension is .ERR, .NOT, etc, the flash failed.
sdaitzman
on 9 Sep 2020
@Beyond246
Which version of DFU do you have out of curiosity?
You absolutely have to use windows explorer to copy, and often having others _installed_ will lead to issues.
The bootloader is programmed to expect how the way windows works where it programs each block one by one in order. If it gets any out of order it resets and reboots (causing it to get into weird states).
Double check what file type is there when it remounts. If it doesn't remount at all (or corrupted) then it's most likely some other software on your PC that has installed hooks on file copies, and in which case another PC is probably best bet.
Ralim
on 9 Sep 2020
@sdaitzman My device started with two hidden folders .fseventsd and .Trashes, I think from my attempts at adding firmware it may have added a 4kb file called ._.Trashes (TRASHES file type), but there's a possibility that it was already there.
I was following the little instructions that came with the order.
@Ralim It has DFU v3.50, I initially had TeraCopy as my default, but I deactivated it to try the default windows transfer method. I may have to try one of the other computers in the house, the problem is it's past midnight and they're not in the best locations to respect the individuals sleeping.
Beyond246
on 9 Sep 2020
Regarding my issue with the display just showing dots (Most of the time but not always) I sent it back for replacement, the replacement has arrived and is working fine.
Paul-80
on 9 Sep 2020
For some reason, when I try to transfer my 1.27hex file, it disconnects the device from the computer
@Beyond246 have you tried booting in DFU, going with explorer to the hexfile and then right-click -> send to USB ?
Not sure why, but this works for me...
Arthur-de-Partuur
on 9 Sep 2020
@Arthur-de-Partuur I haven't tried transferring it out of DFU as there wasn't enough space, so all of my TS80P boots have been DFU.
When you say going with explorer, do you just mean using the general windows folders?
If you are referring to the normal folders, then I just tried what you suggested, and unfortunately, it didn't work for me. The only thing I hadn't tried out of your suggestion was right-clicking and trying to send it to the USB via that method.
Beyond246
on 9 Sep 2020
The only thing I hadn't tried out of your suggestion was right-clicking and trying to send it to the USB via that method.
@Beyond246 that is indeed what I mean: right-click on the hex file for the context menu; then go to "send to" and then choose "USB drive" or "F- drive" (whatever your mounted ts80P shows).
Somehow this works, while draging the file over the USB location and then dropping it does NOT work...
Also, right click on hex -> Copy and then browsing to the USB, selecting that and then right-click-> Paste does not work....
Arthur-de-Partuur
on 9 Sep 2020
Can someone clarify if using my 60Watt Macbook power supply will allow this iron to draw maximum power output (don't crucify me for incorrect terminology, I only dabble in electronics)? I just got a replacement for my dead ts80 sent to me from Miniware (just the iron, no extras). I'd also rather not use my one good-but-stiff usb c cable, is it possible to get the c-to-c silicone one that's usually bundled with the ts80p from somewhere? Otherwise open for power supply and cable suggestions.
 Szpindel
on 10 Sep 2020
Szpindel
on 10 Sep 2020
@Szpindel
MacBook charge should allow you to use the max.
If you plug it in, and it accepts 12V then you are good :).
The cable is possible to buy on AliExpress, but depending where in the world you are your luck varies.
Alternatively, I've had luck with _fairly_ flexible cloth covered cables from local stores.
Ralim
on 10 Sep 2020
Yeah I am struggling to find 30W capable flexible cables.
On Thu, 10 Sep 2020 at 10:38, Ben V. Brown notifications@github.com wrote:
@Szpindel https://github.com/Szpindel
MacBook charge should allow you to use the max.
If you plug it in, and it accepts 12V then you are good :).The cable is possible to buy on AliExpress, but depending where in the
world you are your luck varies.Alternatively, I've had luck with fairly flexible cloth covered cables
from local stores.—
You are receiving this because you were mentioned.
Reply to this email directly, view it on GitHub
https://github.com/Ralim/ts100/issues/630#issuecomment-690084689, or
unsubscribe
https://github.com/notifications/unsubscribe-auth/AIKWRWX6QM2K3ICZVYNURMDSFCGBRANCNFSM4NHYDSSQ
.
NDR008
on 10 Sep 2020
@Ralim Thanks for the quick reply. The quest for the perfect cable continues.
Szpindel
on 10 Sep 2020
@Szpindel @Ralim past weekend I helped a friend with some soldering and I forgot my PD charger, so I used his MacBook one. After connecting I've got 2 or 3 resets of TS80P and then it turned on but stayed on 9V. I didn't check the model of the charger nor its parameters unfortunately. I can ask him to send me what's written on the charger.
@NDR008 according to USB-C specs, all USB-C to USB-C cables should be capable of transporting up to 3A (so 36W at 12V) without marker chip and even up to 5A with the marker chip. So unless you buy something really cheap which is not built up to USB spec, it should be ok.
yawor
on 10 Sep 2020
@Szpindel @Ralim past weekend I helped a friend with some soldering and I forgot my PD charger, so I used his MacBook one. After connecting I've got 2 or 3 resets of TS80P and then it turned on but stayed on 9V. I didn't check the model of the charger nor its parameters unfortunately. I can ask him to send me what's written on the charger.
I see. I've yet to actually use the iron, just verified that it turned on. Instead of writing my thesis I just spent 45 minutes on aliexpress and the best cable I could come up with was this one; I'll probably write an update as soon as it reaches me in... a few... weeks.
Szpindel
on 10 Sep 2020
https://smile.amazon.de/dp/B01GGKYVSY/ref=sspa_dk_detail_4?psc=1&pd_rd_i=B01GGKYVSY&pd_rd_w=8sS3S&pf_rd_p=403c666b-0b30-4f66-afde-0388ffdf2c39&pd_rd_wg=gnen4&pf_rd_r=E879XCZ0KGYJFBSXAVDV&pd_rd_r=c6984dc8-8f1c-47dc-babc-4227fe1805b9&spLa=ZW5jcnlwdGVkUXVhbGlmaWVyPUExNTVDUklMMEpMUDFSJmVuY3J5cHRlZElkPUEwMzAwOTg0MjgwRTRSU1dFSVJPViZlbmNyeXB0ZWRBZElkPUEwNTI1MjAxMzhXSTUyT1ZCMklQWCZ3aWRnZXROYW1lPXNwX2RldGFpbCZhY3Rpb249Y2xpY2tSZWRpcmVjdCZkb05vdExvZ0NsaWNrPXRydWU=
This clearly says 5V 3A max (and most flexible looking ones says so).
On Thu, 10 Sep 2020 at 11:46, Marcin Jaworski notifications@github.com
wrote:
@Szpindel https://github.com/Szpindel @Ralim https://github.com/Ralim
past weekend I helped a friend with some soldering and I forgot my PD
charger, so I used his MacBook one. After connecting I've got 2 or 3 resets
of TS80P and then it turned on but stayed on 9V. I didn't check the model
of the charger nor its parameters unfortunately. I can ask him to send me
what's written on the charger.@NDR008 https://github.com/NDR008 according to USB-C specs, all USB-C
to USB-C cables should be capable of transporting up to 3A (so 36W at 12V)
without marker chip and even up to 5A with the marker chip. So unless you
buy something really cheap which is not built up to USB spec, it should be
ok.—
You are receiving this because you were mentioned.
Reply to this email directly, view it on GitHub
https://github.com/Ralim/ts100/issues/630#issuecomment-690119580, or
unsubscribe
https://github.com/notifications/unsubscribe-auth/AIKWRWVHFB7FZHFFFYYMHSDSFCN7NANCNFSM4NHYDSSQ
.
NDR008
on 11 Sep 2020
@NDR008 I'm 99% sure that you can just ignore the voltage rating in this listing. What's important is that it is capable of 3A like all USB-C cables should. Actually it should be capable of carrying up to 60W (20V, 3A). For TS80P, where the iron uses 2.5A at 12V max it should be ok.
yawor
on 11 Sep 2020
On Fri, 2020-09-11 at 01:48 -0700, Marcin Jaworski wrote:
@NDR008 I'm 99% sure that you can just ignore the voltage rating.
What's important is that it is capable of 3A like all USB-C cables
should. Actually it should be capable of carrying up to 60W (20V,
3A). For TS80P, where the iron uses 2.5A at 12V max it should be ok.—
You are receiving this because you are subscribed to this thread.
Reply to this email directly, view it on GitHub, or unsubscribe.[
{
"@context": "http://schema.org",
"@type": "EmailMessage",
"potentialAction": {
"@type": "ViewAction",
"target": "
https://github.com/Ralim/ts100/issues/630#issuecomment-690963031",
"url": "
https://github.com/Ralim/ts100/issues/630#issuecomment-690963031",
"name": "View Issue"
},
"description": "View this Issue on GitHub",
"publisher": {
"@type": "Organization",
"name": "GitHub",
"url": "https://github.com"
}
}
]
Yes the voltage is largely inconsequential (until you get to voltages
that can break down the insulation or cause large R/C effects). A 3A
cable should be able to handle 200W easily... so long as the current is
still 3A.
 phedders
on 11 Sep 2020
phedders
on 11 Sep 2020
@Arthur-de-Partuur Apologies for the late reply, I should have been more specific, I meant to say, the only thing that I hadn't tried, but have now due to your previous suggestion was the right-clicking on the firmware and sending to USB device.
Beyond246
on 18 Sep 2020
@Arthur-de-Partuur Apologies for the late reply, I should have been more specific, I meant to say, the only thing that I hadn't tried, but have now due to your previous suggestion was the right-clicking on the firmware and sending to USB device.
And??? Did it work for you as well?😃
Arthur-de-Partuur
on 18 Sep 2020
@Arthur-de-Partuur That's a negative, unfortunately.
I still have to try it on a different version of Windows to see if that works.
Out of curiosity, are there any types of items you would recommend go well with the TS80 that don't come with the initial package? (eg; brass wire for cleaning, as opposed to the sponge) This is my first soldering iron, I plan to use it for cable making/repairing primarily.
I see individuals talking about trying to find a flexible cable, is that because the one they give us doesn't fully allow us to fully utilize our devices?
Beyond246
on 18 Sep 2020
@Beyond246 the cables that comes with TS80 (USB-A to USB-C) and TS80P (USB-C on both ends) are actually really good. They have a high temperature resistant silicon outer layer and are very flexible. But there was an option to buy TS80 without the cable, I'm not sure about TS80P. On banggood I can see only an offer with the cable included.
yawor
on 18 Sep 2020
On aliexpress you can get the TS80P with or without the carger n cable,
case, sponge etc.
Definitely go with charger version even if from uk, poundland have high
current plug adapters.
Also use my innatech/innateck cable which is 2m and came with a 60w
charger, not quite as flexible but useful length.
Ended up getting a brass ball (and one replacement ball 5yr later)
instead of sponge years ago because something was aggressively eating my
Lidl soldering iron tip. It solved it.
I read cheap metal tips are coated/plated but the core metal
(steel?iron?) is capable of taking on water due to the carbon content which
makes it brittle and die relatively quickly. Can't really remember, just
that it was eating tips. Recommend distilled water for the sponge but i do
use tap or spit in a pinch which probably didn't help.
I have been only using tap water and the included sponge so far with the
ts80p, but I ordered spare tips just in case 😅
Also I love my no clean flux pen from rs electronics. Makes every job go
smoother and if you need a small flux puddle you can push the tip to flood
the pen tip.
On Fri, 18 Sep 2020, 14:39 Marcin Jaworski, notifications@github.com
wrote:
@Beyond246 https://github.com/Beyond246 the cables that comes with TS80
(USB-A to USB-C) and TS80P (USB-C on both ends) are actually really good.
They have a high temperature resistant silicon outer layer and are very
flexible. But there was an option to buy TS80 without the cable, I'm not
sure about TS80P. On banggood I can see only an offer with the cable
included.—
You are receiving this because you were mentioned.
Reply to this email directly, view it on GitHub
https://github.com/Ralim/ts100/issues/630#issuecomment-694873491, or
unsubscribe
https://github.com/notifications/unsubscribe-auth/ABTBZ44JZFB7XSR2PGZHLUDSGNPI3ANCNFSM4NHYDSSQ
.
tyeth
on 18 Sep 2020
@yawor Oh okay great, thank you for that clarification. Mine does have a silicone outer layer.
@tyeth Yeah I got my TS80P in the full set from the NovelLife Store on AliExpress.
It came with a 45w US travel charger and AU adapter
Does the TS80P utilize all of your 60w charger? Or has it given you a better experience using it as opposed to the 30 or 45w ones?
My cable is 1.5m, I plan to use it with power bank, I hope that it's able to draw enough power to be effective.
Interesting about the sponge, I'm glad you said that, as I had been looking at brass balls back and forth, but wasn't sure if I'd just be wasting money when there was already a supplied sponge.
The comment about the tips and core, very informative. So are all the official TS80P tips considered cheap quality by your definition, or was that more for the 3rd party tips?
Distilled water only? I had no idea.
--Continuing this message on the next post--
Beyond246
on 18 Sep 2020
In my opinion, the thing that has cause me the most problems with oxidation and tip-eating is lead-free solder as the flux has to be more acidic. I've now switched to only using leaded solder and have had no more issues.
The tips for the TS80 and TS80P seem fairly decent quality. I bought the complete set and have been fairly impressed.
@Ralim thank you for this firmware. I've had no issues with day to day use of this release myself.
@beyond246 I had to copy it on several times (10?) before it worked. Just keep trying. .err .err .err .err .err .err .err .err .err .err .rdy oh wow, it worked!
 mnotgninnep
on 18 Sep 2020
mnotgninnep
on 18 Sep 2020
@Beyond246 personally I like using the brass wire sponge instead of wet one. I've used to use a wet sponge but it was always too much of a hassle. Had to wet it every time I needed to solder something and keep it not too wet nor too dry. The brass one cleans the tip very well and it's also easier to use on the go (no need to look for water).
I wouldn't say the TS80(P) tips are of cheap quality. They are pretty good. If you just begin with soldering, look for soldering tip maintenance/care videos on YouTube for example. If you take a good care of them, they'll work for a long time.
yawor
on 18 Sep 2020
--Message continued--
Mine has come with a TS-B02 Tip, I also ordered a TS-BC02 tip.
I picked the original case, it was a tough decision, as the latest case was larger, fit more tips and had room to add so much more in it, but the small one looked so elegant... haha
I also have:
- Desoldering Wick, 1.5mm and 3mm wide. (Braided copper wire desoldering wick saturated with wash-free RMA flux)
- Lead-free Solder Wire, 3% Silver with "secret flux", 0.8mm wide. (it says FLUX 1:8 on the front, but I don't know what that means. Reviewers say 30% lead, melt starts at 280)
- WNB 63/37 Rosin Core Tin Lead, 1-3% flux, 0.5 and 0.6mm wide.
I'm still looking at good/cheap bags that have lots of compartments for all of my soldering equipment.
Is a desoldering pump something I should look at, or it isn't as necessary for cable/connector work?
This took me a very long time to write, as well as gather up all of the information.
Beyond246
on 18 Sep 2020
@mnotgninnep
So you think lead-free solder will take a toll on the tips? I'll have to keep my eyes out.
You copied it ten times using the same method, then it finally worked? Hmm... I may just give that a go, I've tried 5-8 times, but if it's a chance factor, then I should perhaps try another ten times.
@yawor
"Not to wet not too dry", I didn't even think about that hassle.
I've looked at loads of videos so far, but as some of my items for soldering have taken over 90 days, I'm going to have to take a refresher or two right before taking a swing at it.
Soldering is something I want to get into as a hobby, starting with cables, learning about conductors, resistors and insulation, and then possibly adding some circuitry into the equation.
Beyond246
on 18 Sep 2020
On Fri, Sep 18, 2020 at 10:26:40AM -0700, mnotgninnep wrote:
[2]@Beyond246 I had to copy it on several times (10?) before it worked. Just
keep trying. .err .err .err .err .err .err .err .err .err .err .rdy oh wow, it
worked!
fwiw I installed standard _real DFU_ bootloader via SWD on my TS100
and flashing using dfu-util works every single time, flawlessly ;)
 paulfertser
on 18 Sep 2020
paulfertser
on 18 Sep 2020
@Beyond246 maybe you could try flashing the firmware using a virtual machine. You can try running some LiveCD Linux distribution (for example Ubuntu) in VirtualBox. There's an option to pass a specified USB device to VM. If you do that, the VM takes full control of the device so it passes any Windows drivers or software that may be messing with the flashing process.
I use Linux as my primary OS and I've had no issues with flashing both TS80 and TS80P beyond a known bootloader issue where you need to copy the file two times.
yawor
on 18 Sep 2020
@paulfertser
I'm not familiar with a few of those terms or applications off the top of my head, but I'll definitely be taking note of it to give your process a go.
@yawor
I see... I had considered using VMs and CDs as an alternative for the flashing process, but I was unaware entirely of process it does with drivers towards flashing.
I've still got a cd of Ubuntu 12.04 lying around from one of my old jobs, perhaps I should get that a whirl.
With those last two recommendations from paul and yawor, I couldn't imagine not having enough information to successfully get it done.
Beyond246
on 18 Sep 2020
@paulfertser I'm not sure there is a dfu loader for the TS80P yet.
@Beyond246 It's just my opinion. Maybe it was just my lead free solder but it oxidised the tinning on all my soldering irons to the point that fresh solder won't bind to the tip. I literally had to scrape it off without damaging the tip, dip it in flux and try to reapply solder to save the tip. The lead solder isn't causing my any problems so I haven't looked back.
If you want to learn soldering have a look on YouTube for bigclivedotcom. He has several videos on the topic. Essentially he says buy cheap soldering kits from eBay and put them together. If you screw up, they're only cheap but the only way you can learn is to practice.
mnotgninnep
on 18 Sep 2020
On Fri, Sep 18, 2020 at 11:31:47AM -0700, Beyond246 wrote:
With those last two recommendations from paul and yawor, I couldn't imagine not
having enough information to successfully get it done.
You'd need an ARM SWD debugger (e.g. stlink or something else
supported by OpenOCD) to use "my method". And also it's tested on
TS100, not sure if TS80 will be fine with the same code.
paulfertser
on 18 Sep 2020
@Beyond246 @mnotgninnep for hobby level electronics and soldering I think there's nothing better than a standard 60/40 tin lead solder wire with a rosin core. Regarding the lead content, you should be ok as long as you don't eat it or lick your fingers right after soldering :wink:. Don't eat while you're soldering.
I think it's the fumes from rosin/flux that you need to be more careful of. There are fume extractors, but the cheap ones are not very good. I'm just using a battery powered fan to blow the fumes away from my face as fast as possible :).
yawor
on 18 Sep 2020
In regards to the usb-dfu replacement bootloader, it _should_ work on all 3 miniware irons, though it is more "advanced" and if you don't really know what your doing I wouldn't say it's a good road to go down. As it's just much less user friendly to figure out.
I've been using some of my miniware tips since I first picked up the iron in 2016😅 so some definitely do last, but I try not to abuse them - I'm a big fan of the brass ball rather than wet sponge for tip life.
Ralim
on 19 Sep 2020
Brass ball is amazing for instant use. I forgot to mention squeezing the
sponge very very tightly to almost dry (no drips).
the cheap coated tips i mentioned were for my old 10$ soldering iron
@Beyond246 regarding 60w charger, no the ts80p only handles 30w on the pcb
On Sat, 19 Sep 2020, 09:04 Ben V. Brown, notifications@github.com wrote:
In regards to the usb-dfu replacement bootloader, it should work on all
3 miniware irons, though it is more "advanced" and if you don't really know
what your doing I wouldn't say it's a good road to go down. As it's just
much less user friendly to figure out.I've been using some of my miniware tips since I first picked up the iron
in 2016😅 so some definitely do last, but I try not to abuse them - I'm a
big fan of the brass ball rather than wet sponge for tip life.—
You are receiving this because you were mentioned.
Reply to this email directly, view it on GitHub
https://github.com/Ralim/ts100/issues/630#issuecomment-695181336, or
unsubscribe
https://github.com/notifications/unsubscribe-auth/ABTBZ4ZFBWGRYNZPCCJUTYDSGRQ2NANCNFSM4NHYDSSQ
.
tyeth
on 19 Sep 2020
I've been using my TS80P on the stock firmware for a while now with the Aukey PB-Y24 USB-C 26800mAh 60W power bank and it works perfectly. It's not the smallest power bank by any means but the things is a beast and has lasted for more than a few 1 hour soldering sessions without any troubles. I'm am very happy with it, especially for the price. Just thought I'd share my experience in case anyone's interested.
https://www.amazon.com/gp/product/B0819L8BLF/ref=ppx_yo_dt_b_asin_title_o08_s00?ie=UTF8&psc=1
 YourFriendCaspian
on 23 Sep 2020
YourFriendCaspian
on 23 Sep 2020
@Ralim could you summarise if original usb-pd stack needs fixes? I've seen your commits with RTOS replace and drop of PPS mode. Is there anything else to pay attention for?
 puzrin
on 8 Oct 2020
puzrin
on 8 Oct 2020
@puzrin
I'm not sure what you are referring to in terms of "original usb-pd stack"?
None of the stack in this firmware is from Miniware.
I didnt implement PPS at this point as it had no gains for the current use case.
Ralim
on 8 Oct 2020
I mean, you use modified "PD Buddy Firmware Library". Does i needs some fixes or works well out of box?
I'd like to use it in my project to. It would be great to know pitfalls in advance, if possible.
puzrin
on 8 Oct 2020
I definitely had some teething issues with getting it all up and running, some of that was FreeRToS related, some FUSB302 related, some with assumptions in the construction of the firmware.
If your only doing power receive you can simplify down the firmware a _lot_ as well (I've done some of this)
1000% make sure you have a means of debugging the PD transactions, I used my Saleae Logic Pro for this, but its your choice :) PD is hard to debug blind.
Ralim
on 8 Oct 2020
I need SINK only, but with PPS.
For debug... hmm... may be https://github.com/tejv/USBCx with CY4500, as budget solution?
puzrin
on 8 Oct 2020
Yeah you should be fine to get it going really.
I will probably add PPS to this codebase when time permits.
The CY4500 was my next choice, but cant justify dropping the ~$260 on picking one up yet.
Ralim
on 8 Oct 2020
If it helps you, i could donate CY4500 (or TP350110?).
puzrin
on 8 Oct 2020
@Ralim
I am having a SainSmart TS80P
https://www.amazon.co.uk/SainSmart-Upgraded-Soldering-Adjustable-Temperature/dp/B07FY658LN
After plunging it on my Windows Desktop , on DFU mode, Cleaning the DFU storage, and uploading the TS80P_beta.hex
after unplugging it and plugging back on the power it gets stuck on the logo screen... the original logo screen.
Any advice anyone ?
 stiliajohny
on 11 Oct 2020
stiliajohny
on 11 Oct 2020
@stiliajohny
Please use the latest release for the TS80P.
Also don't bother cleaning the DFU storage as that can cause odd bugs with the DFU mode, the files are there to stop your PC automatically making them :)
Ralim
on 11 Oct 2020
After plunging it on my Windows Desktop , on DFU mode, Cleaning the DFU storage
and uploading the TS80P_beta.hex
Probably the filename should be just TS80P.hex ?
paulfertser
on 11 Oct 2020
@puzrin
I absolutely wouldn't say no to one though don't feel you need to; I'm ok to buy one in the future once donations cover it :)
(I try to re-invest them in tooling where I can)
Ralim
on 11 Oct 2020
After plunging it on my Windows Desktop , on DFU mode, Cleaning the DFU storage and uploading the TS80P_beta.hex
Probably the filename should be just TS80P.hex ?
@paulfertser
after renaming it to TS80P.hex,
Drop the file on the Vidrual DFU disk shows up,
The disk disconnects,
Connects back after a moment
New file in there TS80P.ERR
Here is the file
https://drive.google.com/file/d/1Af0N8TtqjF5N2PfDqomLbQsAapv4vNNw/view?usp=sharing
stiliajohny
on 11 Oct 2020
@stiliajohny
Do the double copy trick and it _should_ take.
Ralim
on 11 Oct 2020
@puzrin
❤️ I will order one now.
For your project are you planning on using FreeRToS?
I might try and break it out into an easier to use form
Ralim
on 11 Oct 2020
@stiliajohny
Do the double copy trick and it _should_ take.
Total Noob here
Double copy trick ?????
stiliajohny
on 11 Oct 2020
@stiliajohny
Its mentioned in a few places, but TL;DR is to copy it _again_ once the .ERR file shows up (aka try it again without unplugging the USB). Sometimes you may need to do a that a few times until the ok file shows up :)
Ralim
on 11 Oct 2020
@stiliajohny
Its mentioned in a few places, but TL;DR is to copy it _again_ once the .ERR file shows up (aka try it again without unplugging the USB). Sometimes you may need to do a that a few times until the ok file shows up :)
Indeed it worked,
kofi on me ! thanks for the fast response all!
stiliajohny
on 11 Oct 2020
@Ralim
In ideal world, i would prefer to NOT use FreeRTOS (protothreads instead). But in real world, with time constrains, FreeRTOS will be ok too.
If you break out FreeRTOS, it will be awesome. But if not - i will try to do it myself. The most important is to be sure about PD implementation correctness, and ts80p is ideal for mass testing.
puzrin
on 11 Oct 2020
Nicely done with the FW,
is it normal that with my MacBook charger goes completely insane and keeps rebooting ??/
stiliajohny
on 11 Oct 2020
@puzrin
I think protothreads would work really well for it; agree FreeRToS is overkill (it is sadly the main one that I know however).
Really it should be quite doable to make it all one task (plus IRQ's) and not require threads at all.
Mostly trying to keep to this format to make debugging simpler while I figure out all of the compatibility issues.
@stiliajohny
This was reported earlier, currently trying to borrow a charger to debug this. Per chance what model is your Apple charger?
Suspect I will need to just add PPS support for the apple devices, which will take a bit.
Ralim
on 11 Oct 2020
@stiliajohny
This was reported earlier, currently trying to borrow a charger to debug this. Per chance what model is your Apple charger?
Tested with two different chargers
one is 61W USBC
Output 20.3V-3A(USB PD) or 9V-3A(USB-PD) or 5.2V-2.4A
other is 96W
Output 20.5V-4.7A(USB PD) or 9V-3A(USB-PD) or 5.2V-2.4A
Both Flashing
stiliajohny
on 11 Oct 2020
@Ralim i think i could help with protothreads. A least, with api design and code draft. If you wish, i can create separate issue and write there all expected use cases & proposals.
I'm waiting new PCB-s of USB-PD reflower, and plan to start writing code after 1-2 months, as soon as LVGL v8 released. Also ordered CY4500 to myself :).
puzrin
on 11 Oct 2020
Hi. I received a TS80P with Firmware 1.23 and DFU: 3.50. I've tried multiple times to drop the TS80P.hex file onto the TS80P in DFU mode but it never takes and always returns a .ERR file. Is using the built-in DFU the right thing to do? Also, I can't seem to find this OEM firmware online at all, has anybody else been successful with this firmware or know the location of it?
 mdroberts1243
on 17 Oct 2020
mdroberts1243
on 17 Oct 2020
Hi. I received a TS80P with Firmware 1.23 and DFU: 3.50. I've tried multiple times to drop the TS80P.hex file onto the TS80P in DFU mode but it never takes and always returns a .ERR file. Is using the built-in DFU the right thing to do? Also, I can't seem to find this OEM firmware online at all, has anybody else been successful with this firmware or know the location of it?
UPDATE: I found the new OEM firmware TS80P v1.27 but even with that I can't seem to get the DFU download to work... can't update to Ralim firmware nor the v1.27 OEM version.
mdroberts1243
on 17 Oct 2020
The DFU is broken by design. It works with Windows only, and even when using Windows 10 it fails often for me. I never had much success with Linux. The DFU should not attempt to read a file while it is being stored to the USB drive - but that's exactly what it seems to do. So the DFU sees a broken file, which is probably incomplete. Then it fails. They should have waited until the drive is ejected, but they don't.
You have to retry. Make sure that caching for the driver is disabled though.
skoehler
on 17 Oct 2020
On Sat, Oct 17, 2020 at 10:05:40AM -0700, skoehler wrote:
The DFU should not attempt to read a file while it is being stored
to the USB drive - but that's exactly what it seems to do.
For the reference, STM32 MCU that's used on our soldering irons has 20
kiB RAM and 64 kiB flash, and the firmware in ihex format is about 100
kiB. I guess you see how it invalidates your point.
What DFU should really do is being a real standard DFU as defined by
the official USB device class specification of the USB Implementers
Forum. Then you would be able to use dfu-util or any other compliant
tool to do the flashing fast and reliably.
dap-boot is running on my TS100 and does the job just fine, every time.
paulfertser
on 17 Oct 2020
@skoehler the DFU is broken, that's for sure. But the rest of your statement is simply not true. How is it broken by design? Do you mean that MiniWare wanted to make a broken DFU intentionally?
Also I've been successfully flashing both TS80 and TS80P on my Linux machine from the beginning. I've never used a Windows machine to do this. Of course it needs multiple uploads, usually two, as the first one always produces ERR file.
Regarding my system, it's an Arch Linux. I've used to use Cinnamon, but now I'm using Gnome 3. They both use GVFS and udisks2 to auto-mount USB drives.
The TS80P DFU is mounted like this:
/dev/sda on /run/media/yawor/BFCC80E9 type vfat (rw,nosuid,nodev,relatime,uid=1000,gid=1000,fmask=0022,dmask=0022,codepage=437,iocharset=iso8859-1,shortname=mixed,showexec,utf8,flush,errors=remount-ro,uhelper=udisks2)
I've not changed any settings. This is a system default.
If you have issues copying the file from a window manager or using a cp command in shell, then maybe you can try following command (use correct paths of course):
dd if=TS80P_EN.hex of=/mnt/your_ts80_mount_point/TS80P.hex bs=512K conv=notrunc,fsync
The block size (bs) parameter doesn't seem to make difference. I've tried 512, 1K and 512K and it always behave in the same manner. On first copy the DFU restarts immediately and produces and ERR file and on second copy if takes a little longer and it flashes correctly (DFU produces a RDY file).
yawor
on 17 Oct 2020
On Sat, Oct 17, 2020 at 10:35:59AM -0700, Marcin Jaworski wrote:
How is it broken by design? Do you mean that MiniWare wanted to make
a broken DFU intentionally?
Impersonating UMS for firmware update purposes is defective by design.
paulfertser
on 17 Oct 2020
On Sat, Oct 17, 2020 at 10:05:40AM -0700, skoehler wrote: The DFU should not attempt to read a file while it is being stored to the USB drive - but that's exactly what it seems to do.
For the reference, STM32 MCU that's used on our soldering irons has 20 kiB RAM and 64 kiB flash, and the firmware in ihex format is about 100 kiB. I guess you see how it invalidates your point. What DFU should really do is being a real standard DFU as defined by the official USB device class specification of the USB Implementers Forum. Then you would be able to use dfu-util or any other compliant tool to do the flashing fast and reliably. dap-boot is running on my TS100 and does the job just fine, every time.
You got me. I didn't think that through. So how are they doing it? Are they assuming that Windows would write the blocks of the file in order? No matter how they are doing it, I wholeheartedly agree with your second statement:
Impersonating UMS for firmware update purposes is defective by design.
skoehler
on 17 Oct 2020
@paulfertser well, I don't do anything like that. On my system I'm simply dragging file in Nautilus from my drive to DFU's mount point. Nothing less, nothing more. It has always worked for me. I'm not changing any system settings, I'm not emulating how Windows does this etc.
I've just provided an alternative using dd, because maybe it'll help someone if it doesn't work normally. I don't even know if it is going to work, as on my system it works anyway so I have no idea if this changes anything.
yawor
on 17 Oct 2020
dd if=TS80P_EN.hex of=/mnt/your_ts80_mount_point/TS80P.hex bs=512K conv=notrunc,fsync
How come you're not using unbuffered I/O? If my above guess of how the DFU works is correct, the writes to the output file must not end up in the cache where they could potentially be reordered. AFAIK, bypassing the cache is called direct I/O. Also, your block size is 512 Kilobyte! So the whole file is transferred in a single write call.
This command would use direct I/O and omit the sync call:
dd if=TS80P_EN.hex of=/mnt/your_ts80_mount_point/TS80P.hex bs=512K conv=notrunc oflag=direct
@paulfertser well, I don't do anything like that. On my system I'm simply dragging file in Nautilus from my drive to DFU's mount point. Nothing less, nothing more.
This has never worked for me! Probably due to the fact that Linux has the cache enabled for USB drives by default.
skoehler
on 17 Oct 2020
@skoehler if you need me to check some settings on my OS then don't hesitate to ask. I'll try to provide whatever I can, because my system is definitely an example that it can and does work.
As I've said, I haven't changed anything regarding default storage settings on my system since the installation. Maybe it's just Arch Linux defaults that do the trick.
Regarding my dd command, I've forgot oflag=sync. I've had a different device which also emulated mass storage device for configuration purposes and it indeed didn't work with normal file copy. I've had to use dd like above with oflag=sync and bs=512. That's why I've posted this solution here as maybe it'll help in this case too.
yawor
on 17 Oct 2020
Maybe it's a language barrier (English is not my primary language), but if I understand correctly the phrase "broken by design" means that it was author's intention for breaking this deliberately so it won't work anywhere than on Windows. Do you really think that was MiniWare's intention? Or is it just a lack of proper QA and testing on different systems? Unfortunately software design and software support in Chinese products is what it is, but I would go as far as to assign them bad intentions in that regard.
Sorry for the rant.
yawor
on 17 Oct 2020
Hi. I received a TS80P with Firmware 1.23 and DFU: 3.50. I've tried multiple times to drop the TS80P.hex file onto the TS80P in DFU mode but it never takes and always returns a .ERR file. Is using the built-in DFU the right thing to do? Also, I can't seem to find this OEM firmware online at all, has anybody else been successful with this firmware or know the location of it?
UPDATE: I found the new OEM firmware TS80P v1.27 but even with that I can't seem to get the DFU download to work... can't update to Ralim firmware nor the v1.27 OEM version.
UPDATE 2: I gave up on Windows 10 and switched to my Linux machine. By writing the firmware twice I was able to get a .RDY
I tried both the (new to me) v1.27 and the Ralim firmware. I wanted to see if I could get the TS80P to work better with my USB-C Power Bank. I didn't see any improvement with OEM firmware but with the latest Ralim firmware I was able to get better results using the USB-C port with it running for a least a few minutes vs a few second on USB-A and with the OEM firmware.
mdroberts1243
on 17 Oct 2020
On Sat, Oct 17, 2020 at 02:34:52PM -0700, mdroberts1243 wrote:
with the latest Ralim firmware I was able to get better results
using the USB-C port with it running for a least a few minutes vs a
But then it still turns off? Are you using the power limit setting?
paulfertser
on 17 Oct 2020
@skoehler can you check your mount options when you connect your TS80P in DFU mode? I've just noticed that udisks2 adds a flush option in my system. This causes immediate write of data to the drive. This is a vfat fs mount option.
I think this should be set by udisks2 for vfat drives by default. So maybe it depends on whether your OS uses udisks2 to auto-mount your USB drives or not.
From what I read, the decision to mount vfat with flush option comes from a bug reported and a patch submitted in 2012 in the old udisks project.
yawor
on 18 Oct 2020
This is seriously awesome. Finally my TS80P is delivering performance near/at its true potential. The fundamental functionality is there, so far playing nicely with my power sources, and bringing out the potential of my power banks too, which I've not yet witnessed until now. For example, an $18 HAME H13D, (6800mah at 5V 1A, QC/PD up to 12V 1.5A) power bank is finally providing its max 12V, and gets me up to temp (650F+) in about 15 seconds, around half the previously required time. The added functions in the firmware are really USEFUL! No fluff, and gets out of the way, quickly, transitioning from an intuitive computer configuration menu, to the hot, pointy, metal thingy I need, when I need it. One thing I didn't like previously, was waiting for the stock firmware to initialize completely, before it would register my input and finally begin heating. Even the stock TS80 provided better response in this regard. The TS80P, with this impressive firmware, acknowledges the button press, and begins heating the moment the screen lights up. I currently use no start up image, but might add the, "NO SMOKING," found on my TS80.
I am seeing a cold tip temp of 128F, so perhaps I need to perform a calibration. However, I'll need to familiarize myself with the details of the calibration function first, to be sure. Ill submit my calibration number, as requested, should I wind up doing it.
I'm too excited to read the menu documentation yet, so maybe this is addressed another way, but one thing I always wanted was "shake to confirm," when setting the temperature. This could possibly be applicable to other configurable parameters too, but just now, when I set things up for the first time, the menu was so responsive, and intuitive, I only found want for this feature when setting the temperature. In my experience, pressing either button adjusts the temp parameter, and holding either button adjusts the parameter in bigger steps, so confirming the setting requires the unsatisfying act of waiting for it to time out. Anyone who has ever used a PAX vaporizer, is likely familiar with the intuitive, and satisfying nature of, "shake to confirm/set."
Lastly, the firmware update went differently for me, than other descriptions I've read. On Windows 10 64 bit, I connected TS80P, to a USB hub (technically, the second hub in a 3 hub daisy chain, at the end of a 50 ft. active USB 3.0 cable run,) while holding button, in order to enter DFU mode. A folder browser window opened, displaying the TS80P's storage, which contained a couple invisible files/folders. I dragged, and dropped the hex file below the invisible files/folders, and the TS80P disconnected from Windows. It continued to display DFU while I patiently waited for further indication, and Windows eventually regarded it as an unrecognized USB device. I decided to power cycle the TS80P, and upon boot up, the new firmware was loaded! Probably could have power cycled just a couple seconds after disconnect. No errors, nor odd behaviors yet.
Thank you, sincerely, for recovering my investment. Thanks to all who have contributed. IME, with stock firmware, the device was not worth more than 1/4 of what I paid for it. (Shameless self plug incoming:) Donating (PP) was a no brainer, and I couldn't have been happier to do it. Pardon the wall of text. Cheers-
Tip! HOCO silicone cables on AliExpress are high quality, and legit. 1m/2m, A to C, available in a few colors, and 1.5m PD C to C. AVOID: anything described as, "liquid silicone," "liquid silica gel," cable..
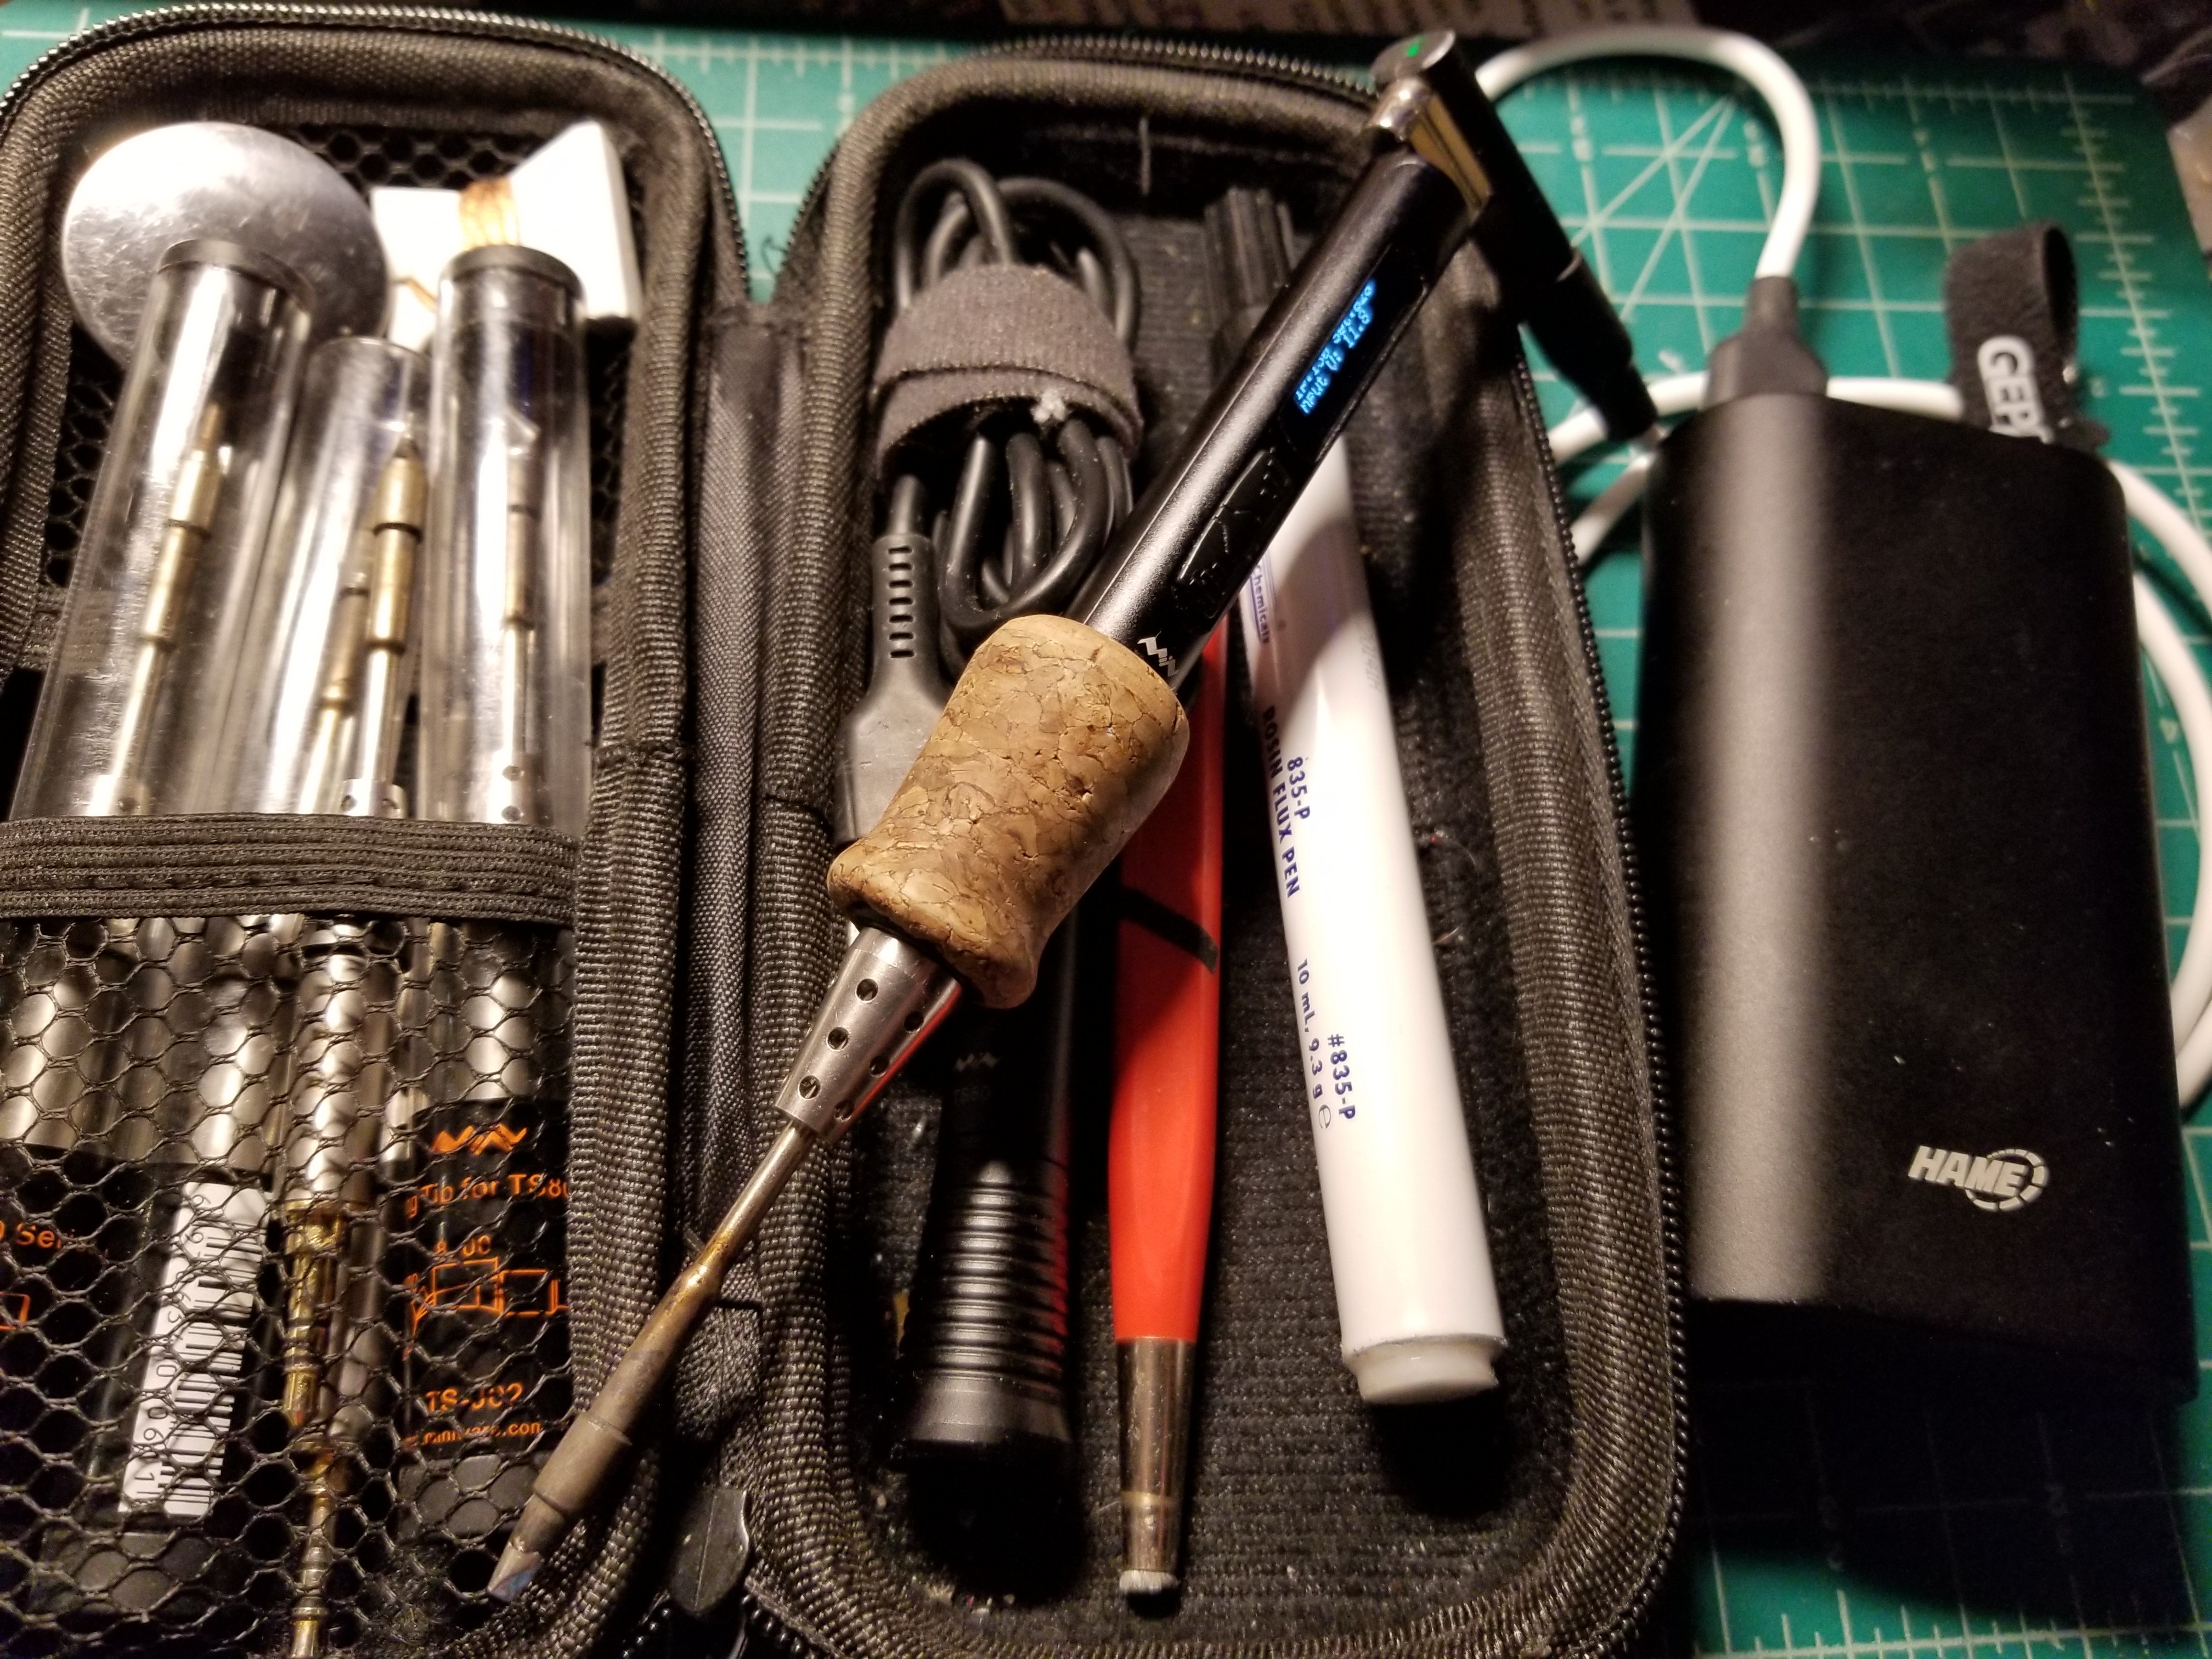
 SantiCO19
on 19 Oct 2020
SantiCO19
on 19 Oct 2020
I can't get the custom logo to work, the iron will not boot, any ideas?
 philberndt
on 25 Oct 2020
philberndt
on 25 Oct 2020
I can't get the custom logo to work, the iron will not boot, any ideas?
I suppose you did try the python script and you got a hex??
also, consider copying the file and then when the drive mounts again copy the file again
are you getting an ERR or a RDY file after you copy the hex
and last :) is this the process you follow ? https://github.com/Ralim/ts100/blob/master/Documentation/Upgrading.md
stiliajohny
on 25 Oct 2020
I can't get the custom logo to work, the iron will not boot, any ideas?
I suppose you did try the python script and you got a hex??
also, consider copying the file and then when the drive mounts again copy the file againare you getting an ERR or a RDY file after you copy the hex
and last :) is this the process you follow ? https://github.com/Ralim/ts100/blob/master/Documentation/Upgrading.md
Ok, I was using the windows GUI, python worked great, Thanks!
philberndt
on 28 Oct 2020
I've missed this chat, I've had so much going on(negatively, unfortunately) that I haven't even made one attempt in the last couple of months to upgrade my firmware.
I kept getting notifications to my email about this chat, and every week or two, I'd go back to wanting to come back and read every message and spend hours responding to everything relevant.
I still haven't even used my device yet, and I've got numerous tasks that have been staring me in the face., really wish I had ordered a brass ball from Ali already.
I didn't have too much free time to do this message, but I have full intention of going back through the last few months, tagging and responding to everyone who responded to me or made a suggestion to my issue; as well as bringing up any interests I have in what's already being discussed.
I hope everyone has a Merry Christmas/Happy Holidays and a solid New Year.
Beyond246
on 22 Dec 2020
@SantiCO19 I just spent a while and couldn't seem to find them, do you have a link possibly?
Also, what thought process behind disregarding"liquid silicone" and "liquid silica gel" is there?
Beyond246
on 22 Dec 2020
@SantiCO19 I just spent a while and couldn't seem to find them, do you have a link possibly?
Also, what thought process behind disregarding"liquid silicone" and "liquid silica gel" is there?
Absolutely. I can't imagine there being cables superior to these, for our application. They are top mechanical, and materials, quality, and very reasonably priced [cheap!] Here are the ones I can vouch for, since I purchased from these exact listings:
A to C -
https://www.aliexpress.com/item/32858516897.html
https://www.aliexpress.com/item/32858133254.html
C to C PD-
https://www.aliexpress.com/item/4000764411868.html
https://www.aliexpress.com/item/1005001319407551.html
Here are some others that I would wager are legit, but I have not purchased:
A to C -
https://www.aliexpress.com/item/32863822101.html
https://www.aliexpress.com/item/4001089039267.html
https://www.aliexpress.com/item/4001233955218.html
Regarding my warning about "liquid silicone," each cable I purchased with this description turned out to be some nasty stiff cheap plastic cable. Further, they did not pass the spec'd current, so weren't even good for a standard use cable. And if you dig down in the listing deep enough, after calling the material 'liquid silica gel,' 'liquid glue,' and other things, you will see they finally labeled in one instance as, "PVC." If I'm not mistaken, that stuff makes highly toxic fumes when heated, so definitely not good for any electrical application. Here is an example to STAY AWAY FROM:
DO NOT BUY (confirmed) -
https://www.aliexpress.com/item/4001241922449.html
Hope this helps! Think I had spent my budgeted time on my original post, hence no links in the first place.
SantiCO19
on 23 Dec 2020
really wish I had ordered a brass ball from Ali already.
@Beyond246 Pay a little extra and get in the UK/elsewhere from RS Components(next day collect or delivery), CPC, amazon/ebay. The brass ball is wonderful, although a wrung-out sponge serves well enough. Good luck taking the plunge and using it for something...
Also I enjoyed this thread like a long running gossip column / hackaday comment section about my favourite new toy the TS80P, so thanks and happy holidays to all.
tyeth
on 23 Dec 2020
Do hope the PD compatibility can indeed be improved somepoint, I actually picked up a small PD battery pack recently that seems to not be negotiated with at all ( but laptop does negotiate to the specified 18W ), but forrtunately it does have QC3 that works and actually gives out 12v at about 2A, but I'd prefer to be able to use the silicone C-C cable directly without adapters.
 MacDragon
on 27 Dec 2020
MacDragon
on 27 Dec 2020
It can definitely be improved, however so far I have not been able to find any units that my iron will not negotiate with 😢
Probably going to generate some firmware with just different timings to test incase its just my unit that is a "golden sample" :/
Ralim
on 28 Dec 2020
Happy to help try and test anything against the powerbank I have ( also have apple 87/96W power supplies that can test against somepoint if something new to test there, I recall they needed some work still too )
MacDragon
on 28 Dec 2020
Confirming that I’ve still been unable to reliably power my TS80P from my 96W MBP 16” supply 😢
sdaitzman
on 28 Dec 2020
Actually, just retested the powerbank again and it does actually work, it just took longer to negotiate than I maybe expected!
Though it does seem not entirely reliably, hmm.
MacDragon
on 29 Dec 2020
How expensive is the power bank? 🤔
If it's cheap I might pick one up to test
Ralim
on 29 Dec 2020
It was pretty cheap from Lidl here ( think regular price was 15e, but I only paid half as were clearing them off ), so not going to be an easy availability one. Once it's going it works fine and actually supplies more power apparently than official rating says, at least iron says taking ~26W at 12V, bank is supposed to be 18W rated. I was just using it for an hour or two soldering some light strips just now, but seems to be touch and go whether it negotiates first time before bank cycles off, but if just leave it, it power cycles and then successfully seems to negotiate second time round.
MacDragon
on 29 Dec 2020
Ah, so that may be the fun of not all power supplies "yell" their specs for long enough for us to get through the miniware boot code as well.
Hmm.
Will have a look into that a bit more, can probably shuffle some stuff a bit more to try and improve it.
if PD fails with CRC errors, the power supply will reboot and re-try which is possibly whats going on.
Ralim
on 30 Dec 2020
Sounds possible, if there's some simple stuff that could be tested easily I can help, already got cubeide installed for some other project stuff so I can change variables and recompile most likely to iterate something, and if there's some easy way to hook up debug stuff I have a j-link too.
MacDragon
on 30 Dec 2020
Btw. with the dfu flashing, what status/error does .NOT indicate? not ready or not right firmware?
edit: not right firmware I guess, forgot it was the .hex and not the .bin supposed to copy.
MacDragon
on 31 Dec 2020
.NOT means that it was not interpreted as a valid HEX file is my guess so far. Generally only had that issue when I've sent a hex in invalid address range or accidentally senta bin or elf instead.
Ralim
on 31 Dec 2020
Just finally updated to Pencil release from official firmware v1.23 because
my Innatek charger (60w) kept resetting the TS80P. Got away with dragging
the hex from the zip :)
New firmware looks good, love the Extra info screens.
Had one reset so far and a few times starting at 5V rather than the 12V
set. Seems reliably at 12V now every time so I'll have to keep an eye on
it.
My saving grace so far / best purchase was the Ravpower PD Pioneer 20ah 60W
powerbank (RP-PB201) as it works flawlessly with any firmware/device.
On Thu, 31 Dec 2020 at 13:23, Ben V. Brown notifications@github.com wrote:
.NOT means that it was not interpreted as a valid HEX file is my guess so
far. Generally only had that issue when I've sent a hex in invalid address
range or accidentally senta bin or elf instead.—
You are receiving this because you were mentioned.
Reply to this email directly, view it on GitHub
https://github.com/Ralim/IronOS/issues/630#issuecomment-752957618, or
unsubscribe
https://github.com/notifications/unsubscribe-auth/ABTBZ42WZ4ZN65X6TMVO43DSXR3OLANCNFSM4NHYDSSQ
.
tyeth
on 11 Jan 2021
@SantiCO19 thank you very much for the cable recommendations. My original MiniWare C to C cable broke (the metal USB C plug got ripped from the plastic part) and I've been looking for a good replacement.
I've ordered the 2m black Kuulaa cable:
which I've just received and it's awesome. Not as flexible as the original one, but close. Extra length is also nice as it gives greater freedom of movement when soldering. I can certainly recommend this one myself too.
yawor
on 25 Mar 2021
@SantiCO19 thank you very much for the cable recommendations. My original MiniWare C to C cable broke (the metal USB C plug got ripped from the plastic part) and I've been looking for a good replacement.
I've ordered the 2m black Kuulaa cable:which I've just received and it's awesome. Not as flexible as the original one, but close. Extra length is also nice as it gives greater freedom of movement when soldering. I can certainly recommend this one myself too.
That cable isn't described as silicone on that page, rather TPE?
MacDragon
on 25 Mar 2021
@nklsol
I found it to be the least destructive, if at all, to use a sewing thread, wich you gently work under the button from one side, using some kind of sharpened or flattened toothpick or a pick. Than just pull up both ends and the button will come loose, revealing the screw beneath it.
After removing the upper shell, gently bend the PCB upwards in the middle, whilst pulling it out from the lower shell.
That's it you should now be holding the PCB in your hands, without having destroyed it. 😃
Hopefully this is, what you were looking for.
kind regards
discip
on 30 Mar 2021
@SantiCO19 thank you very much for the cable recommendations. My original MiniWare C to C cable broke (the metal USB C plug got ripped from the plastic part) and I've been looking for a good replacement.
I've ordered the 2m black Kuulaa cable:https://www.aliexpress.com/item/1005001319407551.html
which I've just received and it's awesome. Not as flexible as the original one, but close. Extra length is also nice as it gives greater freedom of movement when soldering. I can certainly recommend this one myself too.
That cable isn't described as silicone on that page, rather TPE?
Indeed. Looking at my order history, the KUULAA cable I purchased is described as liquid silicone like this listing, but when I click it, I am taken to this listing which does not contain the word silicone. However this is moot, as both show TPE in the graphical description.
The cable is truly nice quality, very soft, and similar to silicone, and it consistently passes 60w to any device calling for it. If this material is heat resistant then my warning about "liquid silicone," must be taken less strict. (The other two cables I purchased with that description truly were garbage in form and function though.) But if it is not heat resistant then I stand by my warning for those after a true replacement. The only thing left to add is that, as it stands untested for heat resistance in my hands, this is one nice cable that I would buy again, and commit to other purposes if necessary.
After another look, this HOCO C to C may not be silicone either, but it also similar in feel, and quality, and is an excellent cable as well.
I guess the only true Silicone cables are the HOCO A to C, and I must say the cord on these is superior.
I also have to add my recommendation for a RAV Power, PD powerbank. This thing is a beast at 90w output, and is also quick to take a charge accepting 60w at the input.
Lastly, this inline Type C PD/QC/etc. meter/tester/trigger seems a steal at $21, and it is feature loaded, nicely documented, and firmware supported. The seemingly fragile female Type C plug (protruding) can be firmed up rock solid with a small bit of Insta-Morph, and very little effort. It has been very handy in identifying PD chargers that fail to negotiate the proper voltage with some devices, and certifying the good ones.
SantiCO19
on 30 Mar 2021
Related issues
 Dag0d
·
5Comments
Dag0d
·
5Comments
 Nazosan
·
4Comments
Nazosan
·
4Comments
 notwired
·
7Comments
notwired
·
7Comments
 jonnieZG
·
4Comments
jonnieZG
·
4Comments
 Lenbok
·
8Comments
Lenbok
·
8Comments
Most helpful comment
@discip Ah awesome :)
Yeah I'm not sure what i will think of the metal handle slide. I wonder if it will fit in the older TS80 plain case if you prefer its style? (I'm only guessing)
I'm sort of expecting that, it would have extra conductors in it i guess :| Still should be better than the ones i have here 😁
I would expect it to be missing the USB3.0/ high speed data pairs as they would be useless. There are USB-C plugs I often use that only have the USB2.0 pins fitted as they are much easier to solder. Possible its that style of connector.
I'm hoping mine will turn up soon. Once it does expect me to start poking at its support 😀