I'm submitting a ...
- [X] Feature request
Do you want to request a feature or report a bug?
Feature, adding TS80 build support
The TS80 runs very similar hardware to the TS100 iron. The firmware does not need many changes to support this.
* Changes To do / Progress *
- [x] Pinout updates to support moved pins
- [x] Update ADC Code to use the newer pins
- [X] Update ADC Scaling to support different power input ranges
- [X] Implement Quick charge 2 & 3 support
- [X] Implement tip resistance calculation for adaptive voltage
- [25%] Update tip gains for the TS80 tips
- [X] Test the new bootloader to see if it can be backported - Yes but no real gain
 Ralim
Ralim
All 554 comments
Hi, I'm thinking about porting the STM32 USB-PD (Power Delivery) to ts80, but I'm not quite sure about the hardware of TS80. I mean, will the hardware of TS80 support 20V 2A?
 cnnblike
on 30 Aug 2018
cnnblike
on 30 Aug 2018
Hi @cnnblike ,
Sadly the TS80 does not support 20V (will die around 16V).
AND
The connections are not made for the USB-PD pins (No CC Pins).
There is only wiring to the D+ and D- pins.
I have already poked around to try and see about PD since I have more PD than QC chargers, but nothing can be done on this hardware sadly :(
Ralim
on 30 Aug 2018
Oh, thank you for your reply @Ralim
That's a pity. Thought this may work.
cnnblike
on 30 Aug 2018
Yeah :( I can dream of everything being neat like this.
I'll keep on the manufacturers case to try and push for a USB-PD model, but I feel that it might be a ways off.
Though, a really nice product if your up for it, that is on my to-build list but buried too far deep would be to make a small USB-c inline adapater that converts between USB-PD and Quick Charge 3.0.
If you have interest in making that ^ hit me up via email and i'm happy to have a yarn about it.
Ralim
on 30 Aug 2018
Maybe sometime when I had more free time :D
But think about it, maybe building a TS12 tips compatible, 3d-printable, USB-PD/QC3.0 compatible iron will get much more attention and be more attractive for the most hobbyists.
cnnblike
on 30 Aug 2018
something like this?
https://hackaday.io/project/18899-rt-soldering-pen
 willumpie82
on 30 Aug 2018
willumpie82
on 30 Aug 2018
@cnnblike I agree, I would love a TS80 shell that can take even TS100 tips with USB PD. Maybe we will get it soon if they like us all lol
Ralim
on 4 Sep 2018
Progress is happening on this FYI to anyone reading, I just edit the top comment to track progress. Getting towards a releasable build soon.
Ralim
on 4 Sep 2018
Would it be possible to use this with a regular 12V/9V supply instead of QC, e.g. by detecting a higher voltage on the input?
 ge0rg
on 8 Sep 2018
ge0rg
on 8 Sep 2018
Yep, already supported.
Note that going much above 9v will pull more than 18W and I haven't tested how the tip and tip connector will last.
Ralim
on 9 Sep 2018
The Weller WRMP pushes 40W through a similar 3.5mm connector, so the ~30% overclock from running the TS80 at 24W from a 12V supply shouldn't be a problem, though I do understand it's what's inside the plug that actually matters.
If it is though, implementing a power limit by calculating the maximum PWM duty cycle to keep it under 20W shouldn't be that complicated I'd reckon?
 JohnEdwa
on 10 Sep 2018
JohnEdwa
on 10 Sep 2018
The changes over at #275 will come into play here nicely.
My biggest concern is just peak current rating and if the connector starts to heat, since if it heats it becomes a more significant drift in the temperature measurement.
I'm going to keep the QC code negotiating for 18W as thats the max for most adapaters (all?). However I wont stop you feeding in more. Note that some of the circuitry is only rated to ~16V though.
12V should be a nice point though. Also interested to look into the options for taking the voltage up higher anyway and just having a more stable PID.
Ralim
on 11 Sep 2018
I thought I remembered it right, the stock firmware has the power setting from 16W to 24W, even though QC3 only supports up to 18W. But it would indicate the iron can handle 12V no problem.
JohnEdwa
on 11 Sep 2018
Nice catch, I never had the original firmware work well on my unit so I haven't been through it thoroughly yet. I have also had confirmation that 12V 2A is supported by the unit which is really good.
Though negotiating for 12V may come later on in my firmware since I want to do the tip calibration and then push out a beta version.
Ralim
on 11 Sep 2018
Will it accept firmware update from TS100? Will it turn into a brick afterwards? Are there any TS80 bootloader-compatible firmware updates in the wild?
 joric
on 21 Sep 2018
joric
on 21 Sep 2018
@joric if you flash the ts100 firmware it will not die, but the pinouts are only similar on the OLED. Nothing else will work.
Not that I know of yet.
If you want I can upload a build of my TS80 fork here for you, its only really waiting on time to tune in the tip temperature calibration.
Ralim
on 21 Sep 2018
Yeah, I guess, not only for me though. Could be useful for all ts80 owners if something goes wrong.
joric
on 21 Sep 2018
Yeah, its currently just an issue where the temp cal is fairly far whacked out atm (like 30 C).
Cant do much else atm though, no time for development.
Ralim
on 21 Sep 2018
Haven't tried your firmware yet, just got an iron today. Apparently it's QC only and doesn't even power on with Xiaomi 65W QC/PD Laptop PSU (CDQ07ZM). Any ideas why? That's pretty bad, I thought I wouldn't need another Type-C cable on the table. Also that 3.5 mm jack isn't too sturdy and wobbles, aluminum sleeve doesn't help very much, maybe it's worth to get carbon one. My TS80 unboxing video: https://youtu.be/xc-yIq0m54o
joric
on 21 Sep 2018
It is a QC3 device, it won't work with PD! QC is a proprietary protocol that is not compatible with the USB-PD standard.
The 3.5mm Jack shouldn't take the strain at all and the mental housing takes the force. The only TS80's I have seen have all been fairly snug with justa little bit of wiggle which is normal.
In my firmware I'm allowing 5V operation as a fallback which works with some PD chargers that don't follow the spec completely.
Also their charger does the higher 24W support which is good.
EDIT: that charger looks to be PD only from what I can see.
Ralim
on 22 Sep 2018
This would be perfect for using the TS80 in the field https://www.indiegogo.com/projects/omni-ultimate-a-new-generation-of-power/x/4042493#/updates/all
 andersvos
on 22 Sep 2018
andersvos
on 22 Sep 2018
@andersvos $16 Xiaomi 10000mAh Mi Power Bank Pro works just fine, TS80 only supports 18W (12V * 1.5A) max, I have one of those https://www.aliexpress.com/item//32826648959.html
Funny that Xiaomi 65W PD Laptop charger (CDQ07ZM) charges this powerbank but doesn't power up the iron directly. May be used as intermediary device.
Upd: sorry wrong link, I have one of those, it's rather $25 than $16. Correct link: https://www.aliexpress.com/item/Xiaomi-Mi-Powerbank-PRO-10000mAh-Power-Bank-External-Battery-Type-C-Portable-Bateria-Externa-Portable/32802457619.html
It's rated 12V*1.5A (18W) Max. Supports "double way Quick Charge" whatever this is, but charges just fine from my PD charger (TS80 doesn't work with the PD charger but works with the power bank).
Doesn't look like the $16 power bank (PLM01ZM) is much different from that $25 one (PLM03ZM). I guess the difference is Type-C that AFAIK is input only (at least it doesn't charge my phone from Type-C).
Here's comparison of those two models:
https://www.hardwarezone.com.sg/tech-news-do-you-know-there-are-2-versions-xiaomi-mi-power-bank-pro-we-tell-you-differences and yeah USB-C port is only for input
_The PLM01ZM and PLM03ZM are the same for the most part. However, the newer PLM03ZM’s fast charge controller also supports Qualcomm’s Quick Charge 3.0 (PLM01ZM only Quick Charge 2.0). So there will be some gains if you pair it with a QC3.0 charger (to charge the power bank) or use it to charge a QC3.0 device._
I really don't know if QC2.0 is compatible with this iron, maybe someone here can tell.
joric
on 22 Sep 2018
@joric
The Omni has QC 3.0 too, and has more than double the capacity.
andersvos
on 23 Sep 2018
@Ralim would you have a test version of the firmware available?
 gbraad
on 23 Sep 2018
gbraad
on 23 Sep 2018
@andersvos
Oh boy! Has the same features and double the capacity of the $16 power bank! So, quick math, 16*2 = 32, how much is the Omni again?
120VAC $299 USD + Shipping
$599(50% Off)
230VAC $325 USD + Shipping$599(45% Off)
Oh. So you can buy 20 Xiaomi power banks right now, or donate money through kickstarter for one Omni you might get somewhere in the next two years, if you are lucky.
There's absolutely no reason to buy the Omni unless you have a real need for the AC inverter output, and even then I'd buy something that actually exists, and not donate through kickstarter.
JohnEdwa
on 23 Sep 2018
@Ralim looks like we got stock 1.06 firmware hex from minidso (no sources yet but it could be helpful to restore TS80 to factory state). Direct link to file: TS80.V1.06.hex (from this forum post). I just've flashed using stock DFU bootloader it and I confirm it works and temperatures seem to be accurate.
joric
on 24 Sep 2018
@joric QC2 should work on their firmware from my reading.
QC 2.0 is implemented on my firmware, but I have nothing I can test with over here :(
Here is a rough build, will feel very similar.
Still needs temp cal.
Would love feedback on if QC works for you.
TS80.zip
Ralim
on 24 Sep 2018
@Ralim I tried the firmware, but the first time it started the OLED stayed black, but it would draw power when I pressed the button. After unplugging and replugging it showed v1.06 and it felt like it started the old firmware?
gbraad
on 24 Sep 2018
How did you try and do the upgrade ? Did you make sure to do it twice if it threw an error etc ?
Ralim
on 24 Sep 2018
I retried it 3 times, and eventually it worked and showed the .RDY file.. it didn't feel like it rebooted, but dismounted and shows the disk drive (not able to open)... I disconnected and reconnected and it works. It even heats on 5V from the laptop.
the flipping of the display seemed to fault at first, but it works... will come back with more info after some testing.
gbraad
on 24 Sep 2018
@gbraad if you've used stock silicone cable it's pretty bad for data (losses, etc.), try another one.
@Ralim worked for me right away. Temperatures seem about accurate.
Video
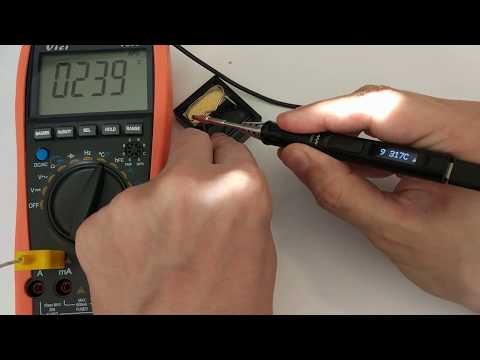
Buttons pictures seem messed up (left button picture should be heating up and right button picture should be settings) and auto orientation is mad (had to set fixed orientation) but otherwise it's OK.
Also the whole screen assembly was shifted a couple millimeters to the right I had to disassemble the iron and center the screen (it's on the flex cable glued with a little bit of adhesive). I guess all TS80 screens are slightly off-center.
Had a few troubles building it. Master branch builds fine but TS80 branch was somehow messed up.
./src/Setup.c: In function 'MX_ADC2_Init':
./src/Setup.c:194:20: error: 'TIP_TEMP_ADC2_CHANNEL' undeclared (first use in this function)
  sConfig.Channel = TIP_TEMP_ADC2_CHANNEL;
Figured out it should've been either make -j16 lang=EN model=TS80 or model:=TS80 in the Makefile then it builds (with a few warnings, same warnings as with the master branch):
./src/hardware.c: In function 'seekQC':
./src/hardware.c:197:4: warning: implicit declaration of function 'vTaskDelay' [-Wimplicit-function-declaration]
    vTaskDelay(3);
    ^
./src/stm32f1xx_it.c: In function 'UsageFault_Handler':
./CMSIS/core/core_cm3.h:1616:22: warning: inlining failed in call to 'NVIC_SystemReset': call is unlikely and code size would grow [-Winline]
 __STATIC_INLINE void NVIC_SystemReset(void)
                      ^
./src/stm32f1xx_it.c:35:2: warning: called from here [-Winline]
  NVIC_SystemReset();
  ^
Also languages are not up to date, apparently, building make lang=CS_CZ model=TS80 shows:
./src/Translation.cpp:200:36: error: conflicting declaration 'const char* SettingsDescriptions [17]'
 const char* SettingsDescriptions[17] = {
In file included from ./src/Translation.cpp:7:0:
./inc/Translation.h:21:20: note: previous declaration as 'const char* SettingsDescriptions [20]'
 extern const char* SettingsDescriptions[20];
But otherwise it builds and works just fine (I've successfully uploaded and tested it on the iron).
Custom logos also work (just uploaded logo.hex the same way as fimware and it worked).
I'm using Windows 10 WSL with Ubuntu 16.04, arm-none-eabi-gcc 4.9.3.
joric
on 24 Sep 2018
@joric whats the stock cable like ? (In my sample I didnt get the nice cable)
Glad to hear it flashed ok :)
Yeah the accelerometer is mounted in a different orientation in the TS80, need to figure out which way round the rollover should be :)
I'm not sure about the screen, its centered on my unit but mines pre-production :| Would love to hear others feedback on this.
I'm planning to merge the TS80 fork into mainline so that translations can be updated, haven't finished work on the firmware but want to get something somewhat out there :)
- Ill keep this issue here for tracking progress on the TS80 support
Ralim
on 25 Sep 2018
@Ralim it's 1m Type-A/Type-C heat-resistant black silicone cable, very soft but I couldn't copy large files from my phone to USB 3.0 (I have no USB 2.0 ports) with it, everything freezes and stops midway.
joric
on 25 Sep 2018
Did anyone try to combine
this
https://www.aliexpress.com/item/DC-DC-Power-Buck-Module-6V-32V12V24V-To-QC3-0-Fast-Charging-Single-USB-Charging-Converter/32864270116.html?spm=a2g0s.8937460.0.0.46132e0e584p43
with this
https://www.aliexpress.com/item/-/32856814801.html?spm=a2g0s.8937460.0.0.46132e0e584p43
to get type c pd to qc3 for about 15$ I would assume some efficiency loss but worth it
 Zyzto
on 25 Sep 2018
Zyzto
on 25 Sep 2018
@Zyzto I use PD-chargeable power bank for that (CDQ07ZM), roughly about the same :) There is X-CUBE-USB-PD stack, part of the STM32Cube software-development ecosystem, that can be downloaded, free of charge, from https://www.st.com/en/embedded-software/x-cube-usb-pd.html not sure if it's possible to add PD support with firmware-only mod though. There are several examples on github how to setup the USB for 12V 6A and it seems to be fairly simple.
joric
on 25 Sep 2018
@Zyzto Havent tried but should work, and if it doesnt happy to try and figure out why :)
@joric Please see the first comments in this thread. PD support cannot be added as the frontend required is missing (and there is no connections at all to the CC pins).
Ralim
on 25 Sep 2018
@Ralim but here they are! If they're not connected that would mean hardware mod, I don't like those. D+ pins are definitely connected through vias. Can't really check CC vias, there's OLED soldered on top.

joric
on 25 Sep 2018
@Zyzto interesting. I'll have a look on Taobao (/me lives in China [expat]).
gbraad
on 25 Sep 2018
Miniware has published official TS80 firmware source code (currently 1.06):
joric
on 25 Sep 2018
@joric Yeah hardware mods are what I'm trying to avoid.
Honestly not worried about trying to get PD in the unit, but rather would inline an adapter :)
@gbraad Let us know what you find, lucky to live over there :)
Ralim
on 25 Sep 2018
Hi to all.
Cannot understand why my TS80 can't be powered from a Blitzwolf 15000mA power bank that claims to have Qualcomm QC3.0 certified.
Every time I plug the iron in the dedicated QC3.0 USB port of the Powerbank the Iron goes off and displays Low Vot.
It seems the power bank cannot deliver more than 5V output, but plugged into a powermeter and a phone it recharges it in QC2.0 mode..
Any hints?
Best regards
 Houseman74
on 26 Sep 2018
Houseman74
on 26 Sep 2018
Hi,
I cant really provide support for the official firmware, but is your power bank QC3 or QC2.0 ? Both should work but some units are more fussy than others. Not all "QC" banks actually follow the standard :(
Do you have an inline usb power meter that can show you the voltages on the D+ and D- pins?
Ralim
on 26 Sep 2018
Hi Ralim
Thank you a lot for your quick reply.
My power bank is following: BlitzWolf BW-P5
bought at:
https://it.aliexpress.com/item/BlitzWolf-BW-P5-15600mAh-Quick-Charge-QC3-0-Dual-USB-Power-Bank-Universal-Fast-Charging-For/32783530009.html
Everywhere it shows a full QC3.0 support.
Power meter shows D+ 1,66V D- 1,65V when connected to the powerbank QC3.0 port.
I saw one hour ago that mindso posted at this link:
http://www.minidso.com/forum.php?mod=viewthread&tid=3225&extra=page%3D1
an unofficial fork, but apparently supported by them in which it claims:
"On the basis of 1.06 firmware issued by the government , a firmware was made to
solve the problem that TS80 solder pen can not be used under the mobile power
supply. It was named 1.06s. The solution is as follows."
The firmware.hex file is 80kB and the fact is that I cannot load it into the ST32 Mass storage device since there is only 8kB in disk.
Am I doing something wrong??
Is the disk E: one that displays once inserted the TS-80 in the USB port of a PC right?
Best regards.
Steve
Houseman74
on 26 Sep 2018
Looks like that power supply supports QC, but those voltages are fairly out (typically 3-3.3V is used).
That fork is to stop power banks going to sleep, it probably wont help your bank not working.
If you check the main page of this repo or the booklet that came with your iron, you need to hold the front button while connecting to the computer to boot up into the bootloader mode to let you update the firmware (It will say DFU on the screen). Then you can drag and drop the file onto it to flash it.
If you get the hang of flashing the firmware OK, you could try the experimental build of this repo that i posted up above instead, as I have a different implimentation for the QC etc so it may behave better / worse.
Ralim
on 26 Sep 2018
Yes You are right. Sorry of course I have to start in DFU mode (as all the MINIDSO units)..
And Yes you are right, the upgrade does not fix the problem.
Low-Vot displayed also.
What does it mean. The power bank is not fully QC3.0 certified or is the TS-80 tight?
Regards
Houseman74
on 26 Sep 2018
All good :)
Not quite sure whats going on, can you try my firmware and check against it as well ?
Ralim
on 26 Sep 2018
of course I will.
I let you know.
Thanks
Houseman74
on 26 Sep 2018
Sorry where can I find the TS-80 FW?
I see all TS-100 FW..
Regards
Houseman74
on 26 Sep 2018
https://github.com/Ralim/ts100/files/2409546/TS80.zip
Further up this thread :)
Ralim
on 26 Sep 2018
Genius!!!!
It works!!!
Man, you made my day!!!
Thanks a lot!!
Houseman74
on 26 Sep 2018
No problem, the firmware has a few rough edges (temp cal isnt perfect, doesnt support >18W mode) but should be usable until i get a full release out soon :)
Ralim
on 26 Sep 2018
Thaks pal. Just a few question:
what has been changed in the source to enable use of QC3.0 different from the original one?
Where is your main page for the new releases of TS-80?
I can only see TS-100 one..
why isn't the ST32M drive shown anymore once plugged in?
thanks
Houseman74
on 26 Sep 2018
Entirely different code :) Basically the TS100 and TS80 are very similar in hardware and as such I extended the TS100 code to work on the TS80 (Thats what this issue here is to track my progress on).
So the code that does the QC3.0 negotiation is totally different to theirs (though inspired by theirs, and using some of the docs on QC they sent me).
The TS80 builds will show up in the releases tab alongside the TS100 firmware when I make a full release when all the features are working
There is no drive anymore, just the menu on the device :)
Basically, this code is build with the free GCC toolchain, which is not as good at optimising as IAR, so way back in the beginning of all this, I took out the virtual drive to make room for extra features instead :) But dont panic, DFU mode still works fine so you can still upgrade etc the same.
Ralim
on 26 Sep 2018
Off-topic; but so far I have only found a QC to PD fast charge converter. I hadn't spend a lot of time on this before, but it seems QC is a very common for the Chinese versions, so very understandable they also choose this for the TS80. I do not agree, but I understand the choice.
Update: Well, I did find this, which is what they call a 'decoy PD/trigger' to convert to several other protocols. Will have to verify, but looks like a device which could work.
gbraad
on 26 Sep 2018
@gbraad I think one jumper wire (two wires, tops, in case if CC's are not already connected on the rear side of the PCB) and firmware support is much better than a bunch of ugly adapters. Google for example hates QC and deprecates QC support in favor of PD (here).
joric
on 27 Sep 2018
to not to take it further off-topic we perhaps would have to discuss this somewhere else. (and yes, I also dislike having to take additional adapters, but soldering inside is also not really preferred).
gbraad
on 27 Sep 2018
Chinese power banks use QC a lot as phones use it, where as PD was really designed for laptops etc.
QC costs about 3 resistors (basically free) to support, where as PD is a much more complicated protocol (1 wire ethernet anyone). PD would require a much larger AFE or a dedicated PD chip.
PD isnt really going to be easy to modify into the existing units.
For example, here is ST's descrete AFE :

So if we were to go to doing something like this, it would be better to try and mod a STUSB4500 IC into the unit.
QC is a ugly pain that legally requires you to pay licensing. PD is at least an open standard.
@gbraad Also feel free to start a new issue to discuss options on all of this :)
Ralim
on 27 Sep 2018
@Ralim There's software implementation by Reclaimer Labs (not sure about circuits needed for this, I thought it's enough to hook up MCU pins to USB pins) but it's 5000 lines of code, including a 1200 line state machine with 29 states that uses 70% of the Arduino program space, hell knows if it's doable but that PD looks like even bigger abomination than QC now :)
joric
on 27 Sep 2018
@joric
I have the FSUSB interface that code uses. That code impliments the state machine but none of the signalling on the wire, so going with a descrete AFE (like above) requires even more code. Which is why I like the STM IC's instead for PD as they have the state machine inside them (but cost slightly more).
usb PD is a hell of a protocol, and takes a large amount of space if you try and program the state machine etc internally. QC is annoying because of the supposed secrecy around it, but PD is just massively complex because of all the things it supports. (PD is actually a subset of the functions that interface supports).
Ralim
on 27 Sep 2018
Is there any test firmware we can try on? I've been waiting for TS80's support the day it came out :)
 1461748123
on 28 Sep 2018
1461748123
on 28 Sep 2018
Scroll up and you will find a zip file (a test file was released a few days
ago)
On Fri, Sep 28, 2018 at 2:58 PM Brian notifications@github.com wrote:
Is there any test firmware we can try on? I've been waiting for TS80's
support the day it came out :)—
You are receiving this because you were mentioned.
Reply to this email directly, view it on GitHub
https://github.com/Ralim/ts100/issues/349#issuecomment-425341097, or mute
the thread
https://github.com/notifications/unsubscribe-auth/AAAHZgE5aS34lcAaxsW3brsuP-njQCXPks5ufciigaJpZM4WO3WC
.
--
Gerard Braad | http://gbraad.nl
[ Doing Open Source Matters ]
gbraad
on 28 Sep 2018
Scroll up and you will find a zip file (a test file was released a few days ago)
…
On Fri, Sep 28, 2018 at 2:58 PM Brian @.*> wrote: Is there any test firmware we can try on? I've been waiting for TS80's support the day it came out :) — You are receiving this because you were mentioned. Reply to this email directly, view it on GitHub <#349 (comment)>, or mute the thread https://github.com/notifications/unsubscribe-auth/AAAHZgE5aS34lcAaxsW3brsuP-njQCXPks5ufciigaJpZM4WO3WC .
-- Gerard Braad | http://gbraad.nl [ Doing Open Source Matters ]
Thanks for the reply. I tried flashing it multiple times and keep getting .ERR file.
I'm not using the stock cable, I'm using a XiaoMi USB-C cable which is confirm working on my other devices.
Here's the .ERR file if it helps!
1461748123
on 29 Sep 2018
Hi,
That is very common on some computers, this is not the firmware but instead the way Miniware implemented updates. Try coping the file multiple times in a row or using the python loader script etc.
This is documented elsewhere on this repo :)
Ralim
on 29 Sep 2018
Hi,
That is very common on some computers, this is not the firmware but instead the way Miniware implemented updates. Try coping the file multiple times in a row or using the python loader script etc.
This is documented elsewhere on this repo :)
Thanks a lot! I tried again today and its working now. I will report back any issues related to the firmware!
1461748123
on 30 Sep 2018
Off-topic: currently resorting to the following solution:

This allows me to use USB-PD as the slim-tip cable requests 20V (this can also be used for the TS100), and the DC-DC converters understands QC and a bunch of other fast charging protocols. This way I can also use any regular ThinkPad slim-tip to power both irons.
gbraad
on 3 Oct 2018
@Ralim is it possible to draw 12V as supply voltage?
Someone reported that using the supplied the supplied silicone rubber cable he experiences noticeable dropouts of the voltage to below 8.4V I can't confirm at the moment
gbraad
on 3 Oct 2018
@gbraad in the Iron u can set off volt to 13 and I saw video where it reached near 11v so I guess if qc can hit 12v u can
Zyzto
on 3 Oct 2018
It's possible to use 12V, the limiting factor is power as most QC devices only support around 18W, but the hardware can do around 25W.
Going to be adding a menu to let you pick which wastage it goes for when selecting a voltage.
It does a tip resistance measurement and uses that to find the correct voltage, as most QC supplies will shut off suddenly if you exceed their power rating.
Ralim
on 3 Oct 2018
Could it be that the tips can't handle more than 18W and therefore it's limited?
 jvdmeulen
on 4 Oct 2018
jvdmeulen
on 4 Oct 2018
QC3 is typically specified at 18W, which is where that comes from. The tips can work with 24W happily if your charger can handle it. Sadly there is no way in QC world to ask what the charger can do, which is why it defaults to 18W to play it safe. Going to be added in a menu option to bump this to 24W soon.
Ralim
on 4 Oct 2018
18W
Right, even the included powerbrick offers 9V at 2A, or 9-12V at 1.5A. Only slightly more capable powerbricks, like some of the Lenovo Type-C bricks for laptops provide USB-PD and QC with 12V at 2A.
gbraad
on 4 Oct 2018
Someone reported that using the supplied the supplied silicone rubber cable he experiences noticeable dropouts of the voltage to below 8.4V I can't confirm at the moment
"Someone" = me :) I even use the same profile pic on YT as I do here ;)
My iron reports the voltage dropping to 8.2-8.3V when heating, depending on which supply I use (the QC3 supply that was supplied with the iron made concerning hissing/popping noises when I first plugged it in and it then died on me after only a few minutes' use - something on the secondary side of the transformer has gone short circuit, but I've not pinned down which component is faulty yet; several components measure as dead short, so it seems like a few components in parallel and only one of them has died). Thankfully I was in the middle of recording a video comparing the voltage drops of different supplies when that supply died, so I have actual video evidence of it that I can send to Banggood at some point!
As such, even though 1.5A @ 12V is nominally no more power than 2A @ 9V, we should see less voltage drop along the cable and therefore higher power available at the iron itself.
When powering the iron from my USB power bank, the voltage drops so low when heating that the stock firmware cuts out completely, but I suspect that the voltage at the power bank itself sags in that case. It's not a very powerful QC3 implementation (it can only handle 1.2A at 12V...) so I wouldn't be surprised if 9V drops a bit at 2A. Thankfully your firmware will happily heat at any voltage, otherwise I'd be in the market for a new power bank right now!
I've also confirmed that my iron is quite happy being fed 12V - I used a QC3 trigger module to request 12V from the supply and plugged that straight into the iron. But I think we knew that anyway :)
 aziraphale
on 4 Oct 2018
aziraphale
on 4 Oct 2018
@aziraphale so that was a shitty cable or what? I've noticed data transfer issues on this cable (copying large files from the phone, there were no issues with its stock cable). Sadly it was the only reason to buy the Pro Kit (well, that, and TS-25D tip).
joric
on 4 Oct 2018
The cable has thinner wires that I would like, but that helps keep it flexible.
If you want I can add to the loop to keep "hunting" the right voltage so that it can try and calibrate out the wire ?
We can just get 12V 2A easily as the tip is resistive, so current is directly proportional to the voltage.
The unit doesn't measure current sadly, so the control measures the tip resistance and then back calculates the voltage to gain the maximum power.
Ralim
on 5 Oct 2018
used a QC3 trigger module to request 12V from the supply and plugged that straight into the iron.
We knew, but is not the right way. If the software gets modified, it is possible without a trigger module ;-)
gbraad
on 5 Oct 2018
"Works" and "Will trip off the supply" are two different things.If your power supply supports 12V 2A then it will work nicely when I add support for 24W mode. (So be careful if your PSU doesnt support this).
Shouldnt harm anything, but would rather most people dont risk it so I can't be blamed :|
Ralim
on 5 Oct 2018
Ralim when will the next revision be ready? Also will I be able to get 12V@2A via a 3S pack without the QC? How much power can the hardware cope with safely?
 thepowersource
on 5 Oct 2018
thepowersource
on 5 Oct 2018
Currently under a fair but of work so not getting much forward progress.
Its currently usable but missing 18/24W selection.
12V it can usually cope with. As far as I know 25W is about the limit safely.
Ralim
on 9 Oct 2018
12V it can usually cope with. As far as I know 25W is about the limit safely.
This might be a bit offtopic, but what exactly limits the max power? I can't find any schematics anywhere, but I'm guessing it's some IC? I'm thinking about buying a STREF-SCS001V1 (when/if it's ever available...) and powering the TS80 with a 45W supply, but it sounds like I might blow it out...
 gji
on 9 Oct 2018
gji
on 9 Oct 2018
Thanks for the response Ralim. I would be interested in replacing a few components to make this iron higher powered like gji. It would be the ultimate portable iron considering the efficiency of the cartridges. I solder a lot of heavy AWG terminals and cables so the more power the better. I'll be holding off until the next firmware version is ready but am looking forward to see what this iron can really do!
thepowersource
on 9 Oct 2018
It would be good to take the chipset from the TS100 and combine it with the TS80 chassis and cartridges.
thepowersource
on 9 Oct 2018
As far as I am aware max power limit is the heater tip + 3.5mm connector used being rated for a maximum power of 2A. The main fet is around 6, the usb-C is 3A.
The PCB may not be laid out for more than 2A either but don't know an easy way to confirm this.
Basically the voltage supplied is adjusted to target 18 or 25W. Since there isn't a huge amount that can be done to control the maximum power easily. If you were to use it with a larger power supply I would just fix the output voltage at 12V and you should be fine :)
@thepowersource I think you will rapidly run into the limits of the hardware (tip and it's connector). It's not going to be a simple swap. If you want the higher power you are talking about and the TS80 just isn't enough then I would suggest just going with the ts100.
The TS80 at the 25W mark looks to be quite capable for most "heavy" wire I come across these days (approx 10awg). So long as you can stand to wait a little while 🙃
Ralim
on 9 Oct 2018
I might just have to accept the TS80 will not be able to work with the larger AWG stuff if it's connector and PCB are limited to 2A and the chip V limited. I'll probably still get a TS80 as it's the most promising iron out at the moment (obviously with your firmware), I'll get a 200W iron for heavy stuff. I hate melting connectors and insulation or putting crap loads of heat into surrounding parts when soldering large AWG cables.
thepowersource
on 9 Oct 2018
The range of tips for this iron seems kind of limited.
Is there any possibility to include support for Wellers RT-type tips?
 erivek
on 10 Oct 2018
erivek
on 10 Oct 2018
Marco Reps' review indicates that the pinout is different:
https://www.youtube.com/watch?time_continue=345&v=83STpUXHilk
gji
on 11 Oct 2018
The pinout for Weller RT tips are indeed different and are completely non-compatible. Might be possible to hardware mod these to work but i'm unsure at the moment if that would work.
Ralim
on 11 Oct 2018
Merged the initial support into master.
Throwing a build here to hopefully nail down any issues.
Please let me know if you have issues with the QC3.0 as I only have 2 devices to test with. Also would love any QC2 feedback.
TS80.zip
Running with a tight ~700 bytes free in the flash.
Ralim
on 11 Oct 2018
Will test... still waiting for some QC2.0 devices to arrive to test
against. Unfortunately the seller on taobao got ill and delayed to ship.
gbraad
on 11 Oct 2018
Hi Ralim. I will also test it tonight. Will let you know. Thanks for the great work!!:blush:
Houseman74
on 11 Oct 2018
Got my iron yesterday - worked through your september release last night quickly went through the menus (I really struggle using them cleanly - I think it's just a case of lack of practice) and everything seems good. Couple of option to calibrate not functional, but you know that (couldn't be bothered boiling water etc). But I like the general layout.
Just loaded October's offering, and it somehow feels less versatile. Cycling through yes/no is fine, but when you see the desired temp whizz by for the 5th time it's not so OK. Having said that its good to be able to use (what looks like) just about any power source in an emergency is great. My worst 1A powerbank melted solder which could save me a long walk someday.
Overall I like your style to date and I look forward to the next offering.
Thanks for your efforts
 whitehoose
on 11 Oct 2018
whitehoose
on 11 Oct 2018

It's a bit mucht to the right. The display is showing it, if i peek from from an angle.
I don't know if my display is misaligned.
jvdmeulen
on 11 Oct 2018
@jvdmeulen iirc the display on the TS80 is shifted to the right from factory. I think you can open it and move it manually
 PaulGameDev
on 11 Oct 2018
PaulGameDev
on 11 Oct 2018
@PaulGameDev ah, that's the quick fix then. But if _everyone_ has that 'problem' maybe it's better to correct it in the code. I don't think everyone is going to open the iron and adjust it (even tho it's little to no effort)
jvdmeulen
on 11 Oct 2018
The text on my TS80 is aligned properly, so this doesn't seem to be an universal issue.
 MaienM
on 11 Oct 2018
MaienM
on 11 Oct 2018
might be an issue that only occurs on certain product charges
PaulGameDev
on 11 Oct 2018
I've got that same screen in the display now and mine is slap in the middle. I might just be lucky. Are people saying the screen has physically slipped - or that the display is showing a mis-aligned image? I'm not clear.
Don't know what a run comprises in numbers but the vids show the screen is mounted over components and doesn't look to have a mount or fixing so I''d guess its mechanical slippeage and not software. and that could be isolated to people who have opened the case - or down to units assembled by 1 worker.
Shame for the average punter who is reluctant to disassemble - but for those contemplating mods - it should be seen as a bonus.
whitehoose
on 11 Oct 2018
Calibration should now be functional i think in the latest build.
By default it will show you just the simple offset cal function, but if you change the tip type to custom then you can do an advanced cal using a tip thermocouple or simple using boiling water.
The screen issue is mechanical and doesnt seem to be overly common, Not much I can do about it really 🤷♂️ Its mostly held in place by the case pressing on it against the foam behind it.
Ralim
on 11 Oct 2018
Ralim:
New firmware issues (at least in my device):
- during heating up display mode the temperature is only visible lower half part of the screen. (but entering settings menu in small shows full screen).before it was flawless.
Running from certified QC3.0 powerbank: - Whenever measured from external USB powermeter on a QC3.0 powerbank the mode jumps continuously from QC3.0 Mode to unknown mode (not QC2.0) even powered from the original AC supply (maybe a powermeter issue??) D+ 3,3V D- 0.6/0.75 .
- After one minutes of heating up the tip the power bank from QC3.0 goes off (as happens usually in standby mode), previous release was not happening.
- Input voltage on TS-80 shows 14.2 V, on powermeter shows 9.36V (both AC and PB).
- When you set the temp to 290°C the TS-80 heats up but then, entering the settings menu, the tip stops getting hot and you see on the display the temp gets lower (no more heating), honestly not a useful feature in my opinion.
Once in setting menu how to exit to soldering?
Now ONE GREAT feature is that drawing at 5V 0.8A the TS-80 can reach the temperature (even if in slower time) so from a normal 5V powerbank the unit can be used!!!!
But as usual powermeter shows Unknown mode, 5.12V (D+ 0.94V D- 2.77V) and TS-80 shows 7.5V
Hope this helps
Houseman74
on 12 Oct 2018
Hi,
Can you get a picture of the off screen issue ?
Interesting that your TS80 reads the input voltage rather differently to mine, Ill investigate this more here before saying too much :)
The power bank going into sleep is a known issue, its just what power banks do. Thinking about making so that it "pulses" the tip on for like 100ms every so often just to try and keep the bank on. Not sure about this one. Thoughts ? The risk is a slowly warming tip when not in use.
The QC2/QC3 detection I have found to be rather hit and miss on most of these units :( Since QC2 and QC3 mostly differ in exact voltage levels, but then most power banks dont even follow these correctly. Also im implimenting my timing slightly off spec which in all of my testing made it much more tolerant to lower quality QC devices.
Could you try doing a factory reset (advanced menu) and checking the voltages on screen again ? 😄 Your voltages are off by almost perfect multipler so just wondering if a setting is out of whack :)
Yes I agree! on 5V its slow but good in a pinch if something goes wrong.
Ralim
on 12 Oct 2018
Ralim you are right.
After factory reset the voltage shows correctly in idle mode (now during heating up it is slightly off by -0.5V. PMETER shows 5V / TS-80 shows 4.5V - must be related to the wire resistance).
Factory reset fixed also the screen issue. GREAT!! I would recommend it to everyone has display issues.
You are also right in QC2.0/QC3.0 , I have seen it is more than try and hit. Different times plugging in into QC3.0 PORT not always enables the feature- once it stays in 5V mode, another time it jumps to 9V (but never reached 12V!!)
One thing I noted is:
QC2.0 mode: the inglorious "Unknown mode" is displayed on the power-meter once D- value goes above 0.81V (during heating up) or below 0.59V (during sleeping mode) (D+ stays fixed to 3.0V) below that value (oscillating from 0.70V to 0.8V) it stays fixed QC2.0 mode.
Ok for power-bank to go to sleep but now it goes off also during warming up. In previous FW this does not happen.
Regards and thanks for the great effort.
Houseman74
on 12 Oct 2018
Glad that fixed it :) I'll bump the settings version on next release which should fix that anyway.
Interesting about the timeout during heating. Might be a bug with me trying to seek the voltage up when the cable resistance causes it to droop. Does this occur just during normal heat up or are you doing anything else ?
During heating it will be pulsing the D-&D+ between 0.5 and 3.3V to adjust the voltage supply up and down. Not sure if your unit is just catching those pulses or not ? hmm
Ralim
on 12 Oct 2018
In order to be sure I have loaded previous fw and confirm this does not happen.
During heat up powerbank stays on. Once it reaches the temp since current drops to 0,0someting after a while it shuts off.
Solder is on the table, it does occur during normal heat up.
Unknown mode happens only during heating up and sleeping mode. Once the tip approaches the set temp QC2.0 stays stable.
Is it normal that once heating up and entering settings it stops the heating phase?
Houseman74
on 12 Oct 2018
One last thing: Is it normal that during heating up it makes some noise? like PWM popping?
Houseman74
on 12 Oct 2018
Ralim:
New firmware issues (at least in my device):
- during heating up display mode the temperature is only visible lower half part of the screen. (but entering settings menu in small shows full screen).before it was flawless.
Running from certified QC3.0 powerbank:- Whenever measured from external USB powermeter on a QC3.0 powerbank the mode jumps continuously from QC3.0 Mode to unknown mode (not QC2.0) even powered from the original AC supply (maybe a powermeter issue??) D+ 3,3V D- 0.6/0.75 .
- After one minutes of heating up the tip the power bank from QC3.0 goes off (as happens usually in standby mode), previous release was not happening.
- Input voltage on TS-80 shows 14.2 V, on powermeter shows 9.36V (both AC and PB).
- When you set the temp to 290°C the TS-80 heats up but then, entering the settings menu, the tip stops getting hot and you see on the display the temp gets lower (no more heating), honestly not a useful feature in my opinion.
Once in setting menu how to exit to soldering?
Now ONE GREAT feature is that drawing at 5V 0.8A the TS-80 can reach the temperature (even if in slower time) so from a normal 5V powerbank the unit can be used!!!!
But as usual powermeter shows Unknown mode, 5.12V (D+ 0.94V D- 2.77V) and TS-80 shows 7.5V
Hope this helps
I've been playing with a new qc3 buck converter with a cheap 12v psu and mine started to duplicated the half display etc. Did a factory reset and voltages shifted from 8.99 to 15.4 which won't calibrate but drops to 12.7 while heating
swapped powersource to the one that came with the iron and things have changed to a more stable operation but voltages still high.
If Amazon get a shift on I should have a Xiaomi MI 2 - 10000 mAh Power Bank to try in the next couple of days.
whitehoose
on 12 Oct 2018
Did the factory reset solve for You the display issue?
You too hear chopped popping noise near the display during Heating up?
Houseman74
on 12 Oct 2018
Did the factory reset solve the display issue?
Wouldn't like to say. I've only had the iron 2 days and it's the first and only time I've seen that. The reset froze the iron so I had to cycle the power then I went back to the original PSU, couldn't repeat it.
It's just dawned that factory reset does just that so maybe one of the other settings causes it - I know what I had set, and what I was doing (trying to calibrate the voltage) I'll have a poke and a more serious try to duplicate in a while. I need a couple of hours to do some stuff then I can get back to the fun.
whitehoose
on 12 Oct 2018
I have to do a factory reset before I was able to get "heating" to start. But this version of the firmware seems to work well with a smaller 18W powerbank, as before I have to use an adapter on the USB-C port to be able to draw 9V... not this just works on the USB-A ports (as expected).
Haven't yet tried the 24W mode... @aziraphale can you check this?
gbraad
on 12 Oct 2018
plugged it into another QC2/QC3 power source, and now the iron acts weird. It turns on for a second, and the display turns off... on the computer it recognizes an unknown device. it reboots so it seems, and then shows garbled text... and after a while it shows the main menu. But that only stays for 2secs and reboots again. I also can not enter the bootloader/flash now... as it only shows for a second and display turns off.
gbraad
on 12 Oct 2018
I got it to reflash... and this seems to have worked (shows .rdy).
it still turned off a few times, but seems to kep the display on now... only draws 7V.
Restarted it a few times and now can do 9V. It sometimes shows 10, which truncates the top of the temperature.
gbraad
on 12 Oct 2018
Hi.
None of all of you except myself is hearing popping noise during heating up?
Houseman74
on 12 Oct 2018
Hi.
None of all of you except myself is hearing popping noise during heating up?
I got a bad burn on my ear now - but apart from my screaming all quiet on the solder front.
whitehoose
on 13 Oct 2018
@gbraad
Good catch on the 10V clipping temperature, ill need to look into a solution for that.
@Houseman74 That will depend on your specific unit, one of my ts100's does it as well. Its the coupling capacitor that is used to drive the base of the small transistor. As its getting a PWM in the audible range and can sometimes be heard.
What do you mean by this :
Is it normal that once heating up and entering settings it stops the heating phase?
If you change screen at all away from the soldering status the heating stops for safety, so temp adjust also does this.
The 7/8/9/10V will be selected automatically based on the resistance reading of your tip. if its not mounted correctly then re-plugging the tip can fix this sometimes.
Computer will always see it as an unknown device.
Ralim
on 13 Oct 2018
It seems my iron is a write off... it enters a reboot loop and the OLED is not functioning anymore. This happened all after connecting to a QC2.0/QC3.0 (24W) USB power source. it can provide 12V and this is likely what killed it? note : this power source worked with the previous release.
gbraad
on 13 Oct 2018
Does DFU still work?
The input on the unit is rated to around 16V without issue so 12V shouldnt have killed it unless the power supply did something else out of spec?
Ralim
on 13 Oct 2018
Will check later tonight. DFU worked, so got the stock firmware installed, but no change. Display stayed off... But after this it reboot loops.
gbraad
on 13 Oct 2018
Miracles do happen, Amazon delivered the powerbank on friday night. Looking at the Banggood publicity, it shows the TS80 plugged into a powerbank which looks very much like my new Mi10000pro. Anyhow I've now tried the iron for real work over the weekend on 3x the same project using the 1.6 and 1.6s firmwares plus Ralims September and October versions. I loaded and factory reset each time before altering settings, in Ralim's case to include all bells and whistles.
Despite being the same powerbank, Different voltages are displayed by every firmware - anything from 8.5 (which I suspect is just slightly low) to a massive 17.8v (which is patently ridiculous).
I've never been able to calibrate the voltage but various USB meters show about 8.7v being delivered @ 16w.
Warm-up times are just about identical - so I'm tempted to believe and go with these values as correct.
Every firmware has a tendency to come out of settings to the low voltage error.
They all also fall asleep at the drop of a hat.
I discovered the powerbank has a low charge current option which flashes each of the LEDs when enabled for small devices, strangely this seems to make the iron more stable and doesn't seem to affect heating times so I don't know what's going on there. The irons report the usual higher voltage so qc3 seems to be working (possibly overriding the low setting? - but the LEDs show it as on.)
Operation isn't stable on any firmware - the main thing is dropping into low volts when exiting settings mode or powerbank switching off randomly despite iron's countdown showing time left on the clock.
On PSU - Low Volts does happen, random shutdowns don't.
on 5v power Ralim's firmwares work but do tend to low volt for no obvious reason.
Restarts clear some problems but not all.
Sorry not a systematic or particularly scientific report ... but overall it's useable in the field even though its not perfect. Beta2.1
whitehoose
on 15 Oct 2018
Getting this, looks very nice https://www.kickstarter.com/projects/hypershop/hyperjuice-worlds-most-powerful-usb-c-battery-pack
andersvos
on 15 Oct 2018
@whitehoose:
Powerbanks usually have a current below which they'll automatically turn off after some period (10mA-100mA, some current).
The low current option is designed to keep the bank from shutting off if you're charging something that takes less current than the cutoff. Basically, it's a manual on switch. Using it should fix your problem and doesn't limit the burst current.
The PID rework should help with random shutoffs as it draws power more consistently during operation. It won't help in standby, though.
 dhiltonp
on 15 Oct 2018
dhiltonp
on 15 Oct 2018
QC3.0 certified powerbanks that has not such a switch that enables low current option (like mine) are useless since once reached the desired tip temperature, the solder unit switches off unless you use it and lower temp adding solder to the tip.
Could be possible to implement such feature instead in the firmware of the TS-80 - maybe as a flagging option which one can enable?
That would solve many frustration...
Thanks
Houseman74
on 15 Oct 2018
plug an old useless flash drive in the other USB slot of the powerbank to keep a little bit of current going. or a USB LED flashlight
 donbowman
on 16 Oct 2018
donbowman
on 16 Oct 2018
plug an old useless flash drive in the other USB slot of the powerbank to keep a little bit of current going. or a USB LED flashlight
Now that's a good idea that seems to have worked on my tatty old 5v powerbank. I plugged a USB power meter into socket 2 and its done the trick.
dhiltonp - thanks for the detail ... what you say makes good sense and supports donbowman.
Unfortunately the spiffy new Mi10000 only has a single outlet ... and using the same meter in series causes the low voltage - so not practical.
Its early doors still, I'm certain that Ralim will solve it (No pressure R :D) shortly. I can get a full heat from a 5v tatty old powerbank which is going to save me bigtime. The rest I can wait for.
whitehoose
on 16 Oct 2018
Does someone else have the issue that the Voltage reading is off or is it already fixed?
 Lenni
on 16 Oct 2018
Lenni
on 16 Oct 2018
Does someone else have the issue that the Voltage reading is off or is it already fixed?
Thats what I've been saying
whitehoose
on 16 Oct 2018
Getting this, looks very nice https://www.kickstarter.com/projects/hypershop/hyperjuice-worlds-most-powerful-usb-c-battery-pack
andersvos, if you're willing to spend $300 on a powerbank, perhaps you might like to adopt me and let me play with your toys?.
Seriously ... you'd pay $300 for a powerbank that looks exactly the same as my Mi10000 except it has 1 extra outlet. Better have two then you wont have to wait for it to charge.
whitehoose
on 16 Oct 2018
@whitehoose It was off for me because the Calibration Values Cap wasnt adjusted to the different ADC of the TS80. I fixed it in https://github.com/Lenni/ts100/commit/5b9adc7803c0e0b49687ac7e15d05f50b97b6cc2
Lenni
on 16 Oct 2018
Should have fixed temp screen issue & included the voltage calibration from @Lenni .
New build :
Still going to look into standby issue by maybe making it pulse on for < 1 second if the tip temp is < 50C. But going to wait until after new PID to check how much better it makes it for all of us :)
Ralim
on 16 Oct 2018
Just tried a flash, It's ridiculous that the first attempt always fails, the second always copies the file but the .hex remains until I manually restart (so far) to get the .rdy extension.
So voltage showing 19v!!! restarted, no change - it required a factory reset/restart for the voltage to correct itself.
Tatty 5v powerbank with USB meter in slot 2 showing 5.11v - iron showing 5.2v.
Mi 10000 - with meter in series showing 5.24v - iron showing 5.3v.
Both brought iron (set to 300c) up to 298c in a reasonable time ...
Mi 10000 refuses to switch to higher voltage.
Stock PSU displayed 5.3v to start but immediately switched to 8.5v to heat up - 298c in short order.
I'd say Lenni is a star and Ralim ... well is Ralim ... quick response with new FW - thanks!.
Too late to see if it goes sleepybyes ... but I am now - night all.
whitehoose
on 17 Oct 2018
Me too. First attempt of flash always shows previous version of firmware loaded. Must flash it twice.
Houseman74
on 17 Oct 2018
@Ralim Voltage Reading issues and Temp Screen issue are both fixed for me with the update
Lenni
on 17 Oct 2018
Just the last piece of the jigsaw. I think it's fair to say the voltages and temps are good now.
Plugged iron in to Tatty powerbank. The powerbank LEDs glow for about 5 seconds then go off to register no activity but the iron sits with it's display on the first screen quite happily for as long as sleep is set to - then it catches some Zs, but wakes instantly when moved.
All as it should be.
Fancy Mi10000 on the other hand drops off at 45 seconds even when stepping through menus and refuses to wake unless manually unplugged/replugged or PB power button pressed. So in this case it's the powerbank not the iron that's controlling sleeping.
If I switch to the PB's low power mode it stays on displaying first screen.
Both PBs work as expected while heating, Tatty shows 4.9v
Fancy, display flickers between 4.9 and 5v - refuses to switch to 9v
Stock PSU shows menus at 5.2v sleeps as per settings and heats up at 8.7v before switching up and down to reflect useage as you'd expect.
I guess this means that qc3 isn't working. Tried holding tip to cold metal block to cool it - no effect.
whitehoose
on 18 Oct 2018
Have you tried the higher wattage mode? Perhaps something happened due to a
change in this codepath.
Note: maybe a cap or other component inside my iron blew? Not sure if this is related due to the higher voltage...
gbraad
on 18 Oct 2018
@whitehoose The issue with programming files is their DFU loader and I cannot really fix it really.:(
Normally I just drag the file twice in quick succession and it works on the second go.
I've attached a bugfixed version that should be more tolerant on the QC starting etc. Let me know if it now works for you please :)
@gbraad Caps shouldnt blow :( I dont have exact specs on parts, but matching size and ratings they are all 16V, and I ran 12V past the manufacturer and they should be totally fine :) So not sure whats happening there, which one blew ? (Photo?)
If I get QC working for everyone here ill push out a proper release :)
Ralim
on 18 Oct 2018
Let me know if it now works for you please :)
@Ralim - curiouser and curiouser.
I've tried this at 18w and 24w without any difference.
flash new fw: change settings to 3m timeout - detailed screens.
Plug in to Mi10000; starts at.5.3v (display always in LHS) immediately counts up to 8.3v - down to 5.3v then up to 9.1v where it stays - display flips to RHS as soon as it hits 9.1v - slumbers within 20s - so have to be fast.
Press button to heat - volts drop back to 5.3v while heating progresses - 2min to reach 248c - and then falls asleep.
Setting other values doesn't seem to alter actual time to sleep.
factory reset - no changes to options - basic icons.
first screen flips to rhs shows icons with "5" to rhs - slumbers within 10 seconds even while changing menu options.
restart iron - press button, 5 changes to 9 - then flicks between all digits 6-9 while heating temp climbs more rapidly - so I think the voltages are accurate.
... sleeps within 15 seconds.
When iron sleeps only a cold reboot restarts it - either unplug lead or press powerbank reset. So I suspect it's the PB.
Slightly off topic - the reboot "thing".
Cold boot to DFU - free space 2.1Mb / 6.7kb used
Drop a 88.6kb file - iron recycles.
Auto warm reboot - File Manager shows *.err (88.6kb) / space used 95.7kb
drop a DIFFERENT 130.4kb file
Auto warm reboot showing both files *.rdy (130.4kb) and *.err (88.6kb)... Used space 226.3kb.
Cold reboot to second file f/w version in use.
or
Cold reboot to DFU - free space 2.1Mb / 6.7kb used
Cold reboot to second file f/w version in use.
The .Hex file doesn't need .hex extension to work - recycle always cuts name to 8.3 format with *.err extension. Second drop renames *.rdy and probably re-flashes??
final restart tidys the folder, deletes the used files and boots to new f/w
I'm thinking that the second drop is just the simple version of the more usual - are you sure y/n without the need to load key function
whitehoose
on 18 Oct 2018
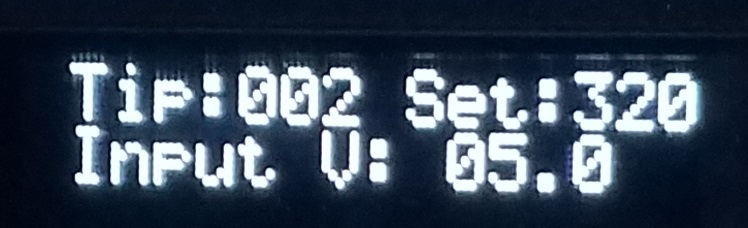
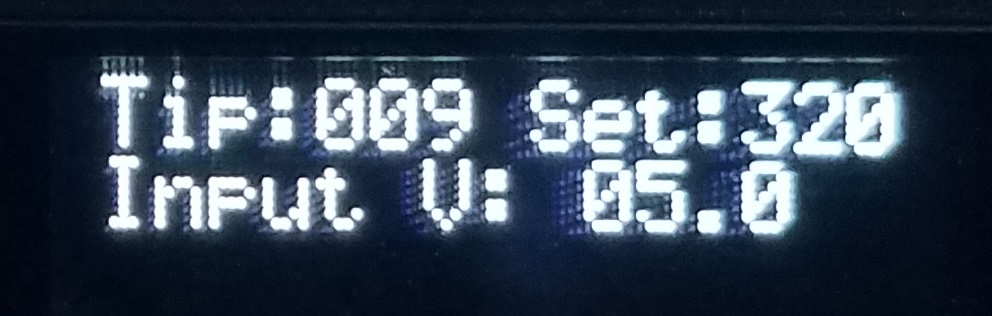
@Ralim, should the calibration procedure work for TS80?
Detailed idle screen is on.
Ambient tip temperature.
Before calibration - Tip: 009.
After calibration - Tip: 002.
I expected there tip temperature ~ambient.
 EVTrifonov
on 18 Oct 2018
EVTrifonov
on 18 Oct 2018
Thank you @Ralim
I flashed the ts80 with your firmware and it worked using a rav power power bank. https://goo.gl/r32wCz
I tried using it on the QC 3.0 usb A port and with the USB-C port and it worked on both.
Just wanted to thank you and let others know that this combination works.
 rmlefever
on 19 Oct 2018
rmlefever
on 19 Oct 2018
So what's the latest status here? Is the master branch compatible with ts80 as is?
 canselcik
on 20 Oct 2018
canselcik
on 20 Oct 2018
@canselcik Yes, you can build the firmware if you execute build.sh in the workspace/TS100 folder
Lenni
on 20 Oct 2018
If I get QC working for everyone here ill push out a proper release :)
That build isn't working for me with QC2.0 - voltage remains at 5V and won't raise to 9V.
Update.
Hm, sometimes it works well.
Looks like or my QC2.0 behave unstable (brand new) or seekQC sometimes fail to detect right mode.Update
Build was from 10/18/2018
EVTrifonov
on 20 Oct 2018
Before we get too far into into this. Ralim - would it be possible to incorporate a version or date into the filename of your Fw zip to make id a little easier? Given the state of play at the mo I'm reluctant to delete any version (just in case!).
I routinely save to a new subfolder but now I have 4 or 5 TS80.zip files - and EVTrifonov has posted a comment that included another link to a download of an unidentified TS80.zip/TS80.hex.
I only ever d/l from links in your posts and also the zip preserves the archived file creation date I'm reasonably confident its a duplicate to your latest ... but if this was a film, geoff goldblum would now running round like a headless chicken and the clock would be counting down ... :smiling_imp: .
whitehoose
on 20 Oct 2018
Received my replacement and will continue testing later. E-design is investigating what happened to the iron (they requested it for analysis as they want to see if this might need an improvement in the design).
gbraad
on 22 Oct 2018
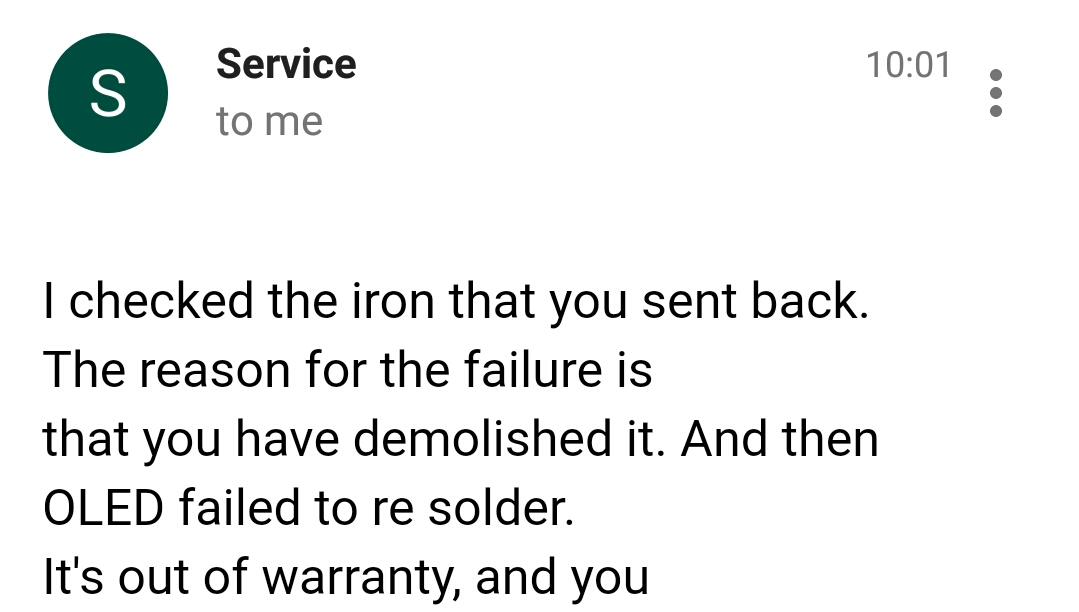
This is the response to the soldering iron I have sent back, which has not been opened d by me... So I have no idea what they found inside. Although they claim the old failed to resolder (not sure what they mean). Anyway, be very careful with the power source. I used it on a QC3.0 USB capable of 24W, but connected to 20V.. maybe the full amount got passed in? Their response: It's out of warranty,
gbraad
on 23 Oct 2018
@Ralim
unless the power supply did something else out of spec?
This might be the case, but the problem is that one of the supplies is this one: https://item.taobao.com/item.htm?spm=a1z09.2.0.0.2c3e2e8dWswFuo&id=564767730860&_u=nfi09h349c8 and no information about the used chipset is shown. And on the actual devices they have removed the markings (I have sourced them from several places on Taobao to investigate, but all the same... no identification is shown). Sold with the description: "DC-DC 6-30V 24W*2 双USB快充降压模块 手机充电头 支持QC2.0 3.0"
The Lenovo powerbank which is based on a SW6106 (PD and QC3) did not work with the stock firmware, as it always reported Low-voltage. This one worked with the second release you made here... haven't tried it with the newer release... and at this stage a little doubtful, as I am very disappointed with the response of e-design.
gbraad
on 23 Oct 2018
I agree that is a very bad answer. I'll hit up the contact I have and see what I can find out / do.
My firmware shouldn't ask for more than 12V input voltage, but I considering there is no official spec for QC and everyone even in china seems to use reverse engineered results, I'm also wondering if its the power supply that is at fault.
@whitehoose There is a build data in the extas menu (hold the B button (near usb) on the idle screen).
But yeah I can certainly try and include version names.
@EVTrifonov Thank you for the feedback. Its quite possible that its not quite following your supplies implementation of QC2 spec correctly. Can you link for your supply you are using?
There is a bit of a conflict here since by my readings of the reverse engineered specs the data lines should be 0.5V or 3-3.3V for the two states, but the TS80 only goes to around 0.6V on my model for the low level. All of the devices I have tested seem to be ok with this this, but since I cant get my hands on an actual spec its all just speculation really :(
Also I'll look into the calibration again, might still have something off in there. :(
Ralim
on 23 Oct 2018
@Ralim would it help if i sent you one of these supplies?
gbraad
on 23 Oct 2018
@Ralim, I'm using that one.
EVTrifonov
on 23 Oct 2018
that one
Anker PowerCore II 10000
- 5V⎓2A, 9V⎓2A (Compatible with Quick Charge / AFC / PowerIQ 2.0)
Haven't been able to track down what IC is used
gbraad
on 23 Oct 2018
Xiaomi Mi PowerBank 2 10000mAh works with the last posted firmware. It only has 15 W max output (according to the spec on the bottom of the power bank) so the voltage drops to 8 V during heating. The USB meter I have shows QC3.0 mode alternating quickly with Unknown mode. The power bank has a button to force it on even with low power consumption.
I'm not able to test the charger I got in the package as it's not compatible with European mains sockets.
I also have a Nokia 7 plus charges which is QC3.0 compatible with up to 1.5 A at 12 V. It seems to be working. If I set 24 W in the settings it switches to 12 V. During heating it drops to 10 V though. The USB meter behaves in the same way (alternating between QC3.0 and Unknown).
 yawor
on 24 Oct 2018
yawor
on 24 Oct 2018
@gbraad, can't tell you for sure right now, but looks like here is pretty similar device.
EVTrifonov
on 24 Oct 2018
@gbraad I certainly wouldn't say no to a donation, but thats entirely your choice :)
If you want to donate one, hit me up on email and i can talk further.
@EVTrifonov Thanks for the link, I'll see what I can dig up to try and increase compadability for you :)
@yawor Good to hear it seems to be working fairly well. The firmware will try and ask for more voltage when its under load to compensate out the cable, but the power bank is probably maxing out first sadly at 15W. For the 24W dont be surprised it its around 11V too as the accuracy isnt perfect in measuring the tip used, but it does get quite close.
Hopefully I can get some time to review QC2 a bit more and then its close to a better release.
Ralim
on 25 Oct 2018
@Ralim Just got around to trying my ts80 with this, I've been looking forward to it! Thanks for all your work so far.
FYI, using the build posted from the 18th (2.06) I also don't have working QC under load. It starts off at 8-9v depending on device but then drops to 4.8v when heating.
You may also like to check out the ZY12PDS module, looks like exactly what we've been looking for- in-line USB-C PD negotiator module.
You program a voltage to request, and then it persists across reboots. Perfect for using the ts80 with existing cable with a PD source. I've got one on the way, will report back when it arrives.
Also grabbed a 5v to QC 12v module ("YZX DIY QC2.0"), to allow running from high current 5v ports/ pairs of ports.
 rlights
on 25 Oct 2018
rlights
on 25 Oct 2018
ZY12PDS
This is a custom implementation by ZYX Studio. He makes several QC and PD
modules, but they are also not error free. I have a lot of these at home
and they arenot really what we look for, as there is a need for a PD to QC,
but this is not what the ZY12PDS does. It is a trigger module.
gbraad
on 25 Oct 2018
@gbraad quite right, it doesn't actually speak any sort of QC. But if I'm not mistaken, it'll still do the job if set to an appropriate voltage.
rlights
on 25 Oct 2018
right... the implementation by XYZStudio does the following; when 20V is requested, it falls back to 12V (if that is the highest offered), and this is in my opinion wrong. it should in that case fail to negotiate the voltage and not provide a wrong (lower) voltage.
Just use a female DC5521-TypeC adapter and a male DC5521 power trigger cable or power it from a battery... but in that case, the TS100 would still be a simpler (and more versatile) solution.
gbraad
on 25 Oct 2018
@Ralim have some small things you might like, such as the cable, the standard power brick, some small QC2/3 power adapters, etc.
gbraad
on 25 Oct 2018
Hi, ...maby dump Q, but...
So for flashing HEX (oposite to BIN) should I use some other software?
How You guys do this for TS80 ?
 kokein
on 26 Oct 2018
kokein
on 26 Oct 2018
@gbraad I'm definitely interested, can you send me an email at [email protected] ?
@kokein the default DFU takes hex files not bin files. Read the main readme of this firmware, the same instructions apply for the ts80
Ralim
on 26 Oct 2018
@gbraad I'm definitely interested, can you send me an email at [email protected] ?
@kokein the default DFU takes hex files not bin files. Read the main readme of this firmware, the same instructions apply for the ts80
"Ok, tried this as it was for ts100 but i get ERR all the time (different cables ect) i thought that i need to use some other software, hm. strange things :)"
EDIT: Ok, now it's working ok, dont know why it returnes ERR a few times. Now it is OK, RDY and have no problems to flash.
kokein
on 26 Oct 2018
Just flashed this onto mine. With a Mi Power Bank Pro it works fine, minus the annoying powerbank time-out I get when browsing menus. Doesn't seem to run at 12V though? Seems to stick with 9V.
With this thing: https://www.amazon.com.au/gp/product/B07C9CLDT1/ref=oh_aui_detailpage_o04_s01?ie=UTF8&psc=1
The voltage is sometimes 9, usually 5ish (It switches between the two very quickly). It charges the Mi Pro at 12 though (According to it's display), so not sure what's going on there.
 V1DEOJAMES
on 29 Oct 2018
V1DEOJAMES
on 29 Oct 2018
That's a nice power unit!
Yeah I'm currently looking into the QC stuff more now, trying to get a more reliable switching system.
With not going to 12V, depending on what it measures the tip resistance at, it back calculates the appropriate voltage to request to run the tip at 18 or 24W. This seems to have noise so is looking like more filtering will help, but I'm waiting until after #358 merges to look into the noise more.
Ralim
on 29 Oct 2018
@jgrrule the Mi Power Bank Pro seems to be almost the same as Mi Power Bank 2, with USB-C instead of MicroUSB to charge it. It has a low power charge mode. Press the button on the power bank two times quickly. The LEDs should start blinking slowly one after another. In this mode power bank doesn't turn off automatically when the power consumption is too low, instead it has a 2 hour time limit, after which it shuts down. You can also turn it off manually by pressing the button again.
Also check the specs at the bottom. It only has 1.5 A max at 12 V, so it's not capable of 24 W output. It looks like it can output max 18 W (1.5A at 12 V or 2A at 9 V). I think this may be a reason of the voltage drop when using the power bank.
yawor
on 29 Oct 2018
New build!
I've bought in the QC3 timings, and would love to hear if it works better or worse for you :)
Has a few small bug fixes otherwise as well.
Still haven't implemented the Pulse to stay awake feature just yet.
EDIT: this one has broken pwm output sorry, fix coming
Ralim
on 29 Oct 2018
@Ralim I've checked today's version on both Mi Power Bank 2 and Nokia QC3 charger and unfortunately it's worse than on previous one. The USB meter shows that it uses QC3, the voltage switches to 9 V, but I couldn't get 12 V, even with 24 W selected. It doesn't draw more than 9 W (it never reaches 1 A).
The current is also very unstable going all over the place between 0.3 A and 0.9 A during heating from 0 (TS80's display shows power at 100%). At least the voltage is holding somehow steady at about 9 V.
On the previous build the current seems to be more stable, but the voltage seems to be more erratic. But at least it draws from 16 to 20 W.
I can record some videos of my USB meter during heating on both versions if this can help you somehow. My meter also supports BT, but I don't trust producer that much to install their app on my phone as it's not distributed on Google Play - but I could install it on one of my older phones. From what I've seen, the app can be used to download history data from the meter and also record it in the real time (power line voltage and current, but also D+/D- voltage is recorded so it could be helpful with debugging QC).
yawor
on 29 Oct 2018
Ah bugger you are correct, I completely mind blanked when uploading this that I had already changed the PWM period for the coming merge. New version should be coming soon.
Ralim
on 29 Oct 2018
I have the Mi10000 pro, does not work with Ralim's 18th but does work (ish) with the one before.
I've had an interesting few days, working with the standard PSU that came with the iron is fine - delivered voltage is about 8.2v. On Thursday plugged in the iron. And it heated quickly ... trouble was the tip stayed cold while the handle hit 300c in seconds!!!
The magic smoke was well and truly out and the pixies were running riot. I unplugged, connected to the the PSU and confirmed the worst - screen shows a few dots and the tip is cold. After random button pressing wailing and crying the tip did start to get warm ... but never enough to melt solder.
I contacted Banggood with an email plus a couple of photos. They replied next day asking for a video of me using the iron. I don't have a film studio - or three pairs of hands ... so had to cobble together helping hands, a vice and a cornflake box. Zen productions then produced it's first (and only) production - "Busy doing Nothing!". Me plugging in the iron, Zoom in on screen to show dots, Zoom out to show cable connection and me holding the tip .... time passes .... more time passed (cough cough, sniff!) Its a wrap!
1:05 mins, 6.8Mb of video, about as entertaining as an episode of The Big Bang.
Submitted Video and a few words to BG who have just replied to say if I agree, a new iron will be sent out tomorrow. And I get to keep the wreckage of the old. I've agreed, so should be with me by christmas.
Will be interesting to see what's in the box when it arrives.
I wonder how I can get hold of a replacement motherboard?
whitehoose
on 29 Oct 2018
I didn't have the magic smoke... but pretty nuch the same happened to mine.
I have the video on YouTube: https://www.youtube.com/watch?v=lBfAeas0xD0
and Tudou: http://video.tudou.com/v/XMzg4NDM5ODIyOA==.html
gbraad
on 29 Oct 2018
I didn't have the magic smoke...
Here's mine https://youtu.be/yV8mPNVAUx8
I'll post the results as they come in.
whitehoose
on 29 Oct 2018
TS80 tips are in stores now: https://www.aliexpress.com/store/product/Original-TS-B02-D24-Soldering-Iron-Tip-Replacement-Solder-Bit-for-TS80-Mini-USB-Digital-Soldering/1703233_32953371385.html
joric
on 30 Oct 2018
@whitehoose, @gbraad, what is the cause of your failures ? The firmware or the power source ? I'm a bit confused and trying to evaluate if I install the custom firmware or not...
 Mpic
on 30 Oct 2018
Mpic
on 30 Oct 2018
I don't think there is a "cause" in my case, not in the sense of an inherent weakness in the standard kit or substandard code anyway ... its either self harm, I was using a new 2x18650 (supposedly with over/under charge, short, voltage stabilisation ... blah blah) power source for the first time, Or else it's just "one of them things". A component spontaneously combusting just because it could.
I don't see a smoking gun pointing at either shabby firmware or bad build quality.
Ralim's firmware is still a little adventure with every release. But equally it's given us the ability to run the iron on a 5v powerbank which is useful to me. Also more qc3 sources... I wouldn't worry from that POV. If you don't need ... or just prefer not to experiment ... again the stock firmware is OK.
At the moment I see the firmwares almost like tips... its nice to have a few options "just in case". In the long run my money would be tortoise and hare. The stock Fw will always be safe and steady while the hacks will hopefully give you something a little edgy and less mundane.
These things take time.
And swapping betwixt and between is so easy - I doubt there is any "danger" involved unless you drop the thing in your haste.
I think we're just unlucky or perhaps in my case careless.
whitehoose
on 30 Oct 2018
@whitehoose How did you wire up the 18650 batteries out of curiosity?
It could be that there is a hardware issue with being connected straight to a supply that is >5V, not sure here. Schematic doesnt show any clues (Missing half the damn ratings) but could be an inrush issue possibly. Pure speculation though.
I aim to try and make the firmware stable and reliable, but generally unless its a published release on the repository its a beta test, so its "working" but may have sharp edges. There is always a trade off in trying to push boundaries on hardware that can sometimes cause issues that when they are reported on I try and get to asap. All beta comes with the idea that there may be issues, so if you would like to play it safe watch this conversation and you will know when I'm happy and push the firmware live.
Ralim
on 31 Oct 2018
Hi something is not good in latest firmware. I have tried with blitzwolf powerbank that is not recognized by stock firmware. In one of previous you releases it worked in QC2 9v, now it heats but very slowly like 5V mode and iron also makes zzzzz sound. stock back - no problems. Please fix this...
 slibbinas
on 31 Oct 2018
slibbinas
on 31 Oct 2018
@slibbinas Are you refering to the firmware I posted earlier called TS80_29_10.zip
Which has this warning right below it:
EDIT: this one has broken pwm output sorry, fix coming
???
Ralim
on 31 Oct 2018
Banggood has both tips too (currently in preorder)
jvdmeulen
on 31 Oct 2018
@slibbinas Are you refering to the firmware I posted earlier called
TS80_29_10.zip
Which has this warning right below it:
EDIT: this one has broken pwm output sorry, fix coming
???
Yes this one. Laten can flash and test with usb checked is it 5V or not. But that buzzing is not nice..
slibbinas
on 31 Oct 2018
Yeas, it has broken PWM as I noted, which is why it has bad output.
Ralim
on 31 Oct 2018
Yeas, it has broken PWM as I noted, which is why it has bad output.
AAAA, it is related. OK.
slibbinas
on 31 Oct 2018
BTW 2018-10-18 has the same problem as TS80_29_10. Battery checker on both versions shows 5V while heating. I assume you know that. 10-17 version works well on stock charger and Blitzwolf also :) Uf. sorted out.
slibbinas
on 31 Oct 2018
Should not have 5V while heating. Slow heating is ok since the PWM is out of what in the last version, but QC should work. Does the unit goto >=9V at any point during operation?
Ralim
on 31 Oct 2018
Nope.
slibbinas
on 31 Oct 2018
Ups sorry doublechecked 10.18 version. It WORKS as it should - 9v on output, only last version as you have told is broken. Sorry. I maybe flashed wrong version. Maybe due to the lack of version numbering. But hopefully from now on you started to number zips :).
slibbinas
on 31 Oct 2018
@Ralim The new kit is really just a better regulated setup. the cells were in parallel and I was relying on the 5v fw to cancel out the need for qc3. I routinely carry a battery pack connected to a modded DPS5005 regulator which covers all my "other" equipment needs - and it works well. A light stable Iron is on my wish list - but qc3 compatibility issues complicates the hell out of portability. Hate to say it but looking back I should probably have settled for a TS100 with a LiPo.
My field soldering 101 was a gas stove with a 1lb chunk of copper fixes to a handle ... temp control was down to experience. My hakko is fine in the lab and temp control is wonderful - I've used a RS NiCad battery iron in the field for 30+ years.
I was curious and enjoy watching the tec grow, I'm also very on the side of progress. I could be wrong but I'm feeling that this is a branch that is tech for techs sake. A soldering Iron doesn't need a high IQ to survive in the wild just muscle, endurance and a little control - qc3 compatibility as its implemented just gets in the way of portability. LiLon frankly scares me, if the pixies escape it's not good. I can see Darwin impatiently tapping his foot.
TS100 is awkward to hold and use but it's powered by more robust and practical tech ... if the TS100's guts fit into the TS80 handle and tip the result would be a great field iron. I can't see it ever replacing a bench rig.
whitehoose
on 31 Oct 2018
Hi,
I've tried the official 1.06s firmware, your firmware of 10/18/2018 and your latest firmware. With all firmwares my Blitzwolf BW-PF2 powerbank (QC3.0) seems to fall a sleep after a couple of seconds. With the original firmware, it does stay awake until the tip is heated. With yours it does not even make it up to temperature.
If I hook your version up to a BW-PF1 bank, which does not support QC3.0 and only 5v, it will slowly heat and only make it fall a sleep when I am in the menu.
I hope this report helps you in any form. If you have anything I could test to keep the BW-PF2 awake, I would be happy to try it out!
 m4rcu5
on 31 Oct 2018
m4rcu5
on 31 Oct 2018
Hi,
I've tried the official 1.06s firmware...
@m4rcu5 when you tried the 1.6s did you enable mobile power mode?
https://github.com/xjtuecho/MiniDSO/blob/master/TS80/SRC/TS80_1.06s/TS80APP1.06s.txt
whitehoose
on 1 Nov 2018
Yep, @whitehoose, But unfortunately, it still seems to fall asleep. Maybe the pulses are not long enough?
m4rcu5
on 1 Nov 2018
Final part of my story, today Postman knocked on door with amy replacement from Banggood.
I bought the more acc package which was £6 more so I could be certain I had a power source that was "approved". After three weeks the magic smoke escapes and the pixies ran away. It took 4 days to wade through the customer service machine, Different timezones and Google translate loses a lot of points when its for real, but the BG staff make it work. Finally a video of the iron looking purdy but not moving was offered in evidence, this clinched the deal and they told me to keep the wreckage and mailed out a replacement.
10 days later I am looking at a replacement Acc package containing all the same bells and whistles.
I have to say the process was a lot smoother (and quicker) than I expected.
whitehoose
on 10 Nov 2018
Any way to donate @Ralim ? I'd like to support development on the TS80-support. Thank you for all the great work!
 HeyRobb
on 10 Nov 2018
HeyRobb
on 10 Nov 2018
@whitehoose Thats a very long story :/ Hopefully banggood were not too painful about it all.
@HeyRobb You can donate if you would like, there is a link at the bottom of the readme for a paypal link if that works for you.
Finally a tester with the newer PID code.
Known things to fix :
- [ ] A current pulse to keep power banks awake
- [ ] Power shown on the detailed soldering screen doesnt calculate from actual tip resistance
- [ ] Still need to figure out the flaw in my logic for the temp calibration routines.
Ralim
on 10 Nov 2018
The power reading on the display is definitely off. I have the D25 tip, which I also set in the advanced settings.
I've recorded two videos with TS80 right next to the USB meter for comparison:
https://youtu.be/eW_UDWtOXsI
https://youtu.be/SCFug0rXkig
On the first video you can find the power reading in the lower right corner.
On the second video there're D+/D- voltages in the lower left corner and detected charging mode in the lower right one. As you can see, the data line voltages are not very stable and most of the time the meter doesn't recognise the charging mode, even though the power bank does enable 9 v output. Maybe the meter applies much tighter requirements on the D+/D- voltages for a proper mode detection.
BTW I have my TS80 set to 24W, but it doesn't switch to 12 v at all. It did on one of the earlier builds.
yawor
on 11 Nov 2018
@yawor Thank you for testing the other tip, I dont have one here and its nice to have data for comparison.
I've done no calibration of the power currently, so im expecting it to be off at the moment (its only visual indicator).
The voltages on D+/D- flick between 0.6 and 3.3V fairly quickly when adjusting the voltage so it might confuse the meter... Which combined with the lack of official docs means that quite a few power meters interpret this as "must be 0.6V" and don't include tolerances on that.
I need to look into the tip resistance measurement then if its not going up to 12V for you.
Ralim
on 11 Nov 2018
Sorry for going offfopic. I appreciate the work you all put into this. ♥️
Would the iron run of 7.4V DC?
I have no QC powerbank, and have enough old ones already. I do have two 16850 lipos though. Would prefer just using them as a constant power supply, but wanted to check if this might break things first.
What do you think, or have you tried this?
Might even design a nice 3d case for it if it is possible.
Thanks
 uvwxy
on 11 Nov 2018
uvwxy
on 11 Nov 2018
@uvwxy
Yep it will run off 5-12V inclusive, there is a delay at start while it probes for the QC but if that fails it will still work. (Same logic fall through as running off usb). Power will increase exponentially with voltage as per normal, so 2x 18650 should provide with a usable current range. I would suggest that you try it with a load inline first (such as a 12V halogen bulb) just when your first wiring it up just in case anything goes wrong :) (Safe than sorry). Havent tried this, but believe it will work afaik.
Ralim
on 11 Nov 2018
Ok, tested with the stock FW, and it did not start heating (the oled just started to flicker, and stayed at room temp). Maybe I should read the manual.
Does the stock FW wait for 9V? Then I would go for 3S and a buck to 9V...
Thanks for the quick response. Want to try your firmware sometime
uvwxy
on 11 Nov 2018
@uvwxy I cant really comment on the stock firmware as i dont really track it much, but when I originally was using it (pre-release) it required QC negotiation for it to start.
Ralim
on 11 Nov 2018
@whitehoose Thats a very long story :/ Hopefully banggood were not too painful about it all.
Actually not that bad, certainly better than gbraad's outcome. I can't complain.
Living in UK introduces a 1 interchange per day limit - so inevitably even a simple question takes an age. If you disagree or ask for clarification - even longer.
The language barrier is frustrating I attempted to anticipate by sending a detailed account and photos ...
Too many details are difficult to get past google translate - so I've learned to keep it short and simple. My chinese is far worse than their english.
First reply was sorry for trouble. What exactly happened? ... (aaagh!) reposted pictures and reworded symptoms. reply came back, send video of iron displaying it's immobility ... set up studio and sent video (this turned out to be amazingly time consuming - and I admit it's not good watching ) for something so small with it's own illuminated areas - the lighting is critical - and phone doesn't fit tripod and hand-held looks like its been shot on a roller coaster - Finally sent in take 11!!! ... weekend ... offer to replace .... accept replacement .... told me keep shrapnel and would arrange replacement.... finally, notification of posting.
Each step took a whole day + weekend. but to be fair there was no third degree or attempts to point fingers, wriggle out or return goods first ... I've had some heated discussions about missing and DOA packages but paypal are pretty good.
Banggood have a process and as long as you play the game and send a video they are very civil, cooperative and even airmailed the replacement which halved the transit time to 10 days which matched the time taken to get the replacement organised.
It's just part of the penalty for low cost mail order. I suppose, because with BG you are dealing with an agent rather than the sole proprietor it's less personal which reduces the aggressive defender instinct. As long as there is no rush, BG is as good as any I've used. The only "problem" has been my adjustment to the chinese "way" which I find different to the ch-e-bay approach (bob bless paypal).
My one "grey" area is the pre-order system ... My TS80 cost £64 ... when it shipped it was down to £62 (exchange rates) which pissed me a little - I asked if they price matched - they "mis-understood" my question for over a week like a brick wall - and no they don't (I got 300 points instead). When the game is to skin the price to the bone £2 is a bitter pill. But I can forgive in light of later events.
There is yet another aspect to this tale which I'll tell you about when the deed is done (nothing to do with BG) - BG are bloody good in my book.
whitehoose
on 11 Nov 2018
This firmware caused my tip to start glowing red hot, the temperature always showed over 400 even on start up. I had set the temp to 320 but it obviously went well past that. Needless to say the TS80 obviously isn't underpowered.
Finally a tester with the newer PID code.
Known things to fix :
- [ ] A current pulse to keep power banks awake
- [ ] Power shown on the detailed soldering screen doesnt calculate from actual tip resistance
- [ ] Still need to figure out the flaw in my logic for the temp calibration routines.
 AdamHoskins
on 13 Nov 2018
AdamHoskins
on 13 Nov 2018
This firmware caused my tip to start glowing red hot
Mine seems fine using it, just soldered some lightweight stuff (connecting AWG28 wires on PCB). Then desoldered/replaced a few SMDs on a faulty PCB.
Powersource my fancy qc3 powerbank.
Quick warmup ;Max 9v, max temp 320c. 20 mins max - No meltdown or anything untoward.
Nice to be using Ralim's FW again - the stock FW doesn't "feel" as comfortable. Can't explain it better than that.
whitehoose
on 13 Nov 2018
I was using an Aukey QC3 power adapter. I just loaded stock FW back onto it and working nominally, just my tip is now blue from the experience
AdamHoskins
on 13 Nov 2018
@AdamHoskins That is both worrying and very weird.
If you feel up to it, would you be able to throw the firmware on there, and go to the advanced settings and perform a settings reset, and then turn on the advanced idle screen. Really interested to see if this is a bad settings issue or a QC issue where its asking for too high of a voltage.
@whitehoose Thank you, I'm glad I'm not the only one who finds it more comfortable.
Been testing current pulses to keep the power supply awake, and for my two that I use for testing, I cant keep them awake without having it heat up the tip :(
Anyone have magic ideas on this ? Happy to throw current ideas up here for testing incase my power adapter is picky.
Power accuracy is still a bit out, but closer (over reads by around 5W worst case).
Still working on temp cal.
Ralim
on 13 Nov 2018
Power accuracy is going to be off until we account for the pwm duty cycle
gap for temp measurement.
Different power banks have different minimum output...
The best solution I can think of has been mentioned already - use a
splitter and add a second device that draws power.
You could add a busy loop to burn more power if no other processing is
going on?
On Mon, Nov 12, 2018, 7:20 PM Ben V. Brown <[email protected] wrote:
@AdamHoskins https://github.com/AdamHoskins That is both worrying and
very weird.
If you feel up to it, would you be able to throw the firmware on there,
and go to the advanced settings and perform a settings reset, and then turn
on the advanced idle screen. Really interested to see if this is a bad
settings issue or a QC issue where its asking for too high of a voltage.@whitehoose https://github.com/whitehoose Thank you, I'm glad I'm not
the only one who finds it more comfortable.Been testing current pulses to keep the power supply awake, and for my two
that I use for testing, I cant keep them awake without having it heat up
the tip :(Anyone have magic ideas on this ? Happy to throw current ideas up here for
testing incase my power adapter is picky.Power accuracy is still a bit out, but closer (over reads by around 5W
worst case).Still working on temp cal.
—
You are receiving this because you commented.
Reply to this email directly, view it on GitHub
https://github.com/Ralim/ts100/issues/349#issuecomment-438105032, or mute
the thread
https://github.com/notifications/unsubscribe-auth/AAGyxBlUxKSmgF4tRxSC3r3DxmFob-W2ks5uuix4gaJpZM4WO3WC
.
dhiltonp
on 13 Nov 2018
@Ralim I did the factory reset and turned on detail screens for soldering and idle. Idle looked fine, detected 9 volts. Went into solder, selected 320 and the tip heated up and held 320, I even measured it with my multimeter temp probe and was very accurate. Then I turned off detail solder screen. As soon as I turned solder mode back on the display said 462, the temp selection screen said 320 but the tip was heating up well past that. Is everyone using detail solder screen?
AdamHoskins
on 13 Nov 2018
The same for me I have got 4xx on display and other weird readings. So I switched back to 18d release.
slibbinas
on 13 Nov 2018
I'm using detail wherever it's available. I suppose because settings are relevant while the FW is at this stage I spend an unhealthy amount of time reading the display.
I never thought about sleep - but thinking back to yesterday, my fancy PB never did but that's maybe because I new what needed doing and things went smoothly without long pauses.
I got a ruideng um34c last week and on it's own the PB falls asleep at the drop of a hat
whitehoose
on 13 Nov 2018
I tried the TS80_11_11 same as AdamHoskins had trouble with. Mine showed over 20 Volts on the OLED both for my Xiaomi powerbank and the wall plug. Did not turn on the heater (I tried it didnt work). Went back to stock firmware for now but will be monitoring the progress as I would love the 12V and like the boost feature for the seldom larger joints.
 MaxKinz
on 14 Nov 2018
MaxKinz
on 14 Nov 2018
Hi,
I've tried the official 1.06s firmware, your firmware of 10/18/2018 and your latest firmware. With all firmwares my Blitzwolf BW-PF2 powerbank (QC3.0) seems to fall a sleep after a couple of seconds. With the original firmware, it does stay awake until the tip is heated. With yours it does not even make it up to temperature.
If I hook your version up to a BW-PF1 bank, which does not support QC3.0 and only 5v, it will slowly heat and only make it fall a sleep when I am in the menu.I hope this report helps you in any form. If you have anything I could test to keep the BW-PF2 awake, I would be happy to try it out!
I have the same problem as m4rcu5. I tried 1.06s on my TS80, but my BW-PF2 still goes to sleep 5 seconds after max temp is reached.
Any idea how to fix this?
 Culain
on 19 Nov 2018
Culain
on 19 Nov 2018
Just got confirmation of the final part of the loooooooooooooong tale of the ts80 repair. Quick recap - bought iron from banggood, using iron when magic smoke and pixies escape leaving dead iron. Banggood want video of dead iron, they watch and agree to send out replacement - tell me to keep the corpse.
After 20 days in total I have the replacement iron in my hand PLUS a dead motherboard with the rest of it in perfect physical condition. This got me thinking, I either have spare case, power, lead tip etc ....
It's unlikely I'll be able to fix the motherboard (unless it's just a resistor or cap that's died), but if MiniDSO will sell me a replacement motherboard - I can fix it and have a spare fully working Iron.
Bit of google translation and I found the enquiry point, I told them my tale of woe and asked the price for the bits and postage. They said - "send us the corpse and we'll fix it for free", so I did, and they did so now a working motherboard is in the post. Talk about a happy ending!
The iron failed 25/10. It took 10 days to negotiate the BG replacement + 10 days in transit - the motherboard should be the same - so give or take a day. The whole thing will have taken about a November to resolve completely. I don't think that's bad under the circumstances.
If you are running a business doing mission critical work - you'd need to look elsewhere or build a stock of spares into the budget but as long as time isn't an issue I see no other real issues.
There isn't a TS80 equivalent - so its not really possible to say this was to "save money" - it's actually a quite expensive indulgence compared with what's in my "serious" field toolbox but the kit and the service is top quality IMHO, given the unavoidable hurdles dealing with language and an (almost) 6000 mile, 8 hour separation. There are a lot of other issues, but it's difficult to criticise this experience.
whitehoose
on 19 Nov 2018
Any idea how to fix this?
Pulsing the tip as @Ralim is experimenting with should help. The powerbank needs a load, which is higher then the standby current of the STM chip.
I wonder how bad the heating of the tip is with his experiments. If it heats up to 50/60 degrees, that would still be acceptable for me. I will be using the iron to solder anyway and not leave it dangling around.
(not sure how this impacts the heating when the tip is already at operating temperature)
m4rcu5
on 20 Nov 2018
I just hope that this "keep powerbank happy :stuck_out_tongue_winking_eye:" feature is going to be optional and configurable from the menu, as there are powerbanks with low current mode. Working with a mains QC3.0 charger also doesn't need that.
Maybe instead of configuration item in the menu it could use button hold when connecting to the power? Right now the right key on @Ralim's firmware shows firmware version, but it could be used to enable this feature for the current session (until power is disconnected).
yawor
on 20 Nov 2018
Right now we overshoot when heating to the target temperature, then settle down and stabilize.
This is useful because the temperature we read isn't the same as the tip temperature - the thermocouple is right next to the heating element, se we need to overshoot to hit the target temperature fastest.
I'm planning on adding estimation for tip temp based on the history of output power and temperature, but I've killed my tip while rewriting the PID code to use watts. I've paused development while waiting for a couple of replacement tips and some thermocouples (which should be arriving within the next week or so).
dhiltonp
on 20 Nov 2018
Hi,
Any idea why i can't use my Notebook usb3.0 Power supply?
Should i change something in iron settings? Wat's etc?
Or just go back to power hub/adapter at this time?
kokein
on 21 Nov 2018
A Laptop is a very expensive psu and nowhere near as easy to repair as say, a nice spacious desktop - but compared to a power brick or wall wart they are both expensive options. I can't say I've never plugged a phone or anything else into my lappy, but in use the Iron has potentially quite a high current requirement and that means heat, which in a laptop esp means trouble. Add to that the somewhat random results people have had - and its a bit of a lottery.
I try to keep my lappy as cool as possible in the vain hope that it might live longer. Only time I plug the iron in is to flash one of Ralim's splendid offerings.
To answer the question, my understanding is it seems not all USB3 is equal or predictable, if you look through earlier posts you'll see that USB and particularly QC is a bit of a lottery, and just occasionally for whatever reason bad things do seem to happen. And the only way to be certain is to connect 'em together and see.
Settings do affect outcome sometimes in unexpected ways.
My approach is to switch all the goodies Ralim gives us on - and see what happens.
And with talk of red hot tips and my own irons burned out motherboard - I'd rather be hung for a cheap powerbank or wall wart than even the cheapest cheap lappy.
I don't stress my lappy unnecessarily.
whitehoose
on 22 Nov 2018
can someone tell me how to flash the firmware I couldn't find it anywhere
Zyzto
on 22 Nov 2018
If your power supply provides both USB-PD and QC you could. For
instance, the Lenovo power supplies as designed by powerland are. You
would however need to connect from USB-C to USB-A and then use USB-A
to USB-C in most cases, or else they will default to using USB PD (and
if fails, go to 5V)
On Thu, Nov 22, 2018 at 11:10 PM Zyzto notifications@github.com wrote:
>
can someone tell me how to flash the firmware I couldn't find it anywhere
—
You are receiving this because you were mentioned.
Reply to this email directly, view it on GitHub, or mute the thread.
--
Gerard Braad | http://gbraad.nl
[ Doing Open Source Matters ]
gbraad
on 22 Nov 2018
If your power supply provides both USB-PD and QC you could. For instance, the Lenovo power supplies as designed by powerland are. You would however need to connect from USB-C to USB-A and then use USB-A to USB-C in most cases, or else they will default to using USB PD (and if fails, go to 5V)
Ok, i do have Lenovo power 3.0 supply, and yes different outputs. But i want wstart at all.
I'll have to try this conversion usbC -> usbA, and usbA-> usbC, did someone test it already?
kokein
on 22 Nov 2018
What is the status on TS80 support? Is there something I can try, and is it stable enough to not fry my iron? :stuck_out_tongue:
 skorokithakis
on 23 Nov 2018
skorokithakis
on 23 Nov 2018
What is the status on TS80 support? Is there something I can try, and is it stable enough to not fry my iron? 😛
I've used the last build from here and it's fine ( my hardware rev is 1.71 )
Finally a tester with the newer PID code.
Known things to fix :
- [ ] A current pulse to keep power banks awake
- [ ] Power shown on the detailed soldering screen doesnt calculate from actual tip resistance
- [ ] Still need to figure out the flaw in my logic for the temp calibration routines.
just don't make my mistake and check the settings cause I had d25 tip and the setting were for b02 ( it won't do anything just it won't work )
Zyzto
on 23 Nov 2018
@gbraad do u think this safe ?
https://youtu.be/FPBqyNWbXdw
Zyzto
on 23 Nov 2018
Ah, thanks. That version worries me because of the bug reports above, but @Ralim's firmware is so nice to look at that I haven't even used the iron because I don't want to figure out the stock firmware... I'll see how it goes, thanks.
skorokithakis
on 23 Nov 2018
Part of this adventure is the ((very)) small risk that's involved. As far as I've seen there is little risk (nothing is ever risk free - but this isn't far off. In my case I've used the firmwares in this topic. Some of them worked, some didn't - but none of them has done any damage - you can always restore 1.6 if it goes pear shaped.
My personal "quest" is to use the iron with any powerbank as I spend a significant part of my working time "off grid" with the prospect of a long trek if my existing universal power source fails. The TS looked a good candidate, but its preference for qc3 means that my current arrangement isn't really compatible so I have to carry a qc3 too - ALL my other tools are happy with USB2's 5v so its not ideal.
So I tried a booster to squeeze a couple of extra volts out of USB2 and that seems to have killed the iron. On paper that WAS safe as QC can deliver double what I introduced. But it was a heck of a coincidence!
Nothing to do with Ralim's efforts, his only implication was that he made 5v possible some weeks ago.
And that's the implication - on a site like this you'll get a mix of experimenters, some of them (us) will only try things in these posts which seems pretty safe.
Others (hem!) will add yet more uncertainty by trying something else that results in disaster.
Not using it shouldn't be an option, if you don't want to risk off piste that's fair enough ... but leaving the iron unused in a drawer due to indecision is just a sin.
You don't need to "figure out" 1.06 it works out of the box - just chose a temperature (320 is a reasonable guess) and press the button. Ralim's offering is nicer - but nice isn't essential to melt a little tin.
whitehoose
on 24 Nov 2018
Oh, no, I'm not saying I'll let the iron sit unused, just that I've been too lazy to figure out the stock menu after spending a month with Ralim's nice menu on my TS100. I spent a few minutes earlier and configured everything, but I might try Ralim's firmware just because it's nicer. I need to decide which iron I want to use, since the TS80 doesn't work with my non-QC3 power bank :/
skorokithakis
on 24 Nov 2018
The most recent revision works fine, the only issue most people seem to be having (myself included) is that not using the detailed views seems to cause the iron to continuously deliver full power to the tip and read a nonsense temperature. Turning on the detailed view makes everything work normally
 Gigahawk
on 24 Nov 2018
Gigahawk
on 24 Nov 2018
That's an easy workaround, but that's a rather serious bug that can destroy the iron, no?
skorokithakis
on 24 Nov 2018
Probably could burn your iron out, it certainly destroyed the tip on mine. End of the day it's pre-release beta firmware, something could go wrong. I certainly aren't complaining, I knew the risks. Having said that everything else works great. As soon as it's fixed it will be a vast improvement.
AdamHoskins
on 24 Nov 2018
Ah, okay, I'll wait for a more stable version then, thanks :)
skorokithakis
on 24 Nov 2018
It's possible to have 450 °C boost for TS80?
 Boia11
on 24 Nov 2018
Boia11
on 24 Nov 2018
@AdamHoskins I'm looking into this bug at the moment.
@Boia11 Not quite, there will be a boost mode, but what maximum temp it reaches will depend on your particular tip's calibration. As it can only control the iron up to the maximum input that the unit can read back from your tip. On some units this is ~455C and on some its closer to ~430C.
Ralim
on 25 Nov 2018
Thank you very much for this Ralim.
I have a number of ADATA 10Ah QC3 battery banks that would give nothing but "Low Voltage" when attempting to heat on the official 1.06 firmware.
Your's works perfectly and updating was without issue. I have set the displays to detailed to avoid the bug reported above.
I have found the (uncalibrated) temperatures to be very close to those measured by a thermocouple. Voltage measurement seems correct too (8.4 to 8.9V).
I only ever see a maximum of 10W drawn by the iron though (on the detailed display). I am looking for another QC3 power source to test if it is the ADATA battery bank (specs say 9V @2A).
 tomlut
on 27 Nov 2018
tomlut
on 27 Nov 2018
@tomlut the power readout in the 11_11 doesn't show a correct value, so don't worry about it.
yawor
on 27 Nov 2018
Thanks. That saved me a bit of mucking around.
tomlut
on 27 Nov 2018
tried flashing my TS80 - got a couple of .ERR attempts.
- then, tried the original
1.06firmware. got.NOT. - reset to factory settings.
- now, trying to update again, it worked.
i also did rename the file to TS80.hex, not sure if that changed it to work.
thanks folks! ❤️
 gretel
on 28 Nov 2018
gretel
on 28 Nov 2018
Shouldn't be an issue with the firmware, DFU mode is just really picky and doesn't always work if you have it plugged in through a USB hub (even internal ones).
Gigahawk
on 28 Nov 2018
The actual act of flashing is a bit of a pain, having to double dip every time, that said, flashing the DPS5005 is far more complex, required a couple of e-bay purchases a lot of typing of commands and some soldering, so compared to that its an absolute walk in the park.
All pain is subjective.
whitehoose
on 28 Nov 2018
Too bad Mini didn't expose programming interface (SWD/JTAG) as test points on the board. It should be possible to replace the bootloader but without the test points you'd need to solder few thin wires directly to the STM32's pins to connect STLink or some other programmer. Of course the new bootloader would need to be not bigger than the original one and probably should use the same offset for the firmware image.
Anyway having to upload two times is not really that bad. You don't replace the firmware that often.
yawor
on 28 Nov 2018
@yawor For the TS80, they did one better. SWD is available on the USB D+/D- pins without opening the unit.
There is an alternate bootloader you could use if you wanted, which implements DFU.
Currently still trying to figure out the hang in the simple UI mode and then will have another release
Ralim
on 28 Nov 2018
All pain is subjective.
so is my interest in your heroism 😁
gretel
on 28 Nov 2018
@Ralim, wow, I didn't know about that. Thanks for the info :).
yawor
on 28 Nov 2018
@Ralim just to be sure, does this mean that to access the SWD lines, I'd need to make a cable with USB-C on one end, which I can then connect directly to an STLink v2 for example? Is that BL you've posted a link to compatible with TS80 firmware (yours and/or the original)?
Has Mini set a fuse which protects the flash from being read by SWD? It would be nice to be able to backup the original bootloader before playing around with something else :).
yawor
on 28 Nov 2018
@Ralim Eagerly waiting for a release that fixes the overheating bug, your firmware is much better than the built-in one.
skorokithakis
on 28 Nov 2018
@Ralim Eagerly waiting for a release that fixes the overheating bug, your firmware is much better than the built-in one.
can you hint me on what is wrong with the current version? seems to work fine for me using the B02 tip.
gretel
on 28 Nov 2018
@gretel there's a bug in 11_11 which starts heating the tip as soon as you disable the detailed view and overheats it. I haven't tested this myself, as I use the detailed view anyway, but few people have reported this.
yawor
on 28 Nov 2018
Upthread:
Probably could burn your iron out, it certainly destroyed the tip on mine
not using the detailed views seems to cause the iron to continuously deliver full power to the tip
skorokithakis
on 28 Nov 2018
@yawor I've never used the firmware on the TS80, so I want to ask you how easy it is to disable the detailed view. Basically, how easy is it to trigger the bug? I don't want to ruin my iron but I want to use the firmware...
skorokithakis
on 28 Nov 2018
@yawor @skorokithakis thanks! did instinctively enable the detailed views... 🤞
gretel
on 28 Nov 2018
@skorokithakis by default you have the simple view, which triggers the bug. You need to enter into the menu and enable the detailed views. You can always do this without the tip being plugged into the unit. After enabling the detailed views you can safely install the tip.
To get back to the simple view, you'd need to either change these settings back by disabling the detailed views or by doing a factory reset.
@Ralim is working on fixing this so if you're afraid of triggering this bug then just wait for the new release.
yawor
on 28 Nov 2018
@yawor Thanks, I think I try this release as I'm not sure when the next one will come, it doesn't sound like it's easy to disable the detailed view, thank you.
skorokithakis
on 28 Nov 2018
Be sure to enable the detailed view, showing estimated watts, standby
timer, voltage and temperature.
dhiltonp
on 28 Nov 2018
Unfortunately I keep getting .ERR even after trying ~30 times, so I'll have to give up :(
skorokithakis
on 28 Nov 2018
Unfortunately I keep getting
.ERReven after trying ~30 times, so I'll have to give up :(
@skorokithakis while being esoteric you could try what i did https://github.com/Ralim/ts100/issues/349#issuecomment-442263536
gretel
on 28 Nov 2018
@gretel I tried that, gave .ERRs too :/ This is under Ubuntu, not sure if that matters.
skorokithakis
on 28 Nov 2018
@gretel I tried that, gave
.ERRs too :/ This is under Ubuntu, not sure if that matters.
- try different usb port
- do not use any hub
- try another cable
i also remember resetting to factory settings just after trying to re-flash the original firmware. i just can't say what made the difference...
gretel
on 28 Nov 2018
Thank you all, it worked in the end. I switched computers, but I think what made it work was the fact that I didn't reset the iron every time I got an .ERR, I just copied the file again and it worked on the third copy.
skorokithakis
on 28 Nov 2018
Thank you all, it worked in the end. I switched computers, but I think what made it work was the fact that I didn't reset the iron every time I got an
.ERR, I just copied the file again and it worked on the third copy.
great. remember to enable the 'detailed views' first!
gretel
on 28 Nov 2018
Already enabled all of them as fast as I could :stuck_out_tongue: Thank you for your help!
skorokithakis
on 28 Nov 2018
No release yet, so look for a zip file in one of the previous messages
for a test release.
gbraad
on 29 Nov 2018
@whitehoose I have two of the 5005's, haven't gotten around to putting custom firmware on them yet. Hope it's not too difficult
AdamHoskins
on 29 Nov 2018
AdamHoskins - I'm a fan, a good reliable little unit.
No, not too demanding, I used John Kanflo's (https://johan.kanflo.com/category/dps5005/) mod.
I like the simplicity of his front end. The original is very colourful - but too busy for my needs. Its a mod that strips out the unnecessary and then adds WiFi. Don't expect lots of new bells and whistles.
You can buy the official version - but DIY is more fun.
The 1.25mm j-tag pads are small and access is tight so it's a fiddly one - you need a very fine tip, the d25 is a bit chunky, or pogo pins, but you still have to solder the UART if you want WiFi. John has written the instructions literally - so follow them EXACTLY and you'll be OK. I bricked mine first go (thinking too much :( ) but its easy to recover. It suits me.
whitehoose
on 29 Nov 2018
Hi,
I just flashed the latest ralim firmware, 2.06 or 11/11 type, I would like to say it is a great firmware that enables the unit to be heated up without QC plugs.
I have few suggestions regarding the settings area:
- move tip type under "soldering settings" as the owner who has both tip types, might gonna change between both so often, I'm not sure what is the real differences here, maybe calculation in the firmware between both?
- add swap between increase/decrease temperature button option.
- add default setting timeout around 15-30 second to go back to idle screen automatically
- move "power source" under "advanced settings"
- set max temp to 400'c only for normal operation, boost mode may exceed up to 450 (I'm not sure what is the max temp the whole unit able to go, I assume 400'c is the safe max temp)
- add reset calibration that only resets the calibration data, voltage and temp instead of whole thing so the user don't have to go through all process of changing the interface and others.
 sarf2k4
on 3 Dec 2018
sarf2k4
on 3 Dec 2018
Can somebody with disassembled TS80 post ST's uC chip part number? ST has released STM32G0 series, which might be pin compatible (same as H7 is compatible with F7), and it has support for USB C and Power Delivery standards. Perhaps simple IC swap would suffice to have such features in TS80?
 tehKaiN
on 10 Dec 2018
tehKaiN
on 10 Dec 2018
@tehKaiN https://www.youtube.com/watch?v=_Z9es-D9_8g#t=19m13s
skorokithakis
on 10 Dec 2018
Thanks. I knew I saw it but I couldn't remember where.
Now, used IC is 36-pin QFN package, G0 comes in QFN too but in 28- or 32-pin variants. So without board redesign it's not doable atm. Perhaps we'll get more G0 chips later.
tehKaiN
on 10 Dec 2018
@joric QC2 _should_ work on their firmware from my reading.
QC 2.0 is implemented on my firmware, but I have nothing I can test with over here :(Here is a rough build, will feel very similar.
Still needs temp cal.
Would love feedback on if QC works for you.
TS80.zip
Excellent!
I own a "Charmast 20800 mAh" QC 3.0 power bank, and was constantly getting LOW VOLTAGE error messages.
This firmware works like a charm.
The only annoying thing is that the power bank expecting the device to draw at least ~60mA constantly, otherwise it turns off. "Draw at least XY mA" would be a nice feature (0-100 would probably suffice). Yes, it would raise the tip temperature somewhat, but we only speak of 1W max.
It even (sort of) works from 5V. Beauty! :)
 netom
on 10 Dec 2018
netom
on 10 Dec 2018
My unit had trouble heating up from 5v input, wonder if its from the power source or the firmware. I'm using the stock firmware because there would be no difference if I can't reach target temp e.g 400 on custom without QC3.0, unless I want to avoid low voltage issues.
On second thought, I just stick with this custom, getting used to it and no low volt issues
sarf2k4
on 14 Dec 2018
Hello, I try TS80 with battery Tessin-QC3-PB. It works about some seconds and de battery auto power off. I use an usb shielded hight speed cable 2.0. Is someone use this powerbank with TS80 ? I have just upgrade V 1.07, it's the same. Thank you.
 jhc58
on 14 Dec 2018
jhc58
on 14 Dec 2018
jhc58 There are two types of falling asleep I think it was October that one of the releases had the iron dropping off, Ralim fixed that and mine certainly eeps woring
The second is the powerbank which drops off when the iron is ust ticking over and not using much current. There was talk of a mod to overcome this (can't for the life of me remember if that was done yet??) #donbowman came up with a stroke of genious _[plug an old useless flash drive in the other USB slot of the powerbank to keep a little bit of current going. or a USB LED flashlight].
My PB also has an option to double press the test button which shifts to low power mode and stops this happening.
whitehoose
on 14 Dec 2018
I make measures. With TS80, the power-bank keep 50 seconds and cut at 0.439 A at 9.13v. With a loud, it begin at 9v and, with decreasing loud, I keep it 17 minutes from 5.15v 0.032A. Put a loud at the other slot works. I have somewhere a little usb flashlight... Thank you very much. (https://github.com/Ralim/ts100/files/2681878/mesures.zip)
jhc58
on 14 Dec 2018
Glad it worked - all credit to #donbowman's simple but effective workround.
I'm currently using the 11_11 dated 10 Nov. You MUST set to full detail view before first use to prevent the tip overheating bug (see the discussion) - but once that's done I've found the firmware well behaved and rock solid in everyday use - powerbank never sleeps.... or becomes red hot and certainly hasn't melted as yet.
whitehoose
on 15 Dec 2018
Works well with 100 ohms resistor, power-bank do not switch-off.
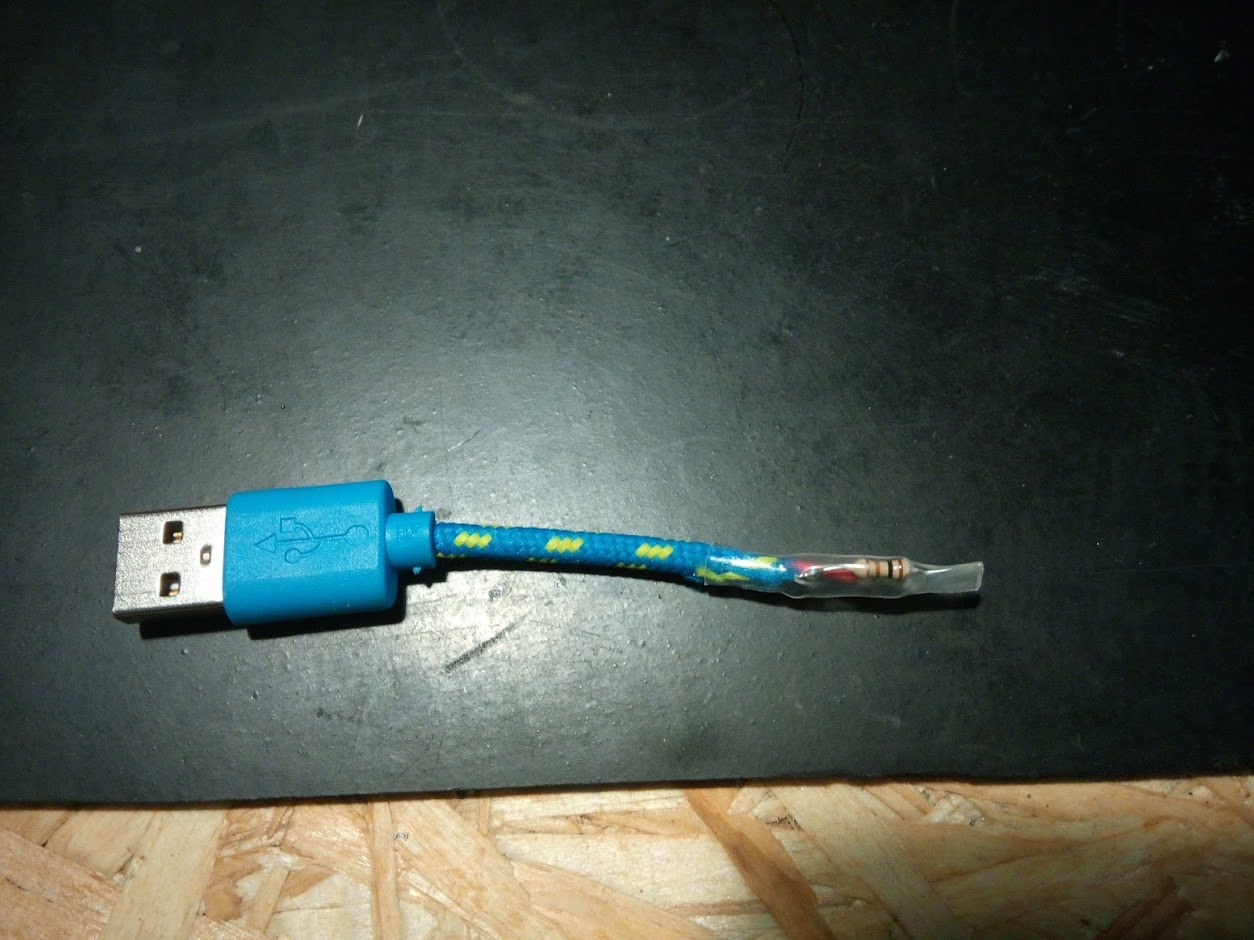
jhc58
on 15 Dec 2018
LOL I was thinkig about a similar solution. An LED lamp of proper power
would do some actuap good.
- dec. 15., Szo 12:33 dátummal Jean-Henri Colleye <
[email protected]> ezt írta:
Works well with 100 ohms resistor, power-bank do not switch-off.
[image: image]
https://user-images.githubusercontent.com/15678375/50042583-59cfd380-0065-11e9-9e13-647188ec124a.png—
You are receiving this because you commented.
Reply to this email directly, view it on GitHub
https://github.com/Ralim/ts100/issues/349#issuecomment-447561848, or mute
the thread
https://github.com/notifications/unsubscribe-auth/AAqbm3lWKaGthFzoMCAqGUe5biLHMJjvks5u5N39gaJpZM4WO3WC
.
netom
on 15 Dec 2018
I'm currently looking at ISDT BattGo BG-8S Smart Battery Checker with a s4 Lipo pack.
The BattGo BG-8S has an option to charge or power a device(s) from a larger batt and has qc3 support with up to 12v output..
At the moment I don't if/how that's going to work given how flakey qc3 seems to be. Every device seems to come with it's own unique set of screw ups. If it does work independently and with different batteries I can save myself some grief when on the road it will be worth the cost of changing (so far the kit has cost the same as an iron).
whitehoose
on 15 Dec 2018
@whitehoose I have the BG-8S it works very well, it's the only reason I have the TS80. USB power is a bit limited out to in the field, I fly quad copters so powering from a lipo battery that I already have loads of is very handy.
AdamHoskins
on 15 Dec 2018
@netom There is some preliminary code in that last release ^ that keeps the iron drawing some power, but the issue is that to avoid heating the tip the best idea is to pulse the current, which on some power supplies will reset the shutdown timer, but on others it wont help (as they want a continious draw).
Adding an option to just continiously draw a certain current is a good idea to toy with.
@tehKaiN Also there is none of the interfacing circuitry, so you would still have to do an entire board re-design anyway sadly.
Ralim
on 16 Dec 2018
TS80_2018_12_16.zip
New tester version, hoping this one is much better.
Open to all feedback, should fix all the bugs I know about.
Be careful with testing the normal vs Detailed screen at first, I'm fairly confident its fixed from my testing, but would be ideal if you guys can test before I put this up as a proper beta release.
Secondly, flash space is tight. If anyone here is a good python programmer, let me know. Looking to expand the translation code to also generate a condensed font table as that's taking up a significant portion of flash space.
Ralim
on 16 Dec 2018
@Ralim I'm a Python programmer. Do you have some ideas regarding an algorithm of the condensing/compressing the font table? It should be something which can be easily used from embedded C code. It wouldn't do much if the code to use the condensed fonts used similar amount of space which we would save by condensing fonts.
I can confirm that the simple view issue is no longer present (at least in my case). I've noticed some UI issues though, that were not present on 11_11:
- The scrolling help text tears in the middle (it looks like bottom half of the text lags behind the top part). This is visible on both slow and fast scrolling speeds.
- In the menu, when an option with a checkbox is displayed, lower right part of the checkbox's frame blinks.
- On simple view, if the cooldown blinking is enabled, the blinking temperature is also tearing - top and bottom halves don't show up and disappear at the same time.
- Right after upgrade I've got an info on the detailed idle screen that the tip is disconnected when it was cold. There was no problem with starting heating and it showed the temperature, but when the temperature went down the text appeared again. After factory reset it didn't show up anymore.
yawor
on 16 Dec 2018
I have just tested the new release with my iron but it sadly didn't work both with and without the detailed screen. I use the B02 tip and the display first said the tip was disconnected. It also said it had 20V input on a Xiaomi powerbank. After I changed to idle non detailed it would report 10v down from the 20 but when trying to get it to heat up it took forever so I first thought oO the temp might be off and unplugged it quickly but another quick test with some solder revealed the tip was actually not getting hot very quickly at all. When trying to heat with the detailed screen it would not even turn on the heat at all. Hope the feedback helps -
For me its back to stock firmware for now. Thanks for your work !
MaxKinz
on 16 Dec 2018
@Ralim regarding the fonts, my idea would be not to store the font data in the Font.h file, but directly in the Translation.cpp for each language. The translator would collect all unique characters used for each language and then produce a font table only with glyphs used in that language. It would also need to generate a second uint8_t table which would map char code to actual position in the glyphs table (table index would be a char code and value would be an index in the glyphs table).
If the translation files would also define which font size is used for each item, the translator could also do this separately for each font size, which would probably save even more space.
yawor
on 16 Dec 2018
@Ralim maybe we should create a new issue for tracking condensed fonts to discuss available options?
yawor
on 16 Dec 2018
@yawor this could be probably constexpr'd to large extent when using latest c++ - this would result with even smaller firmware if prepared for each language separately.
tehKaiN
on 16 Dec 2018
@tehKaiN sorry, my C++ knowledge is rather basic, especially when it comes to the newer standard versions. Can you explain more?
@Ralim I've looked on the source code and here's my idea. Like in my previous message I'd collect all used characters in a translation and generate glyph tables which would only contain glyphs which are actually used. My first idea was to generate a mapping tables for the new shorter glyph tables so the char codes would be translated correctly. But this would make printing more complicated.
Instead my new idea would make printing even easier by replacing char* in Tranlation.cpp with uint8_t[] which would directly point at glyphs used (if we can fit within 255 characters in total, if not then the python generator could use uint16_t[] instead).
This would allow to remove all the code in OLED class which now detects UTF-8 characters and translates their char codes into the glyph table space. The downside would be that you'd loose the ability to display some messages directly from the code: they would all need to be included in the translation files.
yawor
on 16 Dec 2018
I'm sorry if this is dumb, as I haven't been watching the conversation, but if what you want is to compress the fonts, there are compressors with excellent ratios and with an implementation that is less than ten lines of C and run extremely fast. Would one of those work?
skorokithakis
on 16 Dec 2018
I'm a fairly good Python dev, btw, if you need me to hack on anything.
skorokithakis
on 16 Dec 2018
I have an odd issue: I connected the iron to flash, and it said "TIP DISCONNECTED". I didn't think much of it and I upgraded, but I kept getting that issue. The tip is connected, it shows the normal detailed screen for a second when starting up but then says "disconnected" again. if I actually disconnect the tip, I get a temperature reading showing 415ish degrees. No idea what's up with that.
skorokithakis
on 16 Dec 2018
I did a factory reset and this seems to have been fixed, although I haven't tried yet. In the advanced settings, I get:
TIP    TS80
MODEL   B02
Which is a bit confusing, because I read it as "Tip: TS80, Model B02". Maybe reorder to B02 TS80?
skorokithakis
on 16 Dec 2018
Also, why is the default for this 300 C and 420 C boost, instead of 350 C and 400 C boost for the TS100? Should I keep the defaults?
Sorry for the multitude of comments.
skorokithakis
on 16 Dec 2018
AdamHoskins
Good to know. I've ordered the kit which is coming in installments - so not had chance to give it a good shakedown. Lipo hasn't been my default but anything is better (lighter) than lead acid (although I'm a little wary of the publicity Lithium cells get re blast areas. Powerbanks were my first thought for portability - so convenient but QC3 has blown its chance to be my new best friend.
skorokithakis.
I've only started to test the code, but I've been soldering for 50 years. Defaults have only very recently surfaced - if you look on t'internet you'll find that every solder manufacturer produces a datasheet for each mix in their range (and some have 100s of different options). I use 3 different and each has its own "best" temp.
Mainly I use Rapide lead 60/40 and they say melts at 180c and recommend 300-350c tip temp, I find 320c is my best working temp. I occasionally go down to 280c or up to 380c depending what I'm working on but no higher. Settings are there to meet your needs which will probably be different to mine.
As far as temp is concerned - Have a play.
whitehoose
on 16 Dec 2018
@skorokithakis I don't know why the defaults are what they are, but it all depends on what temperature you need. I mainly use leaded solder (standard 60/40) so I'm happy with 260/270 C. I've set my boost to 350, as I don't need more than that.
Regarding the compression algorithms you've mentioned, do you have any examples?
yawor
on 16 Dec 2018
@yawor I dunno if using constexpr is plausible solution since most of codebase is C, and now that I think about it it's quite troublesome, I'll elaborate for discussion's completion sake.
By declaring function constexpr you are declaring that its calls can be evaluated compile-time, so you don't need external scripts to generate data for you, you can declare a function which will prepare it instead and call it as initialization of e.g. const. So you can do something like constexpr reducedFont_t reduceFont(fullFont_t, const char *allowedChars) which would reduce full charset to only used chars. If used properly full charset gets never into firmware and only reduced one gets used.
The most obvious limitation of such approach is such that one needs separate firmware for each language. The better option would be to code firmware in such way that it expects charset & messages on given flash location, then one can update this location by drag&drop to iron connected as usb mass storage. Then you just have one firmware with default language built-in and localization files which would overwrite default language and its font.
tehKaiN
on 16 Dec 2018
When I briefely dabbled with code (I don't consider myself a programmer or even an enthusiastic amature). My approach (from necessity) was to keep it simple and let the end user do a little work.
My thought would be common code using a series of seperate language files. I understand that's not always practical and it's certainly easier to administer a single file but inevitably multilingual dross is bulky from the start and always gets bulkier with time and popularity. Carrying lots of redundant unused code is a luxury you can't always afford
whitehoose
on 16 Dec 2018
@whitehoose That makes sense about the temperature settings, I'll try a few and see what I need, thank you.
@yawor I've been trying to find an algorithm I saw decades ago that had a decompress or that was three or four lines of C. There are definitely compression methods that optimize for preprocessing time and have minimal decompressors, which sounds ideal for this use case.
skorokithakis
on 16 Dec 2018
Report on TS80_2018_12_16 : After using on several different power sources successfully (powerbank, qc3 adapter and macbook pro usb port etc.) it stopped detecting the power sources properly.
Stuck at 5V and 5W while connected to proper 18W QC3 power supply. It was not like the interface issue, it actually warming really slow as if it's a 5V 5W supply. I think it stopped negotiating with the source. I tried reinstalling and factory reset menu but nothing changed. Reverted to original 1.07 firmware and problem fixed.
 bdaver
on 19 Dec 2018
bdaver
on 19 Dec 2018
Sorry for being off topic, is minidso site down or something? I wanted to search for original 1.0.7 firmware which I only have 1.0.6. Can someone point me to the right one?
sarf2k4
on 20 Dec 2018
 Firebie
on 20 Dec 2018
Firebie
on 20 Dec 2018
Thank you for the link
What is the difference between 1.06 and 1.07?
sarf2k4
on 20 Dec 2018
@bdaver That's a very interesting failure mode.
Could you confirm if you have it on 18 or 24W mode? Also if you could confirm the value of the following entries in the debug menu please : "RTip","Vin","QCV","Tr" it will help massively in debugging this.
Ralim
on 20 Dec 2018
I also flashed the latest version from @Ralim , just like @yawor said, no issues on simple ui on my side either where the unit will heat up the tip. I powered mine on a 5v usb charger to limit the heating capability.
I would like to address the tip temperature shown, it is quite confusing because in this custom firmware, the temp value is an offset value. for example if my room temp is 30c, calibrate temp on the unit it will show 000-003. When heating up, it might be that the tip temperature is not accurate since using offset, heating up to 350c might ended up 380c. I don't have the means to measure the temp of the tip accurately.
I read previous posts way back at the tom that @Ralim wanted to tackle down the temp calibration process. I wonder if it is possible to dissect the original's firmware algorithm or was it that already been used?
My only concern is actually the actual temp of the tip shown in the unit's screen be it room temp or heated up temp. Don't want to go overboard with the tip's max temp before it starts to internally break down without knowing the actual temp
sarf2k4
on 20 Dec 2018
@Ralim thanks for the update! i have some experience to share:
- first, tried the official
1.07which works fine - then, flashed
TS80_2018_12_16.hex - did not detect the
B02tip even when selected - factory reset resolved this issue - enabled 'detailed views', selected
24Wsource - tried to solder at
300C- worked as expected - the solder kept quite sticky, i did not suspect any overheating - finally, finished a solder job at
330Cperfectly
using a cheap socket charger, which acutally seems to work very well in regards to QC3.0. it has two ports, using the second one for a solid ground connection - my workbench is made of stainless steel 😏
gretel
on 20 Dec 2018
I did a test on a perforated solder board earlier with @Ralim firmware and the stock 1.07 firmware. Here is what I've found out so far
On custom (ralim's latest december firmware):
- Did a big blob of solder lead on the perf board, and put the D25 in it, temp dropped from 300 to 250
- The unit still pull at about 8.9v even at 24w power mode.
- Had a hard time melting the big blob at 300, had to set at least 350 or 400
On Stock 1.07 firmware:
- Minimal temp drop at a big blob with D25, 300 to 290
- The unit pulls up to 10.5v at 24w power mode
- At 300'c with D25, able to melt big blob without problem
On both tests, there is a small 5v usb fan blowing directly.
The effort of putting a custom firmware is good, it is not that I'm belittling the effort with the comparison that is towards the stock. But I believe there is still more work to be done
sarf2k4
on 21 Dec 2018
@sarf2k4 I dont use the original firmware temperature curve code at the moment as I had issues with it failing on some tips. It especially had issues on the ts100 with some of the Hakko tips being out by a fair bit.
It does still need the ambient temperature added back in before the display why is why it starts fairly close to 0.
the fact that you were getting 9V at 24W makes me think you didn't power cycle the unit after making that change?
If you think the firmware needs more work, you are 100% welcome to add to it / improve it.
Most of the features in the official firmware were taken from this one, so take it however you wish :)
I do this because I enjoy the products and like to have things a bit different, you are under no pressure to use this software, but I hope that it does help.
I do agree that my temperature curve stuff is not 100% perfect by any means, but it handles a wider variety of tips better than the stock firmware did (it may have changed since then)
Ralim
on 21 Dec 2018
Hi, I didn't power cycle the unit after the power mode change at 24w, I assumed that it would apply the power mode immediately because it wasn't stated that I need to power cycle for the change to take effect. I'm not a very good programmer, so I don't think I'm able to add/improve the custom. I may going to mess everything up. Didn't mean to offend you with the comparison above, I did enjoy trying out new things and mods =D
P.S
Tested once again, 24w mode does work after power cycle, the setting will be saved after going back to the idle screen, then will be used after power reset. This I believe some missing info about this custom firmware's behavior
sarf2k4
on 21 Dec 2018
@sarf2k4 even non-programmers can add to the documentation in case they figure their assumptions were not right :)
gretel
on 21 Dec 2018
Has anyone tried the TS-80 with a Besiter power bank?
I have a Besiter 20000mah 12v, 9v, 5v battery pack that is Quick Charge 3.0 on one port and it just shut off or reboots when powering the TS-80 at 5v or 9v. It seems like if I plug something into the other USB port for 5V it will remain on and power the TS-80 at 5V with the Ralim firmware. That is not ideal as I got this to use at 9V.
The specs claim 9v/2A that seemed perfect for the TS-80 but it just reboots and is unusable. I have tried stock firmware and Ralim firmware posted. Any advice or just find another power source? Any thought or idea are appreciated.
Thanks.
 JMA3210
on 21 Dec 2018
JMA3210
on 21 Dec 2018
Aukey qc3 charger is also not recognised and it only draws 5v 5w. Original firmware does work with it.
On 22 Dec 2018, at 01:54, JMA3210 notifications@github.com wrote:
Has anyone tried the TS-80 with a Besiter power bank?
I have a Besiter 20000mah 12v, 9v, 5v battery pack that is Quick Charge 3.0 on one port and it just shut off or reboots when powering the TS-80 at 5v or 9v. It seems like if I plug something into the other USB port for 5V it will remain on and power the TS-80 at 5V with the Ralim firmware. That is not ideal as I got this to use at 9V.
The specs claim 9v/2A that seemed perfect for the TS-80 but it just reboots and is unusable. I have tried stock firmware and Ralim firmware posted. Any advice or just find another power source? Any thought or idea are appreciated.
Thanks.
—
You are receiving this because you were mentioned.
Reply to this email directly, view it on GitHub, or mute the thread.
bdaver
on 22 Dec 2018
#JMA3210
I think you're learning that just about every implementation you encounter will be different to every other one. I think I'm right in saying that some elements of the qc standards are under license - so what always happens happened again and some clever people reverse engineered and of course in fine chinese whispers tradition, changed (or "improved") just enough of it to introduce "variables". Thus every powerbank, power brick, and wall wart with qc3 has potentially different requirements. Where one of the above is supplied WITH a product, it usually guarantees that it will at least work with that particular product... but none of the others. Unfortunately it doesn't help if you have a drawer full of powerbanks representing the diversity of chinese manufacturing - all you're doing is reducing the likelyhood that they're going to work with others, or increasing the time you are going to have to search through your hoard to find one that works.
Having learned that lesson the hard way, I'm currently playing with easily gettable LiPo batteries plugged into a BattGo BG-8S Smart Battery Checker. Which also has a qc3 outlet
That way I have the option of using random over the counter power sources with a consistent qc3 controller that (so far) seems to work faultlessly with the TS80.
All I wanted was a portable soldering I resent qc3's glee at foiling me at every turn.
#sarf2k4
Its maybe worth noting that quite a high proportion of the GitHub map is marked Hic svnt leones or "Here be Dragons" (actually lions) as with the original maps produced in the dark ages - it's a way of people shrugging their shoulders and saying "I dunno".
All the really talented contributors have an idea and do their best to turn that into a reality, whether that's achieved with code, hardware or magic depends on many factors.
Our job (by "us" I mean the gamblers (or gambolers), the ones with time on our hands - will have a go. Thing is there are no guarantees that even the simplest departure from "standard" won't end in tears and a pile of junk where a prized acquisition once stood, but it's something to do.
There are ways to reduce the risks - but there are no guarantees that any of them are going to work...
You'll see that some posts stand in splendid isolation using X with Y while Z resulted in A, B, C and the loss of an eyebrow...
Some affect everyone. Problem is the common buggerance will almost certainly apply to you too but also you just might be the second instance of x, y and z so hope the loner remembered the circumstances correctly and with enough detail.
It helps if you know what the options are for.
Often no instructions other than "see how this goes", the rest is up to you to decide.
If you take the trouble to report back, that contribution just might stop me screwing up my Iron, so do keep in touch.
But understand sympathy is actually Interest in what led to the disaster, not your wellbeing or your investment. There isn't a section on how to get your money back ... because you have to accept that dragons don't have any sympathy with modders. If you mod any guarantee is usually voided too.
When buying from or dealing with dragons, it's Caveat Emptor.
whitehoose
on 22 Dec 2018
all you folks with cheap-o-power sources, try something more reliable, like https://www.tindie.com/products/soubitos/qualcomm-qc2-3-diy-8-32vin-36-12vout-3a-max/ 🇬🇷
gretel
on 25 Dec 2018
Created a ts-80 page under wiki section. Hope the page helps
https://github.com/Ralim/ts100/wiki/TS-80
sarf2k4
on 25 Dec 2018
Custom firmware works with Anker PowerCore II Slim 10000 Powerbank at 9V where original firmware does not.
bdaver
on 25 Dec 2018
@Ralim
Yo mentioned the shematics (here: https://github.com/Ralim/ts100/issues/349#issuecomment-434502694), do you have it? I'm thinking about the feasibility of hardware hacks and a schematic would help a lot.
 nqtronix
on 25 Dec 2018
nqtronix
on 25 Dec 2018
@bdaver the Anker products are nice quality. I have another cheap 20800mah bank that is working with Ralims firmware 9v so that is great.
@gretel thanks for the link I was looking for something like that to use any power source. Ordered a couple and can’t wait to try it out.
JMA3210
on 25 Dec 2018
sarf2k4
_ts-80 page under wiki section. Hope the page helps_
Just a suggestion, for both sources it's useful to know which version of F/w you are pointing at and also useful (given the experimental nature of this) to have quick access to already tested versions so you can easily bail out and revert to happier times. The absolute dogs would be a version control table listing changes for releases - and as with 11_11, warnings if settings need to be set before use to prevent damage.
whitehoose
on 25 Dec 2018
Right now, the ts80 firmware were released in a form of zip file in this thread. I personally think it is best that to have something like version release with changelogs of that particular release. I'm thinking this place https://github.com/Ralim/ts100/releases would suffice, unless want to have another separate repo just for ts80
sarf2k4
on 25 Dec 2018
I agree that version control is important.
ts100 has its own following and some neat addons, while Ive not followed it closely I've taken it that its pretty polished now so I've seen them as apples and oranges with quite different hardware requirements and power needs - the 100 is already a looong list. The 80 would perhaps be lost under the weight of TS100 options.
Easier to start out separate than go through a messy divorce later.
Ultimately though, that decision is Ralim's choice.
The MI10000 pro works fine with TS80 (or at least mine does), delivers up to 9v. As far as I'm aware the only glitch was the sleepy release that seemed to affect everything. That was fixed (in October?).
whitehoose
on 25 Dec 2018
I also set up the page section for ts80 so that those who came here don't have to read 300+ of posts on this thread, figuring out which is which. Feel free to edit the page add relevant information there. Can't be the only one updating the page either =). At least we got a head start
sarf2k4
on 25 Dec 2018
@gretel
@JMA3210
I was going to dip a toe too. however the data sheet shows an input range of 8-32v. but a max current of 3.3a which is a little lower than I need. So I didn't follow that through. I'm desperate to dump the lead acid setup I'm currently using in the field. It's served me well, but I'm getting too old to carry that sort of weight the distances I cover. I chose the ts80 over the TS100 because I naively thought that powerbanks were an easier option. Now I'm eating those words. Currently trying out 14v s4 LiPo batteries and BattGo BG-8S Smart Battery Checker as a qc3 controller. I need consistency over a range of power sources and I'm struggling to find any downside to the 8s so fingers crossed.
@sarf2k4
I'd love to ... but 'fraid Jan/Feb is my manic season. If the weather turns could last 'till April.
whitehoose
on 25 Dec 2018
Hi.. Same problem here with Omars powerbank, the TS80 turns off after a few seconds. A firmware update to 1.07 didn't help. The firmware of Ralim worked for some 20 seconds, then the TS08 turned off again. Do you know a solution?
 Eszett78
on 26 Dec 2018
Eszett78
on 26 Dec 2018
I solved the powering problem of the TS80 without a prebuilt powerbank: a 3S LiIo-cell-holder, an QC3 capable USB module and 3 LiIo cells. Costs (without cells): ~5 US$. With 3000mAh cells it lasts for some 4-6 hours average soldering work. I use it at 21W setting with stock firmware 1.07.
 MaMuCh69
on 26 Dec 2018
MaMuCh69
on 26 Dec 2018
@sarf2k4 @whitehoose
TS80 and TS100 firmware is built from the same source, as they are actually very, very similar. (One has LiPo cutoff, the other has QC, otherwise only difference is tuning constants).
They are therefore worked on together in this repo so that feature improvements on one improve the other as well. Once people have either not found any more issues in the last zip release or i get tired of waiting I will be putting up a new release (2.06) for both TS100 and TS80 on the releases page ?
@nqtronix Sadly I cannot release these :( but that are 98% the same as the ts100. Only changes are the addition of the extra resistors for QC and some components are lower rated to go down a package size.
What mods are you thinking of ?
@Eszett78 That is usually a function of your power banks power saving modes. This firmware tries to draw short pulses of extra power to keep them awake but not all power banks work with this,
@MaMuCh69 Which QC module did you go with ?
Ralim
on 26 Dec 2018
MaMuCh69
on 26 Dec 2018
@Ralim:
Does this work well? Could be fantastic with a barrel jack as a converter from whatever power source to USB/QC.
skorokithakis
on 26 Dec 2018
@MaMuCh69 I have just ordered some, if it works well could be a good find.
Ralim
on 26 Dec 2018
@skorokithakis https://www.tindie.com/products/soubitos/qualcomm-qc2-3-diy-8-32vin-36-12vout-3a-max/
gretel
on 26 Dec 2018
@skorokithakis:
I've made a 4 x USB QC3 charger with 4 of these modules for my sons' phones and stuff and they had no compatibility issues whatsoever. And I use one of those also to feed my QI wireless charger with QC3-function. Never had an issue as opposite to those crappy Blitzwolf chargers and other cheap powerbanks.
MaMuCh69
on 26 Dec 2018
double post
Eszett78
on 27 Dec 2018
Hi. I have the same prob
please stop repeating the same question and start reading about proper power sources right here.
gretel
on 27 Dec 2018
Hi Ralim, does this mean I can forget about the Omars, and better get another powerbank?
Eszett78
on 27 Dec 2018
@sarf2k4 @whitehoose
TS80 and TS100 firmware is built from the same source, as they are actually very, very similar. (One has LiPo cutoff, the other has QC, otherwise only difference is tuning constants).They are therefore worked on together in this repo so that feature improvements on one improve the other as well. Once people have either not found any more issues in the last zip release or i get tired of waiting I will be putting up a new release (2.06) for both TS100 and TS80 on the releases page ?
@nqtronix Sadly I cannot release these :( but that are 98% the same as the ts100. Only changes are the addition of the extra resistors for QC and some components are lower rated to go down a package size.
What mods are you thinking of ?@Eszett78 That is usually a function of your power banks power saving modes. This firmware tries to draw short pulses of extra power to keep them awake but not all power banks work with this,
@MaMuCh69 Which QC module did you go with ?
I personally think that it is okay to release the ts80 under the release page section even though there are several bugs, except the critical bug that were introduced in 11/11 firmware. From there on, those tested the released firmware will open a new issue regarding that particular version.
I personally think that this thread is like a spaghetti, mixing working power source and firmware releases. Just giving my opinion =D
sarf2k4
on 27 Dec 2018
Sadly I cannot release these :( but that are 98% the same as the ts100. Only changes are the addition of the extra resistors for QC and some components are lower rated to go down a package size.
What mods are you thinking of?
Thanks for the answer @Ralim.
I was thinking about a few things:
- adding a RGB status LED to see at a glance how hot the iron is. An APA102-2020 could fit rather comfortably, but requires 2 SPI lines (data and clock). They can be driven with any regular IOs and some code, too.
- increasing the maximum supply voltage to 20V + safety margin (for QC3.0 20V support)
- using a slightly larger screen. I've noticed the window isn't used completely and found a part, which could fit with only need minor modifications to the case.
I was asking for the schematics because the PCB appears to be a 4 layer design (I coudn't find the I2C line to the display, for example) and I really don't want to mess up my christmas present :D I guess I'll wait until the schematics are public and see if I still have interest to hack it.
nqtronix
on 27 Dec 2018
I did a test on a perforated solder board earlier with @Ralim firmware and the stock 1.07 firmware. Here is what I've found out so far
On custom (ralim's latest december firmware):
- Did a big blob of solder lead on the perf board, and put the D25 in it, temp dropped from 300 to 250
- The unit still pull at about 8.9v even at 24w power mode.
- Had a hard time melting the big blob at 300, had to set at least 350 or 400
On Stock 1.07 firmware:
- Minimal temp drop at a big blob with D25, 300 to 290
- The unit pulls up to 10.5v at 24w power mode
- At 300'c with D25, able to melt big blob without problem
On both tests, there is a small 5v usb fan blowing directly.
The effort of putting a custom firmware is good, it is not that I'm belittling the effort with the comparison that is towards the stock. But I believe there is still more work to be done
Can you give a link to the stock 1.07 firmware (hex) . Can't find it on minidso.com forum page.
slibbinas
on 27 Dec 2018
Can you give a link to the stock 1.07 firmware (hex) . Can't find it on minidso.com forum page.
MaMuCh69
on 27 Dec 2018
I can confirm that the imuto X6L Pro 30000 mah power brick with QC3.0 works with the latest TS80 custom firmware. It does, however, also suffer from the well known problem of cutting off after 30 seconds. Here is a link to the power brick on Amazon:
https://www.amazon.com/Portable-30000mAh-Qualcomm-External-Nintendo/dp/B01MXCMGB8/ref=mp_s_a_1_fkmr0_1?ie=UTF8&qid=1545946747&sr=8-1-fkmr0&pi=AC_SX236_SY340_QL65&keywords=imuto+x6l+pro
 SMB784
on 27 Dec 2018
SMB784
on 27 Dec 2018
@Ralim:
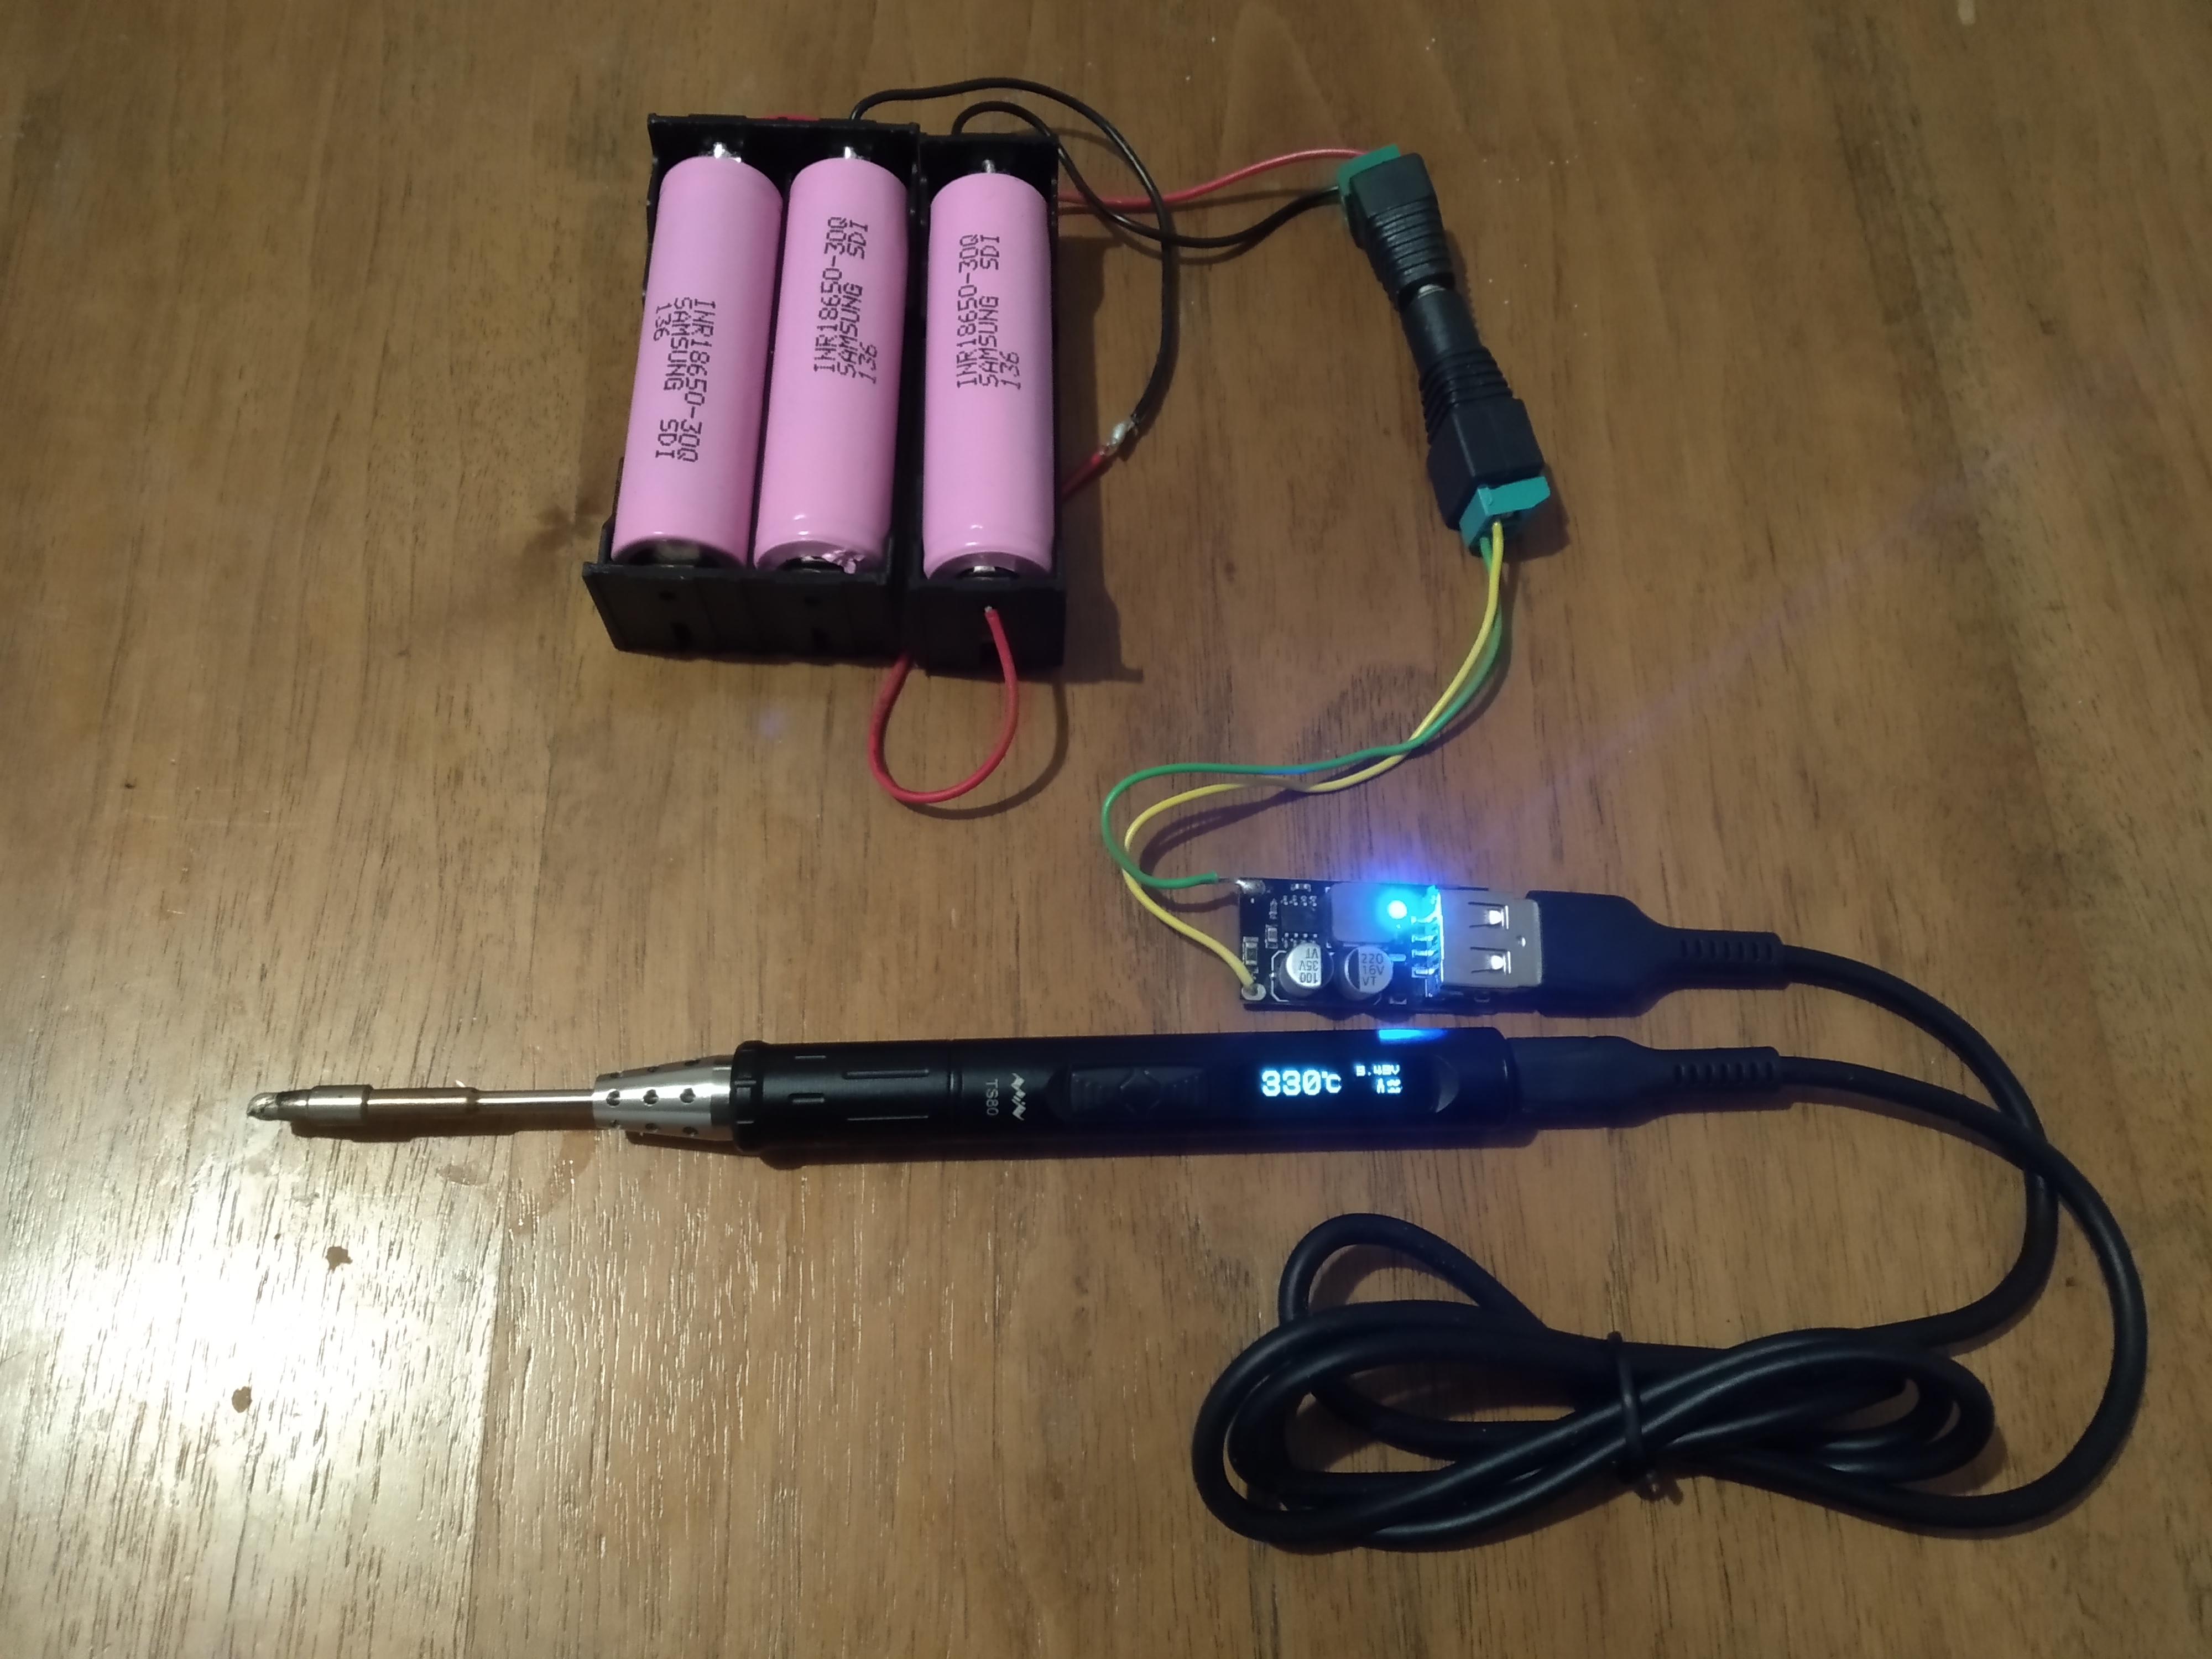
MaMuCh69
on 28 Dec 2018
I can confirm that the imuto X6L Pro 30000 mah power brick with QC3.0 works with the latest TS80 custom firmware. It does, however, also suffer from the well known problem of cutting off after 30 seconds. Here is a link to the power brick on Amazon:
What about stock firmware?
Providing information about which power bank works is good, if you guys able to provide information on both stock and custom firmware would be better.
@MaMuCh69, any caveats of using such setups?
sarf2k4
on 28 Dec 2018
@MaMuCh69, any caveats of using such setups?
Not yet. Using it since 3 weeks and still works like a charm although still in PoC phase. I'm awaiting the 3S Balancer/Protection board and the Boost-Buck-Converter (for charging) I've ordered. Then I will create a small case to fit in all and provide it with an XT60 socket , an 5521 and a 5525 barrel jack socket, as well as a micro USB socket. Then the TS80 can be run with whatever power source one could think of.
MaMuCh69
on 28 Dec 2018
Sorry I should have specified.
Stock firmware does NOT work with the imuto X6L Pro 30000 mAh power brick
Custom firmware DOES work with the imuto X6L Pro 30000 mAh power brick, but suffers from the usual shutoff bug after 30 seconds.
SMB784
on 28 Dec 2018
MaMuCh69
I have had so many projects "in the post", It's a sign of the times. It's an interesting alternative to the track I'm trying. Frustrating that the old "universal" USB powerbrick isn't so adequate in some applications now.
Don't now if this might help. I've used portable power for years, I'm now trying to adapt what I need to use the new lightweight tech. For me the approach has been start high (14v) and come down (which fits a LiPo 4s nicely) and work back from that. This fits the tools and kit I work on best. A dps5005 for higher power and e-bay 12-1v variable converters for lighter (2A) kit.
The glaring "outsider" is my trusty? ts80 which won't play nicely without qc3 (and qc3 doesn't seem willing to play nicely with anything!!!).
It's maddening that power is proving to be such a barrier to using something that only a short time ago was one of the simplest tools in the box. What is simpler than turning electrickery into heat? That used to be the simplest most basic thing in the world. Heath Robinson must be spinning in his new, improved grave.
whitehoose
on 29 Dec 2018
@whitehoose by using @ instead of the twitteresque # tag you would actually get the recipients notified :)
gretel
on 29 Dec 2018
gretel
I know - but thanks anyway - subscribing to a thread does that too - drives me mad when I get 10000 e-mails in the morning, My delete button is getting shiny. If its important I leave it blank and just let nature take it's course. I don't twit or fbk or any other "social" - I prefer to stick with curmudgeon
whitehoose
on 29 Dec 2018
@whitehoose it might not be just about you in any case. anything technical here?
gretel
on 29 Dec 2018
gretel
The whole point (to me) is - it's never been about me in any way at all. Ralim writes the majority of the code and thinks most of the deep thoughts. I don't provide any of the tech here.
If I can contribute anything that helps him, or anyone else for that matter I'll do my best but my part is purely observational. With or without my input this project is heading in the right direction.
If the difference between # and @ eludes you (it doesn't seem important to anyone else) ... just ignore it, like cake it's only empty calories.
whitehoose
on 29 Dec 2018
Hi, I'm thinking about porting the STM32 USB-PD (Power Delivery) to ts80, but I'm not quite sure about the hardware of TS80. I mean, will the hardware of TS80 support 20V 2A?
I've made a PCB for that, it replaces the original TS100 PCB and requests the USB-PD profile with the highest Voltage/Power. https://github.com/Jan--Henrik/Otter-Iron
Based on an STM32F072 it also implements DFU via legacy USB (2.0). The USB-PD foo already works perfectly fine as well as the display, I just need to write the regulation and receive/test the TS100 PCBs.
 Jan--Henrik
on 4 Jan 2019
Jan--Henrik
on 4 Jan 2019
I'd like to know if it's possible to support the VOOC/Dash standard with the TS80, as many people have Oppo/Oneplus Phones, chargers and power banks, capable of 5Vx4A=20W, and upcoming warp charge @30W.
This is the only documentation I could find:
https://forum.xda-developers.com/oneplus-3/accessories/dash-charge-protocol-analysis-t3431917
But there are all kinds of chinese knockoff converters between VOOC and other protocols so it has been reversed engineered.
It seems the communication is I2C with one line being data and one clock line, and 9bit transmition package. The charger has a PIC16F1824 capable of UART, 1Wire, I2C and SPI, and uses the 1 wire on the GND-Drain pin to talk to an BQ2022 Eeprom from Ti embedded in the A-side of the cable.
 bodo2all
on 5 Jan 2019
bodo2all
on 5 Jan 2019
DASH / VOOC isn't worth it, as it gives a higher current at 5V which doesn't help because the to resistance is too high. While it could be imported it would give no gain over a 5V 1.2A supply.
If the tip is 4.5 ohms, 5V is only going to ever be able to draw 1.11A no matter if your adapter can do 4A or not!
I have a few DASH chargers here but not implementing it as it gives no real gain.
Ralim
on 5 Jan 2019
I see Ohms law strikes again, can't believe I missed something so simple before going down this rabbit hole.
bodo2all
on 6 Jan 2019
@bodo2all there is more support for QC (official or by means of clones) than of supporting VOOC. It is a technique developed to charge a phone utilizing two-cell design at a high current. This is quite different from generally powering when 9V or 12V is needed. QC is kind or more generic and versatile due to the multiple voltages, but limited by what powerbank/chargers can provide. However, generally you see 12V at 1.5 (18W) or 2A (24W).
Note: as an example, I have several chargers that support QC (either 2 or 3), but only one that can do VOOC (and even then limited to 2A as it is a multi protocol charger)
gbraad
on 6 Jan 2019
Not sure whether to submit this here or as a new issue. So here goes:
HAME H13D 10,000mAh Power Bank and latest TS80 Ralim Firmware
HAME H13D 10,000mAh Charge AI Power Bank (USB-PD and USB-QC3.0)** https://www.amazon.com/Portable-Delivery-HAME-H13D-Compatible/dp/B07GWMFW82/ref=sr_1_6?ie=UTF8&qid=1546805234&sr=8-6&keywords=H13D
New TS80 with stock firmware: v1.07
- Ralim Firmware: TS80_2018_12_16**
The Bank is very well constructed and a reasonable price ($20). It has 2 USB-A connectors (QC3.0) and a single USB-C connector for PD delivery AND for PD charging of the Power Bank itself which is fast (18W by my measurement). Ralim firmware draws 1.9A at 9V (QC3.0) in heating.
The Power Bank works with both the Ralim and Stock firmware but the Power Bank will power down with EITHER firmware after 30 seconds of inactivity. The Ralim firmware does this only after it enters sleep (Zzzz) mode so changing sleep mode to a longer timeout might work well, I have not experimented yet.
Ralim F/W: The least significant digit of the temp does change constantly but I don't have a problem with it. Otherwise the iron seems to work perfectly well.
I contacted the Power Bank manufacturer (HAME) and they told me the Power Down is a safety feature to prevent overcharging and is triggered by <50mA current draw. In non-heating mode the Ralim firmware draws ~20mA, hence the power down of the Power Bank.
Ralim, thanks for all your efforts, if you have any questions or specific things to test let me know.
 Boyeen
on 6 Jan 2019
Boyeen
on 6 Jan 2019
@bodo2all No problem, I thought about support for it since I own quite a few of them, but it didnt provide any gains really :(
@gbraad I agree QC is more common, though I still wish they had gone with PD instead. (I tried to push for this). If anyone knows of an inline PD->QC adapter I would be interested (Before I make one)
@Boyeen The other place would be the WiKi for this information. But thank you for the feedback!
Ralim
on 6 Jan 2019
boyeen
If you look back in this thread you'll find a number of different powerbanks with the same problem.
I can confirm that the Mi Power Bank Pro works fine as is.
There are two types of falling asleep I think it was October that one of the releases had the iron dropping off, Ralim fixed that and mine certainly keeps working
The second is the powerbank which drops off when the iron is just ticking over and not using much current. There was talk of a mod to overcome this (can't for the life of me remember if that was done yet??) #donbowman came up with a stroke of genius _[plug an old useless flash drive in the other USB slot of the powerbank to keep a little bit of current going. or a USB LED flashlight].
My PB also has an option to double press the test button which shifts to low power mode and stops this happening.
jhc58 deserves a special mention for his polished solution
Works well with 100 ohms resistor, power-bank do not switch-off.
Trouble is it seems that every powerbank is different to every other and the qc3 "standard" just isn't. Its a case of finding one that works - and then practising brand loyalty.
While QC3 IS a pita problem
And honestly I now think is more trouble than its worth - I'll never get involved with another device that is so picky about just turning on. I've got two of the buggers and I'm bloody well going to use them.
It's not an insurmountable problem, and for anyone working indoors near a magic pixie tap, it's not a problem at all it's just I wanted a portable iron, I already have a good bench iron .
whitehoose
on 7 Jan 2019
Hallo,
I have a little problem with TS80 ....
Received and tested with LowVoltage problems with the fw 1.06.
Updated with the last official 1.07 which solves the problem of minimum power, but I noticed the continuous flash with temperature set at 400 °. How can you solve?
Thanks
 Zino77
on 8 Jan 2019
Zino77
on 8 Jan 2019
I'm kinda fed up with the whole TS80 low voltage situation. Dont get me wrong here. Ralim is doing a stellar work with this custom firmware.
I have two QC devices, one power bank and one wall charger (both Anker). One plays fine with Ralim's firmware while the other only plays fine with the stock firmware. I decided to apply a workaround and never bother with the problematic voltages any more. I just knew I had to force 9V no matter what.
So I bought this QC3 trigger from banggood.
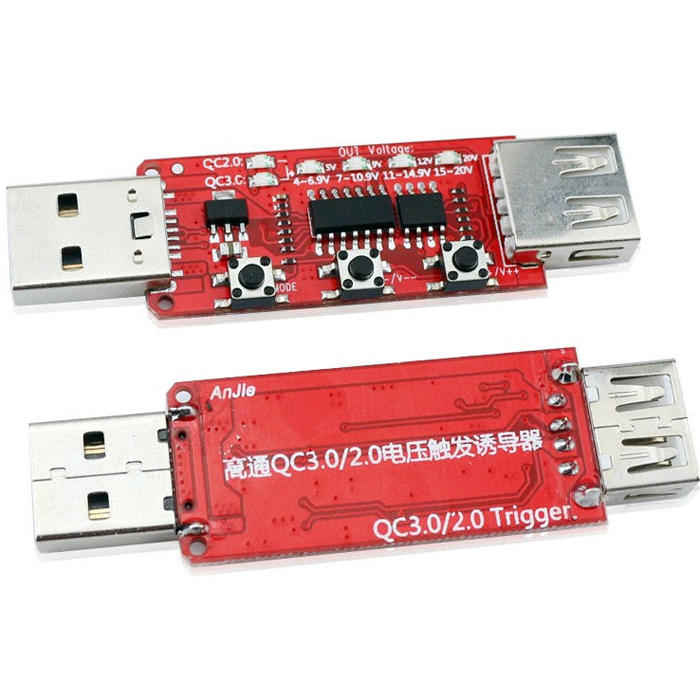
At first even when I set the voltage to 9V from the trigger, TS80 would still force its pulse and drop the voltage to 5V. To address that I simply removed the middle pins from the USB female port on that trigger
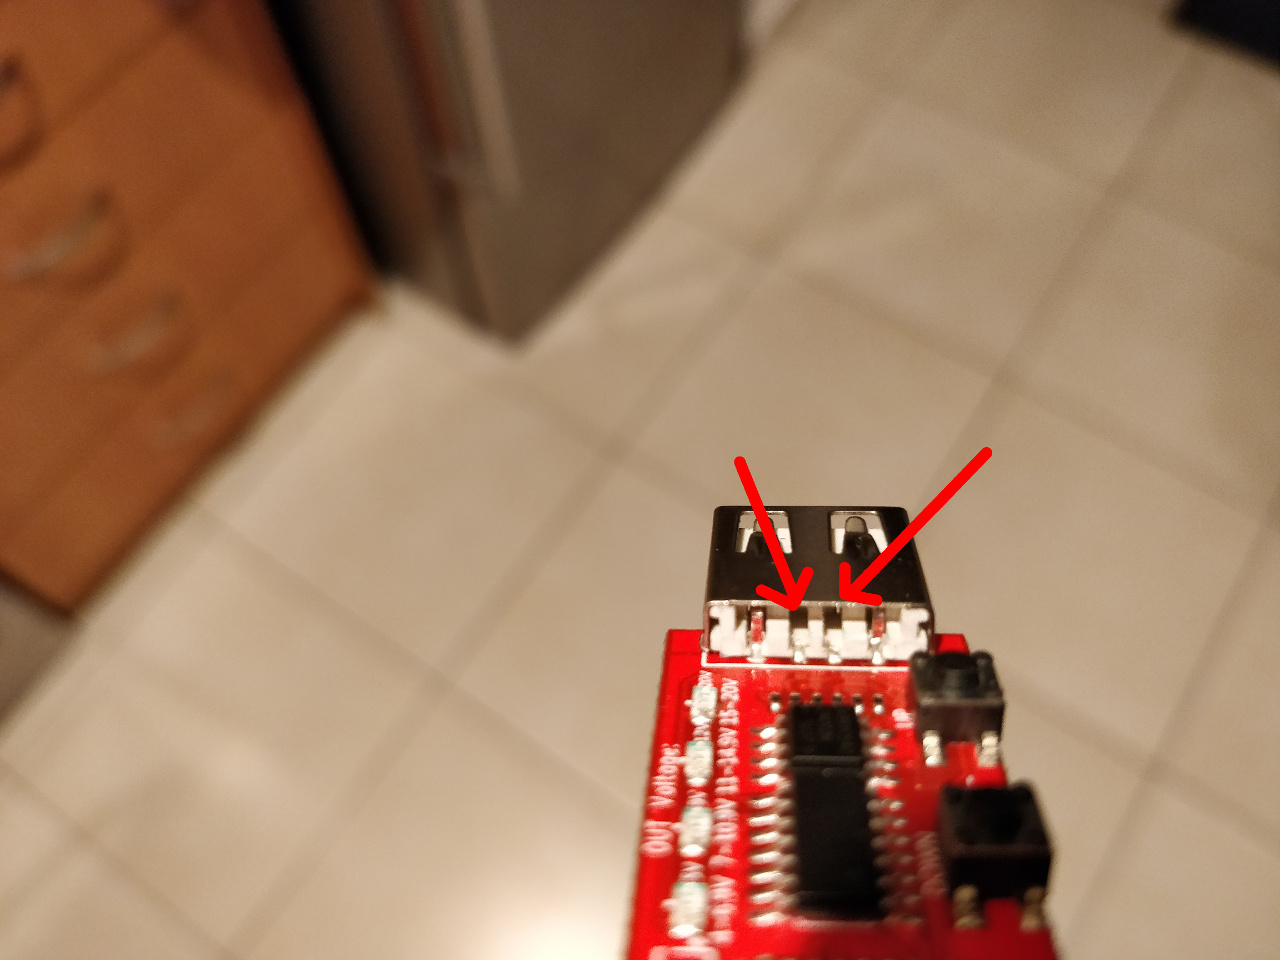
VOILA! I can use any QC charger now without worrying about the LowVot error
 alexballas
on 8 Jan 2019
alexballas
on 8 Jan 2019
And my dream - still - is the ability to use the Lenovo USB C power (notebook) adapter :)
That would solve so many problems, haha :D
Now i'm using with success cheap charger "ESSIEN Universal 9V 2A QC3.0" from Ali.
kokein
on 8 Jan 2019
The Lenovo power adapters for the Chinese market (the Lipstick charger and
the ones made by powerland) offer PD and QC.
They are at the moment ONLY available in China, but I am going to resell
them with a USB-PD to Slimtip cable I will be offering.
- https://imgur.com/GI4p2D7 (these are the QC capable 45/65W Lenovo
notebook adapters for the Chinese market
If Ben is still considering the PD-QC adapter, perhaps we should create a
new repo and start with a design for this.
gbraad
on 8 Jan 2019
The setup tested was as follows: https://imgur.com/neca7e4 (LS-65WTCQCPD)

Note: the USB-C to USBA adapter was needed, else it was not possible use QC.
Note2: There is however an improved version of the powerbrick with a USB+20V plug, as was once used with the Yoga (those weird USB plugs), that has 20V on the same USB plug. It supports QC and 20V with a slimtip cable. I do not have the photo at the moment, but it is the LS-65WTAQCPD and looks similar to the one above.
gbraad
on 8 Jan 2019
Hi @gbraad ,
I can see that what you are talking about, i have asked this question some time earlier.
It is true that it needs adapter, in your situation it's quite a simple solution.
I'm thinking about ThinkPad USBC - larger one power adapter (I already have one)
And now, due to the "endings" whitch it is equipped with, in my case I should probably use a simple USBC male/female extension cord - you think it will work?


kokein
on 10 Jan 2019
If you order the cord you'll find out for certain.
My (admittedly limited) experience with QC3 has made me conclude that it's the betamax of the power options (possibly even the phillips videodisk!!). To say I'm disenchanted is a massive understatement.
I would always recommend people starting out with whatever power package options are offered with whatever device it is they are buying. That way you have some degree of a promise that you'll be able to power up the device without having to resort to voodoo (*or ebay) - and Yes that completely scuppers the ideal of only needing to carry a single adaptor/powerbrick - but the reality seems to be that the only certainty is the uncertainty that even the adaptor you are currently using will work with any of your other devices.
The Banggood ts80 extras package includes a wallwart and lead (plus other gewgaws) and only adds £6 to the total - and by implication is included with the same guarantee as the iron.
Ordering just the lead and the wallwart separately costs £14.
whitehoose
on 10 Jan 2019
Yes, ofcourse i'll order to test it and let You know, till now i'm using chepest $1.99 ESSIEN Universal 9V 2A QC3.0" from Ali and It works perfect :) (like fora a mobile dev) buy dont kow why at home i prefere to have something more "assurance" from trusted manufacturer ;) that's why im looking for a easy way to use above Lenovo ThinkPad power adapter
kokein
on 10 Jan 2019
@kokein These Notebook adapters do not support QC2/QC3 and do not offer 12V... they are limited to use on notebook devices and therefore aim to provide 15V and 20V using USB-C Power Delivery. You would have to use an adapter that translates/handles PD to QC, or have a trigger cable for PD and feed the 9V or 12V directly on to the USB-C port (bypassing the QC negotiation)
gbraad
on 10 Jan 2019
@whitehoose like how you mention this ;-P... I think to me it looks more like PD being the betamax and QC the VHS option?
gbraad
on 10 Jan 2019
Sorry, is it a firmware problem? Or did I get a faulty product?
https://youtu.be/y0eR7_IGK_k
I hope in an answer, thank you!
Zino77
on 10 Jan 2019
@Zino77 hard to tell. Anyway, you're using an official firmware, which has nothing to do with the firmware being developed here by @Ralim.
yawor
on 10 Jan 2019
Zino77
It looks like the temp control is a little keen, when set to reach max temp the iron has it's "safety" limit as well as the desired temp both halting the cycle at the same temp, but maybe in different ways with different tolerances.
I agree it shouldn't display in that way.
Questions.
What happens if you set the iron max to 410 and then select 400c.
(is 400 just a test value - or is it a temp you use?)
Are you using lead or lead free solder.
If you do intend to use 400 ... what are you soldering (joining heavy metal or creating a solder pool)?
gbraad
Well, what's in a name? :smiley: but both now faded away, and almost forgotten. How about the solderer's Powerpoint?
I'm not a luddite but (KISS) still has a place in even the most sophisticated systems.
I think anything that can so comprehensively scupper a device needs a serious rethink .... rant! rant! Chocolate teapots and glass hammers. It's OK enhancing ... but forcing tec into a blunt instrument is dumb. I started with a gas stove and a block of copper and the system worked. "Tec" was a handle, and limiting the amount of hot you could put into the job was a breakthrough and a godsend, needing the dancing pixies was a major restriction for a lot of people, so conflict isn't new. Irons were plugged in in January - and they were left on 24x7 until they died which could be 3 or more years, it was a resilient robust system - and it hasn't changed significantly, even with smd. A reasonably well made iron is self regulating, and tips are almost indestructible if you follow a couple of simple rules and use decent solder and flux.
The ts100 pushes the practicality envelope, but leaves the user in charge of power - The TS80 barges in, rips the job out of your hands and races round the room screaming and laughing hysterically. It's lost the plot.
whitehoose
on 10 Jan 2019
@kokein I can confirm that lenovo adapter will not work as its PD only.
@gbraad I dont think it honestly matters when we know that most groups are trying to push to phase out QC. And I have to agree, PD is overkill but works reliably, QC is a nightmare unless you agree to give Qualcomm money.
@Zino77 For help with the official firmware I suggest the minidso forum or asking over their support email.
Ralim
on 11 Jan 2019
Here in China almost no one gives Qualcomm money... until they start
breathing down your neck. Which ionly matters for the mobile phone
manufacturers (as they are of size). But yes, I would have wished QC was an
open standard... and wish PD was simpler to handle.
gbraad
on 11 Jan 2019
@Zino77 when not actually 'using', my TS80 did the same about 400 degrees. Post a message on the official forum and hope you get an answer.
gbraad
on 11 Jan 2019
In the whole discussion about QC, PD and whatever else, one important point gets missing:
In my opinion (and based on the tests I've made over the past couple of weeks) the core of the problem is that people try to feed a TS80 with devices that have never been designed for such purposes. They are CHARGERS, not power supplies. Thus they are not designed to cope with rapidly pulsing 18W power requests whilst still deliver a stable voltage.
With the QC3 module I've shown earlier in this thread, I noticed that with Li-Ion and with bench power supplies there were no problems at all. As soon as I used phone chargers, laptop chargers or powerbanks, the troubles began. With the power pulses of the TS80 they undershoot in voltage quiet badly. This in turn affects the USB/QC3 interface in a way that at some point it reverts back to 5V. The result: "LowVot" alert on the TS80. Even an ASUS netbook powerbrick rated 40W (2.1A@19V) dropped by 3-4V or even more.
MaMuCh69
on 12 Jan 2019
Actually, I had mentioned this when VOOC came up. Anyway, for this purpose
QC would have been a better choice as it allows to provide a stable voltage
at a high current. Alas, that didn't happen... Nothing to see here. Move
along... :'-( (a reason why I like the ts100 more. No opinion about power
source)
On Sat, Jan 12, 2019, 08:06 MaMuCh69 <[email protected] wrote:
In the whole discussion about QC, PD and whatever else, one important
point gets missing:
In my opinion (and based on the tests I've made over the past couple of
weeks) the core of the problem is that people try to feed a TS80 with
devices that have never been designed for such purposes. They are CHARGERS,
not power supplies. Thus they are not designed to cope with rapidly pulsing
18W power requests whilst still deliver a stable voltage.
With the QC3 module I've shown earlier in this thread, I noticed that with
Li-Ion and with bench power supplies there were no problems at all. As soon
as I used phone chargers, laptop chargers or powerbanks, the troubles
began. With the power pulses of the TS80 they undershoot in voltage quiet
badly. This in turn affects the USB/QC3 interface in a way that at some
point it reverts back to 5V. The result: "LowVot" alert on the TS80. Even
an ASUS netbook powerbrick rated 40W (2.1A@19V) dropped by 3-4V or even
more.—
You are receiving this because you were mentioned.
Reply to this email directly, view it on GitHub
https://github.com/Ralim/ts100/issues/349#issuecomment-453696619, or mute
the thread
https://github.com/notifications/unsubscribe-auth/AAAHZnwtpufUbUoPrNkAhxTGs8ijS7Hdks5vCSb3gaJpZM4WO3WC
.
gbraad
on 12 Jan 2019
Hi, I'm not sure if this issue thread is really the best place to post this, but I'm wondering if it's safe for my TS80 with Ralim firmware to be drawing 28W from my Xiaomi Mi Power Bank 2C. The bank supports output at 9V 2A or 12V 1.5A, but if I set the 24W mode (which seems to make it pull 12V rather than 9) it actually jumps all the way up to 28W according to the irons display. Actually it pulls 20W on the 18W setting too. Neither the power bank nor the iron (other than the tip obviously) seem to be getting hot and it heats up super fast (like 10 seconds), but it's definitely outside the power banks rating (at least if the display is accurate). I guess I'm wondering if the power bank has good enough safety features to shut off if it becomes an issue or something like that? Also possibly worth noting is that this high draw obviously doesn't last very long so I wonder if peak vs sustained power draw might be a factor.
Thanks :)
 rilwal
on 14 Jan 2019
rilwal
on 14 Jan 2019
If the voltage reading is 12.6v instead of 12v, the wattage estimate at 80% duty cycle (the max) would be around 28 watts. This doesn't mean that 28 watts are being pulled - it's an estimate. The voltage reading could be off or the resistance estimate could be off.
The estimate is based on voltage and an average tip resistance of 4.5 ohms for the ts80, multiplied by duty cycle (tip is driven 20% of the time=20% of the available wattage).
https://www.rapidtables.com/calc/electric/watt-volt-amp-calculator.html
dhiltonp
on 14 Jan 2019
Thanks for the reply
Measuring my tip with a multimeter shows 3.0 Ohms so I guess that's lower than expected, unless I'm measuring it wrong. I just measured resistance between the two furthest polls on the 3.5mm jack. So at 12V the available wattage would be 48W but I think the power bank would start to limit the voltage before then. Also not sure about resistance within the iron and the cable so maybe it does work out to 4.5 Ohms. Honestly I'm pretty new to electrical stuff and all the interrelated variables are kinda tough to work out.
rilwal
on 14 Jan 2019
Just in market for a new iron and found this bad boy.
Related to the power bank issues, does the TS80 accept all QC 3.0 wall adapters? I can get some pretty quality looking 12V 2A adapters for cheap so i could run it at 24W for snap-in caps and big traces ;)
Still not fully torn, but 90% looks like i'm getting the TS80, i do mostly audio stuff (amps, dacs) or light RC.
Also, just for sheets and giggles, does the custom logo work on TS80 too? The manual mentions it but i don't see any dedicated tool around here. Perhaps the TS100 tool works since it's the same screen?
Thanks a lot! :)
I'm a huge fan of this custom software thing for these irons, great stuff :)
 ghost
on 14 Jan 2019
ghost
on 14 Jan 2019
ExtraThiccDave
I really hate to say this but while it's by no means a total loss, nor is it an unconditional success. I have two of the little beasties, My first went faulty, BG replaced it and told me to keep the wreckage, I contacted minidso to ask if they would sell me a replacement mobo, they told me to post the old one to them and kindly sent me a replacement no charge.
I originaly bought the plus pac which included a PSU and that works well.
I wanted a replacement portable iron and as I'm awash with powerbanks and PSUs of every size type and colour I thought the TS80 was a no brainer.
Ralim's fw (october18) makes the iron work with a 5v usb2 (slow but steady). and I have qc3 bricks that are fine with my phone. The ts80 ticked all the boxes.
THE REALITY : The only wall wart that works is the one that was included in the BG plus package.
The only power brick that works is the Mi 10000 pro (ironically so does any 5v USB2).
I'm currently having good experiences with the banggood ISDT BattGo BG-8S Smart Battery Checker as a QC3 controller coupled with any brand of s4 14v LiPo for portability without strings.
Indoors I have a solder rework station with heatgun that does everything a lad can dream of.
The TS80 is a nice time eating project/gadget that melts solder ONLY if you have the correct kit (so far I've spent as much on powering it as buying it) ... and I'm reluctant to buy extra tips because I'm not certain what's coming next. But the TS-d25 has a jaw droping thermal density but it's big (bit not impossible) for SMD work.
My Hakko solder station does EVERYTHING faultlessly (except work in the field ... in a field) and I have a different tip for every occasion which cost £5.00.
Dave - think long and hard about what you want and expect. If time is no issue, you like a challenge and are independently wealthy. Keep TS80 in your list, It's a sexy little thing that looks good in any company and will fill your evenings with diversions and puzzles.
If you want to just plug it in to a wall socket to melt solder in all conditions and fix stuff without fuss
go Hakko.
whitehoose
on 14 Jan 2019
whitehoose
I was recommended the FX888D (or the knockoffs, more or less the same lol) too, but it's too big and bulky for me.
What about the TS100 then, is it more reliable? The TS100 kits available in europe cost around 55 euros shipped (close to BG price) and come with a full blown 19V 4A power brick. Those ship with one sided bevel tip, the extra chisel costs another 8 euros or so. DC to XT60 jacks can be had too. The things that put me off on the TS100 are the plastic shell and overall bigger bulkiness (i have super small hands).
Tbc, i don't intend on mindlessly modding the TS80, just flash latest ofi fw, plug it into the wall wart and solder.
The fact it comes with great chisel tip is a benefit for me, as well as the included silicone cable and decent wall wart. I don't need to run it off a battery though it would be nice in the future.
How does it compare in terms of thermal performance to more traditional station? Is the construction really that magical as it seems from the videos so it works just as good as higher wattage one with separate element/tip assembly?
Thanks! ;)
ghost
on 14 Jan 2019
I have both the TS80 and TS100. I bought the TS80 for the convenience of USB, but this thread shows why it's not as straightforward. Still, it worked fine with all my power adapters and banks, but when I want an iron that works 100% of the time, you can't beat a simple 24V rail with the TS100.
USB is too complicated to work as reliably.
skorokithakis
on 14 Jan 2019
If you are OK with the provided kit and its going to sit on a desk plugged into the wall in a known environment. Honestly I can say the TS80 is as good enough as any other. As someting that melts solder it's really surprisingly very good at that and has pretty big muscles.
The Hakko was a real revelation and I never felt a need to look further In the field I had a RS battery iron that plugged into the car and did what I needed. Then I met someone who used a ts100, it was little, and connected to a massive LiPo battery. It wasn't perfect, the batteries could take out a small city if mistreated ... but it was a gadget, When I looked to buy one ... the TS80 was pre release and possibly the sexiest Iron I'd seen. I ignored a practical recommendation based on actual use and went for the pretty face!!
For the reasons skorokithakis gives ... I was a fool ... the QC3 "standard" is anything but standard.... at least the way its implemented in many non telephonic(?) devices. It's as sane as a processor controlled glass mallet.
I cant recommend a TS100 simply because I've never owned one so have no experience. People who have speak highly
Based on what you say;
If you aren't intending to stray far from electrickery ... I've indulged in a few full day sessions doing (what I call) "proper" work fixing and building SMD and Hole mounted components, nothing bigger. I have soldered a stainless nut onto a stainless 3mm bolt and made off more XT60 connectors with stranded copper than I care to remember and I routinely use 42A single strand copper bus wires. OK I bumped up the temp from 320 to above 350 the Iron just did it. So while not heavy, its not lightweight stuff either.
There is a "known" with powerbanks so that even when you find one that will talk nicely to the Iron. it will fall asleep when the iron hits temp and idles. Best fix seems to be plug a small load into second socket (if you have one). It just never stops!
That said, if you want one - and if you aren't that bothered about battery operation - you have my blessing (for what it's worth). On a wallwart its pretty stable and obedient.
Enjoy your new toy :D
whitehoose
on 15 Jan 2019
@whitehoose I've mentioned this already quite some time ago, but Xiaomi Mi Power Bank 2 10000 mAh works nicely with TS80 and has a low power mode where it doesn't shutdown because of low current draw (the low power mode doesn't restrict the max current). You presses quickly two times on the button on the power bank and the LEDs start blinking one at a time and a timer starts which is going to shut down the power bank automatically after 2 hours.
yawor
on 15 Jan 2019
Yawor
It could well have been your recommendation I took at the time. Worked a treat, but then mine fell asleep with one of Ralims updates - also a bugger that there is only one port on the pro.
The principle holds with powerbanks and wallwarts, its a complete lottery. It shouldnt be down to word of mouth for what works. but that's how it is.
Its Ironic that this "china syndrome" was created in China and is hurting smaller Chinese manufacturing most of all. My Phone works with every device Ive tried .... I new nothing about the problems until I got a TS80 (my first QC3!) I've learned a lot in a short time since then.
But whatever, the "standard" is infected and probably cant be saved - only avoided
whitehoose
on 15 Jan 2019
@yawor Do you have a manual or something for that? I have the power bank you mention but could never figure out what the button does.
skorokithakis
on 15 Jan 2019
... but Xiaomi Mi Power Bank 2 10000 mAh works nicely with TS80 ...
The Xiaomi PLM03Z (better give this exact product number), is the only powerbank, for which I got confirmation so far, that it works with the TS80. My guess is that the TS80 was designed for this exact powerbank? Which is abit silly, since it claims to be QC3 compatible, suggesting every QC3.0 powerbank will work, instead of one single QC3 powerbank on the market. I think the TS80 is a product released in a buggy and immature state, which is quite a shame, since the idea behind it is really laudable.
Eszett78
on 15 Jan 2019
PLM02ZM works fine here (although it powers off if the iron sleeps for a few seconds).
skorokithakis
on 15 Jan 2019
@skorokithakis I think it was described on the really short user manual which was included in the box.
Here's a manual for Mi Power Bank 2S: https://i01.appmifile.com/webfile/globalimg/UK/Manual/10000mAh_Mi_Power_Bank_2S.pdf/%2210000mAh%20Mi%20Power%20Bank%202S%22
In a "Discharging" section, there's following description:
Low-current discharge: when Mi Power Bank is not charging, double press the Power Check
button to enter low-current discharge mode to charge small devices, such as Bluetooth
headphones and smart bands. The indicator LEDs will turn on one by one in succession,
indicating that Mi Power Bank is in low-current discharge mode. To exit low-current
discharge mode, press the Power Check button.
In mine there was also an information regarding the mode automatically shutting down after two hours.
yawor
on 15 Jan 2019
@skorokithakis Good to hear that and thanks for that info.
Eszett78
on 15 Jan 2019
@Eszett78 mine's PLM02ZM.
@skorokithakis just double press the button on the power bank before or after connecting the TS80. It doesn't matter as in the low current mode it won't shutdown even when nothing is connected to it.
yawor
on 15 Jan 2019
@yawor Very useful information, thanks a lot, that solves my problem.
skorokithakis
on 15 Jan 2019
If you already have a need for LiPo s4 and above. Adding a ISDT BattGo BG-8S Smart Battery Checker also provides faultless QC3 support so you get the bonus of a TS80 compatible QC3 output which never sleeps.
whitehoose
on 15 Jan 2019
I have both the TS80 and TS100. I bought the TS80 for the convenience of USB, but this thread shows why it's not as straightforward. Still, it worked fine with all my power adapters and banks, but when I want an iron that works 100% of the time, you can't beat a simple 24V rail with the TS100.
USB is too complicated to work as reliably.
Since you have both, how would you compare the performance? Is the TS100 better in terms of heating stuff up because of the extra power? Don't you know if the TS80 doesn't suffer with solder wick? Also is the TS80 capable of true 24W with 12V 2A wall warts? I actually find the barrel jack bulky for my personal feel. As an audio guy, i'm well familiar with the 3.5mm TRS connector and i know it spins around. Doesn't the TS80 tip spin around when u put pressure on a pad with it?
Thanks!
ghost
on 15 Jan 2019
Since you have both, how would you compare the performance?
I have never directly compared the two, so I don't know of small differences. Both are great, but the TS100 is faster to heat up, and I have it better dialed in so it's better in subjective performance, at least.
Is the TS100 better in terms of heating stuff up because of the extra power?
Faster, yes, better, I don't know.
Also is the TS80 capable of true 24W with 12V 2A wall warts?
I have never tried, but I can only tell you what the screen reports, anyway. I can try and report back, if you want.
I actually find the barrel jack bulky for my personal feel
Me too, but the very short USB wire of the TS80 is even worse. At least with the barrel jack I got a meter of silicone wire and soldered a jack, so it works great.
Doesn't the TS80 tip spin around when u put pressure on a pad with it?
No, with normal soldering pressure, it never spins around, but the tip is elongated on one side and I always press the long part down, so it has nowhere to spin to anyway. This has never been a problem for me with the TS80, at least.
skorokithakis
on 15 Jan 2019
I also have both the TS100 and TS80, and I have to say I prefer the
TS100... it is more versatile (especially in powering options), has more
tip and is faster to heat up. I have given it as a present at several
occassions and never have to worry about people not able to use it (due to
the weird QC need). Every user has been VERY satisfied... from using
powerbanks with a trigger cable, laptop power supplies and batteries with
XT60 plugs. Also, no one I know tightens the screws for the tips... no one
ever complained about it spinning... or they even spin the tip around
themselves easily to get the right angle for the chisel or so.
gbraad
on 15 Jan 2019
@skorokithakis
Thanks a lot man! :) I'm starting to lean towards the TS100 by now honestly. Would it be safe to build a wire for the ts100 using audio-grade cables? They are usually pretty flexible, i have some Tricone MK2 instrument/microphone wire on me rn and it's got great feel to it.
ghost
on 15 Jan 2019
I'm starting to lean towards the TS100 by now honestly.
It's certainly much better supported by this firmware, and a very nice iron. Then again, I like the TS80 a lot too.
Would it be safe to build a wire for the ts100 using audio-grade cables?
If they were thick enough, I don't see why not. It can't be drawing more than 3A or so (I forget the exact number).
skorokithakis
on 15 Jan 2019
Not so much thick enough as coppery enough. AWG18 is 1mm and rated at 2.3A (2.7ohm/100m) so any cable with a stripped single conductor thicker than 1mm should be OK. Speaker wire would depend on the speaker.
I often recycle old 3 or 5A copper mains flex from Vacs and domestic appliances. Its nice and flexible and as long as it's on a known brand, it's going to be good pure copper (check the resistance of the whole length to confirm).
The iron is still a tough decision, the TS80 would maybe fit your freakishly small hands better than the 100 :smiling_imp: but, end of the day they are both sexy in their own way, as a bench iron the 80 is fine. It's only when you push the envelope that the cracks show.
I'll be interested to know which way you take.
whitehoose
on 16 Jan 2019
@whitehoose
The Iron i previously used was around 11cm grip to tip distance with a nasty stiff, tangly PVC lead.
The TS100 looks like it's around 60mm tip to grip if i hold it by the metal cone thingy. I have some of those fabric-covered iron (for clothes) cables, so i guess those would be optimal.
This is one helluva tough choice 😅
ghost
on 16 Jan 2019
It's certainly much better supported by this firmware, and a very nice iron. Then again, I like the TS80 a lot too.
If they were thick enough, I don't see why not. It can't be drawing more than 3A or so (I forget the exact number).
Have you ever run into a case where the TS80 outperformed TS100? I've seen EEVBlog video and i was super confused.
ghost
on 16 Jan 2019
The boost mode helps with that issue.
It's due to the tip thermocouple being right next to the heating element, so the iron thinks it's the right temp while the tip is too cool.
We should be able to compensate for that in software, I'm in the middle of working on that.
dhiltonp
on 16 Jan 2019
@dhiltonp That sounds great! I've seen some video and the TS100 seems 20-30 degrees under the set temperature. So if i set it at 330°C and go soldering transistors i should be safe since it's at 300ish? Or is it just a thing of time when tip will get to the right temp later after the iron shows it's already there?
I know it's probably safe, but doesnt the boost mode overstress the power FET or the heating element?
@whitehoose Well, i ordered the TS100. it's got more power (i don't know when ill i have to desolder a power transistor fused to a massive heatsink) lol and more tips to choose from. Also a wire can be built for 5 bucks, doesnt need any quirky power standarts, i'll just find a salvage 24V laptop power brick and can run 65W (plus i get a 19V 4A for free).
Thanks to everyone for help, looking forward to join this awesome TS100 community! :)
ghost
on 16 Jan 2019
Thanks for completing the story.
happy soldering!
whitehoose
on 16 Jan 2019
silly question...
when i hold the second button in while heating and with detailed on it shows a different screen with info and the tip starts cooling. what is that display?
Also is there a way to stop heating without unplugging the iron?
 AmazingSpanoMan
on 17 Jan 2019
AmazingSpanoMan
on 17 Jan 2019
That button exits soldering mode and goes to the start screen.
dhiltonp
on 17 Jan 2019
@dhiltonp that's what I figured. Thanks for confirming.
I'm wondering if there is a way to include the pulse even while in the menus. The firmware has allowed me to use my power brick and it seems to stay on when using the he iron but as soon as I go into the menu it will sleep after a couple seconds.
AmazingSpanoMan
on 17 Jan 2019
@Ralim implemented that type of pulsing behavior.
I believe it was removed because it didn't actually help on most power banks, while increasing complexity and flash overhead.
dhiltonp
on 17 Jan 2019
I can confirm that this QC 2.0 power bank works on @Ralim's firmware: https://www.amazon.com/gp/aw/d/B01CZR3LT2
 marcuswu
on 18 Jan 2019
marcuswu
on 18 Jan 2019
Hi!
I have a few questions about firmware for TS80:
- What does the 18W/24W settings do in v2.06? When I checked, TS80 still negotiates for 9V.
- Can I simply connect 12V to the USB terminals without the iron negotiating first?
- How does tip calibration work? When I select B02 tip and calibrate to room temperature, it still shows 2-4°C ambient, which is over 20°C off. If I first place the tip to 0°C environment, it still calibrates incorrectly.
Doing custom calibration isn't much help too, "Simple" cal. with boiling water isn't actually safe, and "Advanced" doesn't come with any documentation. I assume it first tries to read ambient and then heats up the iron to 160° which should be checked with a probe. - Is there a way how to get more than 5W out of 5V USB (I suppose not)?
- Would it be possible to implement max wattage with more steps than 18W and 24W?
Thanks,
 asymcon
on 19 Jan 2019
asymcon
on 19 Jan 2019
Hi!
I have a few questions about firmware for TS80:
- What does the 18W/24W settings do in v2.06? When I checked, TS80 still negotiates for 9V.
- Can I simply connect 12V to the USB terminals without the iron negotiating first?
- How does tip calibration work? When I select B02 tip and calibrate to room temperature, it still shows 2-4°C ambient, which is over 20°C off. If I first place the tip to 0°C environment, it still calibrates incorrectly.
Doing custom calibration isn't much help too, "Simple" cal. with boiling water isn't actually safe, and "Advanced" doesn't come with any documentation. I assume it first tries to read ambient and then heats up the iron to 160° which should be checked with a probe.- Is there a way how to get more than 5W out of 5V USB (I suppose not)?
- Would it be possible to implement max wattage with more steps than 18W and 24W?
Thanks,
If you want 24W, you have to first up the power limit and second, raise "OffVolt" (thats in the stock fw, idk about Ralim) to 13V, this will allow the iron to run at 12V 2A.
The stock firmware might be reliable than Ralim, it's got linear power setting from 16 to 24W in 1W increments and same with the voltage.
Btw, watch marco reps' video, he powered it directly from a bench power supply.
ghost
on 19 Jan 2019
Hi!
I have a few questions about firmware for TS80:
- What does the 18W/24W settings do in v2.06? When I checked, TS80 still negotiates for 9V.
- Can I simply connect 12V to the USB terminals without the iron negotiating first?
- How does tip calibration work? When I select B02 tip and calibrate to room temperature, it still shows 2-4°C ambient, which is over 20°C off. If I first place the tip to 0°C environment, it still calibrates incorrectly.
Doing custom calibration isn't much help too, "Simple" cal. with boiling water isn't actually safe, and "Advanced" doesn't come with any documentation. I assume it first tries to read ambient and then heats up the iron to 160° which should be checked with a probe.- Is there a way how to get more than 5W out of 5V USB (I suppose not)?
- Would it be possible to implement max wattage with more steps than 18W and 24W?
Thanks,
If you want 24W, you have to first up the power limit and second, raise "OffVolt" (thats in the stock fw, idk about Ralim) to 13V, this will allow the iron to run at 12V 2A.
The stock firmware might be reliable than Ralim, it's got linear power setting from 16 to 24W in 1W increments and same with the voltage.
Btw, watch marco reps' video, he powered it directly from a bench power supply.
So flash the original FW, change offvolt to 13V and flash back Ralim's one?
Also no need for power negotiation? I assume it wouldn't be a problem to feed 12V straight away.
asymcon
on 19 Jan 2019
So flash the original FW, change offvolt to 13V and flash back Ralim's one?
Also no need for power negotiation? I assume it wouldn't be a problem to feed 12V straight away.
No, keep the stock firmware, or maybe rewrite Ralim's one for 12V if it would work. The OffVolt parameter is where the iron cuts off. If you don't change it and feed it 12V anyway, the iron might either 1) blow up (unlikely hehe) 2) just dont give a damn and take it's 9V.
I'd keep it with the stock latest firmware tbh, it doesnt seem to be as well supported as TS100 yet on Ralim.
ghost
on 19 Jan 2019
Or neither, as it's designed to withstand at least 13V given the existence of that setting. Why/how can a firmware determine the operating voltage of a device???
Also, thanks for the responses, but basically that wasn't even one of my questions, which I would still appreciate to be answered if possible.
asymcon
on 19 Jan 2019
Or neither, as it's designed to withstand at least 13V given the existence of that setting. Why/how can a firmware determine the operating voltage of a device???
Also, thanks for the responses, but basically that wasn't even one of my questions, which I would still appreciate to be answered if possible.
I answered 1, 2 and 5. Answer to 1 and 5 is use the factory firmware. The firmware voltage readings are provided by the microcontroller (presumably) that reads them through a voltage divider on the PCB (atleast that's how it works on TS100 and i think the TS80 is similiar). For the 13V thing, from the EEVblog video it seemed like it cuts off around 1V below the OffVolt setting (stock comes at 10V and you can see it runs only at max 9V). So setting to 13V cutoff makes it run 12V max.
ghost
on 19 Jan 2019
ETD couple of answers ... maybe (?)
More watts out of 5v ... well sort of. In my work I need access to a few standard voltages. For a few years I've been using buck boost converters, with mixed results. The trick (when it matters) is once you find a combo that works, you duplicate it (for spares) and then stick with it. Recently I've been playing with changing my existing time tested (20 years+) setup for something lighter and more in keeping with current tech (although I'll probably retire before then) A boy needs a hobby - so it's fun if nothing else.
I've sort of settled on LiPo s4 as a beefy source that shouldn't take out more than a couple of buildings if one ever goes critical ... and what e-bay describes as an up/down buck boost converter to provide all the voltages.
That said a single good 18650 will give good results (2xAA will just do too).
So a decent sized "ordinary" USB brick (3p - 3x 3.7v) should convert up with enough pixies to meet 9, 12 and 20v outputs. Stick a £1.50 qc3 controller on the converter's output (set at 12 or 20v) and you get a prize. Confirming compatibility is a pig. I've sometimes had 3 different models from the same seller in the same transaction ... sometimes it (whatever "it is") works - sometimes not.
That said - why would you? Just about every review comparing 100 and 80s shows the 80 passing the puddle test and leaving the 100 looking slightly uncomfortable (if not actually embarrassed).
Subjectively I've not found my 80s struggle over any of the the jobs I give them. I don't solder girders ... but nor do I coddle them I've done nuts and bolts (4mm) and a 5mm copper bus.
I'd be thinking any bigger than that on a regular basis, I'd be looking at a different iron to add to the bag. I still carry a gas canister for emergencies.
whitehoose
on 19 Jan 2019
@asymcon
Hi!
I have a few questions about firmware for TS80:1. What does the 18W/24W settings do in v2.06? When I checked, TS80 still negotiates for 9V.
The 18W mode will measure your tip resistance and then calculate the voltage to ensure it doesnt pull more than 2A. In 24W mode it will try and negotiate up to 12 V using the QC3 pulses to raise voltage.
If both give you exactly 9V then either your power source is QC2.0 or it doesn't implement the QC3.0 voltage change pulses
2. Can I simply connect 12V to the USB terminals without the iron negotiating first?
Yes you can.
3. How does tip calibration work? When I select B02 tip and calibrate to room temperature, it still shows 2-4°C ambient, which is over 20°C off. If I first place the tip to 0°C environment, it still calibrates incorrectly.
This is known, and being worked on which is why its not a "proper" release. Its mostly a cosmetic use for most irons.
Doing custom calibration isn't much help too, "Simple" cal. with boiling water isn't actually safe, and "Advanced" doesn't come with any documentation. I assume it first tries to read ambient and then heats up the iron to 160° which should be checked with a probe.
Boiling water is the safest method for people who do not have the means to measure the tip temperature. If you know of another method to get the tip at least 50+ deg C above ambient in a repeatable way, im all ears.
Advanced instead works the other way of you measuring the tip and adjusting the on screen display until it matches what the tips temperature actually is.
4. Is there a way how to get more than 5W out of 5V USB (I suppose not)?
Not without boosting the voltage up. If you boost it up to 9V with a DC/DC then you can get the normal 18W if your USB port supports this.
Its just ohms law, the tip is around 4.5 ohms, so the max possible wattages are :
5V/4.5 ohms = 1.11A = 5.5W
9V/4.5 ohms = 2A = 18W
12V/4.5 ohms = 2.66A = 32W
5. Would it be possible to implement max wattage with more steps than 18W and 24W?Yes, could be added in a future release, you are welcome to add a pull request to add this option (PID already has wattage tracking and voltage compensation), or it will be added in future when someone has more time to add it 😄
In regards to the stock firmware VS this firmware debate, its your choice. Stock firmware has some things mine doesn't (linear wattage limit). This firmware has more QC compatibility to some chargers along with other changes such as a better PID for some tips and continuous voltage adjustment (cable loss compensation).
Most of the issues with the whole QC world come down to the fact that the "standard" is not public and so almost all IC's that implement it are reverse engineered from other data sheets and then built for lowest cost. So it means that the "official" timings don't work on all of them.
Ralim
on 19 Jan 2019
Does anyone know if the TS80 works with apple's MBP (USB-C) adapter?
jvdmeulen
on 19 Jan 2019
@jvdmeulen No, that is a USB-PD charger which does not support QC.
Ralim
on 19 Jan 2019
Thanks a ton for you reply, @Ralim !
The 18W mode will measure your tip resistance and then calculate the voltage to ensure it doesnt pull more than 2A. In 24W mode it will try and negotiate up to 12 V using the QC3 pulses to raise voltage.
If both give you exactly 9V then either your power source is QC2.0 or it doesn't implement the QC3.0 voltage change pulses
When using QC3.0 supply, it seems to pulse the voltage from 10-12V every second. I'll post a video. The iron shows even 40W at some point, but the tip is heated in the same amount of time as with 9V from QC2.0
Boiling water is the safest method for people who do not have the means to measure the tip temperature. If you know of another method to get the tip at least 50+ deg C above ambient in a repeatable way, im all ears.
Advanced instead works the other way of you measuring the tip and adjusting the on screen display until it matches what the tips temperature actually is.
The thing is boiling water creates air moisture which may corrode the internal PCB traces, that's why I'd probably choose different method.
I'll keep thinking of something :+1:
So the best method so far is to use thermal couple and DMM...
Its just ohms law, the tip is around 4.5 ohms, so the max possible wattages are
Yes, this is just what I thought, although my tip is around 7.5Ohms so at first it didn't make sense to me how is the iron pumping 5 watts into that resistance.
That said - why would you? Just about every review comparing 100 and 80s shows the 80 passing the puddle test and leaving the 100 looking slightly uncomfortable (if not actually embarrassed).
Subjectively I've not found my 80s struggle over any of the the jobs I give them. I don't solder girders ... but nor do I coddle them I've done nuts and bolts (4mm) and a 5mm copper bus.
Mainly because I managed to hit the iron limits not at the best time. Yesterday I was attempting to fix my co-linear antenna on the roof which had a cold joint. It's made of thick copper wire, about 4-5AWG, and even big soldering irons tend to struggle with that one, but since no AC line connects to the roof, it was battery power or nothing.
TS80 managed to do the joint, but it struggled to keep even 260°C, and pulled constantly over 16W. Even after a minute, the joint wasn't mating to my satisfaction (I was using low-temp silver solder which melts at 160°C), but when I let it cool down it seemed to be fine.
If that job was done on anyone else's roof, I would not consider that joint satisfactory though.
It's not a problem with the iron, certainly not, but 16W wasn't quite the power required for such job. I'm very sure at 24W it would've passed with flying colours. :100:
asymcon
on 20 Jan 2019
I know what you are saying, it's always nice to get the last drop out of the bottle.
And I think that's the territory you are in. The balance is teetering on the brink. Nothing wrong there I'll chase that drop too.
Boiling water - yes of course you are right water and pixies don't play well together ... the question then is how often are you going to solder an aerial or calibrate a tip? If you dip into a litre or so of water (which you need to keep the thermal mass constant long enough to give some degree of accuracy). Dip at an angle to stop the rising vapour touching the case and getting in too far, and/or make a lid for the container.
The iron / aerial. Been there done that ... however well you plan there is always something that sneaks up on you. Again it's a case of how often. You are so near the edge on that if its going to be an issue - you have to accept that it's the wrong tool and get yourself a blowtorch (I got a £5.00 chinesium one that is excellent for very occasional emergencies). the only certainty is, if you bog off a joint it WILL fail (usually at the worst time) and cost you dear.
The real problem there is that cold soldering hits a point where all you are doing is smearing softened metal round a gap. You need a certain heat to make that magic molecular bond. An aggressive flux and torch is an easier option. And you can then use it to boil the water to calibrate your tip too :P. A knockoff iron thermocouple is only £9.
One of my visits can involve a 4 hour walk out to a remote site. I have to take the kitchen sink to avoid doing the route more than once.
whitehoose
on 20 Jan 2019
if you bog off a joint it WILL fail (usually at the worst time) and cost you dear.
That's why I sort of tolerated it on my own installation, but for a "customer" it would be a no-no. Anyway the conclusion to the aerial project is that the SWR went off the charts when I put it back together, so another trip there is mandatory anyway.
get yourself a blowtorch
I was curious if someone makes that suggestion. For this use, blowtorch is inadequate due to lack of temperature monitoring. The aerial is encased in plastic shell which would not be able to survive 1k°C of a butane blowtorch even if I took the coil out.
Secondly, I did try with a blowtorch when it was still on the ground, and even careful use caused the coax to melt together at the feedpoint, shorting out its core and shield.
No, this needs temperature compensated tool with low thermal resistance, and TS80 with D25 seems to be the right one for the job. And 3s li-ion pack providing about 11V to reach 24W of thermal power.
asymcon
on 20 Jan 2019
What are you using to control qc3? I either use a BattGo BG-8S connected directly to a 4s to act as QC3 controller capable of delivering 12v max. But its a relatively expensive solution.
Also playing with a cheap fleabay QC3 step down converter but from a 4s it needs a step up stage to about 25v so it can step down and deliver the full range - 20v max!. Its over complicated (but only cost £5.50) and so far it works surprisingly well. I wouldn't normally use such a Heath Robinson setup - but... welllll the price is right, It's compact and provides a reasonable degree of protection.
My instinct is reluctant to allow the TS80 get above 9v, whatever the "standard" says and the F/w allows. My instinct is to under run LEDs ... and soldering irons, they both benefit in the long run. 12v would only be for emergencies - that fits the kit I tend to work on, it's different for others.
The blowtorch I was meaning is something on these lines (Ebay search GAS BLOW TORCH CORDLESS REFILLABLE BUTANE POWERED SOLDERING WELDER IRON PEN - or the even cheaper MICRO GAS PENCIL SOLDERING IRON). If you find you have a real high thermal mass and no mains, they are a get out of jail cards in a tight spot.
Maybe takes a little practice but I'd even attempt SMD if my life depended on it, I learned to solder using a block of copper and a gas stove. The setup is as delicate as the skill of the user.
whitehoose
on 20 Jan 2019
What are you using to control qc3?
I'm not into QC3 honestly. I have about six 250Wh home made 3s7p li-ion batteries, built to deliver more than 40A each. Forgot how much can QC3 deliver, but I'd assume nowhere near that current.
Step up/down transformers tend to create lot of RFI on the power lines, best to avoid them where it matters. I don't need 12V 40A every day, but it sure helps to know the packs can handle it, for that 1% of scenarios where it's mission critical (actually they can handle over 100A each, but my "rating" is purposefully lower)
My instinct is reluctant to allow the TS80 get above 9v
Sure, to each their own :+1:
But at the end of the day, all the TS80 does is to pulse the input voltage to reach certain temperature on the tip. And the tip is just like any other resistor. You can pump 500W into 5W resistor if it does have the thermal capacity to keep the heat somewhere (beefy heatsink). "It" wouldn't mind any more than the tip does, as long as the temperature probe is there, 12V isn't going to hurt anything.
For regular soldering, yes, 9V is enough and would suffice, that's about 97% cases. But for those 3% it's good to have extra watt reserve and knowing the iron can handle it.
asymcon
on 20 Jan 2019
Where I can get a carbon sleeve for TS80? The stock one is wobbly and borderline impossble to use without wrapping into a kapton tape. Aliexpress maybe? Can't find where to buy it.
joric
on 22 Jan 2019
I would also be interested to know where to buy the grounding cable. My bundle haven't came with one. Haven't received any carbon sleeve as well.
asymcon
on 22 Jan 2019
The grounding cable that came with the TS100 was just a coiled wire with a
1 megohm resistor in it, with a spade lug at one end for the screw on the
tail end of the iron, and an alligator clip on the other for connecting to
ground. You could get a cheap static wrist strap and disconnect it from the
strap, and put a lug on the end. It should already have a ground connector
on the other end, either an alligator clip or a banana plug + alligator
clip, if it's a more expensive one. Just make sure the resistance
end-to-end is around 1m ohm and you should be fine.
It's a soldering iron. Making a wire with a resistor in it should be
child's play with a soldering iron.
On Tue, Jan 22, 2019 at 3:09 AM asymcon notifications@github.com wrote:
I would also be interested to know where to buy the grounding cable. My
bundle haven't came with one. Haven't received any carbon sleeve as well.—
You are receiving this because you are subscribed to this thread.
Reply to this email directly, view it on GitHub
https://github.com/Ralim/ts100/issues/349#issuecomment-456306587, or mute
the thread
https://github.com/notifications/unsubscribe-auth/ARoafV1LXR_40YpHGOkvBxxWK6B17MOfks5vFscegaJpZM4WO3WC
.
--
-+-+-+-+-
Jenny Everywhere's Infinite: Quark Time
http://quarktime.net
 JennyEverywhere
on 22 Jan 2019
JennyEverywhere
on 22 Jan 2019
Yes, I already made myself one, but at least knowledge of where to get OEM accessories of this sort would be appreciated.
asymcon
on 22 Jan 2019
What carbon sleeve? I'm sure it's obvious - but I'm uncertain just what part of the Iron would benefit from being carbon. Marco Reps made a carbon collar ... but it has an aluminium core - so really just a cosmetic frippery.
Buying with Banggood - The ground lead comes as part of the "more acc" package (£6 extra) PSU, nice silicone lead, ground strap not elaborate but broken down the PSU alone costs £14, so decent value. Can't hit on a search that shows the lead as an item (they call it "Safety Ground Wire" - search that - results say NO!), Nearest would be use the lead that comes with the static wristband with a terminal loop to replace the press-stud. The kit I work on has strict static procedures which prohibits unbonded leads. I just stick with the programme - so mine is somewhere in a drawer. It would mess with flexibility of the sexy silicone lead too - so not on my list.
asymcon ... I'm still curious about your power provision, without qc3 I can't see how you get the Iron to chooch. just to be clear are you using the 3s7p with both the 100 AND 80 or just the TS80?
whitehoose
on 22 Jan 2019
asymcon ... I'm still curious about your power provision, without qc3 I can't see how you get the Iron to chooch. just to be clear are you using the 3s7p with both the 100 AND 80 or just the TS80?
I don't own TS100.
So far I have used Mi 10Ah powerbank with QC 2.0.
What makes those QC 3.0 pixies so special that the iron can't work without them? 11V out of QC or 11V out of 3s7p, just about the same breed of pixies, only the li-ion can supply whole lot more of them at a time, not really needed for TS80, but what if I want to use the kettle while soldering? More skookum solution.
asymcon
on 23 Jan 2019
The power supply more likely costs around 29 CNY, so not much value to be
had there. Personally the 'more' set is for those who do not have any of
this, else you are better off taking the cheaper option. Luckily they do
not make the same mistake as ONLY offering a black iron for the normal
option (and offering 'more' with orange, cause that way you can never get a
black iron as there is no black cover option). Anyway, diverging...
Also not sure what you mean with 'carbon sleeve' ?
On Wed, Jan 23, 2019 at 3:19 PM asymcon notifications@github.com wrote:
asymcon ... I'm still curious about your power provision, without qc3 I
can't see how you get the Iron to chooch. just to be clear are you using
the 3s7p with both the 100 AND 80 or just the TS80?I don't own TS100.
So far I have used Mi 10Ah powerbank with QC 2.0.
What makes those QC 3.0 pixies so special that the iron can't work without
them? 11V out of QC or 11V out of 3s7p, just about the same breed of
pixies, only the li-ion can supply whole lot more of them at a time, not
really needed for TS80, but what if I want to use the kettle while
soldering? More skookum solution.—
You are receiving this because you were mentioned.
Reply to this email directly, view it on GitHub
https://github.com/Ralim/ts100/issues/349#issuecomment-456696500, or mute
the thread
https://github.com/notifications/unsubscribe-auth/AAAHZvd2mKAhDOGL_wtEgDHNOFygMl1iks5vGA0UgaJpZM4WO3WC
.
--
Gerard Braad | http://gbraad.nl
[ Doing Open Source Matters ]
gbraad
on 23 Jan 2019
gbraad
point of the more option, OK yes good for those who don't, but with new tech also it's GUARANTEED to work. (and I have had to use the banggood replacement routine before). Pricing is also an issue - because QC3 is new (ish - to me) I have my phone charger but that's it. Unknown alternatives showed that the more pack was less than half the price of the alternatives, as well as being twice the price in its own right. More Oranges for your buck - for me a no-brainer. And doing my reading. 99% of the people complaining were using different brand kit. Mostly cosmetic options are so not as tempting.
asymcon
_"I'm not into QC3 honestly. I have about six 250Wh home made 3s7p li-ion batteries, built to deliver more than 40A each"._
Not seen any mention of QC2 to that point, which now explains how you chase pixies up the pipe. I think you'll find them LiPo beasties are a whole different breed of mischief.
So now, what's the carbon sleeve for?
whitehoose
on 23 Jan 2019
@whitehoose it's rather a Carbon Fastener. I can't work with TS80 it's shaky as hell, TS100 feels rock solid. Here, from the Marko Reps video:

Also, my video
joric
on 23 Jan 2019
Well - every day's a schoolday! ... Both my 80s are totally solid, even with the fastener off. I thought that that part was a removal aid - when unscrewed it pushes the tip up and out .. it forms a collar round the jack but doesn't fix the tip in any way I can see (although I suppose you could jam the tip using it).
There is a warning that the handle will get hot if used for an extended period - but mine never reaches anywhere near "ouchy" temperatures.
It doesn't even fix the two halves in place because there isn't a split - more of a ... lid?
If I thought of it at all Its just a design feature that doesn't have function other than as a handle.
I suppose you could use a length of silicone tube - I use a length to cover the tip when I put it in my bag.
whitehoose
on 23 Jan 2019
Haven't received any carbon sleeves, collars or t-shirts with my TS80, unfortunately. I bought a set which had silicone power cable, both D25 and B02 tips, power brick and the iron itself.
OEM shop would have been great. I haven't received even the allen key, which appears to be imperial, not metric (none of my screwdrivers fit).
Anyway @whitehoose today's test revealed that even regular 12V pixies are compatible with TS80. I set my PSU to 12V and limited current to 2.5A. It only went to 2.1A when heating up. Wet sponge test has driven the element to its limits, 30W was shown on the display, but in reality only 25W was drawn from the PSU. Great, so no QC nonsense necessary. With that said, I wouldn't dare to venture above 12.0V, so no lead acid.
Heat-up time @11.7V about 8 seconds
Some voltage and power matches:
12.00V 25W
11.50V 22.2W
11.00V 21W
9.00V 15W
BTW, tomorrow some more aerial soldering awaits. Yes, the same 5 AWG wire. But this time with proper power and TS-D25
asymcon
on 25 Jan 2019
So now, what's the carbon sleeve for?
Carbon Fastener
still not clear what this is about :-s Will look for the video, but
expect me to remain puzzled. Do not recall any 'shakiness' for either
the TS100 or TS80
On Fri, Jan 25, 2019 at 6:18 PM asymcon notifications@github.com wrote:
>
Haven't received any carbon sleeves, collars or t-shirts with my TS80, unfortunately. I bought a set which had silicone power cable, both D25 and B02 tips, power brick and the iron itself.
OEM shop would have been great. I haven't received even the allen key, which appears to be imperial, not metric (none of my screwdrivers fit).Anyway @whitehoose today's test revealed that even regular 12V pixies are compatible with TS80. I set my PSU to 12V and limited current to 2.5A. It only went to 2.1A when heating up. Wet sponge test has driven the element to limits, 30W was shown on the display, but in reality only 25W was drawn from the PSU. Great, so no QC nonsense necessary. With that said, I wouldn't dare to venture above 12.0V, so no lead acid.
—
You are receiving this because you were mentioned.
Reply to this email directly, view it on GitHub, or mute the thread.
--
Gerard Braad | http://gbraad.nl
[ Doing Open Source Matters ]
gbraad
on 25 Jan 2019
@gbraad here, from 9:25:
joric
on 25 Jan 2019
Oh, that part... (not sure what that has to do with being 'high'), but as
Marco said "he does not like the feel" and it is certainly something
personal. I do not have this issue...
On Fri, Jan 25, 2019 at 8:13 PM joric notifications@github.com wrote:
@gbraad https://github.com/gbraad are you high? Here, from 9:25:
https://youtu.be/83STpUXHilk?t=565—
You are receiving this because you were mentioned.
Reply to this email directly, view it on GitHub
https://github.com/Ralim/ts100/issues/349#issuecomment-457554775, or mute
the thread
https://github.com/notifications/unsubscribe-auth/AAAHZnZpJ7c9buxPRzH2HA6dsveLJR8iks5vGvT2gaJpZM4WO3WC
.
--
Gerard Braad | http://gbraad.nl
[ Doing Open Source Matters ]
gbraad
on 25 Jan 2019
Anyone else tried the direct power option asymcon is using?
I wasn't aware that QC3 made provision for over volting directly up the tube like that.
Squirting 12v straight up the pipe seems a little adventurous to me, I wont be playing that game.
_BTW, tomorrow some more aerial soldering awaits. Yes, the same 5 AWG wire. But this time with proper power and TS-D25_
(Do it right - do it once :D)
Marco Reps says "their carbon handle is pretty cool, but I think I prefer a silicone one". - so everyone DID get the carbon, As for the silicone - I never can see the point in buying a white cat while wishing it was a purple aardvark ... then spending money on making it look like a lame giraffe. A soldering Iron is one of the more basic tools in the bag (or should be) It is what it is - a hot nail.
I use silicone tubing and it comes in just about every OD/id combo imaginable. I've no problem with the iron as it is - but I've chopped a short length that fits snugly over the sleeve and feels comfortable in my grip - we'll see if that melts solder any better.
I've finally connected a 4s Lipo directly to a fleabay qc3 step down controller (£1.73) and done a real day's work. I'm not burning any boats just yet, but the signs are good, it works an absolute treat without any downside I can see (yet?).
For emergencies I can also introduce an up/down converter into the chain and connect it to a single 18650 or a couple of AAs and crank the pixies up to 12v to feed the QC3 and that also works surprisingly well (obviously it's restricted to a quite limited time). 300c in both cases was just 6 seconds which compares to the wall wart. And most importantly the Iron behaves itself without glitches.
I think that's my solution found. I can carry standard batteries and with the booster at £4.50 - total price £6 makes it expendable (I have spares) if something unforseen happens.
whitehoose
on 25 Jan 2019
so everyone DID get the carbon,
hence the confusion, since it was sounding like an additional thing that should have been included. It is just part of the standard barrel (and to me has nothing to do with the shakiness, at least for me).
Stuffing 12V down the USB-C cable is quite normal. There is nothing that could prevent it, and basically is what the QC negotiation does. However, also to me this sounds drastic... and much like the design was defective to begin with :-P
gbraad
on 25 Jan 2019
so everyone DID get the carbon
Everyone -1 (at least)
I'd be still interested to know if one could get the extra oem accessories somehow.
(Do it right - do it once :D)
That old joint hasn't failed, it's just that the aerial needs retuning. However since I'll be there anyway, I'll fix that joint :-P
Anyone else tried the direct power option asymcon is using?
I wasn't aware that QC3 made provision for over volting directly up the tube like that.
Squirting 12v straight up the pipe seems a little adventurous to me, I wont be playing that game.
Well, @Ralim gave me the green light. Him being the author of this fw, one would assume he knows a thing or two about supplying power directly. I also started gently, 12V and 0.1A just in case of a bad day. That went well, so I kept opening the tap until there was 2.1A
asymcon
on 25 Jan 2019
and much like the design was defective to begin with :-P
Lol gbraad - Don't get me started on the half arsed design.
Plugging the 80 into a ruideng tester the "normal" max is 8.6v with 1.something amps. The wee beastie heats up swiftly and melts anything I've thrown at it - so I've never felt the need to slap her 'till she cries for mercy. I generally err on the side of a bigger resistor when replacing things. Under tends to last better than over. I've spent £60 on a toy that should cost less than £20 - I'm going to protect that investment for at least the next 20 years o<}:P
My impression (No I haven't looked at the specs - I should really) was that QC3 decides what it wants and that's what it takes after negotiating the deal. My only expendable QC3 dooh-dad is a questionable QC3 stepdown controller and that delivers 5v unless the device asks for more ... in my head that sounded logical given a bog standard USB results in Low Volts lockup with the stock 1.06 fw.
The 9, 12 ->20v options for devices that can take it, seemed logical that if there is a universal standard psu - the device has to ask the source for more pixies to stop the weedy kids getting fried and not just accept whatever is thrown at it.
This is the only spec I've read and it shows op volts at 9v and off volts at 10
http://gotronik.pl/images/img/TS80%20Soldering%20Iron%20User%20Manual%20V1.1.pdf
Banggood supposedly sells all the kit - I find the chinglish search is sometimes "challenging".
http://www.minidso.com has a surprisingly good enquiry option - I was talking to tech support within a few hours and they certainly went the extra mile to help
whitehoose
on 25 Jan 2019
I'd be still interested to know if one could get the extra oem accessories somehow.
I doubt. They didn't even sell black TS100 casings. I am sure a thirdparty option might be available at some point.
supplying power directly
QC just negotiates and applies the power on the vbus... but always better to use caution. I have also used a USB-C to DC5521 plug and some QC and PD trigger cables to apply power to avoid needed conversion/mediation (but again, the TS100 is still my primary choice instead).
gbraad
on 25 Jan 2019
Thinking to the next step ... a logical mod would be to remove the motherboard, borrow a TS100 and connect red and black of a USB cable to a (tip and ring?) of a 3.5mm socket.
jam the socket into the case and plug the tip of your choice into the socket. Connect the USB plug to a wall wart ...
voila! A directly powered 5v soldering iron with no irritating flashy dots... or complications with power compatibility. A simple variable resistor can be added to control temperature.
The "economy" mod would be to substitute the 3.5mm socket for two cunningly crafted "U" shaped springs so that cheaper bits used by the TS100 can be used.
Please note this also extends the choice of bits by 250% !!!
NB; Any resemblance to the simple analogue device called "an iron commonly used for melting spelter to coat thin wires with a tin lead alloy to securely connect to the terminals of electronic componentry" is purely coincidental.
whitehoose
on 25 Jan 2019
@whitehoose What you're describing is basically _TS400_, which is on the market for several years now:
https://www.ebay.com/itm/Mini-USB-5V-8W-Portable-Electric-Powered-Soldering-Iron-Pen-Tip-Touch-Switch-kit/163190518639
asymcon
on 26 Jan 2019
And just about every other soldering iron I remember having. Eeeh them were the days. I suspect 8w is a little weedy - I'm pretty certain big clive showed one of these (or something very like it) more than a year ago.
I have one of these - https://uk.rs-online.com/web/p/soldering-irons/0545008/ It's had a couple of new bits new batteries and charger as it has transformed from a NiCad to 18650s - it's been (and if I'm truthful, still is) my go to portable since I bought it in 1984 and its still excellent, I doubt the 80 will outlive it (or out perform it).
Prospective Iron designers should look long and hard at the utility, practicality and more importantly simplicity this iron brings to the party ... it's 100% dedicated to getting hot and melting solder without melting components.
Where brute strength is needed gas takes over. Any well designed iron is self regulating, Thermal mass works on both bit and component to prevent runaway.
whitehoose
on 26 Jan 2019
To whom it may concern a picture explaining Weller RT tips vs T80. They don't physically fit even with the grip unscrewed. The threaded bit overhangs a little bit, which would be just about the right amount and provide well-needed mechanical stability - however, the Weller tips are 9mm on the part that would need to fit there, and the TS80 tips are just under 8.5mm. (Also there's an electrical incompatibility, according to Marko Reps video, sensor and power pins don't match).

joric
on 27 Jan 2019
Sometimes the effort that goes into stopping people reusing parts in other devices is huge. Just shows how the cash cow mentality outweighs everything.
Being able to swap bits would be a real advantage to those who do that sort of thing.
The RS - Just connect a screw block to a battery then connect the bit and it works. The first one I bought got stood on I had two NiCads in a piece of conduit connected using 2.5mm copper wires to a screw block. I even included a switch ... that served me well for two years or more until santa brought me a replacement. :0)
whitehoose
on 27 Jan 2019
Did You know this solution for LiPo's?
AOKoda Lipo to USB Power Converter QC3.0 Adapter Quick Charger for Smartphone Tablet PC
Cheaper solution for ISDT Battery checker.
kokein
on 29 Jan 2019
Lol - Hindsight is a wonderful thing. Also based on the knowledge that QC3 can be very flakey - I asked round - and the ISDT came up every time yours has been the first mention, of the AOKoda.
Do you know from experience that it works with the TS80?
The step down adapter I took a chance on is only £1.71 and it works really well. I'm considering ditching the LiPos and passing on the ISDT in favour of 18650s I can't risk taking a fire hazard into my worksite
What worries me about the LiPo route is the lack of protection - not that I expect it to explode - but shit happens - and I'd hate to be remembered for that.
... and there's the relatively short lifespan. I've been using lead acids, and my setup has worked well for years - as does my solder melting kit. The TS80 is a hobby in it's own right, even with a good imagination its not a pro kit - far too many variables to be reliable.
I thought it was time to join the 21st century and also fancied playing with some new toys. From that point of view it's fun.
whitehoose
on 29 Jan 2019
Do you know from experience that it works with the TS80?
I do, using it about two months now.
jvdmeulen
on 29 Jan 2019
LiPos and passing on the ISDT in favour of 18650s I can't risk taking a fire hazard into my worksite
What worries me about the LiPo route is the lack of protection - not that I expect it to explode - but shit happens - and I'd hate to be remembered for that.
By that same logic, everyone carries a fire hazard with them in the form of a phone, smartwatch, MP3 player, tablet, laptop, vape, ...
I spotwelded over 5000 li-ions, and built several huge batteries out of them. They aren't dangerous as long as they are treated to manufacturer's recommendation. All those hoverboard explosions in the media doesn't take into consideration several factors:
possibility of external damageimproperly calibrated charging circuitlayer deformationcrystals on the anode resulted from below freezing chargingmanufacturer
As a result, there's a lot of unsubstantiated fear among people due to bad reporting.
But I have to agree that Li-Ions aren't perfect for 100% of cases. Where safety is #1 concern, I'd grab 3.2V LiFePO4 (iron phosphates) cells. About 10 times more expensive, and with 1/3 of the capacity, but uncompromised safety. Maybe those would suit your application (about 140Wh/kg, still miles better than VRLAs).
Never mind, read your reply incorrectly
Edit no. 2,099,084: This works too:
https://www.aliexpress.com/item/QC3-0-QC2-0-USB-DC-DC-Buck-Converter-Charging-Step-Down-Module-6-32V-9V/32671645129.html
Input 6-32V
asymcon
on 29 Jan 2019
Its nice to here that this Aokoda works with ts80, thanks @jvdmeulen ! Sure we can solder even more cheap solution, but as mentioned by @asymcon but as i see in details this Aokoda has low voltage protection, am i right? @jvdmeulen ?
kokein
on 29 Jan 2019
low voltage protection, am i right
Why would you need it? For anything lithium protection PCB is mandatory anyways.
asymcon
on 29 Jan 2019
but as i see in details this Aokoda has low voltage protection, am i right? @jvdmeulen ?
Yeah, it's really convenient.
Input: 7-27V (XT60/2-6s )Lipo Battery
Output: USB QC3.0/USB  QC2.0/USB 5V(Max: 2.4A)
USB QC3.0: 3.6V-6.5V/3A, 6.5V-9V/2A, 9V-12V/1.5A
LED meaning: LV(Low voltage number)
                           VI(Input voltage)
                           VO(Output power)
                           IO(Output current)
                           QC(Quick charge)
And a few other things.. check
details part1
details part2
jvdmeulen
on 29 Jan 2019
jvdmeulen - thanks for that confirmation.
Well I've ordered one on the strength of the over discharge protection alone.
I have to bear in mind the other guys who may end up using the kit will find a unit more convenient than individual components
asymcon
Protection is an odd beast. LiPo tends NOT to be protected in most cases because for some reason the manufacturers just don't do it and you'd have to dismantle the battery to add cell level protection. if you look round the forums - people seem happy to accept that their drone may explode at any time... (and I suppose that dropping one from 10000 feet is an everyday risk.
Dunno if its a weight issue or what but the construction of a LiPo accommodates balance charging and explosions but not protection! (you can get blast bags for storage and carbon fibre bullet proof vests to minimise damage caused.
What I think of as Li-ion (18650 and phone batteries) still don't have compulsory protection.
I don't know this as fact - but my impression is that where single cells are to be used, protection is usual.
Where batteries will be made up - they come without protection and it's added later (I have a box of single, double etc, etc cell protection/charge boards for constructing batteries of various capacities/sizes.
I can confirm that the step down converter you show on Ali is my current favourite controller - and that it works well with the TS80
whitehoose
on 29 Jan 2019
Guys I don't think this is a good place to continue thr discussion about alternative power sources for TS80. This is an issue opened for TS80 firmware support and right now there's probably more about the power sources than the firmware itself.
Just think about someone new coming here, trying to find the latest build for TS80 only to get lost in the bunch of off topic messages.
Maybe a discord channel would be better for generic TS80 discussions.
yawor
on 29 Jan 2019
@Ralim add ts80 binary to the latest release please so the guy above could be happy.
Upd oh there were TS80_EN.hex (and other languages) in the release section already, my bad.
joric
on 30 Jan 2019
It might however point this new visitor towards the answer to why their brand new QC3 powerbank isn't powering their TS80 (or indeed why their old USB2 powerbank isn't either).
Its not just about firmware per se. The thread is after all TS80 support. and QC3 compatibility (or incompatibility) is an intrinsic part of the TS80 spec.
Perhaps at 444 comments that fight is already lost and a new thread is a little overdue for opening, I doubt the situation its recoverable either way.
If you are lost and require redirection.
TS100 and 80 Firmwares are here:
Ralim's https://github.com/Ralim/ts100/releases
MiniDSO Stock: http://www.minidso.com/forum.php?mod=viewthread&tid=3208
whitehoose
on 30 Jan 2019
I had a bit of mishap with TS80 two days ago, I managed to reverse polarity on that one (first time in 10 years). Magic smoke escaped and the iron was not turning on.
Having no schematic I resorted to guessing, STM32 looked intact and even the dc-dc converter was showing signs of life. As it turns out, only the resettable fuse was blown.
For the time being I bridged it, but would welcome confirmation if it's the right part - digging through Aliexpress I think I found it - 32V 3A SMD1206 CC12H3A-TR.
Can anyone with schematic confirm?
asymcon
on 11 Feb 2019
Schematic doesnt show anything overly useful for the fuse, but that one looks good!
Ralim
on 11 Feb 2019
@Ralim
Have you received the USB/QC3 modules I mentioned sometime back in this thread? Have you tried them?
MaMuCh69
on 11 Feb 2019
I have received them, they work well for my use cases (using my ts100 batteries). Handle 24W mode fine so far. Just haven't found a good case for them yet.
With a bit of careful soldering it's possible to easily mount an xt30 to them but it bypasses the fuse
Ralim
on 13 Feb 2019
I'm not involved with Aokoda in any way.
I've been using one with a 4s LiPo for a couple of weeks now, I've had a reasonable chance to use it and abuse it enough to be willing to give it my pretty confident seal of approval. It has a settable over-discharge warning as well as built in short circuit overload etc etc protection .... it also has a very dinky power mode which allows you to connect not just LiPo batteries - but just about any input source (from 7v-27v) through it's XT60 connector to power the QC3 output for an iron (and every other QC3 thingy I own). Effectively making it a neat, cheap and effective general power source conditioning / protection option. I wish I'd found it earlier I got 2 units from a UK e-bay seller for £6.99 ea. Made up a couple of XT60 to various plug adapters - and ready to roll wherever I need.
Can get a buck boost converter and a buck QC3 controller to cover a slightly more convenient 3.3v - 32v range for just £5.55 on eBay but still needs a case the Aokoda is much more compact and neater if you can manage without the lower voltage USB powerbank option.
I'll probably settle for the Aokoda and also carry the buck boost to allow me to use anything from a couple of AAs or an 18650 to an 6s LiPo.
For anyone who moves around or is trying out new (or dodgy) kit, at only £7 it's maybe worth using the Aokoda routinely as a sacrificial defensive precaution.
whitehoose
on 14 Feb 2019
@Ralim
Boiling water is the safest method for people who do not have the means to measure the tip temperature. If you know of another method to get the tip at least 50+ deg C above ambient in a repeatable way, im all ears.
Here's an idea. Eutectic solder melts and freezes at one temperature point, 183°C for Sn63Pb37 and 179°C for Sn62Pb36Ag2. Set an advanced calibration to one of those temperatures and once the solder start to melt, you're spot on.
asymcon
on 17 Feb 2019
I've used a ring of solder round the tip as long as I've been using solder, its a useful landmark.
Like most components, solder from reputable sources comes with a datasheet. Although in the UK as of 1 March 2018, Leaded solder is for "professional" use only, Rapid have recently altered their website so now only "professional" account holders can buy lead based solder ... Chinesium solder is more like a lottery, there is more lead in the atmosphere than in many of their solders.
The advantage of water is it boils at 100c - and stops getting hotter... solder melted with an iron usually gives a moving target, the solder may be consistent, but the temp from the iron is usually racing up to 300c+ so you have to be on the ball to hit target. Setting the tip to 180c then hunting for the point is an interesting prospect ... I've just tried with a trusted 0.7mm 60/40, the datasheet says 190c ...
180c - no melt
190c - no melt
200c - as soon as iron passed 190c - the tip "broke" and the solder went plastic.
I don't hang too much on the display ... but I'd say that was pretty text book.
room temp is 21.8c, humidity 48% - voltage 9.18v (missed the current - looking at temp) and I'm using v2.06-RC4. Reset the iron but not calibrated, detail mode ticked.
The display is a bit flicky but consistent - temp rapidly hunts +/- 1deg round target when "at rest" but all lettering is solid and in line.
I'm pleased as punch - think I'll go put the kettle on.
whitehoose
on 17 Feb 2019
Yes, the tip "breaks" the solder at much higher temperature than melting point, I know about this. But still, if the tip was wetted before the temp calibration, and a new solder added to it at melting point, that would show the correct temperature with about 1-3°C accuracy with eutectic, not 60/40, solder.
Water isn't as consistent as some might think - minerals in it combined with atm pressure can easily move the boiling point downwards.
Gotta agree on the leaded solder, and it's both enraging and disappointing move. However, quality leaded solder can still be purchased in the EU without turning to shoddy chinese products, only requires more digging. Last week I got myself Sn62/Pb36/Ag2, 500g spool for about $35. I'll be likely getting more, as it'll be valued in gold in future times.
BTW, Kester 235 is still available through Farnell, if you don't mind paying shipping from Newark.
asymcon
on 17 Feb 2019
No need to pay newark - I live 15 miles from the main Leeds depot I collect most of my kit over the counter. UK isn't quite as third world as some think - you can even drink the water thanks to them thar Victorians.
I've had accounts with most of the suppliers for 30 years or so even though I don't think of myself as "pro", they do - thus I don't have supply problems myself, it's just the poor guys trying to stick wires together of a weekend. Long story, but 25 years ago I was working in an electronics plant in my home town when the bailiffs shut down the place. Turned out I knew one of them and was able to make offers on some of the items in the supply room I got a ton (almost literally!) of good 1mm 60/40 solder and enough wire/cable to reach the moon. All for a pittance. It set me up so my overheads were negligible when it mattered most. I still have more than I'll ever use in the loft. But I do still buy thin solder and paste for some smd work.
I still like to know where the bargains are ... or at least which supppliers can be trusted ... and solder is about as basic (and essential) as water.
whitehoose
on 20 Feb 2019
Fuses arrived! Now I need a soldering iron to fix this soldering iron.
Oh dear. :-)
asymcon
on 3 Mar 2019
Stock FW 1.07 does not work on Blitzwolf BW-PL2. Custom FW works
 SensorsIot
on 14 Mar 2019
SensorsIot
on 14 Mar 2019
I read the TS800 has a max temperature of 400°C.
While the TS100 has 450°C.
Is this a physical limitation or does the custom firmware allow for a higher temperature on the TS80?
 CWempe
on 21 Mar 2019
CWempe
on 21 Mar 2019
Both,
The tip isn't really rated for over 400 but will do it.
The ts80 tip has a different thermocouple gain, so we cannot read over a certain point. This often falls between 420-440 depending on the tip and the tolerance of the gain resistors in your particular unit.
Ts80 can go over 400C but how far varies, firmware will cap you at 450 but hardware may limit earlier.
Ralim
on 21 Mar 2019
Hi Ralim and Co,
Loving this firmware, you guys have done a great job, its running really well on my TS80 - not sure how close the temp readouts are, I don’t have an accurate thermocouple here.
I ran into some problems using the boot up image tool, uploading the DFU package seems to work, but the image doesn’t display on boot and it seems to mess up the scrolling text in menus (certain characters not displaying) - reflashing the latest RC4 fixed the text but still no logo. I assume the logo tool .exe just hasn’t been updated for the TS80 yet, I got excited when I saw a sample image file in the repo.
Watching this project keenly,
Brad
 compgeek35610
on 22 Mar 2019
compgeek35610
on 22 Mar 2019
Tried again this time with the Python tool and compared checksums - it produced a different file, tried that one and it worked flawlessly.
Thanks to all the contributors making this happen!
compgeek35610
on 23 Mar 2019
Sad day. Just a report of a failed TS80 that may or may not be relevant for V2.06-RC2 https://github.com/Ralim/ts100/releases/download/v2.06-RC2/TS80_EN.hex
It may not be relevant but my TS80 failed this am when I powered it on today after only 20 or less hours of use. I am powering it through my bench DC supply that I had set to 5v and then increased the voltage to 12v. Normally I would set it to 12v and then connect my iron but meh. I have run this from 5v with no issues though it wont get very hot so I am not sure if the voltage change is what caused the issue or if it just failed randomly. I am not sure if the increase in voltage is the cause just noting what I did that may be of importance.
If anyone has any input I would love to hear it. Not sure if I can repair this board or not it got a bit cooked. The back of the PCB shows no signs of failure just on that side of the ST chip. Anyone sell spares?
 f34rdotcom
on 3 Apr 2019
f34rdotcom
on 3 Apr 2019
That's really sad :(
Looking at the spot on the IC that is damaged, that group of pins all connect to either usb data+ or data-.
I would be inclined to think that somehow you managed to feed the 12v down the data lines by accident. Would that be possible ?
Does also mean that most likely if you swapped the stm it would be fixable
Ralim
on 3 Apr 2019
Ya very sad :( I love this thing. I must fix it. I was looking for any schematics so I could see what pins were involved but was not able to find any via google. If you have any links I would appreciate it. I can order a chip and replace if the pads are not cooked but I need the exact chip part #.
I have it so that I can avoid the dumbs by using my USB meter for all my work. It is a double check of my voltage and measures current and prevents me from doing a polarity mistake :)
I am very confused. I am not sure if USB3 would have a potential of shorting but AFAIK not so much.
f34rdotcom
on 3 Apr 2019
I've jumped through a series of hoops to find good ways to power mine through a qc3 controller that delivered the correct juice. I've never seen my irons take more than 9v. Perhaps your power delivery method needs re-evaluating?
Whatever you decide ... This isn't meant to be an I know better session. Here's my tale of woe - it might give you some direction. I bought my ts80 from Banggood after about 2 weeks mine died - just a few dots on screen - no heat. Contacted BG who wanted a vid of iron being faulty. Day after they sent out a replacement which was the complete kit, arrived 10 days later.
They said to keep the old dead iron + everything else .... this left me with an almost perfect second kit with just a faulty mobo. Component spares were a non-starter however I found the miniDSO has support info so I contacted them asking for price of replacement board. I got a reply next day with a return address - "send the mobo to us and we'll fix/replace and return for free".
I did, they did ... and within 2 weeks I got a new mobo.
I now have 2 ts80s which I power via wallwart, or batteries connected to a couple of different qc3 controllers that work well when I'm out and about. Or just the boring old USB3 wallwarts that came with the iron when I'm home.
Still never seen more than 9v on the wire, whatever method I've used. But that's for you to work out.
whitehoose
on 3 Apr 2019
STM32F103T8U6 is the part number , the 6 at the end can be something else depending on how you buy it but it will be fine.
There is a pinmap in the header files for what pin is what. Sadly I have a partial schematic that I can't release, but circuity basically matches the ts100 otherwise apart from some resistors for the USB QC negotiation.
The unit is rated for a max of 12V input, and should be fine with 12V but I wouldn't push it beyond that. However more than 5V on any of the data pins will blow it instantly.
Ralim
on 3 Apr 2019
@Ralim When QC4.0 comes out its planned max output power is 28W via USB-PD. QC4.0 will also support max 18W (9V Max 2A / no 12V output). Can we somehow make USB adapter that will redirect D+ and D- to USBPD select pins on type c connector without frying anything so that in future we can get more than 18W from TS80? Is there any solution for more than 18W power output of TS80?
 DjordjeMandic
on 17 Apr 2019
DjordjeMandic
on 17 Apr 2019
@DjordjeMandic I got new QC 3.0 adapter recently, which is 30 watts adapter. On custom FW I see 12V supplied on TS80. It is still may be 1.5A @ 12V, but I have not seen 12V earlier, so is could be powering with 24 watts already.
 salavatkhafizov
on 18 Apr 2019
salavatkhafizov
on 18 Apr 2019
@salavatkhafizov Niceeee. I ordered TS80. Can't wait to try it. Maybe i will try modding it to support PD but idk if i will succeed.
DjordjeMandic
on 18 Apr 2019
@DjordjeMandic somewhere it was mentioned that TS80 does not support PD neither on hardware nor on software side. Only QC 3.0 with potential support of upcoming QC 4.0
salavatkhafizov
on 19 Apr 2019
Hi,
I'm thinking of getting this adaptor for the TS80 (with appropriate connection converter)
PD+QC 3.0 support.
Output: 5V=3A/9V=3A/12V=3A/15V=3A/20V=2.25A
My question, and I've tried to find it but not 100% sure. What is the safe way to power this up, re max power draw (watts, and volt off). Will powering up with an adaptor that can exceed spec, break the TS80, before I can set the limits.
A far as I understand, you can set watts (18w,24w), volt off, via menu screen? Or is there a way to pre set the configuration, then build the project?
And thanks Relim for your excellent hard work!
Edit:
With my layman's knowledge (i.e. v little) I was assuming the above output was max values, and I would be able to achieve 12v @2A (to match tip max) but I'm thinking the power adaptor will only supply a set value i.e 12v @3A, then brick my TS80?
 rvectors
on 26 Apr 2019
rvectors
on 26 Apr 2019
I don't understand where this idea that you have to drive the iron so hard comes from.
I've been using mine in the field either from lipo batteries and a qc3 controller or where mains is available from the PSU that was included in the banggood package for a few months now.
I do general SMD and hole mounted plus (mainly) 3-5mm bus and tails. I've never found the Iron lacking. If I did - I carry a small gas blowtorch Iron to fill the gap. In the lab I use a standard Hakko iron which is more than enough.
If I needed more oomph - I'd buy something that could deliver a better thermal load. If you are constantly pushing the iron. Over feeding is going to drastically reduce the life of the iron. Also expecting a low mass tip to deliver a high thermal load is inevitably going to lead to dry or brittle joints. If the solder doesn't combine the joint isn't going to last. We all take liberties at times but there is a big difference between hacking and bodging. Neither of the TSs have the physical mass for soldering girders, If that's the aim you need to look for a bigger setup.
This is supplied as part of the "DELUX" TS80 option and mine supplies the iron without problems.
https://www.banggood.com/MINI-QC3_0-USB-Type-C-Power-Supply-Kit-DC-3_6V-to-12V-EU-US-Plug-for-TS80-Solder-Soldering-Iron-p-1373604.html?rmmds=search&ID=43101&cur_warehouse=CN
whitehoose
on 26 Apr 2019
Hello,
Thanks for reply.
I'm not trying to drive the iron hard. I was asking if the power adaptor in the link will supply the correct voltage, once the TS80 is setup with the FW. I'm not made of money, so if I'm going to buy an adaptor, I like to get one that I can use for other uses as well.
So what I mean, is I set the wattage, and off volt (say 10-11v) via the menu of the TS80, will it draw the correct V/A, with the adaptor I linked.
I was initially assuming that the adaptor I linked (BlitzWolf® BW-PL4 45W ), although supporting the higher PD volts/amps,
e.g.
Output: 5V=3A/9V=3A/12V=3A/15V=3A/20V=2.25A
if it is also QC3.0 compliant, it should supply the 12v @1.5A as that standard suggests... but the product details don't mention any QC3.0 V/A
rvectors
on 26 Apr 2019
OK, there have been a few discussions round changing protocols and over-volting supplies.
If you want to config the Iron before plugging into a QC3 source, Ralim's F/w works fine with a USB2 port.
it will even get the tip hot in an emergency.
One problem you may meet is the vagaries of the QC3 standard which doesn't seem to be particularly standard. A quick look at the questions will show that a frightening number of QC3 kit refuses to play nicely. So its worth posting here before you buy anything for use with the iron.
The Link I've given is for the PSUY that comes in the box - and I can confirm it's working fine with my oneplus6 phone, my Xiaomi MI 2 - 10000 mAh Power Bank which also powers the iron.
You can also use Lilon or Lipo batteries with both the ISDT BattGo BG-8S Smart Battery Checker. as well as a AOKoda Lipo to USB Power Converter QC3.0 Adapter Quick Charger.
Both will convert any 7-27v power source to power the iron and act as a qc3 compatible source - although I can only confirm that the mentioned kit works well with them.
The AOKoda is cheap enough to use as a consumable supply conditioner to protect more expensive kit if you doubt your available supply.
Only drawback is min of 7v - so a USB2 powerbrick or wallwart can only be used if you couple it with a buck boost converter to get the output up to 12ishV first. It depends how much versatility you need.
whitehoose
on 26 Apr 2019
Power supplies are different. I've got 30 watts adapter that DOES work on custom firmware (and I see 12V on iron) and does NOT work on stock firmware. The opposite is with my Baseus power bank (but the highest voltage I see is just 9.9V). I think both firmwares and power supplies are causing this mishap. Or lack of consistency in PS protocols.
salavatkhafizov
on 26 Apr 2019
Tried the TS80 on an Aukey PB-N36.
With custom firmware it turns off after reaching 260C
With standard firmware reports "low vot" and turns off before start heating.
(It Works perfectly with a Leeco LePro 3 Wall power supply)
Any Suggestions?
 wesbluemarine
on 28 Apr 2019
wesbluemarine
on 28 Apr 2019
The TS80 is a QC3 (probably 9-12v) device USB2 (5v) sort of works but the undervolts means the iron is very slow to reach working temp - sounds like yours is falling asleep before it reaches temp - try plugging a LED or any other device in the other outlet to keep the bank awake. There should also be an override (mine is hold check button for 10 sec) to stop it dropping off when it thinks it's inactive.
Looking at the spec for the Aukey - it doesn't support qc3 while the LePro 3 does.
To get the Aukey into service you'll need a buck boost converter (search DC-DC Boost-Buck Converter Step Up/Down Module 3.5-28V to 2-26V 3A LED Display) to increase the output from powerbank to 12v ... then a qc3 converter (the AOKoda is a good choice). Total cost - about £14 on ebay.
You could just about buy a new powerbrick for that .... but this setup has the advantage of working with any non qc3 Power Source from 7-27v.
whitehoose
on 29 Apr 2019
@Ralim I think that this line of code OLED::drawHeatSymbol(milliWattsToPWM(milliWattHistory[0], systemSettings.voltageDiv)); is not working on my TS80. Can you confirm it or tell me what could be the cause?

Something is wrong, milliWattsToPWM(int32_t milliWatts, uint8_t divisor, uint8_t sample) takes 3 parameters but you only pass 2? Can you tell me on what os and in what ide are you building this code?
DjordjeMandic
on 18 May 2019
Hello,
I have a problem with the new, charged powerbank BlitzWolf BW-PF-2 (10000mAh QC3.0) and a soldering iron TS80.
The soldering iron from firmware 1.07 warms up to the set temperature and then quickly turns off (POWER = ON).
https://photos.app.goo.gl/mgoEqoLRD5EmYmPc8
Soldering iron with custom firmware by Ralim can not even heat up to the set temperature. (default settings).
https://photos.app.goo.gl/qGYzVv7LEGz1rHsb8
Do you have any solution? I tried different settings. This powerbank is listed as supported on this site:
https://github.com/Ralim/ts100/wiki/TS-80
 kleju00
on 23 May 2019
kleju00
on 23 May 2019
The entry for pB you show is annotated "_OK* (10sec t/o)_" (_*Most Power Banks shut down if current draw drops below 50mA, assuming that charging is complete and avoiding overcharging. Custom firmware is designed to avoid this until it enters Zzzz mode_.)
What you say seems to support this.
I read this to mean that the powerbank has an override option you need to set (or reset).
On mine you hold the reset for 10 seconds to switch on wakey wakey mode. Have a look at the instructions to see what yours says.
Failing that plug in a second device and see if that cures it - the current best "try it" device would be a LED with a 100 ohm resistor.
whitehoose
on 23 May 2019
Hey, I have the same powerbank (BW-PF2) and it shows the same behaviour. I cannot use it with the TS80 due to it turning off, even before heating up all the way. Unfortunately I haven't found a way to disable the auto power off on the powerbank.
m4rcu5
on 26 May 2019
I wish I could A) claim credit and B) remember the name of the guys who came up with the idea but a LED protected by a .... mmm 150 - 200 ohm resistor (I'd use a 1k pot so you can adjust it as high as you can before it hibernates). To use in that second slot. It should up the outut current just enough to stop the p/B going bye byes.
In the customary chenglish tradition there's little or no info. Can't see a manual or find a YT vid with any info either - anything in the box?
Before you build or buy - the "button" in question is possibly that strip of LEDs on the top ... either double Press or press and hold for 10 seconds or so and see if that does anything.
Give my regards to Jean-Claude :D
whitehoose
on 26 May 2019
I do not need a resistor and LED, because I have an adjustable USB load tester with QC hack. I have four powerbanks with QC so I did some tests. Maybe it will help someone.
List of powerbanks:
1) Xiaomi Mi Power Bank 2C (PLM06ZM) 20000 mhA
2) Baseus BS-P10KQ02 10000 mhA
3) BlitzWolf BW-PF2 10000 mhA
4) Rock P65 Mini PD (RMP0398) 10000 mhA
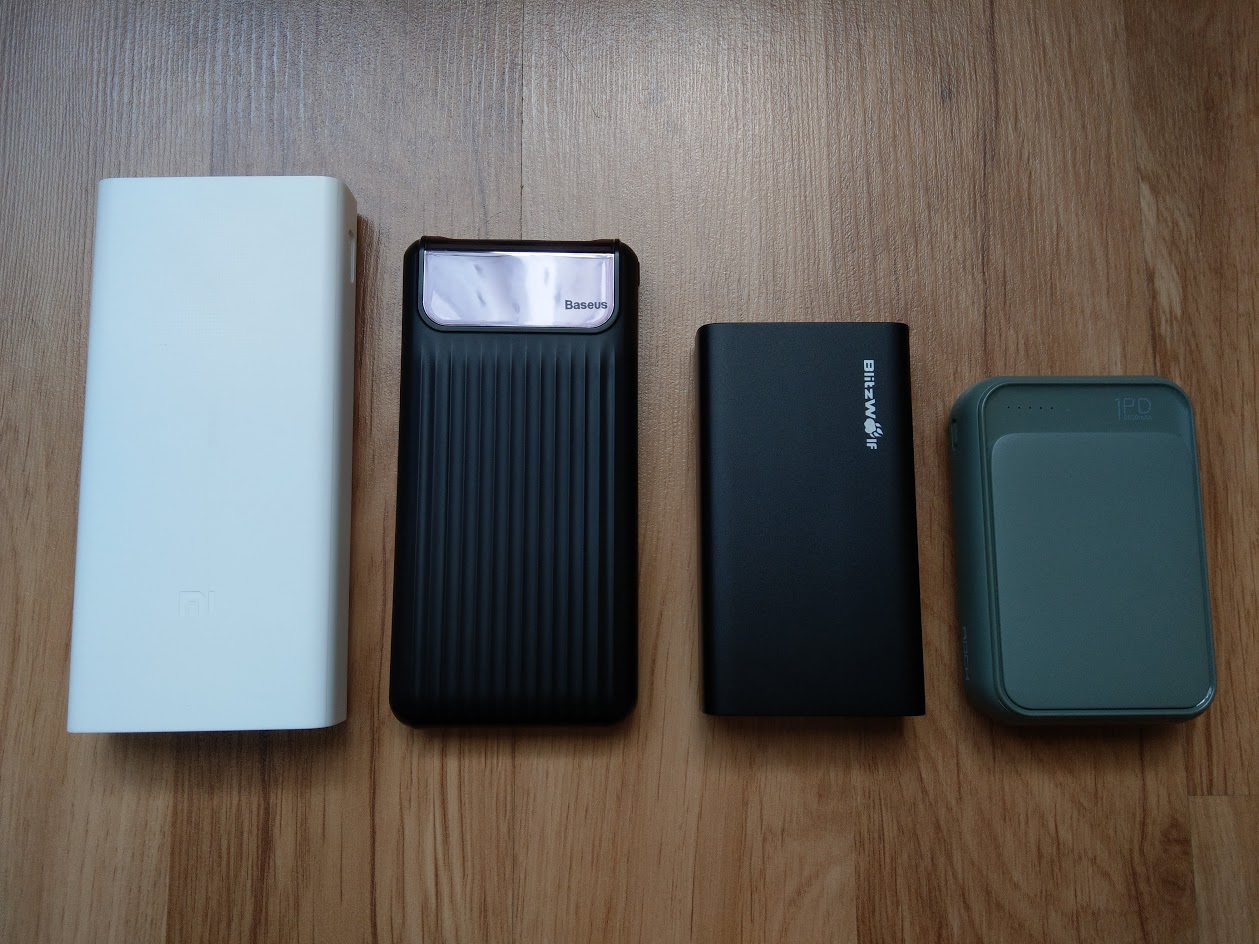
Results:
Legend:
- Manufacturer's name: shutdown time in standby mode (no heating) / off time after heating up to 300C
Stock firmware v1.07
1) POWER = OFF
- Xiaomi: 80s / no shutdown
- Baseus: 60s / no shutdown
- BlitzWolf: 10s / 10s
- Rock: low voltage (QC does not work)
2) POWER = ON - Xiaomi: no shutdown / no shutdown
- Baseus: no shutdown / no shutdown
- BlitzWolf: 10s / 10s
- Rock: low voltage (QC does not work)
Custom firmware by Ralim v2.06
Sleep time = OFF
- Xiaomi: 30s / no shutdown
- Baseus: 20s / no shutdown
- BlitzWolf: 10s / soldering iron does not want to warm up to the set temperature (turns off earlier)
- Rock: 35s / 45s
Conclusions:
- BlitzWolf has a very aggressive power saving mode that can not be turned off. I have measured that only a current greater than 80 mA ( 9 V ) stops the powerbank from switching off.
- Stock firmware does not support Rock powerbank.
- The heating method programmed in the custom firmware is not compatible with the BlitzWolf powerbank.
- Xiaomi and Baseus powerbank is best suited for working with stock firmware. They never turn off if we do not want to.
I wanted a BlitzWolf powerbank, because only he is small enough for my case.
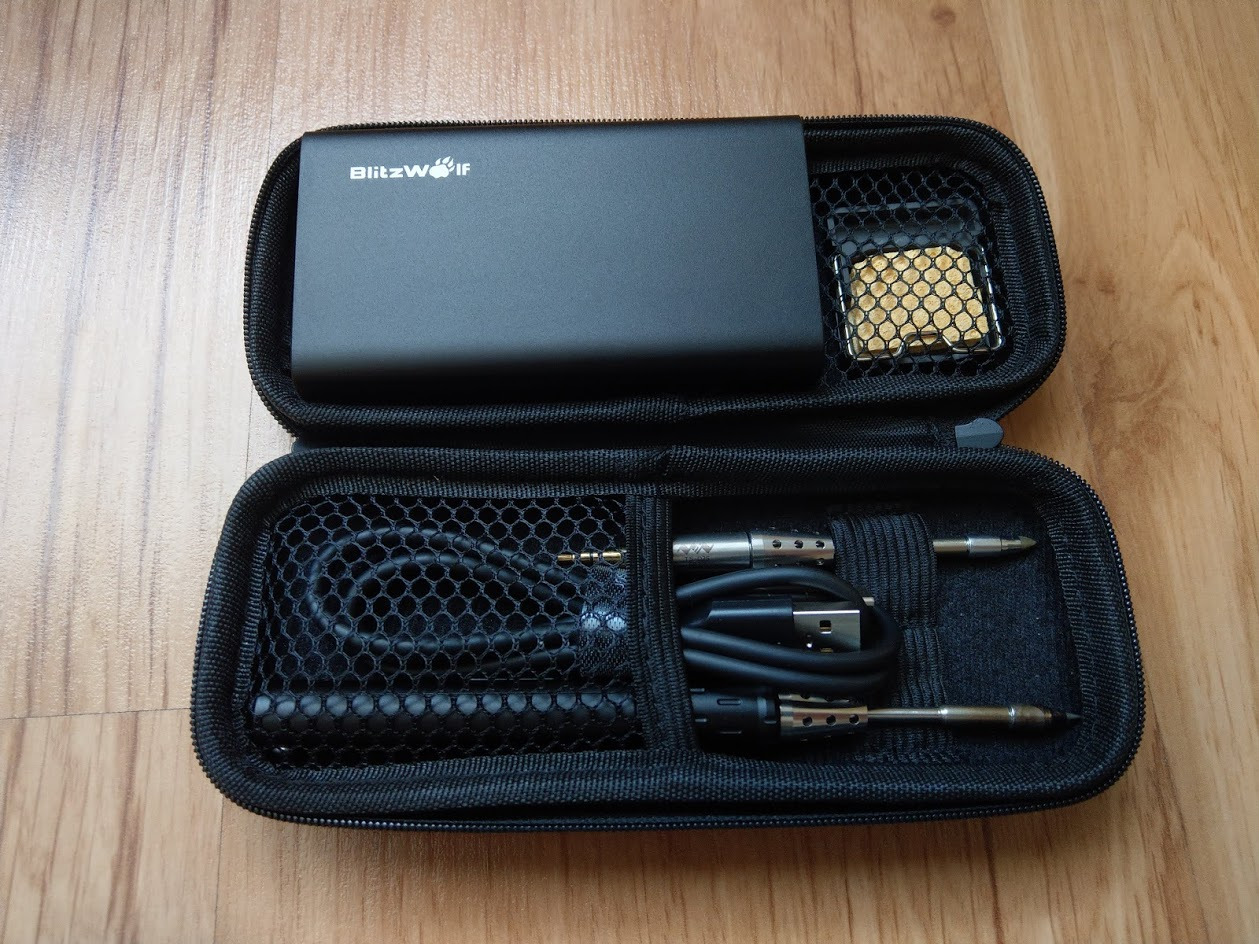
kleju00
on 26 May 2019
I'm not against adding back in the power keep alive mode again, last time i had it in, it didnt seem to help anyone.
What would be really neat (but harder to test), how long does the blitzwolf power bank need to see that load for it to keep awake (like is it 10ms/ 100ms / 1 second / 10 seconds etc).
Also what case is that ? Really neat package with that power bank. I would love to pickup a set that nice.
But yeah, if possible would love any insight into how much of a load and for how long is required?
(joking) could try overclocking the internal PLL to burn some extra power & gain a speed boost :P
Ralim
on 27 May 2019
@kleju00 Does your TS80 with custom firmware (2.06) work with Baseus power bank? I have exactly the same power bank, but it works only with stock firmware (1.07) via QC 3.0 port, custom firmware give Low Volt error..
salavatkhafizov
on 27 May 2019
@Ralim I've done some tests with the BlitzWolf powerbank and it's more complicated. I found a hysteresis. At the start, the current consumption must be greater than 80 mA, otherwise the powerbank will turn off after 10 seconds. Then the current may drop to 50 mA and the powerbank will not turn off. If a proper start-up occurs, then less than 0.5 s of 80 mA current pulse will be enough for the powerbank to function properly. This pulse must appear more often than every 10 seconds. Unfortunately, the pulse was done manually so it is not very accurate. At the moment I can not do it differently.
I bought a soldering iron with a case here:
https://www.aliexpress.com/item/32904641235.html?gps-id=6311502&scm=1007.24625.129096.0&scm_id=1007.24625.129096.0&scm-url=1007.24625.129096.0&pvid=46660224-3275-46cc-b799-f98921f00dc9&spm=a2g1y.12024536.fullPieceDiscountPromo_51074608.32904641235
Previously, they sold a case without a logo.
@salavatkhafizov Yes, my Baseus powerbank works without any problems with both firmware versions. Maybe the manufacturer changed something in hardware because my one is quite old, he is a few years old.
kleju00
on 27 May 2019
@kleju00
That is very useful information!
When i get some damn time to myself I'll try and mock some ideas for you to test :)
Ralim
on 29 May 2019
I've recently bought this iron and immediately tested the custom firmware. I want to report that the Anker PowerCore Speed 20000 QC seems to work fine for both stock (1.06 didn't try with 1.07) and the custom one.
 Parozzz
on 15 Jun 2019
Parozzz
on 15 Jun 2019
new ts80 tip has been released ts-k4
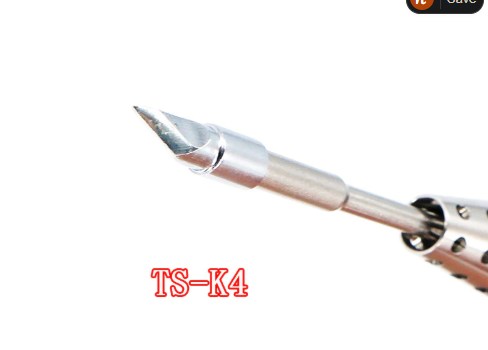
it doesn't look useful what so ever the angle is bit to much not like normal knife tip
Zyzto
on 20 Jun 2019
Ordered it, thanks for info)) My consideration was: 1) TS80 is an excellent and versatile iron (I use JBC T245 as well) 2) D25 (chisel type) is nice, but it is rather small for something more massive 3) New (K4 tip) has a wider and bigger tip surface, so probably it should work. I'll update when I get it.
salavatkhafizov
on 20 Jun 2019
I have received new tip for TS80 and tried it. Seems that custom firmware needs some update, I see some overshooting with TS-K4 tip, stock firmware seems to be fine (does not overshoot). New tip has bigger heating surface (probably) as compared to D25 chisel (I think). I tried quick test of melting solder on copper board, at 250 C it seems slowly melt solder (cannot properly melt big spot of solder though). At 300 C it does melt solder (both leaded and lead free) just easily. Nice job miniware. Enclosing pic so that you can compare chisels and K type of tip.
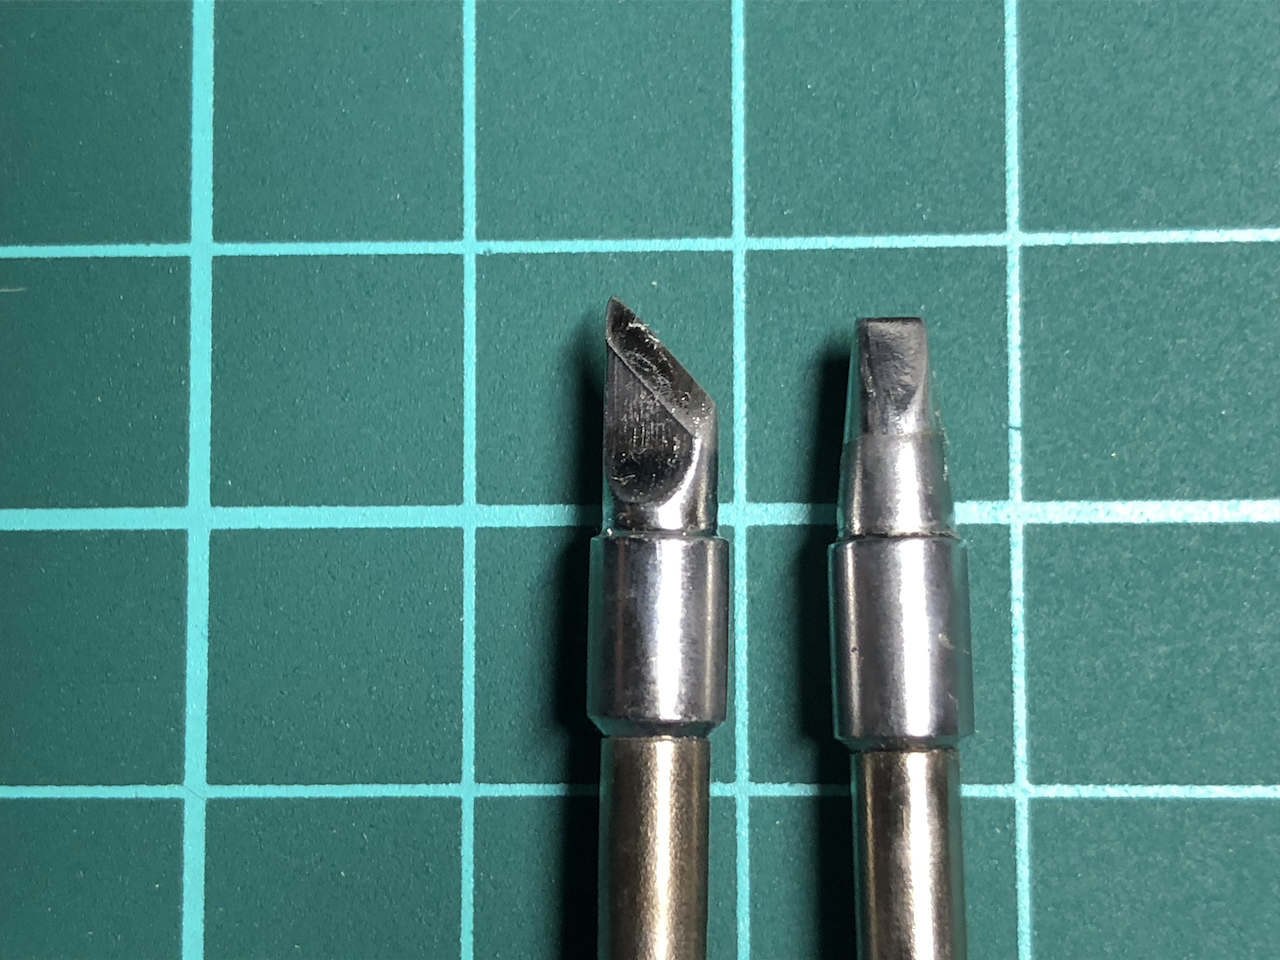
salavatkhafizov
on 4 Jul 2019
I think with the k4 you are seeing the logical result of a small element heating a (relatively) massive tip. To start with you are going to have to pour a lot of pixies in just to move the thing. Heat has a similar characteristic to mass, it has inertia so like all massive things, once its moving the trick then is stopping it. Within reason a few degrees it shouldn't matter but the hotter it is the quicker you have to be shifting that tip. Tip temperature isn't a vital element of a good result, what matters is controlling the amount of heat you allow through to the site. You can solder with a red tip if needs be. What matters is the tech recognising and adapting their technique to accommodate the temp. Like borrowing an iron. The only thing you can't accommodate is a big under temp.
Your example temps of 250 and 300c are both a little low in my book. I'm currently working on medium through hole in ambient 25c using 60/40 lead and set at 320c.
In winter I might up that to 330 indoors, On smd I'd probably stick at 320c depending on the substrate.
On a 2-4mm bus outdoors that might exceptionally go up to 400 but not often.
Lead free you can add 30c. Any more than that I'd be digging out my bigger irons.
whitehoose
on 6 Jul 2019
Very quickie. Just loaded latest (without a glitch), file smaller than last so looks good.
Not much time, so a very basic heat and greet.
Looking good - everything in it's place, hit the iron with an IR thermometer and ball park numbers look good.
Got to 300c using a standard USB 5.2v, melted leaded solder on a track to prove.
Not very thorough but basics proven. well done!
whitehoose
on 14 Jul 2019
Tested the Digitech (Jaycar) MB3797 20000mAh battery bank and it works well with Ralim’s firmware. 12v / 30W with no sleep issues. 3A current at 12V rather than than the 1.5A claimed in the specs. It seems as capable as the mains adapter shipped with the TS80. Metal case and seems well constructed, if you are after larger capacity this is an option if you have access to Jaycar.
 yzept
on 21 Jul 2019
yzept
on 21 Jul 2019
For anyone wondring 9v(alklaine) battery doesnt work with ts80
And I got my self best portable setup


- ts80 + 3 tips
- type cable
- usb fan with filter + cable
- solder
- solder wick
- flux
- solder cleaning tip
- tin wire
- 3d printed stand

- cable type c
- battery
- wire
- magnifing glass
Zyzto
on 3 Aug 2019
Zyzto
For anyone wondring 9v(alklaine) battery doesnt work with ts80
And I got my self best portable setup.
I'd have to disagree it's the best.
If you don't want to use a USB3 qc powerbank (seems to be a lottery which one's will). Most of the stand alone qc3 adapters need <7.2v. The AOKoda qc3 USB charger is reasonably priced (ebay, bangood or aliexpress) works flawlessly with the TS80s version of qc3 and just about any USB device I've tried. I do have an old poundshop usb2 powerbank that crashes the converter ... but every other source works well.
It's really a qc3 adapter and buck converter that has a reasonable degree of protection built in. Mainly for LiPo but also works with other types of cell including lead acid - so if you are in doubt about the integrity of your supply at £5(ish) it's a cheap conditioner.
It needs <7.2v to supply it, I went for a 4s 14.8v but you could go up to 6s although 12v @ 1.2v is the most the qc3 stage of the adapter will deliver.
You could be really flash and add a buck boost converter to work with anything from a single aaa cell up to 32v to power the AOKoda and in turn melt solder with your TS80.
It's more of a party piece with a button cell but I made up a set of cables to connect just about any source to my iron.
whitehoose
on 3 Aug 2019
G'day,
I received a TS80 for Christmas and bought a Xiaomi 20000mAh Mi Power Bank 3 (PLM07ZM) to accompany it on the road.
I did notice on the TS80 wiki page, it says Good Type-A/Bad Type-C however I am only able to get 5v from the Type-A port. Also if the iron isn't heating, the Power Bank shuts off after 10s
I have tried to adjust the operational voltage, but cannot get anywhere as the power bank shuts off too soon.
Is there something I'm missing here?
 lysdexic1
on 2 Jan 2020
lysdexic1
on 2 Jan 2020
G'day,
I received a TS80 for Christmas and bought a Xiaomi 20000mAh Mi Power Bank 3 (PLM07ZM) to accompany it on the road.
I did notice on the TS80 wiki page, it says Good Type-A/Bad Type-C however I am only able to get 5v from the Type-A port. Also if the iron isn't heating, the Power Bank shuts off after 10s
I have tried to adjust the operational voltage, but cannot get anywhere as the power bank shuts off too soon.
Is there something I'm missing here?
The ts80 is a C (qc3 type device - so whoever submitted the wiki entry is saying its probably not going to work) Nothing you can do. If you have a returns option - I'd send it back while you have time
Looking on Amazon you have two Outputs that are USB, with QC3 compatibility to 12v@15a. Unfortunately not all QC3 devices fully conform to qc3 and for whatever reason they don't work. Unfortunately its down to suck it and see - whatever the spec - if the wiki says bad - its probably not going to work.
"Operational voltage" on USB devices isn't negotiable, it adheres to the USB standard - so your A socket ust means it will conform to USB1, 1.1 and 2 which by default delivers a straight 4.5-5.2v @500mA - that's Fixed. (Although yours is sold as USB2 - [email protected]. The usb 2 spec gives leeway on different current limits - the voltage will still be a fixed 5v max).
The USB3 (c) compatibility will by default deliver a basic USB default 5v but when you plug in a device that is compatible with QC2 or 3 the 5v basic is DEVICE negotiable - so while you can't alter the voltage manually - devices plugged in to that outlet can negotiate 9v or even 12v as required.
Have a look at my reply here https://github.com/Ralim/ts100/issues/537
Instead of a powerbank if you intend using on batteries consider Lipo options
whitehoose
on 2 Jan 2020
I would expect 12V at 1.25A which is 15W.
On Fri, Jan 3, 2020 at 3:06 AM whitehoose notifications@github.com wrote:
G'day,
I received a TS80 for Christmas and bought a Xiaomi 20000mAh Mi Power Bank
3 (PLM07ZM) to accompany it on the road.I did notice on the TS80 wiki page, it says Good Type-A/Bad Type-C however
I am only able to get 5v from the Type-A port. Also if the iron isn't
heating, the Power Bank shuts off after 10sI have tried to adjust the operational voltage, but cannot get anywhere as
the power bank shuts off too soon.
Is there something I'm missing here?The ts80 is a C (qc3 type device - so whoever submitted the wiki entry is
saying its probably not going to work) Nothing you can do. If you have a
returns option - I'd send it back while you have timeLooking on Amazon you have two Outputs that are USB, with QC3
compatibility to 12v@15a. Unfortunately not all QC3 devices fully conform
to qc3 and for whatever reason they don't work. Unfortunately its down to
suck it and see - whatever the spec - if the wiki says bad - its probably
not going to work."Operational voltage" on USB devices isn't negotiable, it adheres to the
USB standard - so your A socket ust means it will conform to USB1, 1.1 and
2 which by default delivers a straight 4.5-5.2v @500mA - that's Fixed.
(Although yours is sold as USB2 - [email protected]. The usb 2 spec gives leeway on
different current limits - the voltage will still be a fixed 5v max).The USB3 (c) compatibility will by default deliver a basic USB default 5v
but when you plug in a device that is compatible with QC2 or 3 the 5v basic
is DEVICE negotiable - so while you can't alter the voltage manually -
devices plugged in to that outlet can negotiate 9v or even 12v as required.Have a look at my reply here #537
https://github.com/Ralim/ts100/issues/537
Instead of a powerbank if you intend using on batteries consider Lipo
options—
You are receiving this because you were mentioned.
Reply to this email directly, view it on GitHub
https://github.com/Ralim/ts100/issues/349?email_source=notifications&email_token=AAAAOZSJJ3N627FDDWTIRKTQ3Y3KZA5CNFSM4FR3OWBKYY3PNVWWK3TUL52HS4DFVREXG43VMVBW63LNMVXHJKTDN5WW2ZLOORPWSZGOEH7DQRI#issuecomment-570308677,
or unsubscribe
https://github.com/notifications/unsubscribe-auth/AAAAOZTYZDXYT2YDHSQEXJLQ3Y3KZANCNFSM4FR3OWBA
.
--
Gerard Braad | http://gbraad.nl
[ Doing Open Source Matters ]
gbraad
on 2 Jan 2020
I would expect 12V at 1.25A which is 15W.
-- Gerard Braad | http://gbraad.nl [ Doing Open Source Matters ]
Good try - but no coconut 🤗 they rate it 1.5a=18w - but allow combining also
I wouldn't want it switched on in my back pocket!!!
the Amazon listing
https://www.amazon.co.uk/Xiaomi-Power-20000mAh-Delivery-Charge/dp/B07MBH8KZZ
shows the following - sounded about right
Apparently you can also combine outputs which adds quite a lot to the excitement
Product description
TECHNICAL PARAMETERS:
Capacity: 20000 mAh (75 Wh)
Cell Type: Lithium Polymer
Connectors: 1x USB-C , 2x USB
Input current (INPUT): 5V /3A, 9V /3A, 12V /3A, 15V /3A, 20V /2.25A (45W max.)
Output current USB-C (OUTPUT): 5V /3A, 9V /3A, 12V /3A, 15V /3A, 20V /2A (45W max.)
Current on the USB outputs (OUTPUT ): 5V /2.4A, 9V /2A, 12V /1.5A (max 18W); when both ports are used simultaneously: 5V /3A (15W max.)
Maximum current when using multiple OUTPUTs: 5V /5.4A, 9V /3A, 12V /3A, 15 V /3A, 20V /2A (45W max.)
Efficiency: 90% (5V /1A) /84% (5V /5.4A)
Additional functions: Pass LEDs
: 153,5 × 73,5 × 27,5 mm
Weight: 400 g
The package includes: power supply, USB USB-C cable, sticker confirming the originality.
Model: Xiaomi Mi Power Bank Pro 3 20000mAh PLM07ZM
whitehoose
on 2 Jan 2020
I did notice on the TS80 wiki page, it says Good Type-A/Bad Type-C however I am only able to get 5v from the Type-A port. Also if the iron isn't heating, the Power Bank shuts off after 10s
Are you sure you have PLM07ZM? I have the exact same powerbank and I have no problems with the stock firmware - USB A gives me 9.78 V when the iron is set to 24 W (it was giving 8.42 V when the power was set to 18 W). Also, my bank doesn't shut off when the iron is not heating - I think there is a special "low power mode" but can't remember if or how I activated it.
 piit79
on 2 Jan 2020
piit79
on 2 Jan 2020
whitehoose, piit79, Thanks for your help :)
Too many things where not adding up, the power bank never put out more than 5v, research says usb-c is also supposed to have PD but my Pixel 3 didnt work, and piit79's comment made me check my model number, which was correct, but then I thought: Do I have a real PLM07ZM?
Turns out im pretty sure I got a fake. Yay!
I have a QC2/3 Trigger on the way, so that will tell me if it literally is just 5V. In which case I might gut it and try my own battery pack with it's remains haha.
Hopefully ebay will refund me as well :)
Thanks again for your help!
lysdexic1
on 3 Jan 2020
If Santa brought it from a reputable pixie camp you maybe need to look at their returns policy - if that ship has sailed... I've always found fleabay very good, even on occasion when things develop faults.
You possibly need to work the other way round if you end up scrapping the bank
The battery is presumably working, while the innards are causing you the grief.
You will have a LiLon battery pack - which at worst will be a lower than advertised capacity - probably it will be flat which makes using it elsewhere more difficult but not impossible.
None the less It should still squirt out pixies though maybe only 3.8v boosted to a USB2 5v and not any flavour of QC3 - (most dodgy QC3 clones (in my limited experience) do seem to work with most phones it's only the TS80 they won't entertain).
I've never used a trigger but there is a gizmo - The AOKoda qc3 USB charger which is pretty cheap, has a good voltage range (7-27v) and the best bit is it's completely compatible with the TS80 (even at 12v!). Looking here and in other forums, QC3 is the scourge of the civilised world, With phones it's an enhancement for charging times - with a TS80 - its a dealbreaker because with stock firmware no qc3 no workee - the iron errors out and refuses to work - That's why I used Ralim's firmware in the first place - its as slow as hell on 5v but you can at least still use the iron in a pinch.
As for the good old powerbrick. QC is licensed and it seems many manufacturers, instead of paying qualcomm for a license they all seem to know a bloke who knocked up something that sort of emulates qc ..... but because EVERYONE did the same, and because they don't seem to have gotten their heads together - in the best tradition of chinese whispers - they all deliver most of the goods some of the time ... but not all the time.
I've done a fair bit of fiddling with devices and most of them need 7v to startup, Because of that I settled on 4S Lipos which suit my needs - They power everything I need - so that's what I use now. I have quite a few USB2 powerbricks - and just 1 qc3 brick - and a bag full of 4S Lipos plus a couple of AOKoda qc3 adapters and a buck boost converter for the rest of my kit which is 12v
The downside is 4Ss are chunky and don't slot into an inside pocket and they need a lipo charger. That said if you haven't sold your soul to qc3 - the lipo is a cheaper more versatile option (because ALL USB bricks use a buck/boost adapter they actually produce a high frequency voltage which can conflict with some other devices that use sequential logic). - By starting with a 16v lipo you only process the output once which I find causes fewer problems in general. (A silly example but many colour changing LEDS just glow red when powered from a brick)
whitehoose
on 3 Jan 2020
It was purchased off fleabay so I have lodged an incorrect description case at the advice of customer service because even though they have a 100% no counterfeit policy, it seems they don't like to enforce it.
The plans where to keep the battery and turf the rest, but I might have to send it back now....
Either way, I have a bunch of lipos and li-ions I can fabricobble into a pack.
My question is now (be careful, my noob is showing), can I shove plain-old 9V into the TS80 or does it need this magical QC train-wreck bs?
lysdexic1
on 4 Jan 2020
@lysdexic1
I would return the bank if you can get a refund.
You can feed 5-12V down the USB C totally fine, if you feed > 10V the firmware skips the QC entirely, but all QC does is toggle the USB data lines a few times, so if you just leave them open its totally fine.
Just be _very_ careful, having a USB-C with 6-12V on it is a good way to accidentally kill other electronics :)
Ralim
on 4 Jan 2020
Re-reading - santa delivered iron ....you bought dodgy powerbrick ..... Mmmm, Have you actually made the 80 melt lead? What other power source to you have that does make the 80 work?
If as mentioned you feel uncomfortable squirting 12v around bareback, I know only too well that Mr Chuckles will exploit any stupid you leave hanging around - I've squirted bad pixies just about everywhere its inadvisable but possible. USB plugs are handy power connectors - but I now follow a rigid rule about what plug I allow myself to connect to which voltages.
The AOKoda is dirt cheap and unstupids me at least a little - it also acts as a supply conditioner - as long as you can find 7.2v it works well with TS80 and you can set it to cut off at any voltage you fancy to help reserve those vulnerable Lipos from over discharge. I treat mine like a consumable although the tough little cuss takes punishment well. In the early days I had a "bit of a thing" for powering my 80 from everything from a button cell upwards - but Mr Bozo helped me kill my first iron in a brainfart incident. Bangood replaced the faulty Iron and when I told Mini what had happened and asked them about buying a new Mobo to fix the ashes - they kindly gave me a replacement board in exchange for the old one (they wanted to see the damage for themselves) So now I have two irons to worry about killing, both has it's own aokoda to keep it safe from me.
whitehoose
on 4 Jan 2020
The power bank refund process is underway and will hopefully be resolved soon :)
Awesome, thanks for that @Ralim !
I think I'll knock up some boost module monstrosity to use until I figure out my portable power requirements.
I'm no stranger to pixies in strange places, I repair pinball & arcade machines haha. Just new to the whole QC thing and don't want to release that precious magic smoke from a 1 week-old iron.
@whitehoose 80 works like a dream as far as I can tell... I used the DN.OX charger from the more kit to take it up to 370c for a burn-in (and to see if it _would_ chooch that high), then easily melted lead onto a plane that my station usually has issues with.
I know what you mean about using connectors outside of spec, it just feels wrong. But it will have to do for the time being. As long as I don't plug my phone into the boost module, I'll be fine...... lol
That AOKoda looks like the best (easy) way to go about it, I just want to find a few more uses for the cells before I fork out for them.
Soldering with a button cell. Now that would be an.... experience haha.
It's good to know mini take an interest in failures in the field and that they have good customer service. Power issues aside, I'm really liking this iron so far :)
lysdexic1
on 4 Jan 2020
It's a surprisingly good iron - I puddled solder on a 20g copper slug I use for testing in about 15seconds (320c) so quite respectable.
I just hate QC. Its like a processor controlled hammer. It has one job, why complicate it so badly the bloody thing won't work on its own? Its how I found Ralim - I wanted a USB iron, so I got the TS80 and not the 100 which I knew needed >12 to work stupidly hadn't joined the dots with QC3 - all I'd seen was phones - so i just assumed while it was nice to have it wouldn't be compulsory - pah!
It just struck me that you said got iron .. bought p bank there was no mention of any other source ... So sod's law said at a stretch, could have been the iron - its the same wallwart I use (presumably the bangood package?). Worth asking though I thought it was unlikely.
whitehoose
on 4 Jan 2020
@lysdexic1
I have a USB-C cable that has red heat-shrink on its end, and a plastic cover cap i _try_ and keep on it, which is my _out of spec_ cable i use for things like this. Which works until a friend "borrows your charger" 😆
I've found the TS80 to be quite the decent iron, and I hope it serves you well. If it helps I've had one since about 2 months before launch and it has taken a _lot_ of service and is still going strong. It _should_ chooch to around 430-450C, but i recommend sticking below 400 for tip life :)
QC is definitely the biggest pain there is out there to deal with, while newer supplies tend to work better some of the older ones had very bad implementations that are a pain to work with.
Also not a bad option I've found to pick up a fairly small QC power bank from china that is listed to work (though most do), and just know I only have 2-3 hours of runtime.
Ralim
on 5 Jan 2020
Hello everyone,
I just wanted to tell you that I tested the "Omars 2000mAh USB-C PD+QC3.0 (OMPB20KBUPLT / OMPB20KPLT)" as well as a TS80 with the latest custom firmware from Ralim.
Unfortunately, this doesn't fix the automatic 20s shut down.
Thought you might want to add this to the list.
Thank you all for your contributions and have a wonderful 2020.
Regards
Jakob
 Jajaho
on 9 Jan 2020
Jajaho
on 9 Jan 2020
There are 2 new tips for TS80 out now:
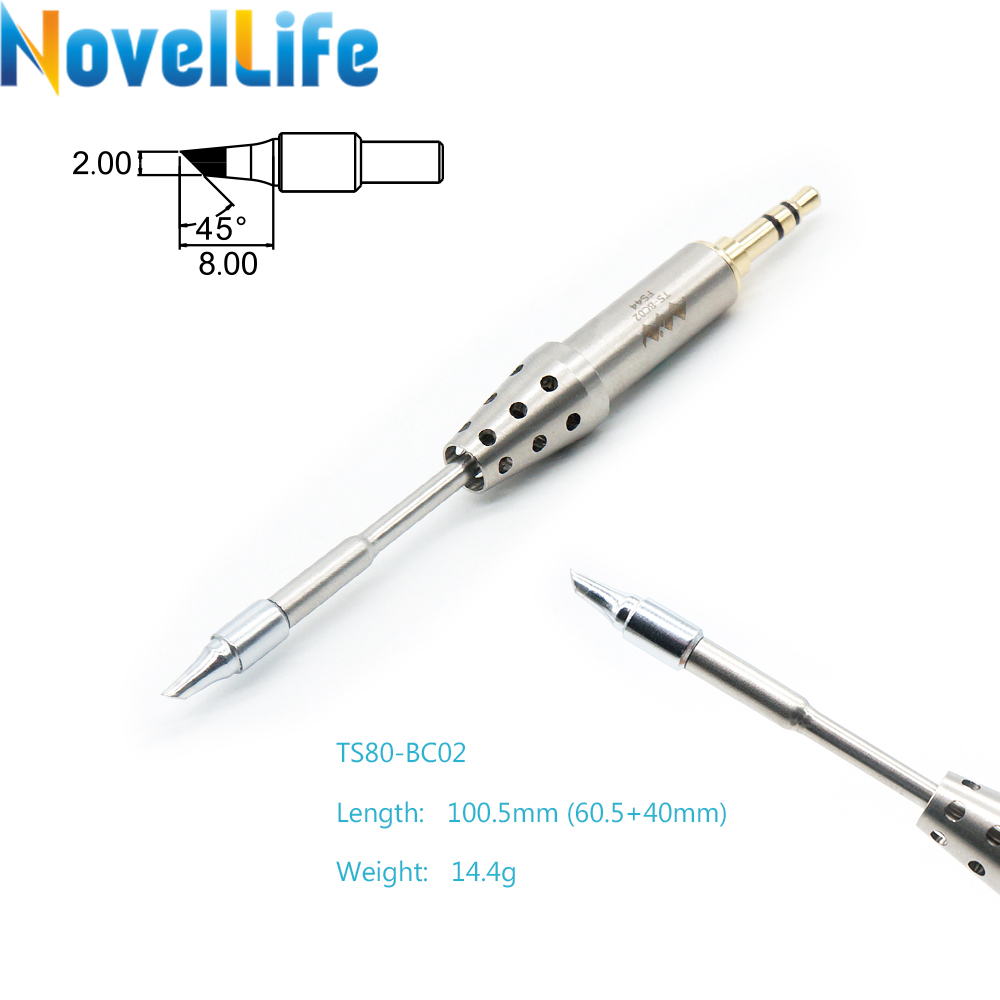
salavatkhafizov
on 13 Jan 2020
I write with minidso, and they told me that TS80 PD version will be in this year :)
 WerVa
on 18 Jan 2020
WerVa
on 18 Jan 2020
Oh that's great news! Would this mean that the board would be able to handle 100w (20v * 5a)?
What is the maximum wattage that a modern digital temperature controller soldering iron can output?
 i2
on 18 Jan 2020
i2
on 18 Jan 2020
@i2 @WerVa
The new TS80 is USB-PD, but uses the existing TS80 tips, so maximum power is supposedly 32W, but having also blown a TS80 tip at about 35W, it might be closer to 30W.
This will be done I'm guessing, but using PD to negotiate for 9V or 12V.
I dont know much more about it than that so far, haven't heard of a pd TS100 from Miniware, though Jan Henrik is making one.
Ralim
on 18 Jan 2020
@Ralim @WerVa and to even make decision-making for buying/making soldering iron more difficult for me, here are the options:
- Otter-Iron: TS100
- USB-C-PD soldering pen by Thomas: it doesn't have OLED
- USB-C soldering pen by vlk: it has OLED but I'm not sure it supports USB-C PD another link
- TS80
The other option from station type soldering iron:
I'm interested to know what you think of them!
i2
on 19 Jan 2020
i2 - are you wanting a toy or a serious iron and do you want portability? What sort of work do you do?
The Soldering stations available on ebay vary from thermostatic iron to iron, hot air and power supply.
I couldn't survive at home without a bench station with all three in 1 box. From the guys at work, between us we have everything from a £50 unit a weller and a ridiculously expensive lab grade setup.
They all make a good job and have bags of hot pixies for joining girders. If you plan working on a bench - it's a no brainer - buy what you can afford (mine came from e-bay and cost £120(ish) - I bought 20 of three tip types. Many years ago I bought 50Kg of 1mm and 0.7mm 60/40 for pennies in a bankruptcy sale (actually £5+vat) and that will see me out. Enjoy.
For portable kit there are lots of "ifs"
TS80 is surprisingly able (most "shootouts" say its better than the ts100 - but don't have one so no real opinion) - but think very carefully before crossing swords with QC3 - it's a bit of a fussy master about which powerbanks it works with. Its a little like fitting a hammer with a processor imho - I grew up with soldering irons that either used a stove - or had an electric element and no controls - it just got hot and melted lead. Either way I used them all day, every day for years without any problems.
My ts80 was bought as a toy - to see what the fuss was. Now I power it with 4s Lipo and a AOKoda Lipo to USB Power Converter QC3.0 Adapter which is 100% compatible with every qc3 device I've tried and I don't have issues.
powerbanks are a lottery and will stop you melting lead.
A wall wart like the one that comes with the banggood package has worked well - but it's not portable.
The unisolder 5.2 is still a bag of electronics - there is nothing wrong with a big chunky transformer and a few capacitors. Melting metal is (or should be) a simple operation, it doesn't need (or benefit) from lots of tech. What it needs is a modicum of savvy and a chunky tip to maintain thermal density that matches the work on your bench.
Weller has good press I imagine that choice there is down to if you want a display.
whitehoose
on 19 Jan 2020
As an option - TS100 + Type-C Male to 5.5mmx2.5mm Plug PD cable ($5) - and we have 40W of power.
Firebie
on 19 Jan 2020
@whitehoose Unisolder is a very good controller, especially with JBC iron)), and it is actually feeding 130 watts to the iron (firmware is limited to 6A and my transformer is about 160 watts). At least it is better than Goot RX802 which I sold out after finishing Unisolder and never looked back. If you are fancy you could use a few different JBC tools, as well as other types (T12, Weller, Ersa, etc). Comparisons between Unisolder and genuine JBC controllers show that it is at par or even better than JBC one.
TS80 does not seem to be deficient as compared to Unisolder/JBC T245, except for high thermal tips.
salavatkhafizov
on 19 Jan 2020
So coming back to this, may I ask if I understand correctly, is it definitely possible and safe to run this on a fixed input of 9V or 12V without QC or PD? QC (and even PD to some extent) is just such a pain to deal with and so hard to get decent current from that I'm wondering if there isn't really a better way. For example, might it be better to, say, get a decent 12V PSU and run it at 9V through a DC-DC converter that can handle 3+A to smooth out the voltage just for instance? All these QC and PD chargers just don't seem to be made to the same sort of specs as a decent fixed voltage PSU and I find they all seem to get worringly hot to even the point of producing burning smells sometimes when I don't even push them that hard on their intended uses (for example, running one of my other devices at 5V at ~2A to one device has even 3A PSUs seeming to be pushed quite hard and 2A is well within the expectations for "fast charge" which officially goes up to 2.4A that most of these PSUs should be expecting.) Or would it even care that much if the voltage isn't terribly stable and, say, a 12V PSU provides, say, 11V +/- a tiny bit here and there? It seems to me like a DC-DC converter + PSU could be a lot easier and perhaps even safer to deal with than the QC/PD lottery and direct to PSU even easier still.
I think someone said this before, I just want to be sure before I try it on what for me is quite an expensive iron.
 Nazosan
on 2 Feb 2020
Nazosan
on 2 Feb 2020
@Nazosan
1) Feeding 5-12V down the plug directly is fine and will act the same
2) Tip resistance is 4.5 ohms, so you can calculate required current with that
3) I would not exceed much over 12V (I'm not sure of max), but if your around 9V, going +-1V wont harm anything (might make tip slightly unstable but not much)
4) !! Be very careful !! Having > 5V on a random usb-c is very dangerous for other devices
Ralim
on 2 Feb 2020
Thanks for the quick and thorough answer. And don't worry, I fully understand the danger of # 4 there.
Nazosan
on 2 Feb 2020
im having greif with the ts80 and my powerbank. they work ok together until ts80 goes to sleep and then the powerbank shuts off. its running on 9v with power limit set to 18w sleep 5mins and tip slepp temp is 230. any ideas ??
this is the powerbank im using
https://www.aliexpress.com/item/32991445955.html?spm=a2g0s.9042311.0.0.1ec64c4dxNYWvt
 coldfire0101
on 9 Feb 2020
coldfire0101
on 9 Feb 2020
Hey,
Generally your out of luck if going into sleep mode triggers the power bank to shut off.
Your power bank may just be very sensitive to turning off.
As that's a kit that you have assembled, what is the main ic used in the main PCBA, as it may be adjustable hopefully.
Otherwise, other tricks to increase the load work (such as plugging in an led light) or it may have a mode to turn off the sleep.
Ralim
on 9 Feb 2020
hey, thanks for response ralim. the main chip is sw6 105 ony28ef29b
couple pics of the board
https://ibb.co/HntQjnY
https://ibb.co/51Jnt0t
coldfire0101
on 10 Feb 2020
im having greif with the ts80 and my powerbank. they work ok together until ts80 goes to sleep and then the powerbank shuts off. its running on 9v with power limit set to 18w sleep 5mins and tip slepp temp is 230. any ideas ??
this is the powerbank im using
https://www.aliexpress.com/item/32991445955.html?spm=a2g0s.9042311.0.0.1ec64c4dxNYWvt
found the pdf for the main ic but im not sure what im looking at tbh, is there anyone that would mind having a look
http://ismartware.com/enet_upload/file/20181214/20181214101104_63565.pdf
coldfire0101
on 9 Mar 2020
I think as ralim said - if the bank goes sleepy byes its game over. I'm a big fan of the power LED and after offering this as a solution quire recently I had a fiddle and found that using SMD led and a 3x3 SMD Potentiometer you can just about squeeze them into a slightly modified USB plug. A bit fiddly but it means you can "tune" the led so it just keeps the pixies dancing without seriously adding to the load or blinding you (unless additional light is handy). And it looks quite good too.
I've come to the conclusion that specifically qc3 powerbanks (but really ALL powerbanks) are a waste of time - they simply aren't built for soldering and other serious stuff. Sleep makes perfect sense when you are charging a phone but not when you want to power a device that's extremely low power or has standby. A powerbank is OK to carry "just in case" but if you really need a versatile portable power source for all comers - you want something without conditional delivery ... an on/off switch is more use.
I settled for using 4s batteries and an AOKoda Lipo to USB Power Converter QC3.0 Adapter 4s are cheap and you can either use the AOKoda for USB/QC3 - and for a not ridiculous amount of money include a 5A (or higher) buck boost converter to power anything you please up to mains voltages if needs be.
whitehoose
on 10 Mar 2020
I like the Inline Power LED, I might just have to make one :)
Another option If you are rolling your own portable solution and have a decent capacity pouch cell is the AILAVI-180312 QC2.0/3.0 Boost Converter. It works beautifully with my TS80 (9v@18w) but does get a little warm after a few minutes of use but nothing too scary. AFAIK, It can do more than 2A @ 9v but it will need a fan to keep the magic smoke from escaping.
The only downside compared to a typical power bank PCB is you need a separate charge controller to cram pixies back into the batteria.
Mine's hooked to a 3200mah pouch cell and i'd say it gives about an hour and a half or so of melting. When it's dead I use one of the little 1A micro-usb lipo chargers to filler 'er back up.
lysdexic1
on 10 Mar 2020
@coldfire0101 it looks like your supply turns off lost likely at 50-100mA, so the keep alive _should_ work for you. Sadly it doesn't have a mode to disable light load auto turn off in the data sheet.
The light load is set by the MOSFET, so better MOSFETs will increase efficiency but also raise the minimum turn off current.
If you raise the sleep temperature to say, 200C it may help here as average power draw will be higher.
It also looks like there is no light sleep on the USB-C port. So if you picked up a C-C cable that has the 5.1k CC pulldown resistor in it, it could work to power the iron and also not have light sleep issues.
@lysdexic1
That's very similar to what I use most often, except with a reclaimed 4400mAh cell. Always good to hear what people use.
Ralim
on 10 Mar 2020
@lysdexic1 - looks like a decent converter.
I can never get ali to sell me anything - always fails to complete the cash, fleabay has so many similar (but not the same) options I'll have to look a little harder - but my aok is A-ok so no rush. I got a bag of small arduino style heatsinks 8x8 with thermal adhesive dots that stick to anything - I put them on everything in my toolkit that gets warm and has space to fit. Don't know if they help - but they don't harm.
whitehoose
on 10 Mar 2020
thanks for all the help, really appreciate it. will try the both suggestions
coldfire0101
on 10 Mar 2020
@Ralim oh nice! I could have gone higher capacity, but I wanted to keep it reasonably small and portable. I 3D printed a housing for it too seeing as I dont want to puncture the cell in my bag (as fun as that sounds!)
@whitehoose Can't fault it yet, does what it says on the box (which is surprising for QC)
Ali works for me all the time... maybe it's your bank or card?
searching ebayAU for AILAVI-180312 gets a few hits from the Hong Kong that will deliver here. Not sure where you are, but here's one that will ship to me, maybe you can dissect some locally searchable info from it :) https://www.ebay.com.au/itm/QC3-0-QC2-0-USB-Fast-Quick-Charging-Module-DC-DC-Boost-Converter-Board-Car-Phone/392177982492
It is a pretty small confuzer on the PCB, might have to settle for a 3mm copper wire "heat pipe" haha... but anything would be better than nothing right?
@coldfire0101 No worries, have fun! :)
lysdexic1
on 11 Mar 2020
@lysdexic1 I ordered 10 ikkle heatsinks - the seller delivered 100 each of 8x8 and similar and 10 each of 6", 8" 10" ... obviously some one else's order I offered to post it on (if they paid the postage) they said keep 'em... So I could cover a tennis court. I have even cut some up to fit tiny gaps, but the novelty soon wears off that for a game, aluminimum is horrible stuff to cut and file. The heat pipe sounds good!! dull red is still better than orange or yellow :+1:
I'm in the UK - Ali don't (or didn't) have complete towns & counties in their drop down form (stupid idea!) and no option to type it in, so I couldn't complete. It's only been an issue a couple of times their AOKdata adapter was half price and I wanted a few for work - ebay and banggood are usually within pennies so I survive. Most big chinesium e-bay sellers have warehouses in London or Manchester - so postage is usually a week instead of 28-48 days from the smaller guys. So I tend to stick with them if I can.
Thanks for the fleabay listing - oh the irony - they don't post to UK - other listings that will are in the $25 range (with postage) - I'm not THAT keen :dagger:
Looks like I'll have to take your word that it's good :grin: My AOK has no issues either - Its only me being nosey.
ADDON - ust found one in hong kong £3.40 - but it's a slow boat more (much) later.
whitehoose
on 11 Mar 2020
found this on ali, hopefully useful for usb c power banks
https://www.aliexpress.com/item/4000326204762.html?spm=2114.12057483.0.0.39492c40b0IulN
coldfire0101
on 14 Mar 2020
AAAAAAAAGGGHHHH!!!! I cant afford all these lucky finds - stop it immediately!!!!! :grin:
@Coldfire0101
Luckily at this precise instant I can't think of anything I could use this for. I try to avoid C like the plague however knowing they're there and by the look of it you can get just the ends is a bit of a find, nice one - I'm sure the inspiration will follow.
whitehoose
on 15 Mar 2020
Another pwerbank for the no-go list
Omars Powerbank 24000mAh switches off after 20seconds with stock and custom firmware just the same.
 ScruffR
on 20 Mar 2020
ScruffR
on 20 Mar 2020
@lysdexic1
Adapter arrived this AM - wired it up with heatsinks and using .7mm mains flex to reduce resistance.
Initial test showed both Ralim's firmware and the mini stock 1.7 powered the TS80 both on my bench supply a wall socket USB and using a one cell USB adapter. I need to find my 18650 holders and a protection card to cobble a direct battery connection.
In all cases the instant you hit a button to excite the pixies to the iron it sucks <3A and shuts off.
I can see both versions negotiate voltages 1.7 9v and ralim's 11.8v before cutting out before the tip gets warm (its that qick!).
Using a QC3 wallwart, power brick or 4s+AOKoda works as expected - highest drain is 2A (ish).
just wondering what you are using as source and what the average drain is
whitehoose
on 23 Mar 2020
I can confirm Anker PowerCore Essential 20000 does not work with Ralim firmware (only negotiates 5v). But it does work with stock firmware at 9v (circa 10.5v). Just a heads up to anyone who wishes to use this powerbank.
 drewzh
on 23 Mar 2020
drewzh
on 23 Mar 2020
Finally found my batt holders, A bog standard 18650 connected to adaptor gives an input of 4.1v produces 5v out - stock firmware negs to 9v and heats up quite fast to 320c.
Ralim's firmware starts off well, negs to 9v, gets to about 37c and then switches off. unplugging the iron does nothing ... have to remove power source from adaptor to reset. First impression is it must be power (at a guess over current) but UM34 tester not showing anything significant. Either the adaptor or the cell protection is kicking in, I hope it's the protection ('cause that's it's job) but needs a looking at - and I cant be bothered tonight. I'll see tomorrow
whitehoose
on 23 Mar 2020
For anyone interested, I had a conversation with a sales rep from e-Design and they said the new model (called TS80P) will be released “soon” and support USB-PD at up to 30W.
 MichaelD33
on 27 Mar 2020
MichaelD33
on 27 Mar 2020
They have been saying _soon_ for a few months though. So take with grain of salt :D TS80 was in _soon_ for ~6 months iirc
Ralim
on 29 Mar 2020
The MDP-P905 doesnt even do USB-C PD yet... and this was mentioned as soon
too.
On Sun, Mar 29, 2020, 10:52 Ben V. Brown notifications@github.com wrote:
They have been saying soon for a few months though. So take with grain
of salt :D TS80 was in soon for ~6 months iirc—
You are receiving this because you were mentioned.
Reply to this email directly, view it on GitHub
https://github.com/Ralim/ts100/issues/349#issuecomment-605550387, or
unsubscribe
https://github.com/notifications/unsubscribe-auth/AAAAOZVXYNXUO33KD3T4OVTRJ2ZWXANCNFSM4FR3OWBA
.
gbraad
on 29 Mar 2020
@gbraad The MDP-P905 does not have hardware to do USB-PD as far as I could find in its teardown (no frontend that I could find, and very little components so doubt it has a descrete one).
Ralim
on 29 Mar 2020
They 'promised' USB-C PD support. And since they also flash over USB-C instead of the prog cable... hardware revision?
gbraad
on 29 Mar 2020
When i probed it out, there was nothing connected to the CC pins, so yes, hardware revision would be required.
Ralim
on 29 Mar 2020
I recently bought TS80.
USB PD seems to be the way forward. It's sad that TS80 is QC3 only.
I could accept if MINI would provide a replacement PCB with PD capability in the future. I know some have replaced the PCB of TS100 to get USB PD capability. But that's completely 3rd party hardware.
I like TS80 more than TS100 because of the metal body and shorter tips (although you can get shorter tip for TS100 too).
Therefore I do hope that hardware upgrades to TS80 will come, but I don't have my hopes high. ;(
 Zuccace
on 4 May 2020
Zuccace
on 4 May 2020
"_It's sad that TS80 is QC3 only_" You got that right - sad they used qc3 at all, its inappropriate tech and overkill imo ... neither qc3 nor PD is worth the hassle - the ts80 is a capable little iron if it was simply connected at 9v it would solve everything. Its not like melting lead is particularly technical. Using completely conventional settings it will stick through hole and smd sized components to most rational surfaces without fuss. If anyone needs more - larger irons are available and will do a better job than driving the 80 like a deathstar. I mean, most people carry more than one screwdriver, soldering should be seen as the same.
A retrospective (free) upgrade wouldn't be economic for mini, They don't seem overly willing to sell spares at all, unless there are special circumstances.
It's unclear if the tips will be the same - or if they'll change too - if they do it will spell the demise of the qc3 version it wouldn't be worth an upgrade if you have to replace everything but the case.
whitehoose
on 4 May 2020
Right. So, the discussion here should not focus further on could haves or future version of a possible iron. This issue is about the TS80 support in the firmware. This is already a very long thread with over 500 comments. Is there anything specific that remains open? I would suggest to have follow-up issues created for specific problems that exist with the QC implementation etc.
gbraad
on 5 May 2020
GB - I don't see any problem with keeping an "off topic" thread. Its good to keep an eye on the scenery and not lose sight of the surroundings. Even the OCD and aspergers crowd look up occasionally. It's interesting to know that people don't just melt lead and have alternative uses (like the guy who prepares wax moulds).
You can see how the Iron has arrived at where it is today, and if you have the patience - there are some off the wall dirty fixes that actually work (as well as some that didn't).
Its not a bad thing to know just how many requests there have been for MORE POWER, MORE AMPS and FASTER HEATUP times before pressing send on the one you're contemplating submitting :frowning_face:
There are limits to what is possible as well as what's desirable. Thing is you don't hear from the people who do know and understand because they know and understand what a soldering iron is and does and just get on with it.
It would be nice to see people sharing some basic knowledge with the newbs.
Sometimes a question or opinion can only be answered by going off topic - there needs to be a space for that.
whitehoose
on 5 May 2020
@whitehoose LTNS! To keep this issue on topic, if it ever was, would you mind dropping a message to my box - [email protected]? I might have something that might be interesting for you, following up on powering ts80 from small powerbank. Let's say I diyed something that might work for more than 10 minutes.
asymcon
on 5 May 2020
https://www.youtube.com/watch?v=9TvgolijzUY
New TS80P :) - Support PD 30W
WerVa
on 8 May 2020
Well that's that then .... the TS80 is dead, long live the TS80(p).
I smell a bangood sale ....
I've just built a carrier for my jeweller's sawblades - nothing fancy, 7" of 15mm copper pipe with a soldered brass stop at one end and a screw stop at the other.
I decided to solder both fittings, Couldn't face the mess a blowtorch leaves so I gave the old ts80 a chance to shine, turned it up to 390c and easily soldered this considerable (for a small iron) chunk of brass fittings to the copper pipe - doesn't look much but its a proper fill, the entire neck is full of lead ... it took less than 8 minutes from start to finish.
If I blow my own trumpet, it's made two very tidy seams and I blistered my pinky in the process, There is already power to spare.

I don't see what the fuss for more power is about
I won't be upgrading. I've taken this forced break to arrange for retirement, so won't be trekking the wilds, miles from mains power outlets. I've dusted down the big solder station and I intend to use it.
whitehoose
on 8 May 2020
@whitehoose The sales team says it's available on Amazon, eBay, and Aliexpress. I haven't seen anything from banggood yet, although it seems to be for sale on Aliexpress.
MichaelD33
on 9 May 2020
@MichaelD33
Found it on Ali - It's not very obvious, no fanfare or dancing ponies!
I somehow had the impression that banggood had a bit of a partnership with Mini, seem to remember they had a bit of a "thing" for the TS80 launch .... and were almost giving the ts100 away..
But there is no show on their site and the TS80 presence in general is very underwhelming.
Not that Ali have made much effort to make anything of the occasion at all. I show 4 sellers and one of those shows an ordinary 80 by default with the 80p in a dusty corner as a selectable option with a tiny thumbnail.
I wonder if the penny has dropped and the numbers are showing that no-one wants to spend more than £30ish for an Iron.
The Wellers, Anteks and no names are going great guns on e-bay ... up to 100w and more, many for less than £20. and no problems powering them.
It strikes me that the 80p bears more than a passing resemblance to the old Weller needle tip irons, and the price is the same as the straight 80.
Maybe the party's over for these premium priced gadgets.
whitehoose
on 9 May 2020
Hi, all. I just wanted to pop in and share my cordless TS80 battery module. I made it out of very inexpensive parts, and the function is excellent. I happened to have a collection of 18500 batteries already, for my RC transmitters, which was not only convenient, but played a roll in conceiving the module in the first place. I hope you find this information useful, or at least entertaining. Cord free soldering is a nice experience when mobile, and even when at the desk at home.
If you care to follow the link, you'll also see the cork grip that I spun up, using a cordless driver/drill as a lathe. The TS80 grip was way too small for me, coming from my Weller, and I couldn't use it for very long without discomfort. Instead of enduring the time to adjust to it, I made my cork grip, and it made all the difference. Super comfortable. I used a sealant that is used on the cork handles of fly fishing rods. I can't remember the name, but it is some excellent stuff.
I use wall power, (3) QC power banks, and my 18500 battery module all pretty evenly. I've built, repaired, and maintained over 30 fpv quads in the last year or so, which amounts to truly countless hours with my TS80. Everyday I'm still impressed by it. With that said, I'm about to pull the trigger on the new one. It really seems like a solid upgrade. I'm really curious about that new grip; that's the only questionable part imo. Cheers
 SantiCO19
on 10 Jun 2020
SantiCO19
on 10 Jun 2020
Related issues
 Dag0d
·
5Comments
Dag0d
·
5Comments
 Gregory1981
·
3Comments
Gregory1981
·
3Comments
 Fluvance
·
3Comments
Fluvance
·
3Comments
 federicodilo
·
5Comments
federicodilo
·
5Comments
 Lenbok
·
8Comments
Lenbok
·
8Comments
Most helpful comment
Yeah :( I can dream of everything being neat like this.
I'll keep on the manufacturers case to try and push for a USB-PD model, but I feel that it might be a ways off.
Though, a really nice product if your up for it, that is on my to-build list but buried too far deep would be to make a small USB-c inline adapater that converts between USB-PD and Quick Charge 3.0.
If you have interest in making that ^ hit me up via email and i'm happy to have a yarn about it.