Cura: unique Benchy defect with Cura 4.6 beta or 4.6 final
Application version: 4.6 beta and 4.6 final
Platform: Windows 10
Printer: Tronxy X3A
Reproduction steps:
- Print Benchy with gcode from any earlier version. Version 4.1 is a good choice.
- Print Benchy with gcode from 4.6
- compare top view
Screenshot: included.
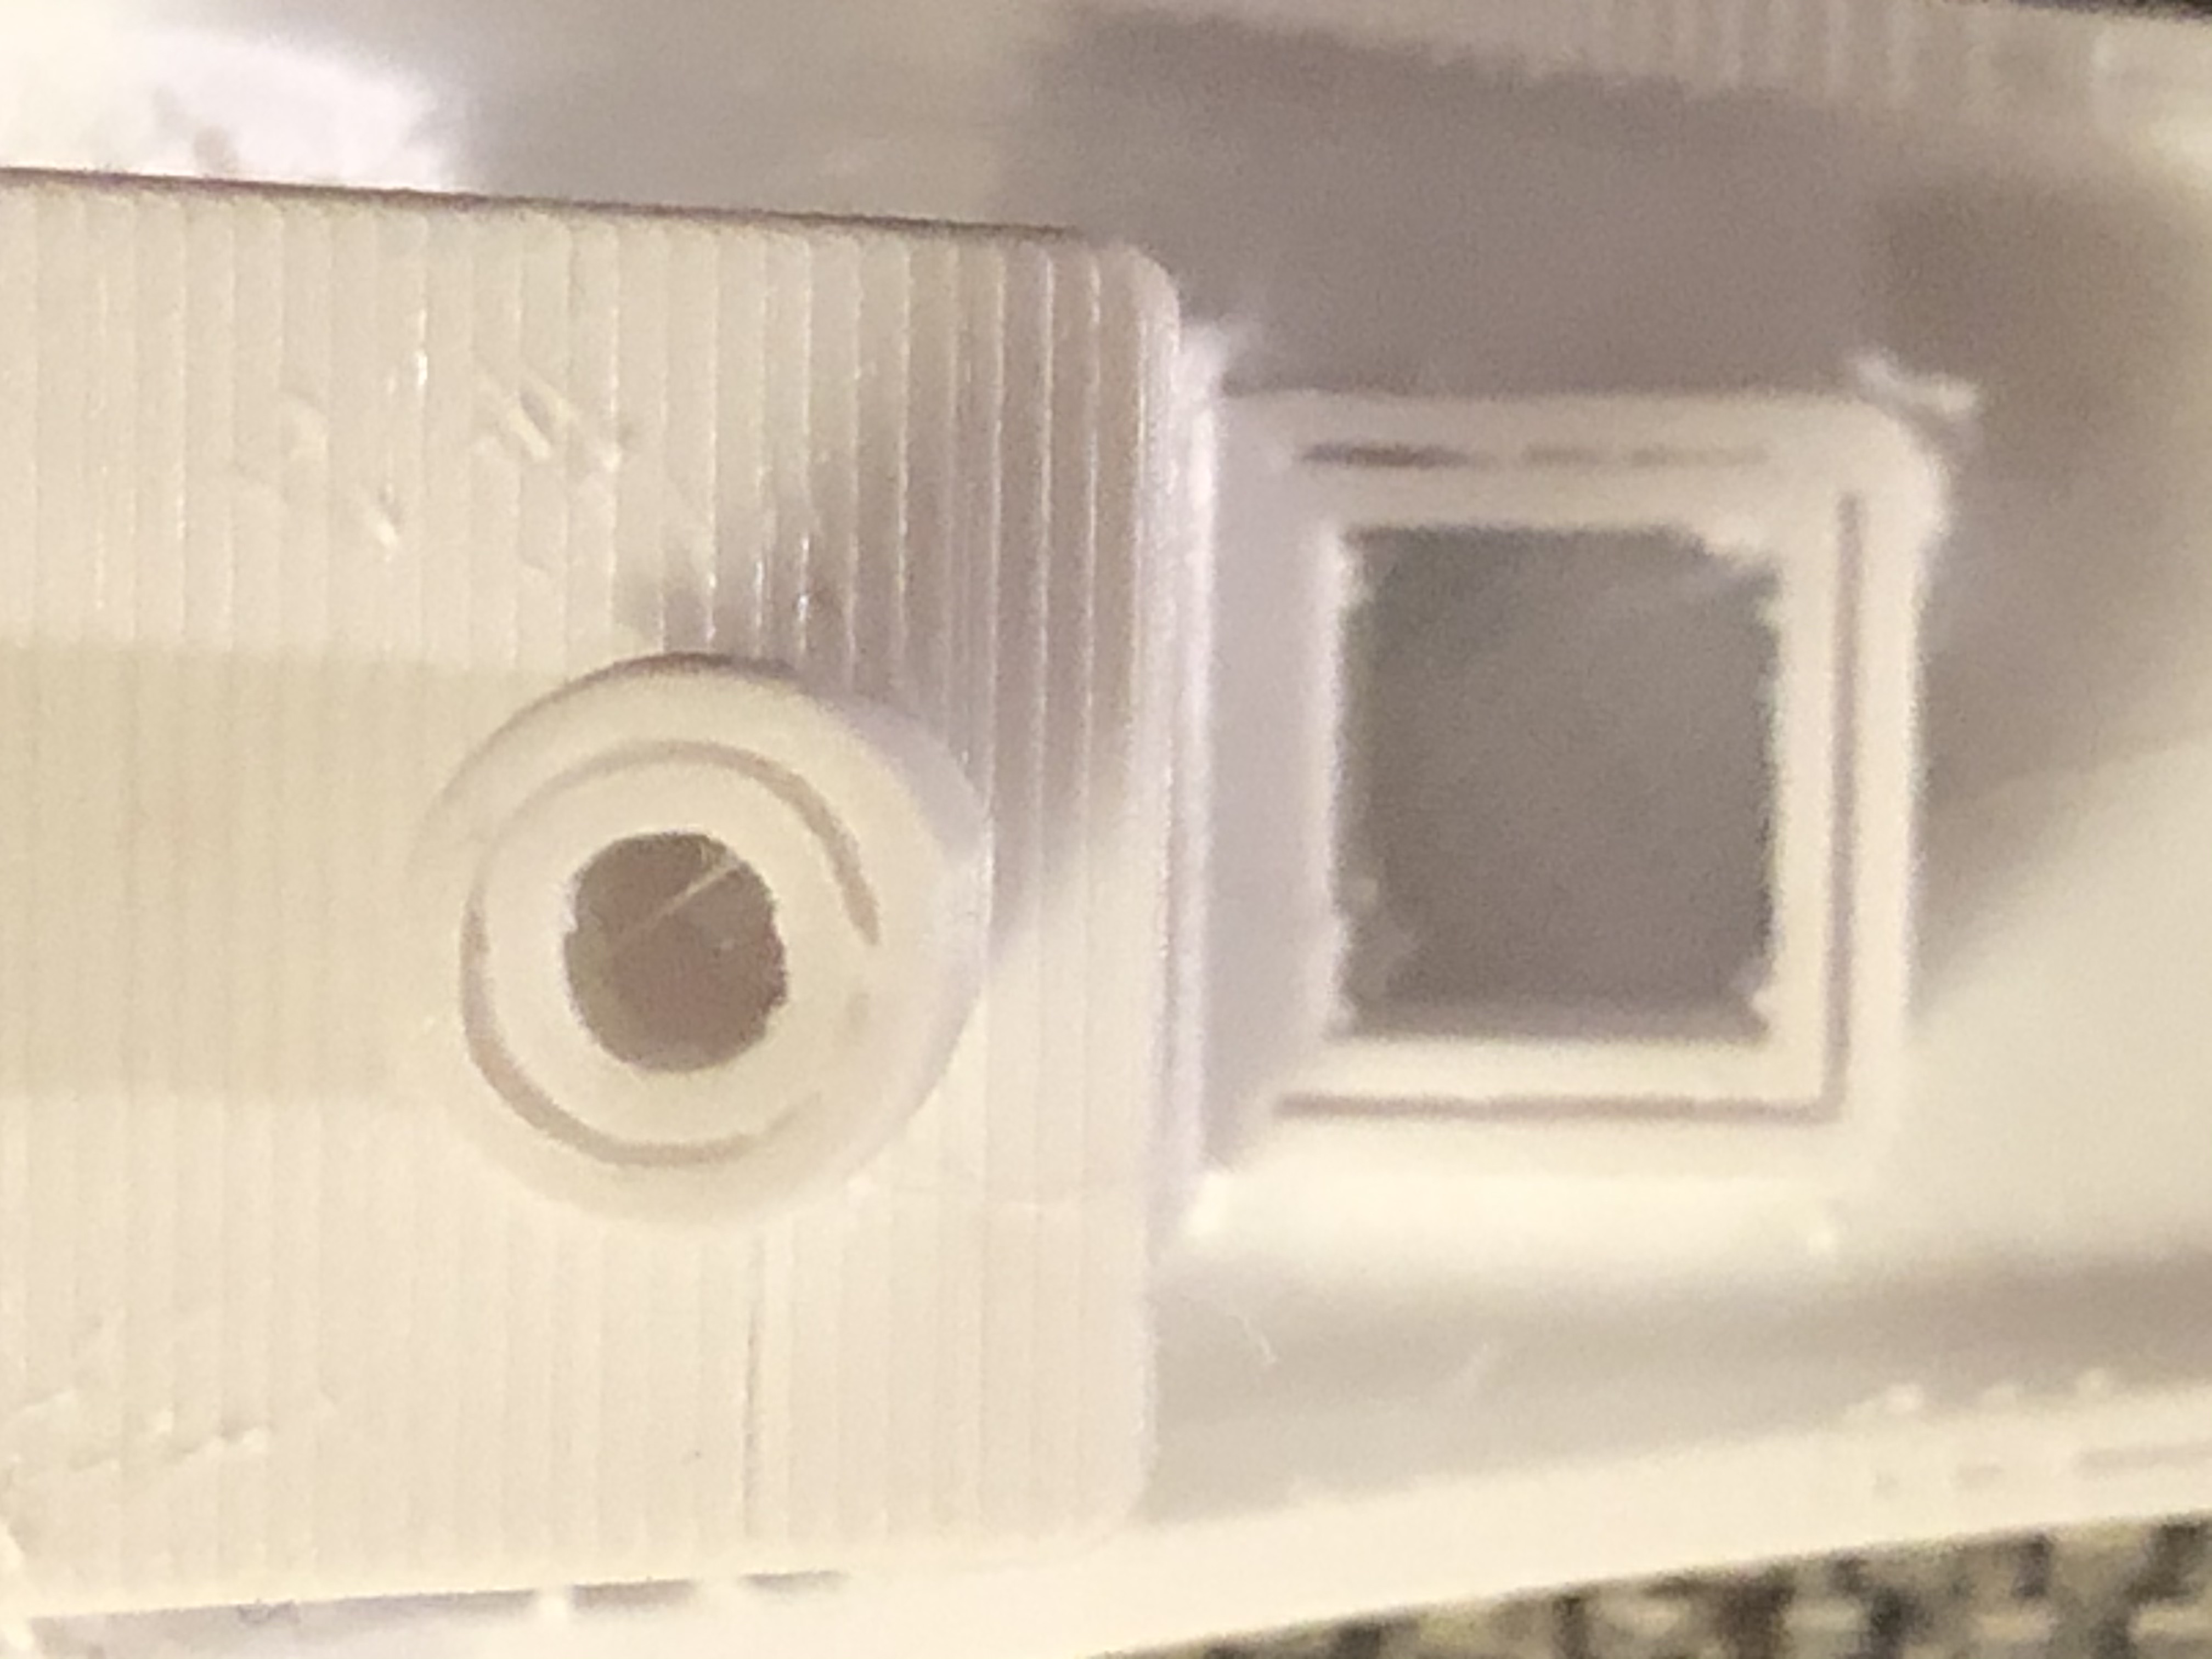
Actual results: Observe the void in the top edge of the motor compartment and smokestack
Expected results: no voids:
Project file: Included
Log file: not relevant
Additional information: I have printed an armada of Benchys in attempts to rid myself of stringing. My latest Benchys made iwth Cura version 4.6 show type of defect that I have not seen before. Unfortunately, I have NOT done comprehensive regression testing to eliminate any other possible factors.
Is this a setting issue or a genuine BUG?
 bill-orange
All 11 comments
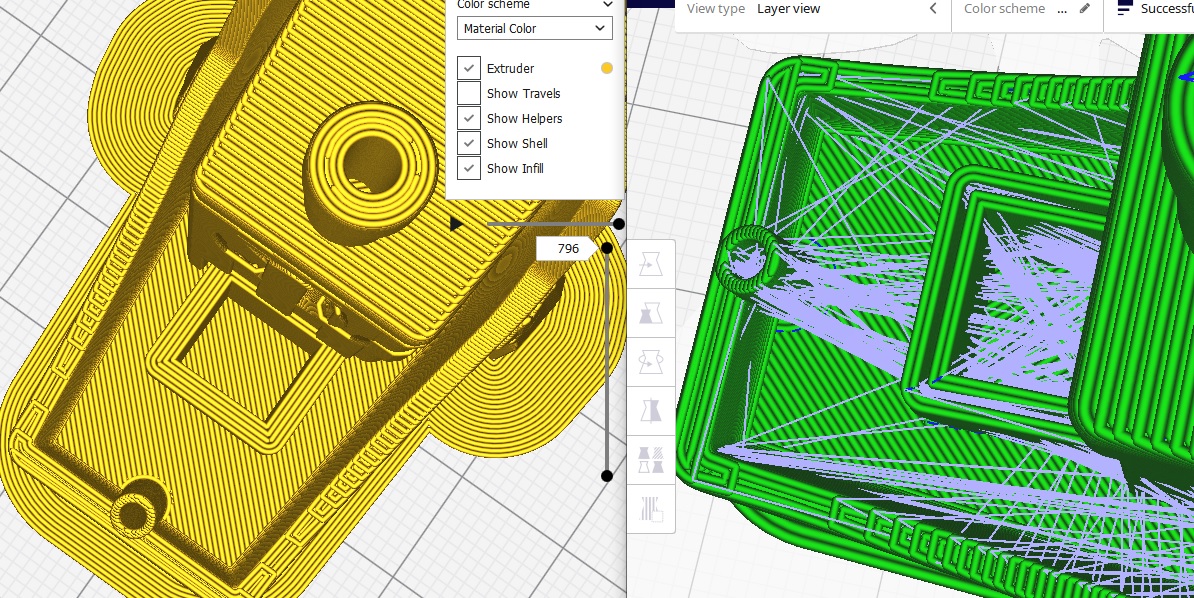
Here's an additional photo for this bug report. The image on the left is from Cura 3.1. The Image on the right is from 4.6. Same project file.
bill-orange
on 27 Apr 2020
Possibly related to #7557
We're going to make a patch release this week
 mahtDFR
on 28 Apr 2020
mahtDFR
on 28 Apr 2020
Possibly related to #7557
We're going to make a patch release this week
It's not. You get the same result in 4.6.1.
 Ghostkeeper
on 29 Apr 2020
Ghostkeeper
on 29 Apr 2020
I manually performed an inverse of the version upgrade from 4.5 to 4.6 on your project file and loaded it in 4.5, but it shows the same effect.

Maybe you have a project file from 4.5 (or any earlier version as you say) that produces the desired result?
As measured in Blender, the thickness of this wall is exactly 2mm. After the inset for the outer wall that becomes 1.6mm (the width of the polygon traced by the centreline for the outer wall). After the inset for the first inner wall that becomes 0.8mm. After the inset for the second inner wall that becomes 0mm, thus there is no more second inner wall.
You can resolve the issue by reducing the inner wall line width to 0.397mm (3μm lower). Normally you'd be able to reduce it by just 1μm and you'd bet a 2μm-wide polygon which effectively gives one single line and a travel move back, with wall overlap compensation. However to reduce the effect of rounding errors with properly tessellated thin walls in curves, we have a heuristic that tries slightly different line widths to see if the number of parts is reduced, so 3μm it is then. At that sort of scale, rounding to micrometres makes a real difference.
Ghostkeeper
on 29 Apr 2020
The experimental variable line width feature would resolve this sort of issues, hopefully: https://github.com/Ultimaker/CuraEngine/pull/1210 It's still a long way off though.
Ghostkeeper
on 29 Apr 2020
The problem was not present in Cura 3.x I never noticed this problem on Cura 4.4.
bill-orange
on 29 Apr 2020
Try setting "Fill Gaps Between Walls" to "Everywhere" (why is this a drop-down and not a check box?). I'll admit I never really tried any Cura before 4.0 (I'm only a recent inductee to the 3D Printer owners' society) but I do know that setting was required to seal the box when I tried my own Benchies.
 Asterchades
on 29 Apr 2020
Asterchades
on 29 Apr 2020
@Asterchades You are correct. Setting "Fill Gaps Between Walls" to "Everywhere" corrects, or at least papers over) the problem. I don't know if @Ghostkeeper wants to consider this the solution or consider it a temporary fix until a more permanent solution is implemented.
bill-orange
on 30 Apr 2020
(why is this a drop-down and not a check box?)
Historical :smile: We should change it one day.
Ghostkeeper
on 6 May 2020
As far as I'm concerned the current system will pretty much always have this problem. I wouldn't want a fix for this specific case. If you're willing to spend some time on tweaking settings, I strongly advise you to try a few line widths to get a better fit. Otherwise just use the gap filling technique.
The gap filling technique is a general solution to this problem. It's intended precisely for this sort of issue. We know that the gap filling technique has some issues though, especially with thin curved walls where it sometimes produces a lot of small, separate line segments, so we're reworking that to use a wholly different technique.
Ghostkeeper
on 6 May 2020
Thanks. Good advise.
bill-orange
on 6 May 2020
Related issues
 DamianSepczuk
·
3Comments
DamianSepczuk
·
3Comments
 DmitryBychkov
·
3Comments
DmitryBychkov
·
3Comments
 jellewie
·
3Comments
jellewie
·
3Comments
 StanislavJochman
·
3Comments
StanislavJochman
·
3Comments
 ferociousdiablo
·
3Comments
ferociousdiablo
·
3Comments
Most helpful comment
Try setting "Fill Gaps Between Walls" to "Everywhere" (why is this a drop-down and not a check box?). I'll admit I never really tried any Cura before 4.0 (I'm only a recent inductee to the 3D Printer owners' society) but I do know that setting was required to seal the box when I tried my own Benchies.