Cura: [3.4.1] Unable to slice in vase mode without glitches
Application Version
3.4.1
Platform
Windows 10
Printer
Creality Cr-10s
Steps to Reproduce
- Use a model that has multiple planes meeting at an angle in edges and in points. (example attached)
- Remove contents of configuration folder.
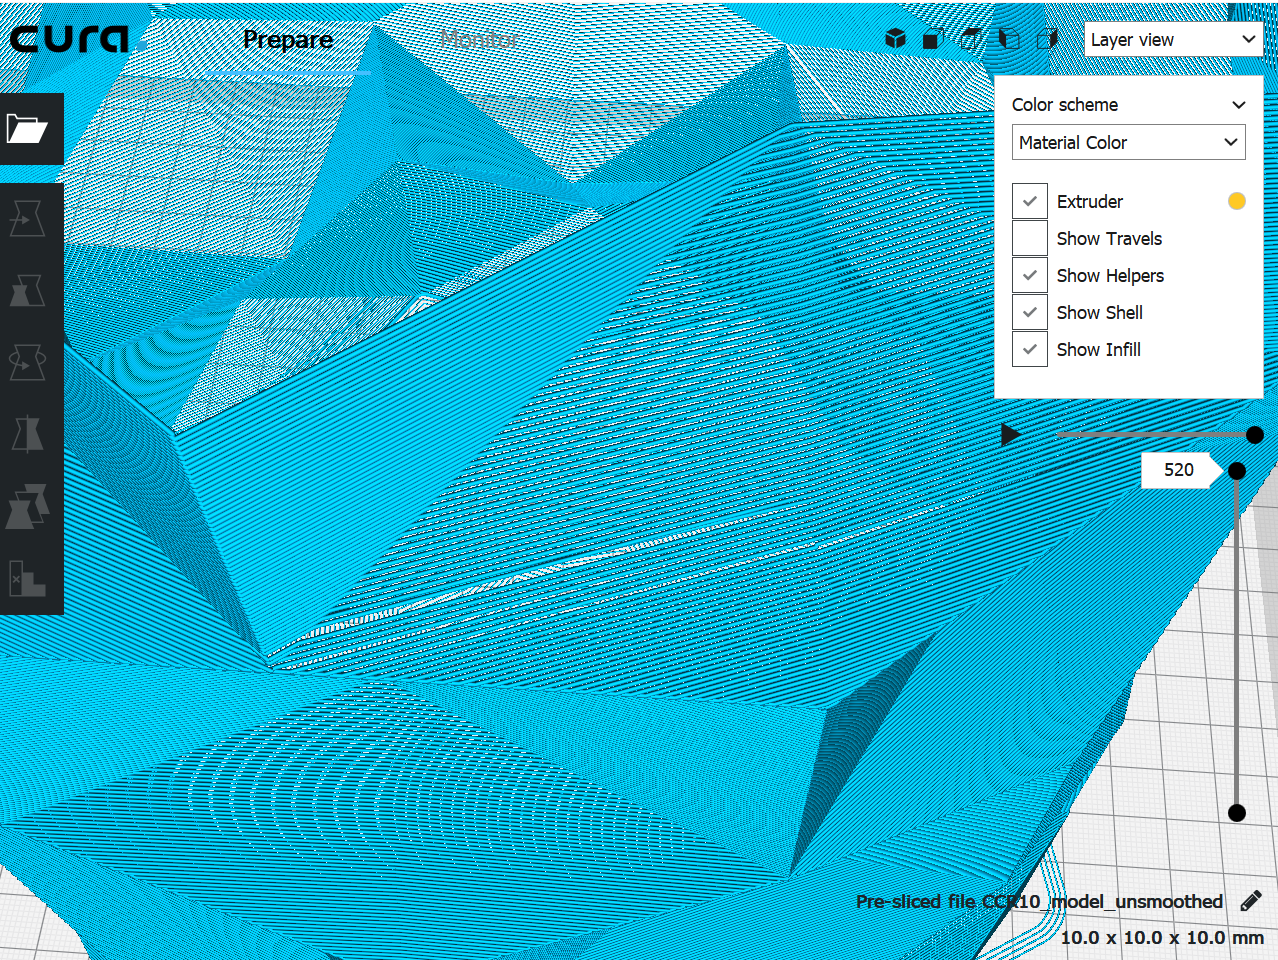
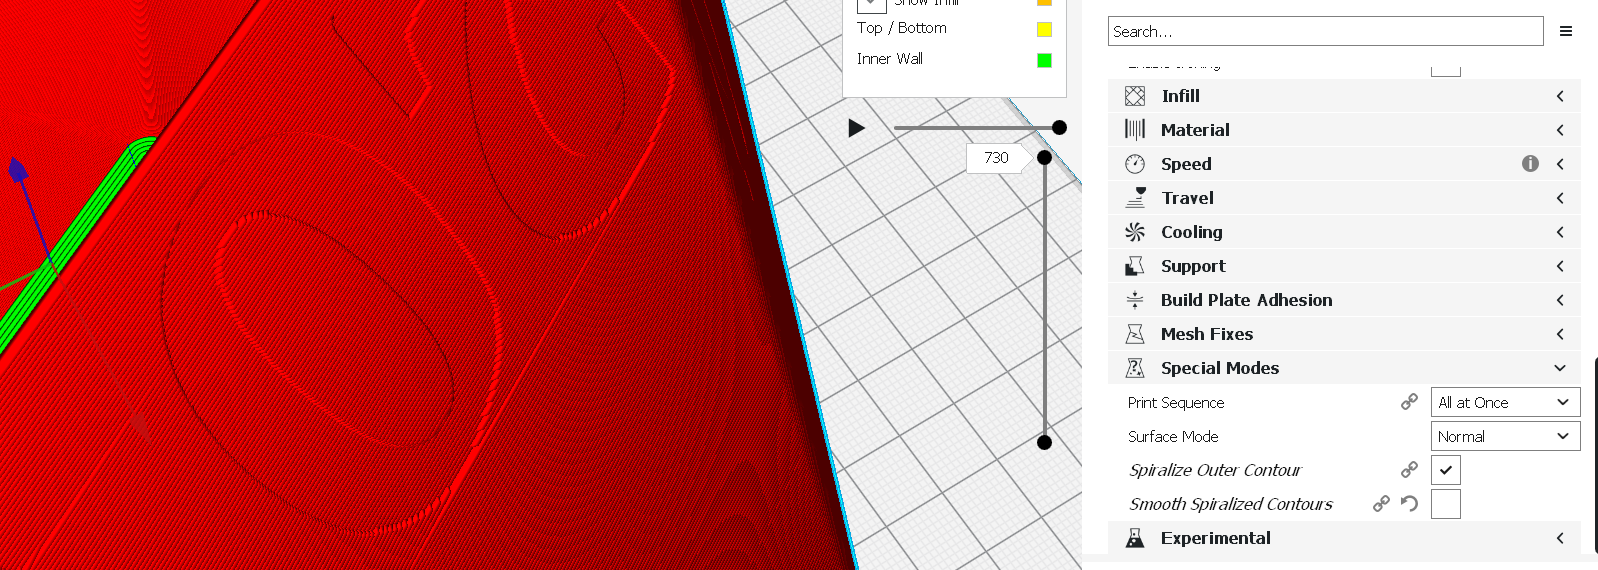
- Slice with spiralize outer contour option enabled and smoothing disabled.
( To enhance the effect use 1mm nozzle and 0.5 mm height)
Actual Results
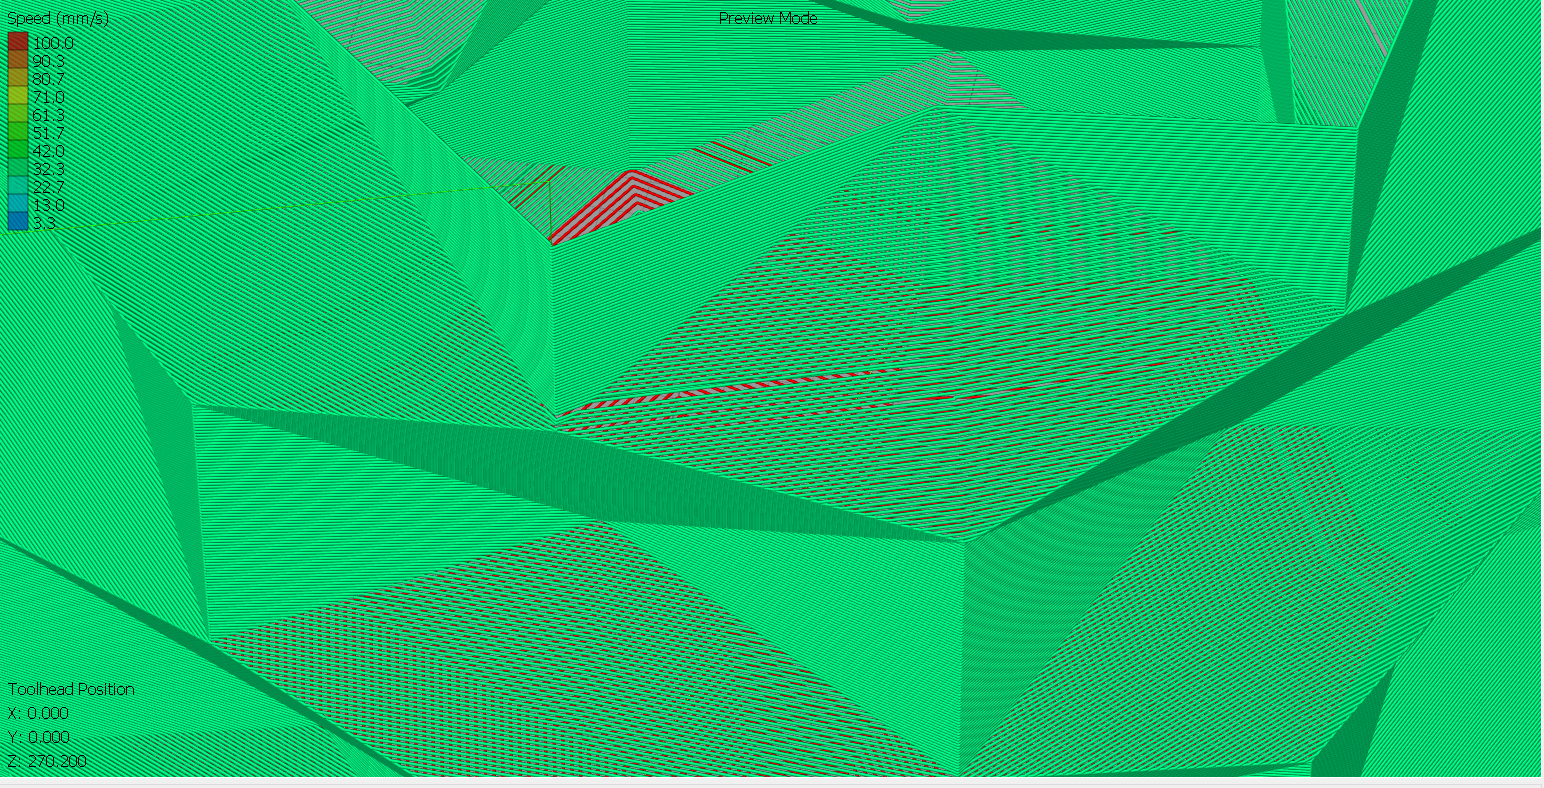
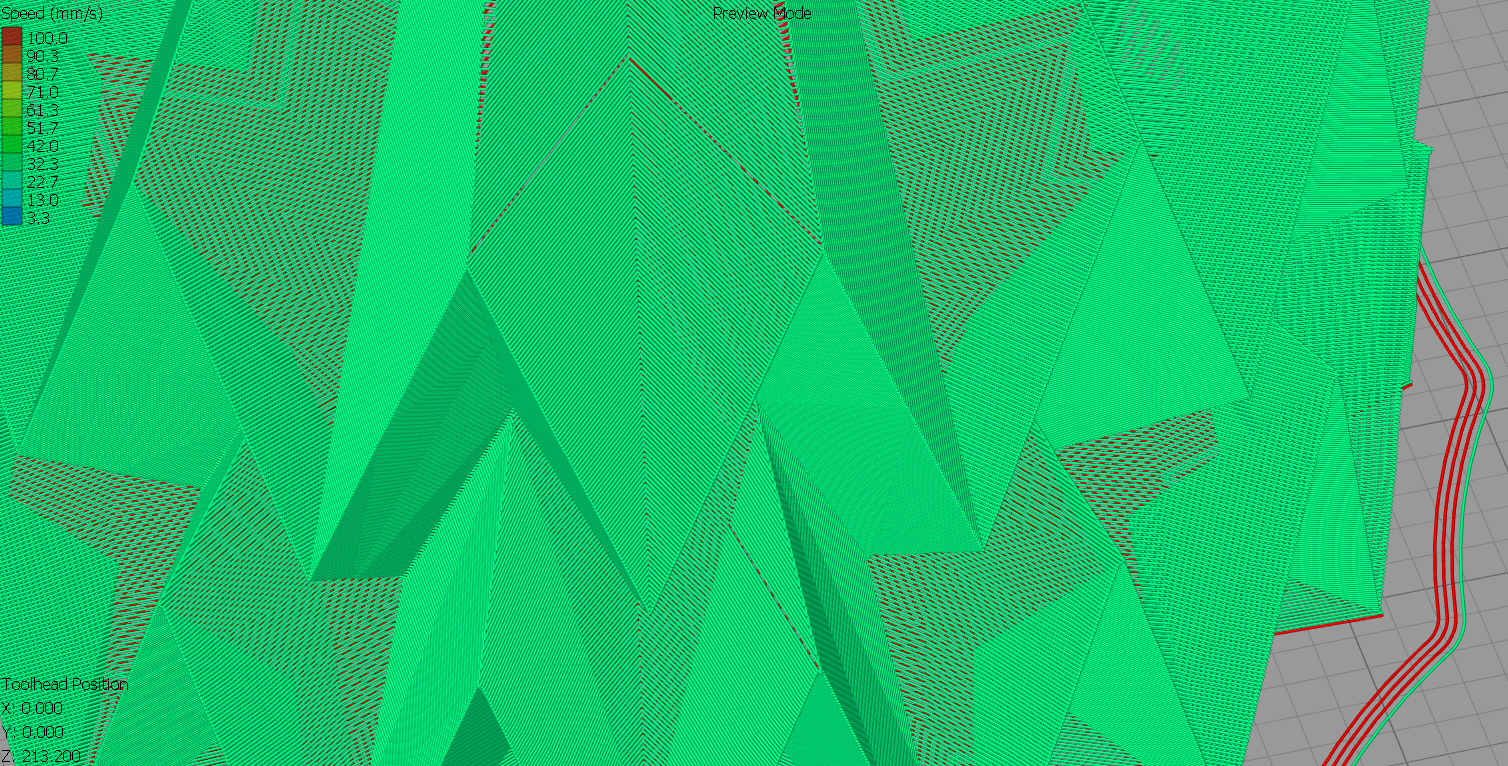
Model appears to be properly sliced until further investigation.
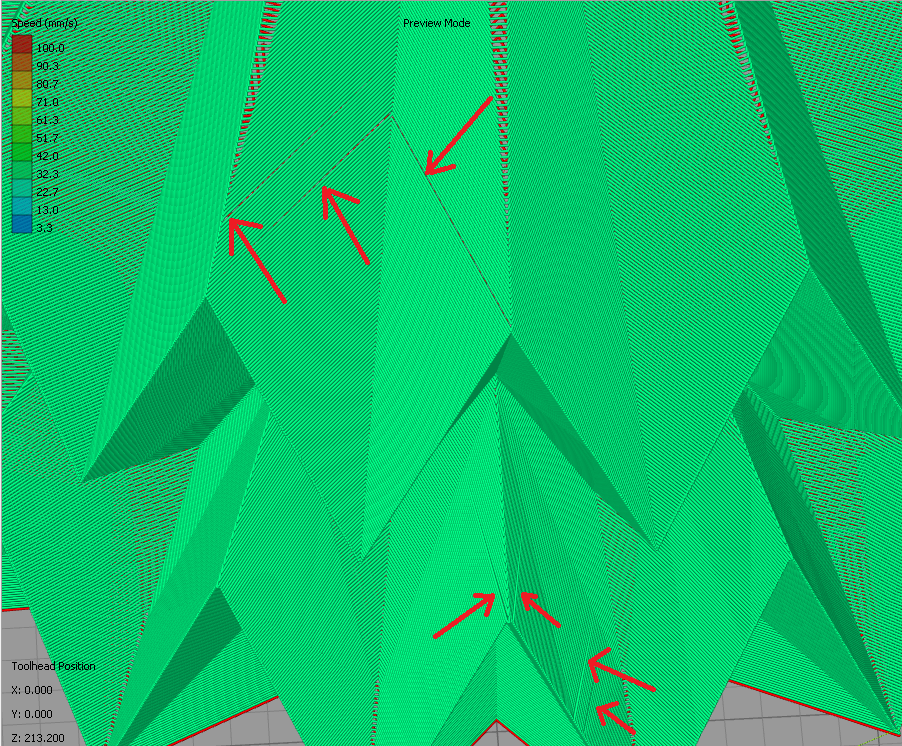
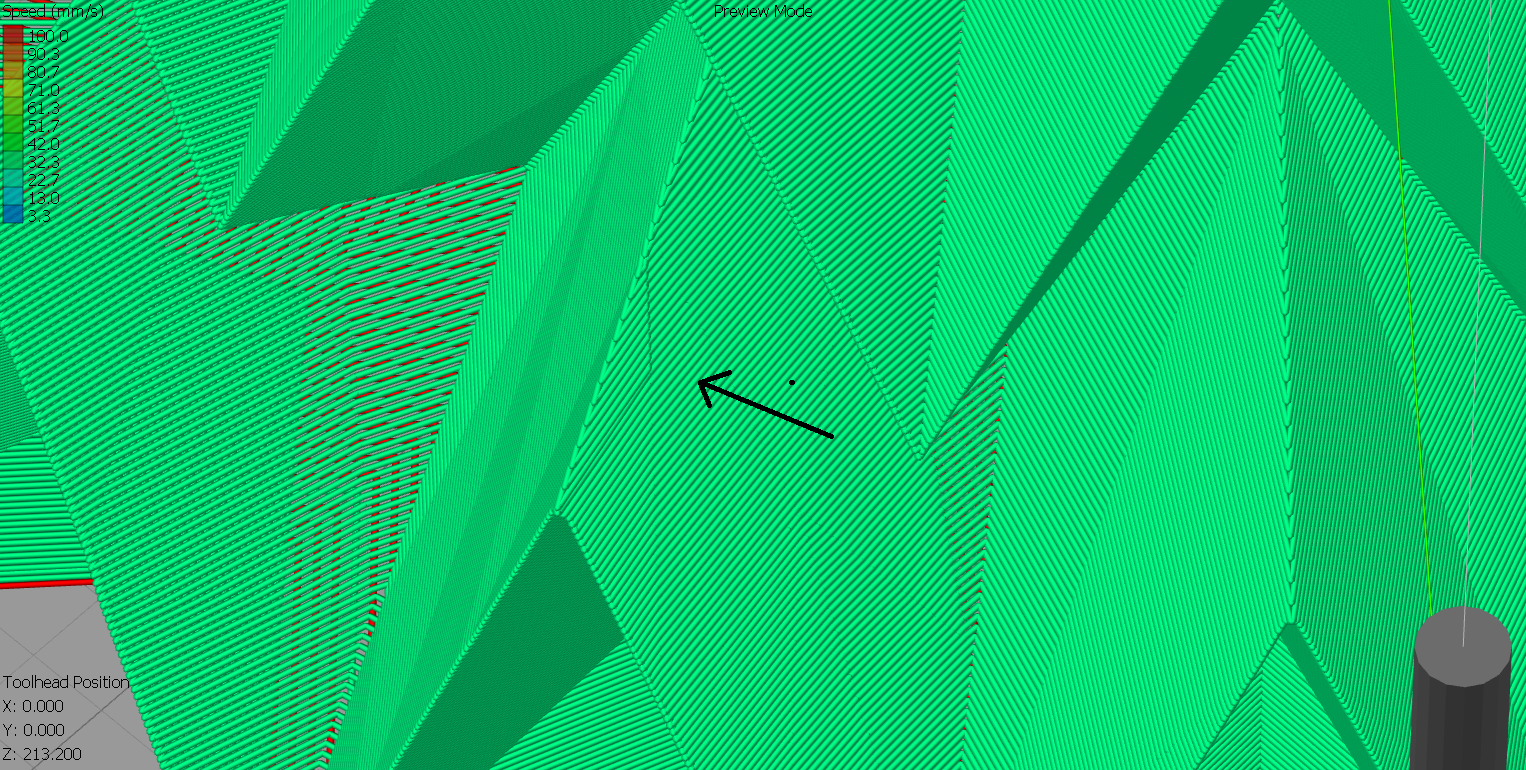
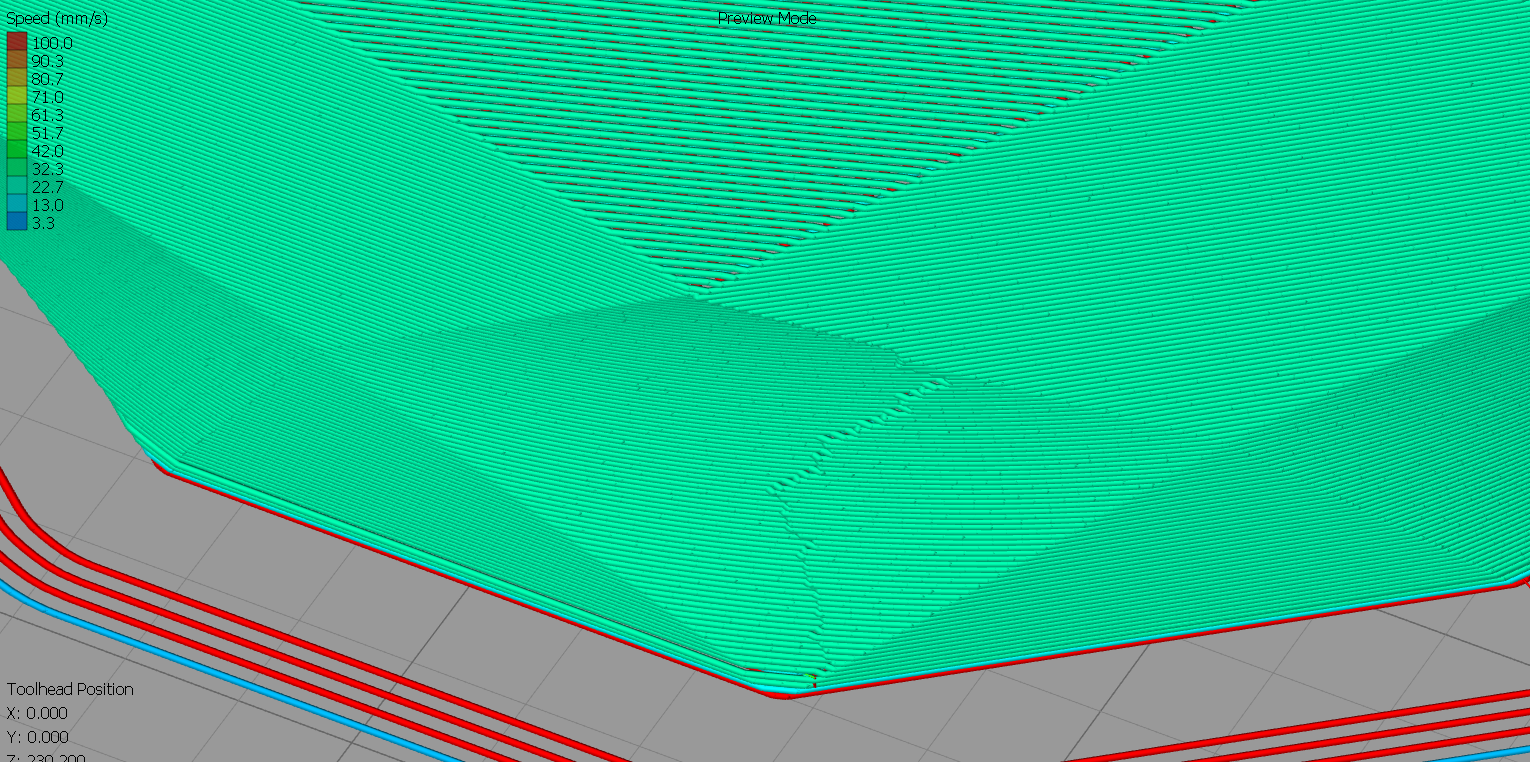
Glitches occur in few places where planes meet: edges and points.
The problem is not only the gcode display, it is also visible on the printed model.

Expected results
The slicer should generate model without distortions in vase mode.
Additional Information
The problem occurs only in vase mode in places near the layer change.
Files are attached in zip file.
files.zip
 JasiuHimself
All 47 comments
I will investigate why this particular model causes problems for vase mode. I have some ideas.
 smartavionics
on 9 Aug 2018
smartavionics
on 9 Aug 2018
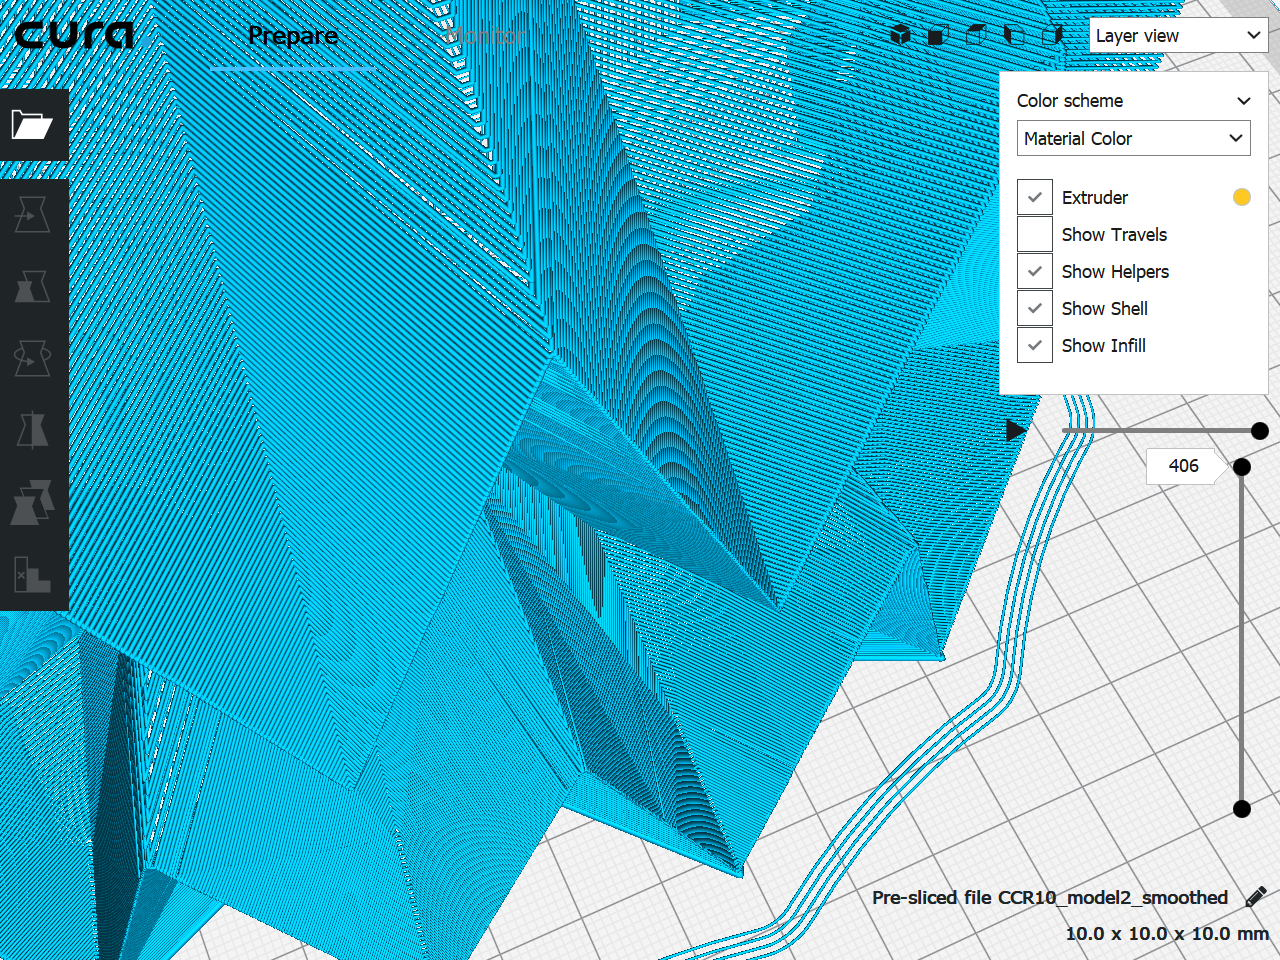
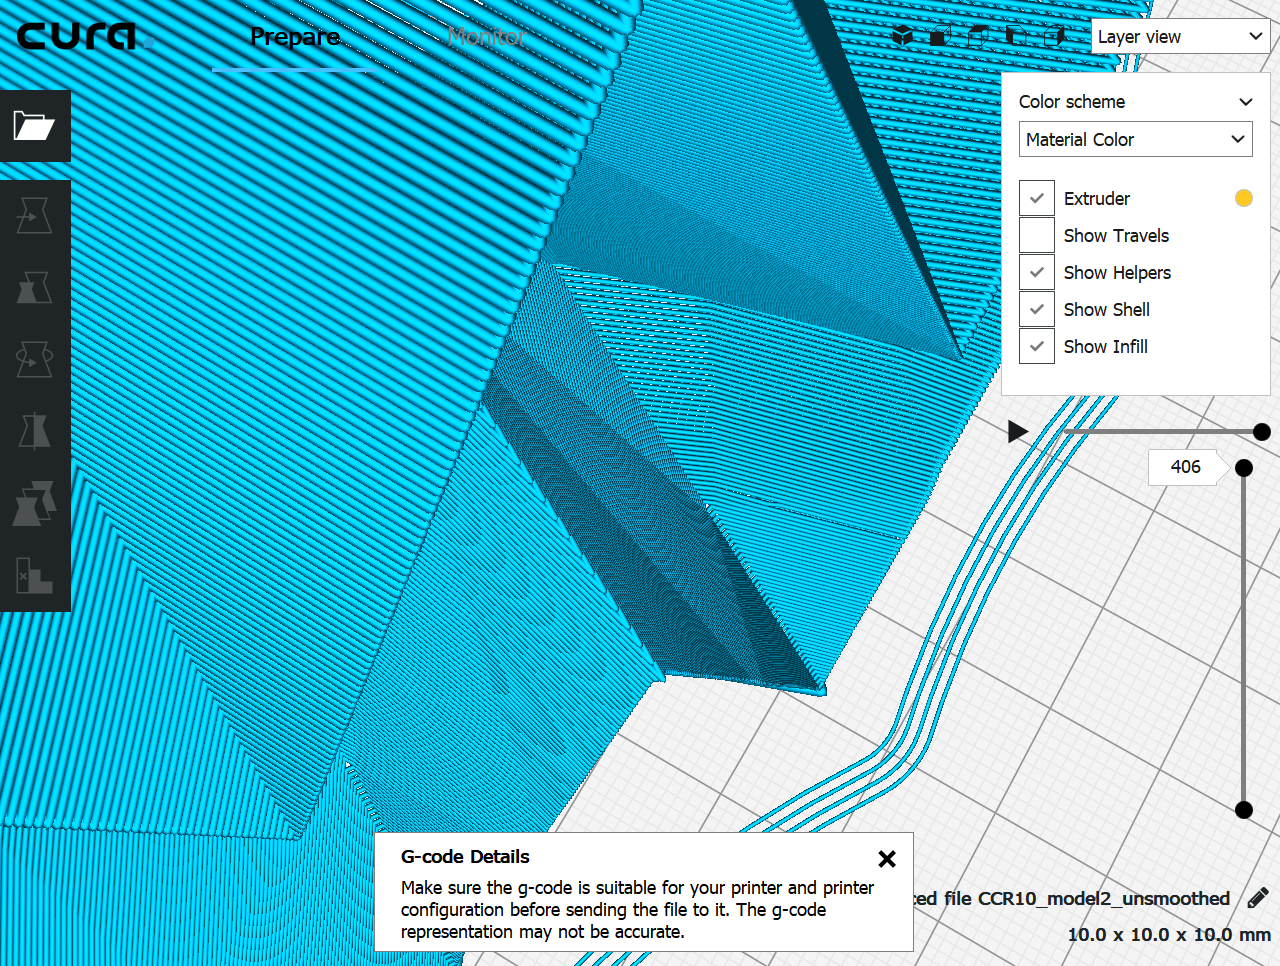
It's not the only model. The problem occurs in many models that are made of planes.
Here another example.
model2.stl.txt
And here I played with the steepness of the top surfaces in order to replicate the problem.
model3.stl.txt
JasiuHimself
on 9 Aug 2018
I attach some test gcodes, can you look at these gcodes and see if they have any problems? Thanks.
smartavionics
on 9 Aug 2018
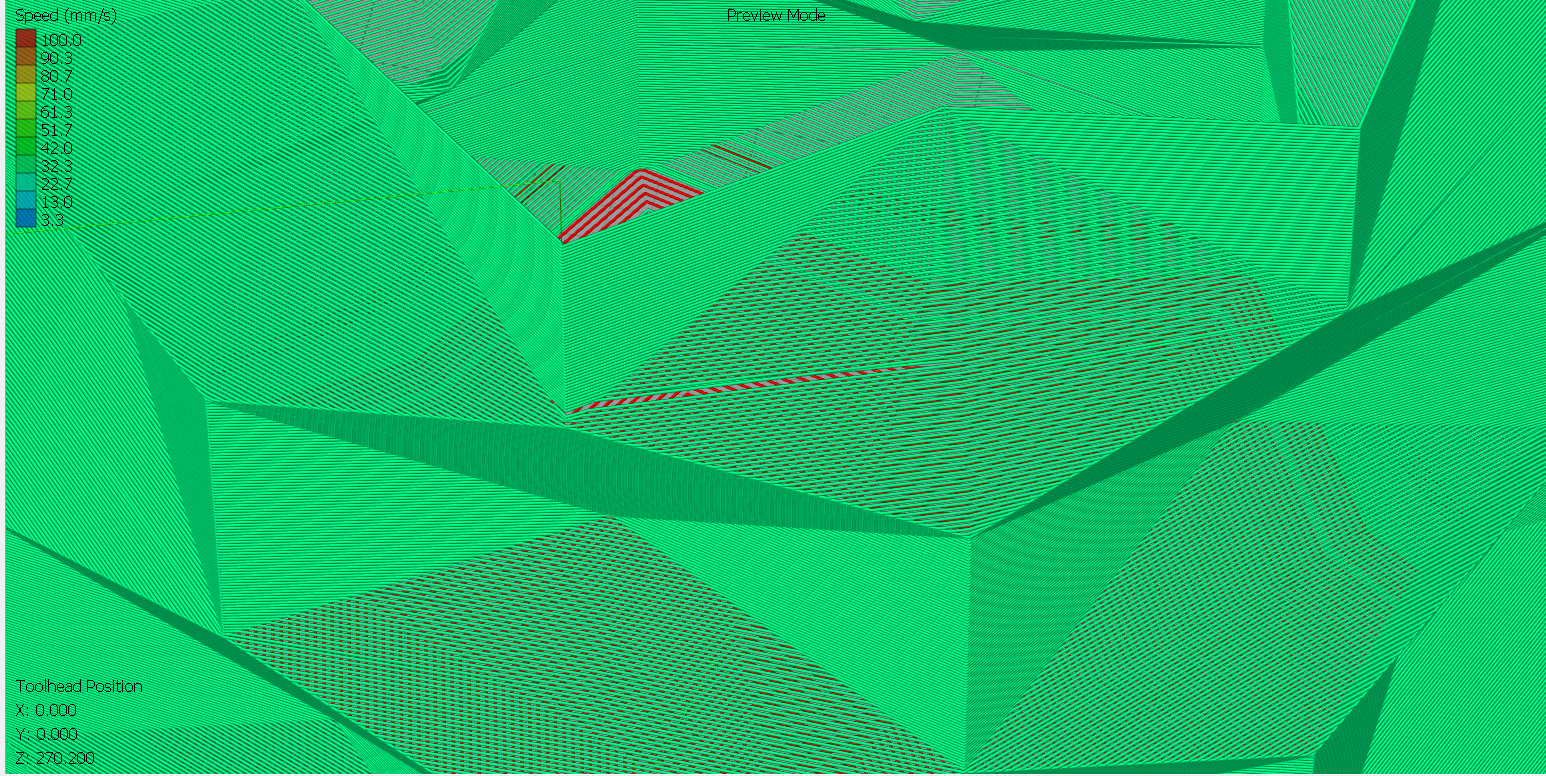
Hmm, it really has a problem with model3.
smartavionics
on 9 Aug 2018
Yes, every gcode you have attached has issues.

JasiuHimself
on 9 Aug 2018
OK, but you should know that the Cura gcode viewer is not good. I was hoping you had some other viewer to check them with. Doesn't matter, model3 is still not looking good for me so I will continue to work on this.
smartavionics
on 9 Aug 2018
Oh, of course, here you have screens from S3D.

JasiuHimself
on 9 Aug 2018
Hi. I have done some work, can you see any problems with the attached gcodes? Thanks.
smartavionics
on 10 Aug 2018
It looks like the model 3 is now flawless!
Unfortunately there are still some glitches in the first two gcodes you've sent.
There is an improvement though.
First gcode - only two hard glitches
Second gcode - three soft glitches
JasiuHimself
on 10 Aug 2018
Here's some more gcode to look at. I have not tried modifying the slicing tolerance or maximum resolution settings which could make a difference.
So far I have fixed one silly bug and rewritten some of the code that determines the start points for each layer. Overall, I think it is improved for models like these and still works OK on smooth models.
smartavionics
on 10 Aug 2018
Unfortunately now it's worse than before, even model 3 has issues.
model1

model2
model3
JasiuHimself
on 10 Aug 2018
Hi @JasiuHimself , I have made some good progress but still can't remove all the glitches - work continues...
smartavionics
on 11 Aug 2018
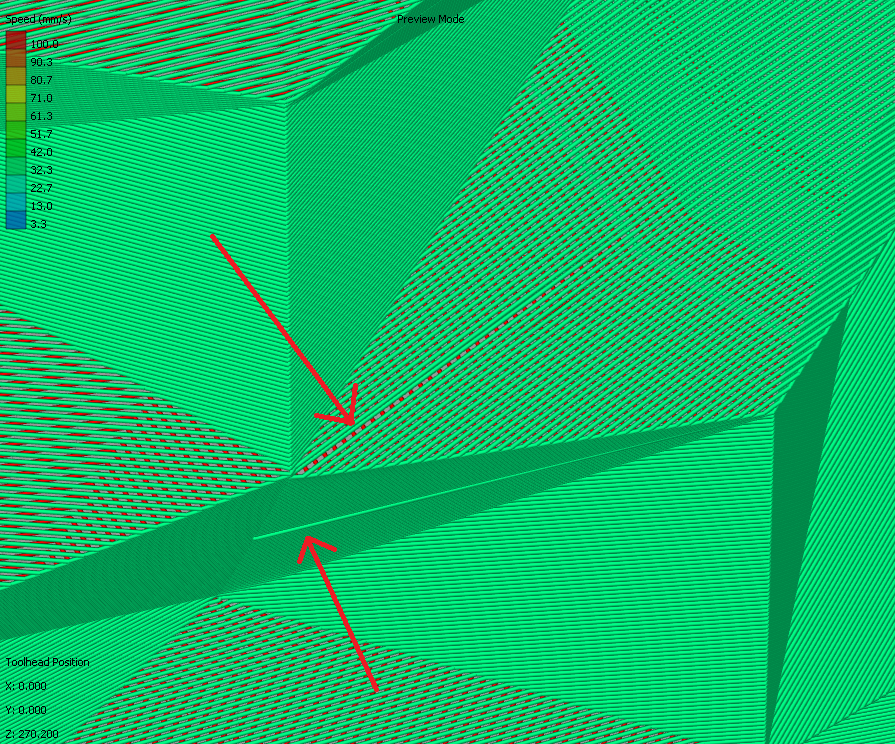
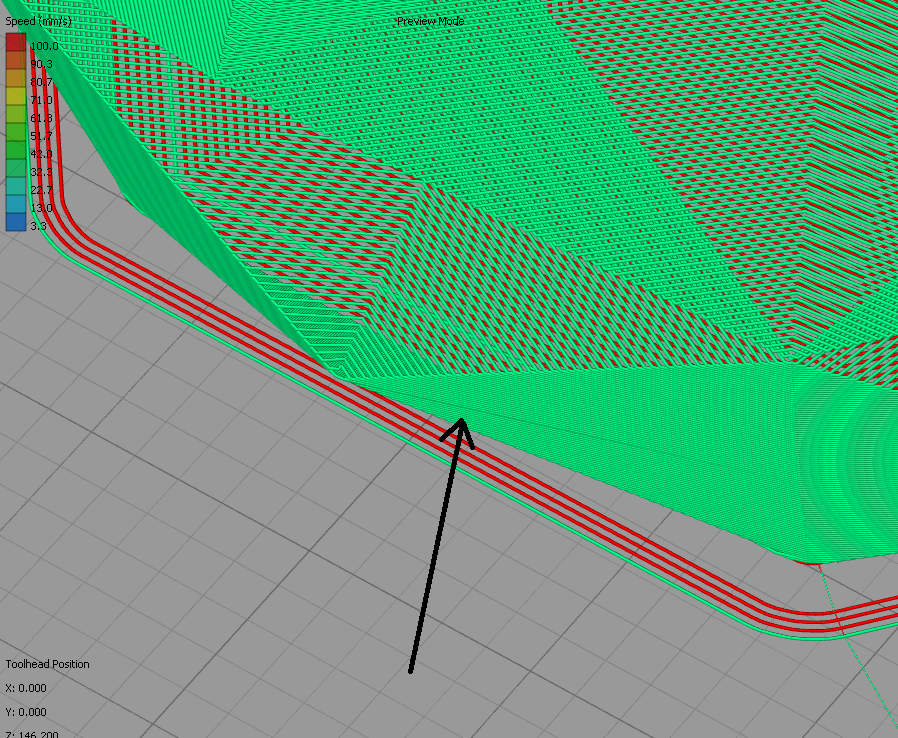
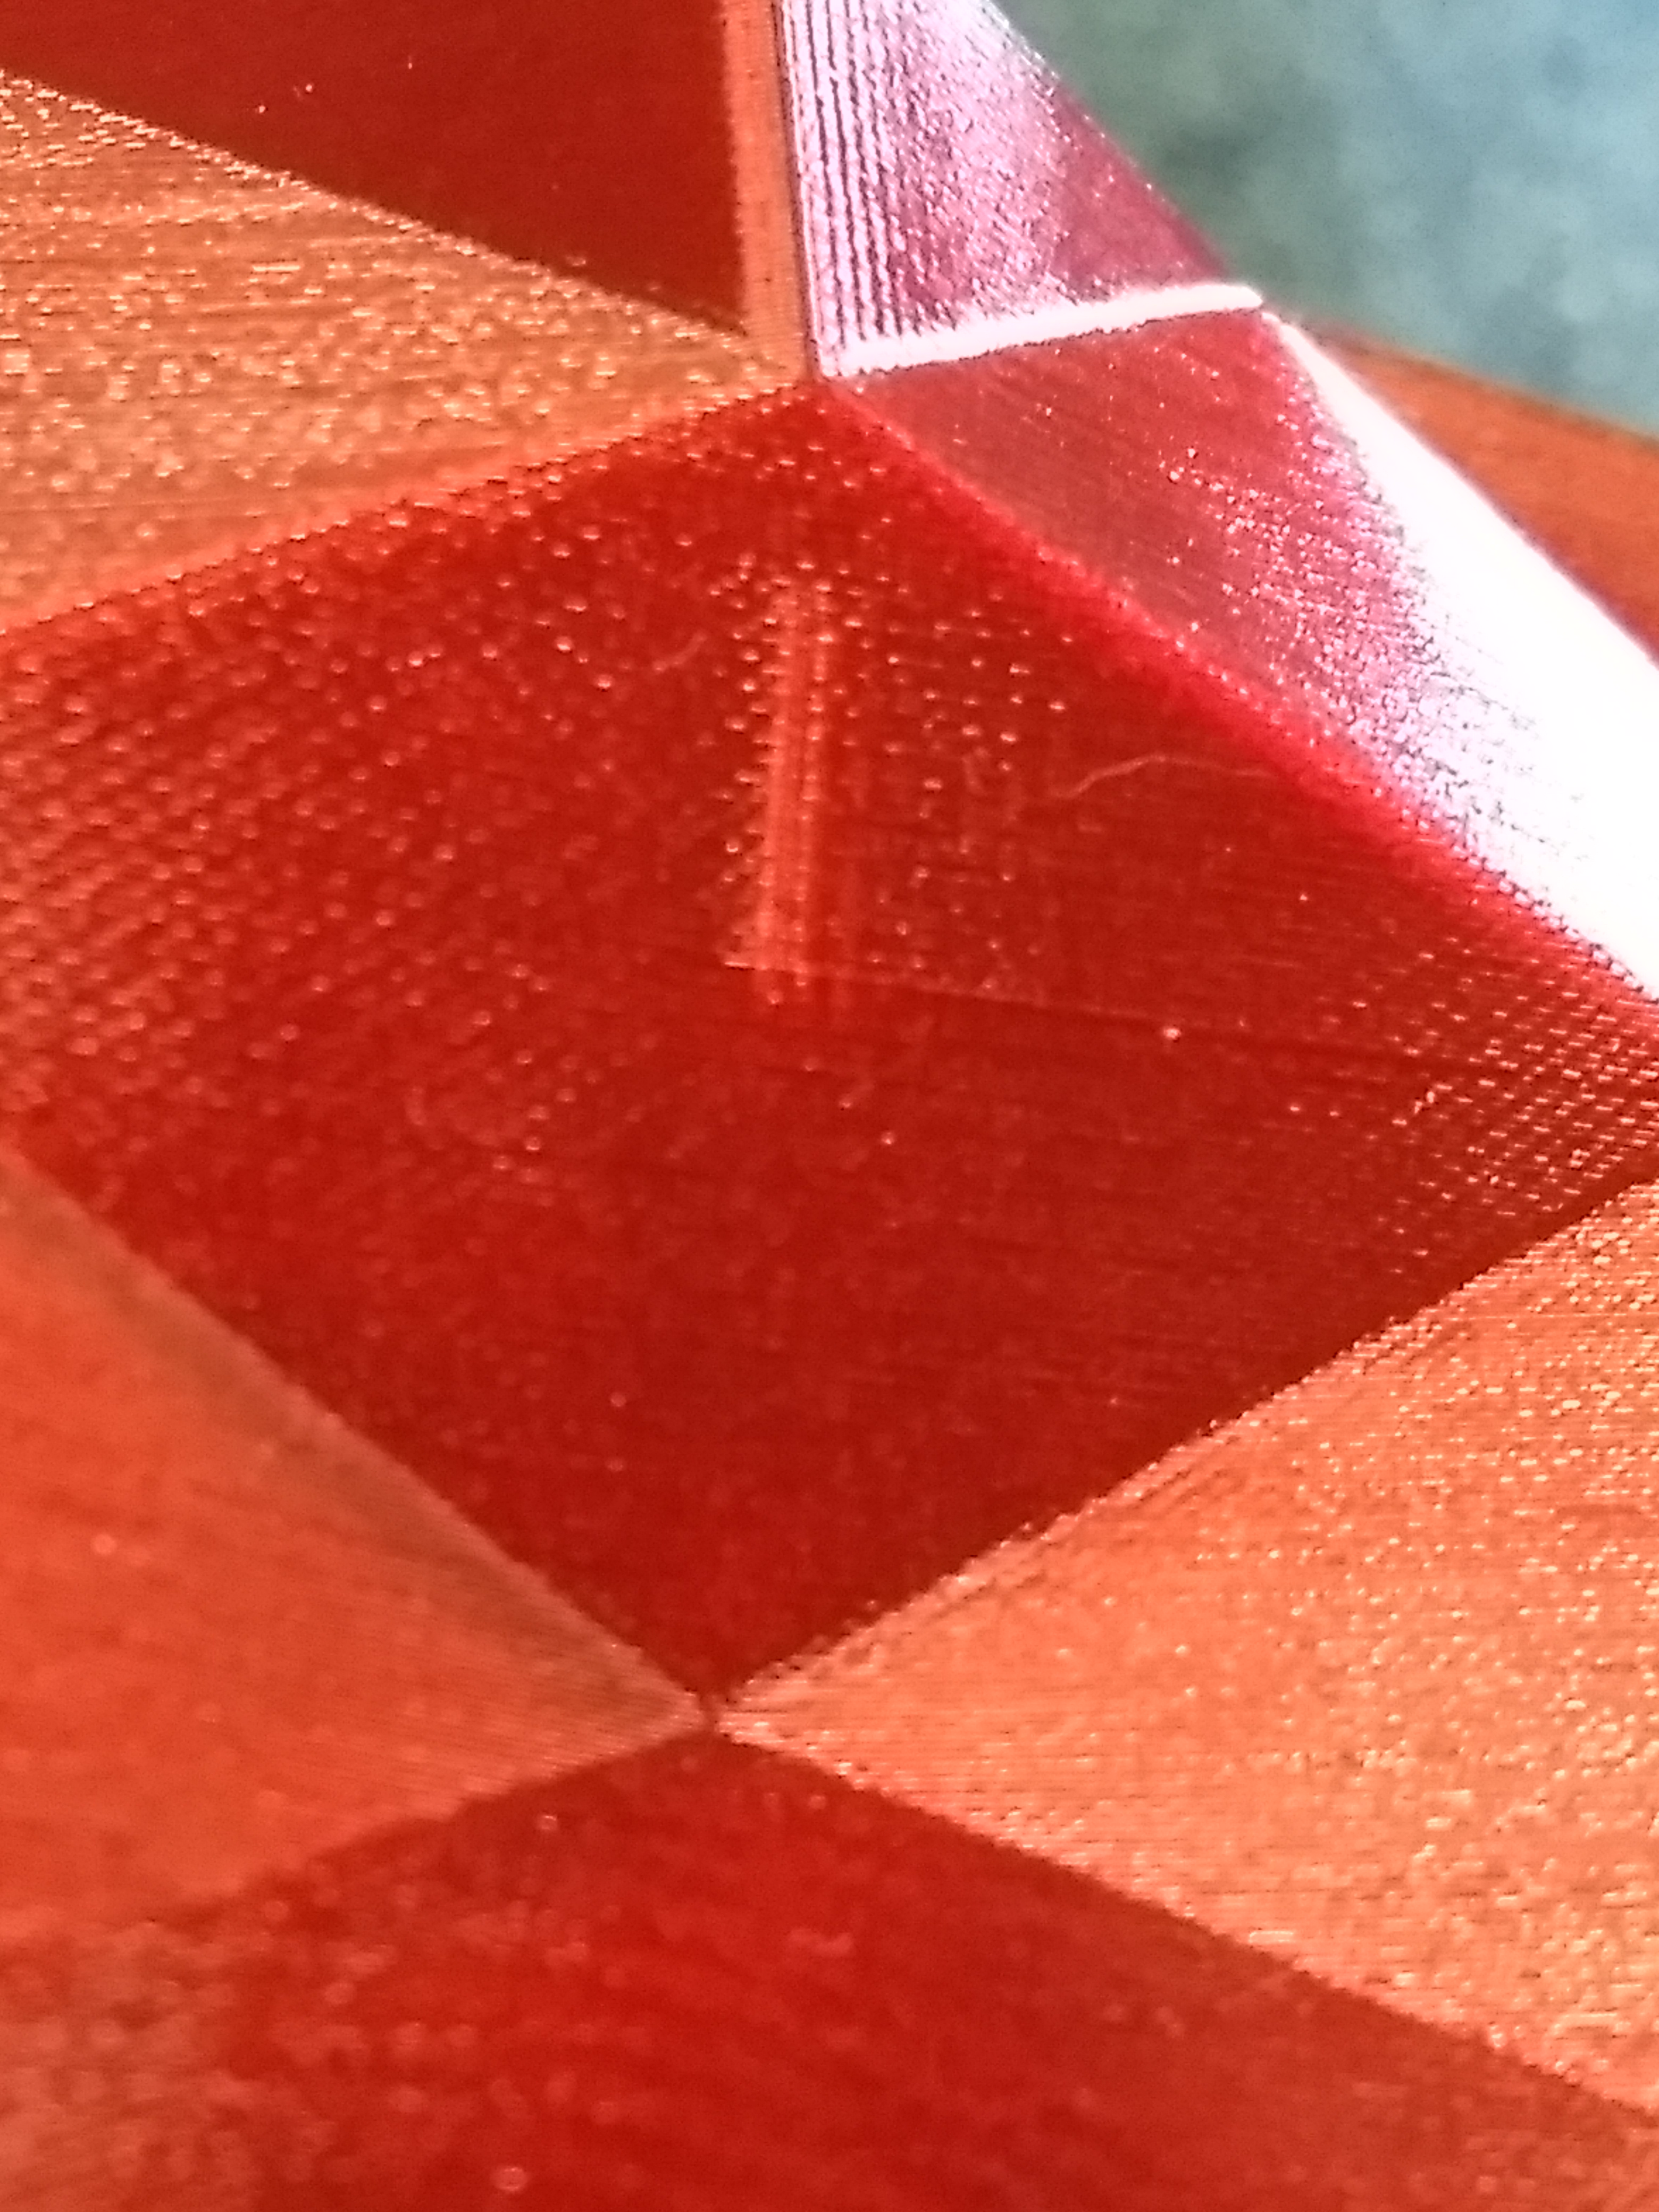
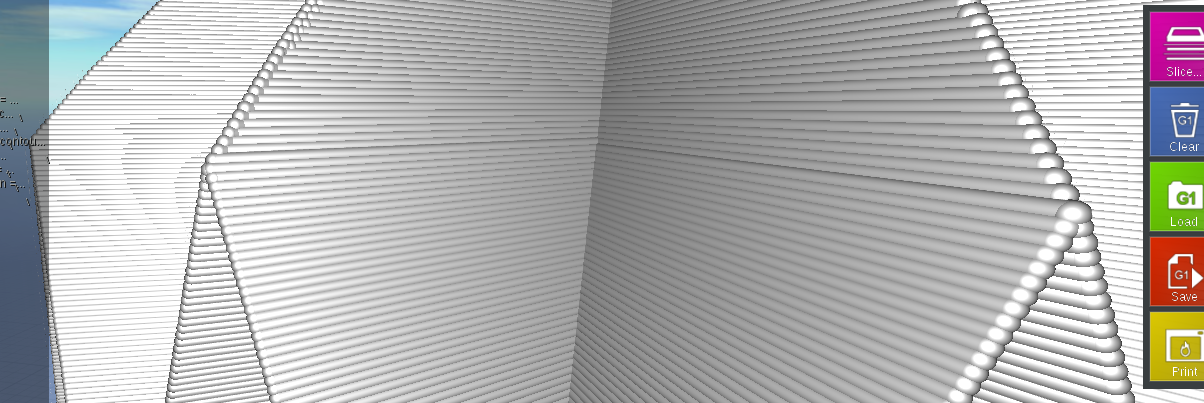
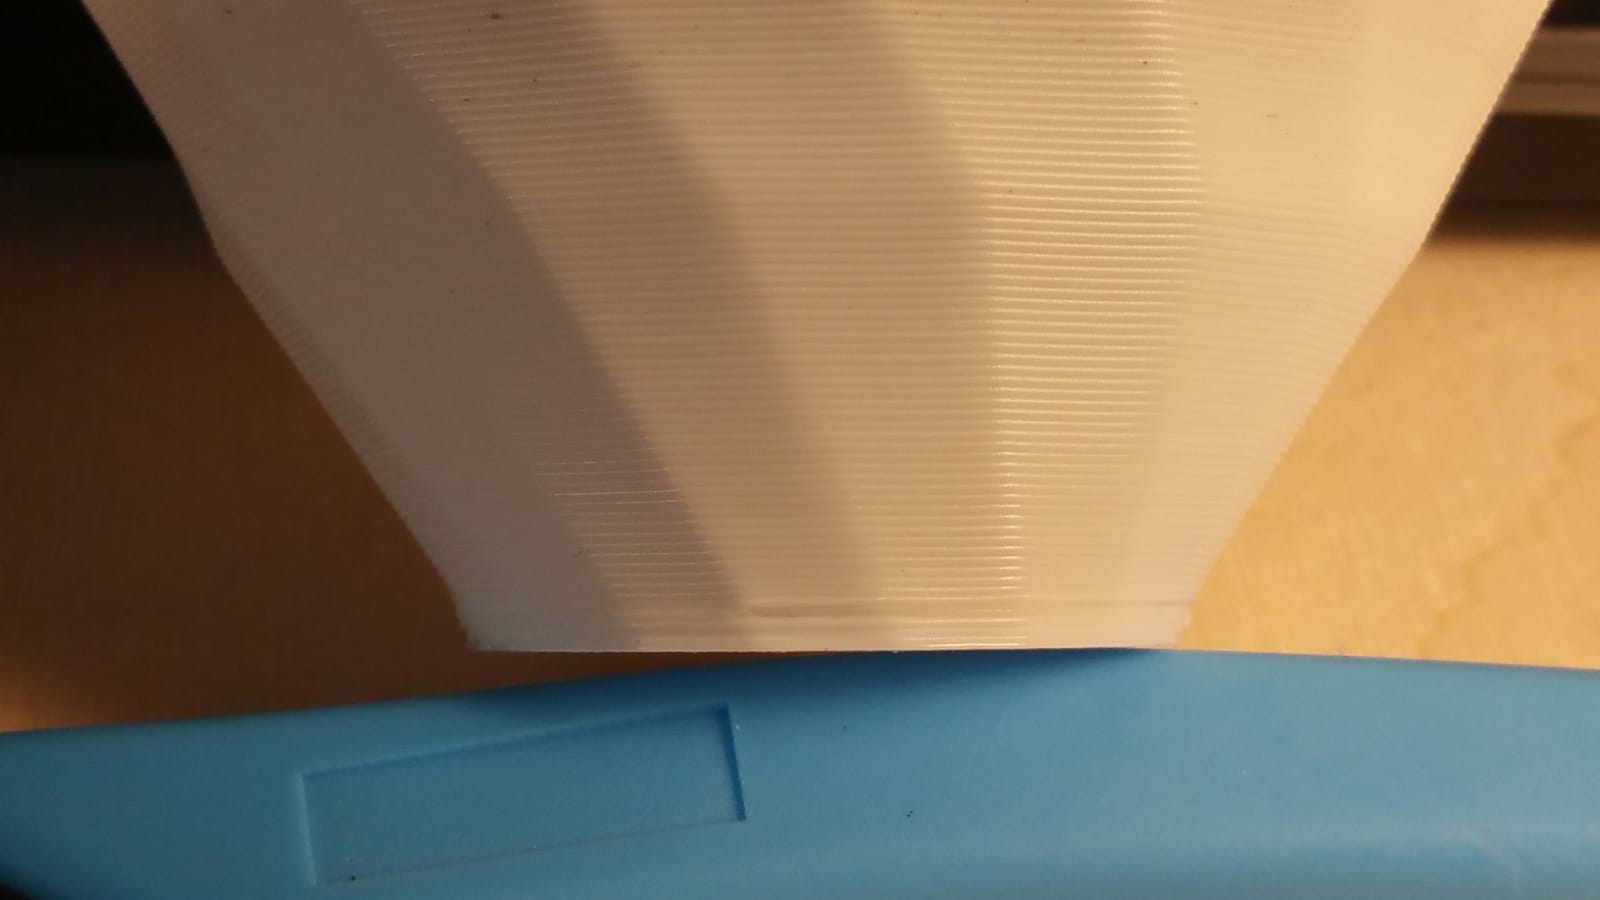
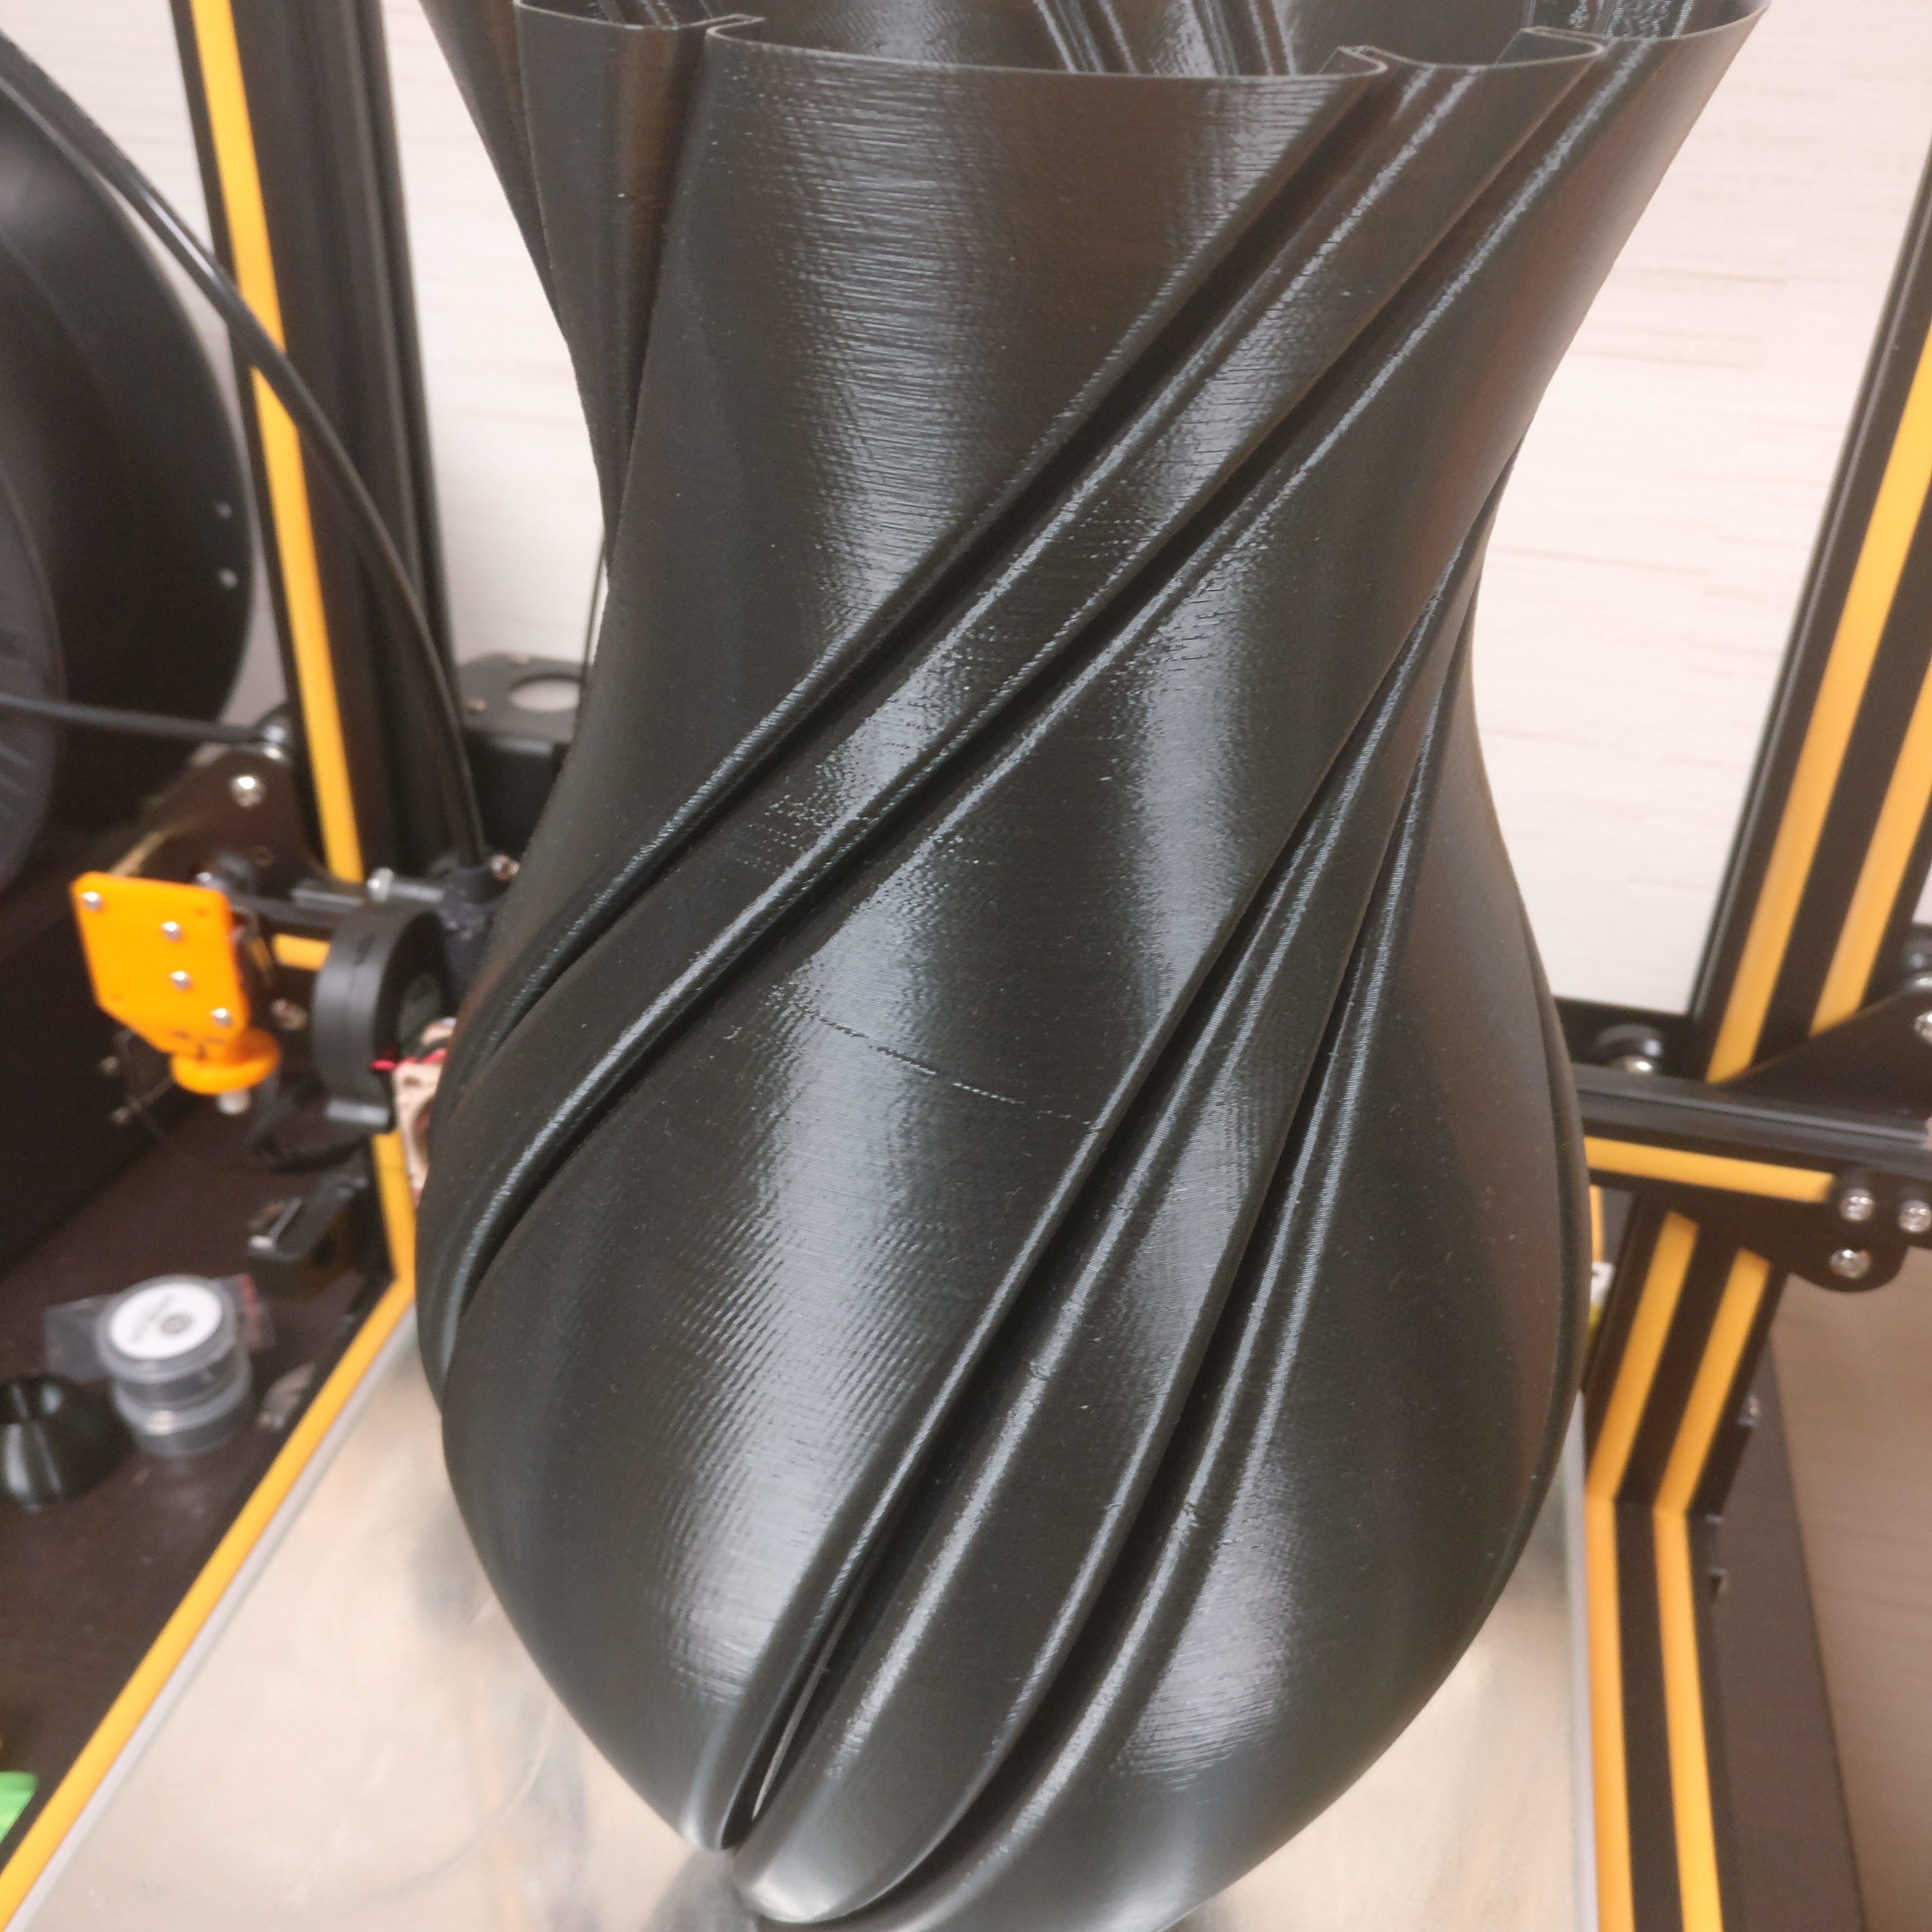
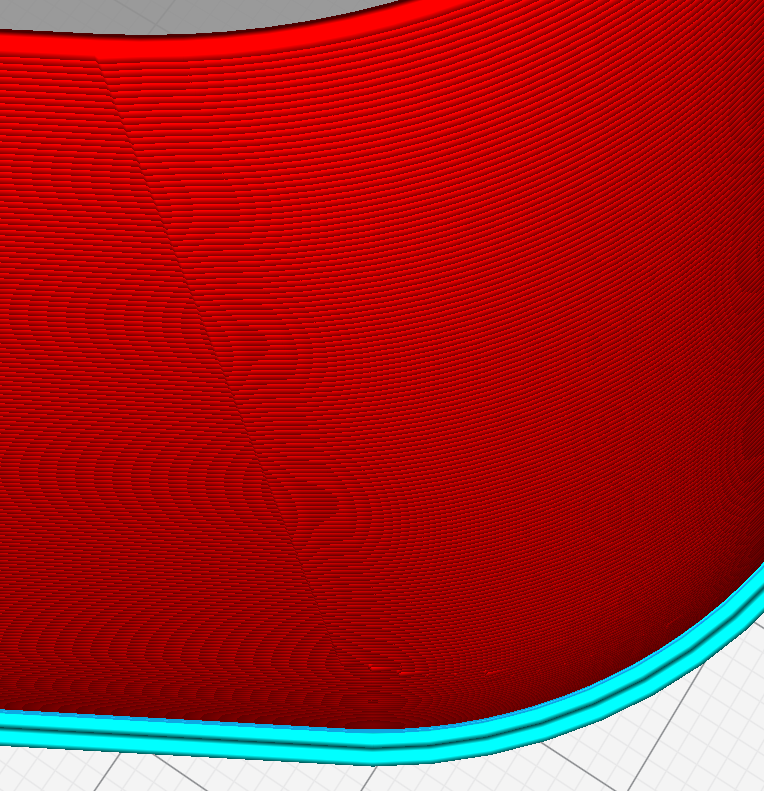
The remaining problem which I can't erradicate at the moment is with the occasional occurrence of the seam being positioned in the middle of a surface that has a very shallow gradient as you can see in this photo (ignore the ringing artifacts, that's just my wobbly printer).
This ugliness only occurs when you have the combination of 3 things:
1 - the surface is "almost flat" but does have some vertices in it.
2 - the surface slopes in the vertical direction (i.e. the next wall up is not immediately above the wall below).
3 - the right hand side of the surface alters with height such that the seam vertex is moved from the sharper edge on the right to one of the shallow edges nearer the middle of the surface.
I've tried various solutions but cannot solve this yet. I will continue to think about it but can't guarantee that I can fix it. I think the problem boils down to the fact that spiralization is by its very nature will introduce distortion because the model is sliced in flat layers and joining the outlines of those slices into a single continuous line will always introduce some distortion unless the outlines do not change with height (i.e. a tube with constant diameter).
Anyway, I attach my current results. If you can see any problems other that as described above please let me know.
smartavionics
on 12 Aug 2018
@smartavionics the problem you've mentioned introduces a subtle "ring" through whole model, this might not be visible in a print.
The second model has other issue
The third model is once again flawless! Bravo!
JasiuHimself
on 12 Aug 2018
That ring around the first model is not visible on my print. I printed using translucent PETG and the surface is very shiny so I can see every flaw. I don't think that one is a problem.
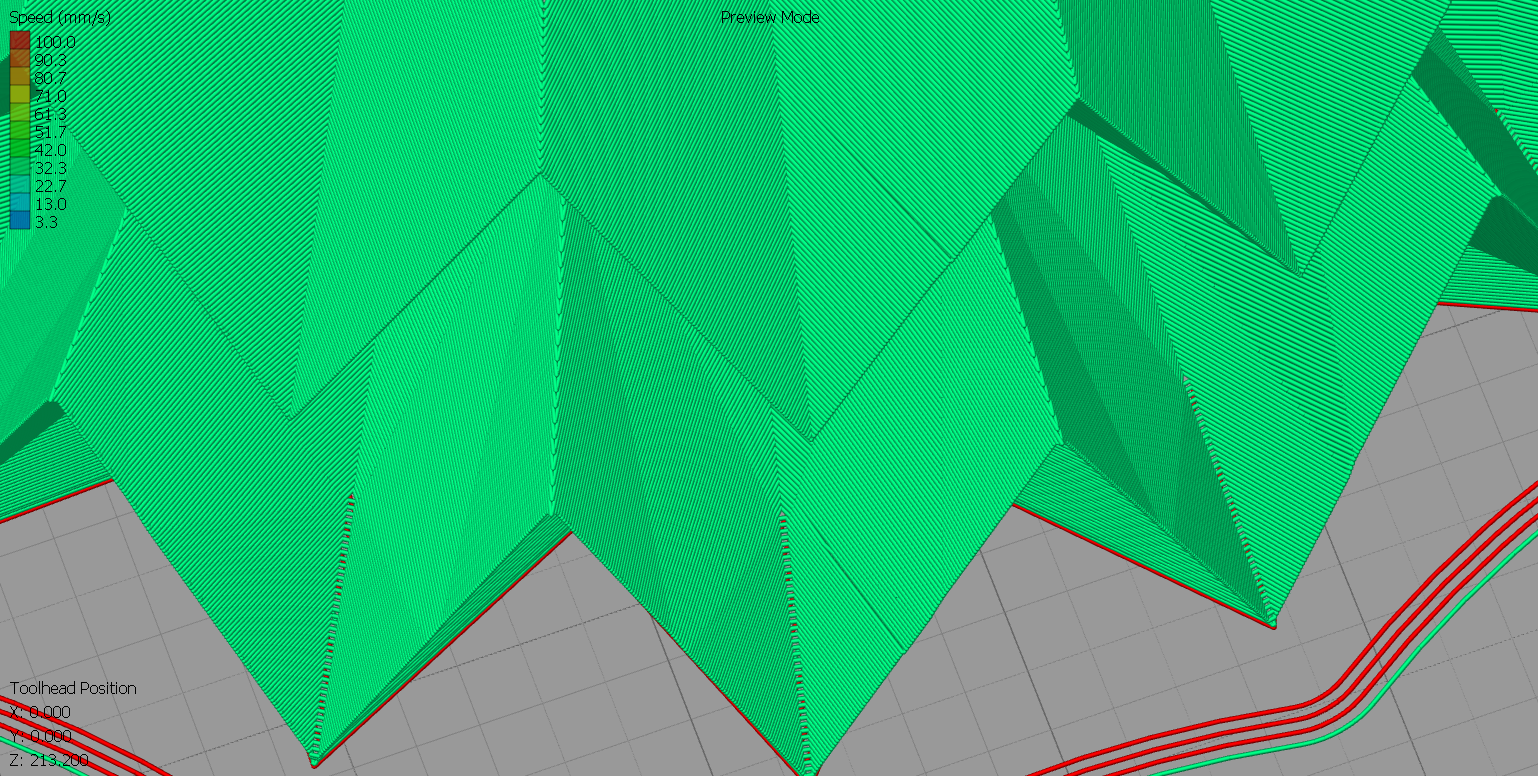
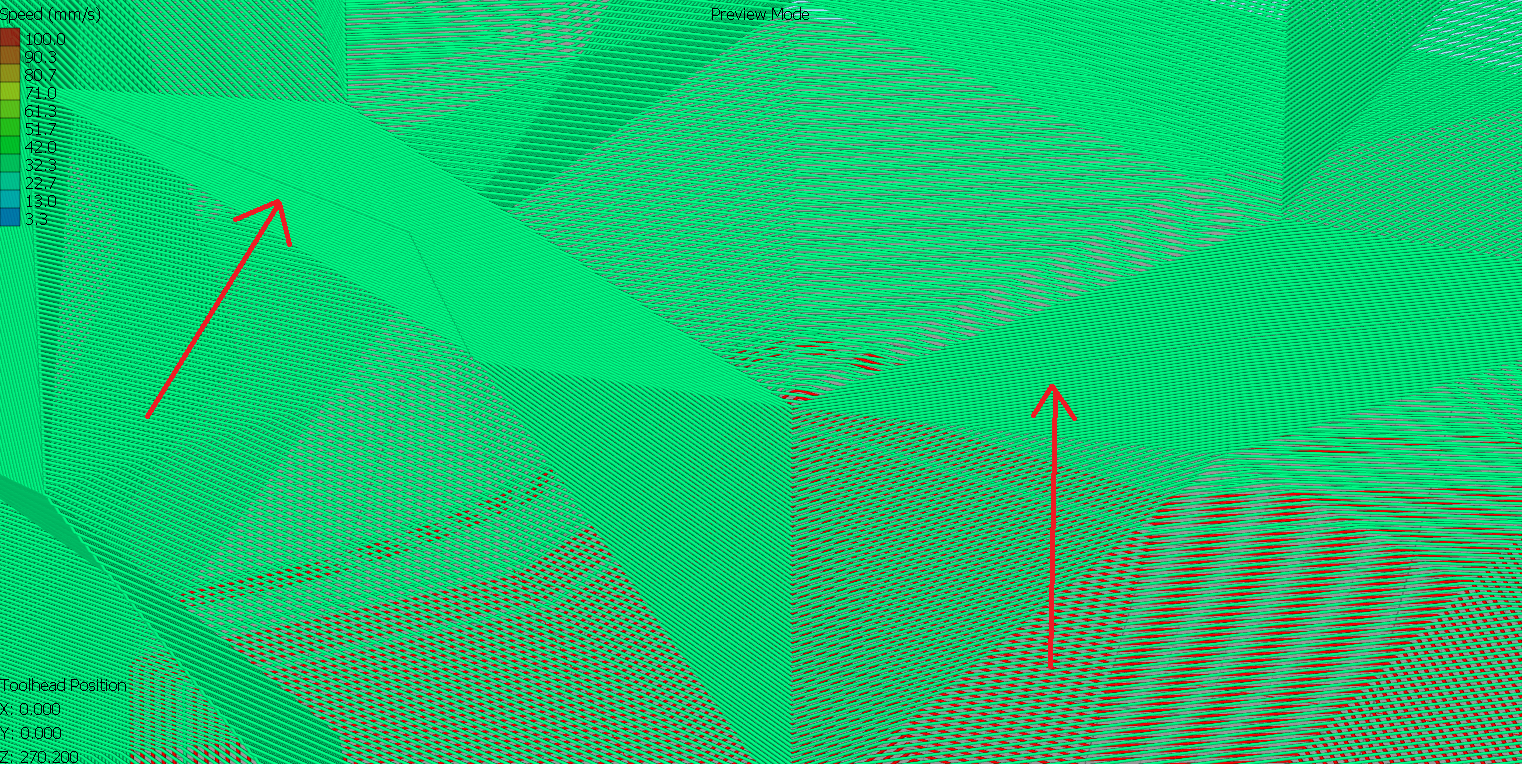
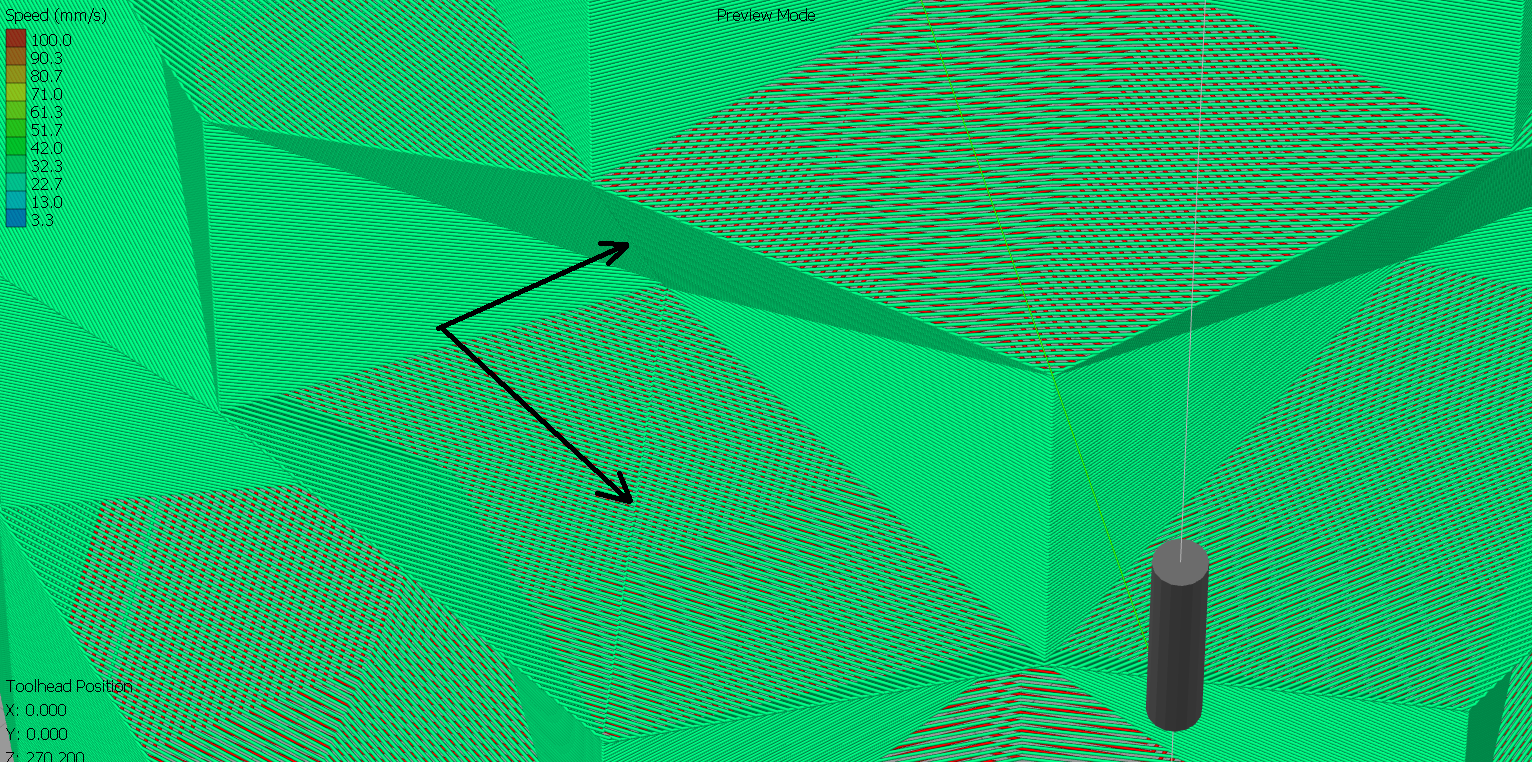
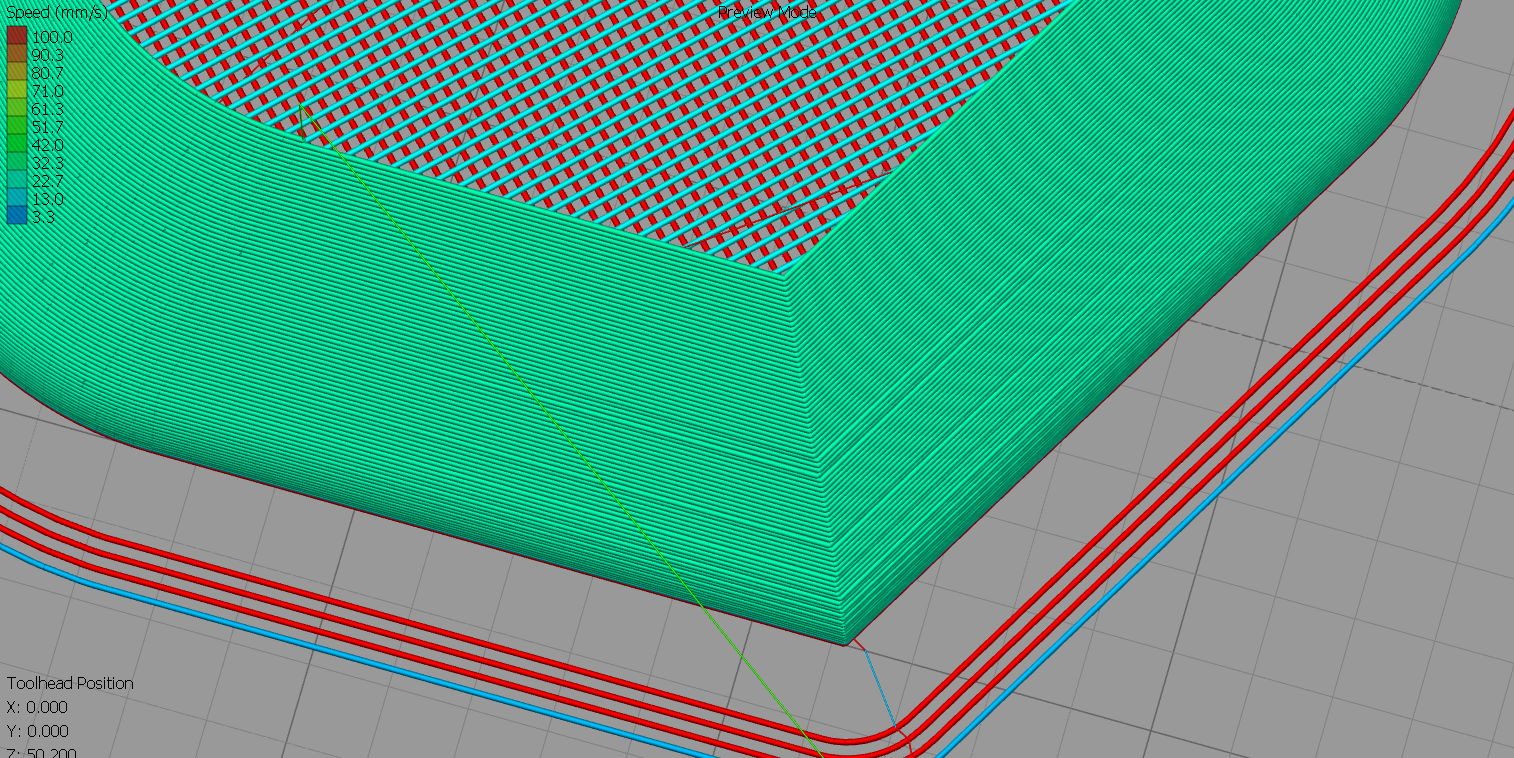
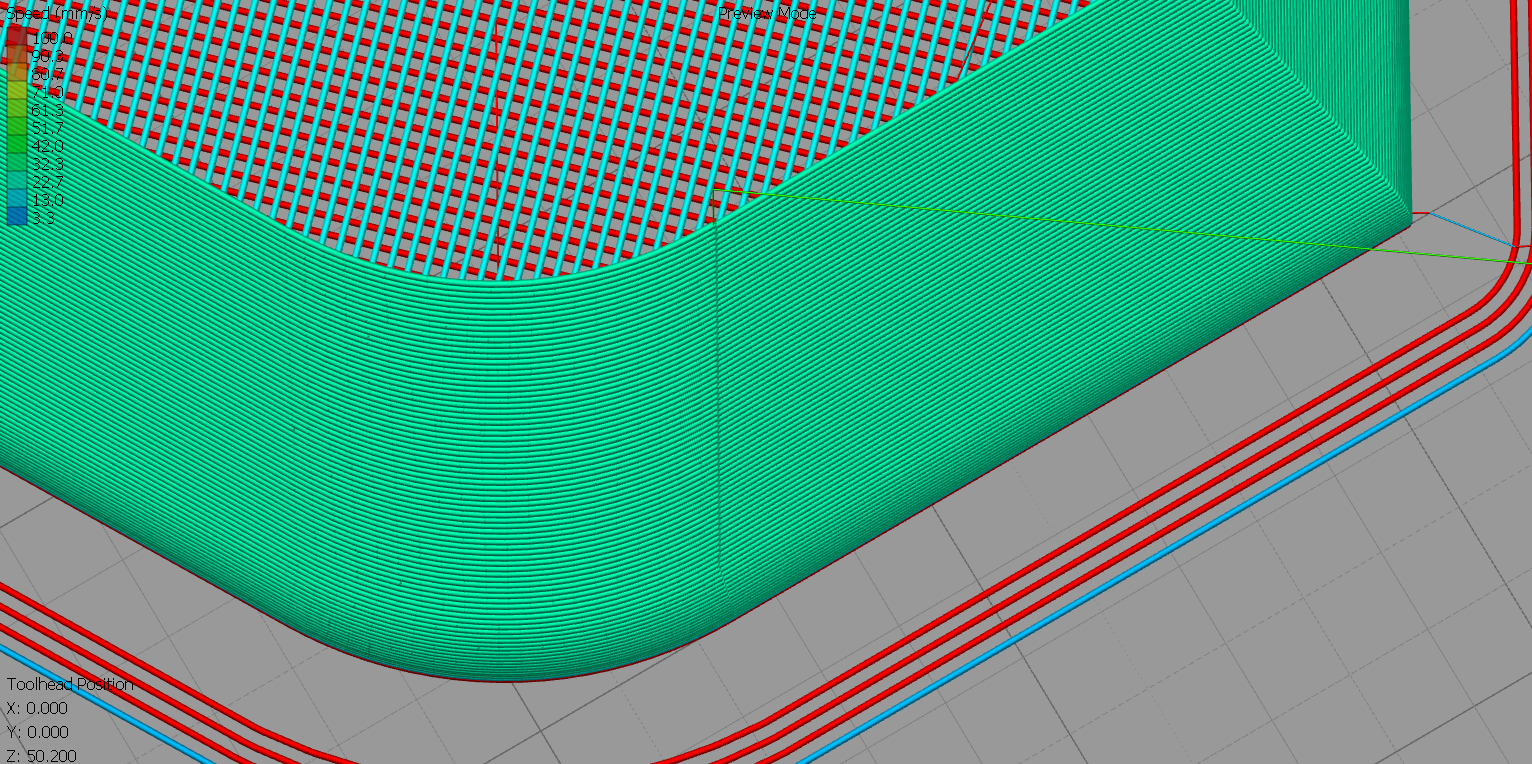
The V shaped line(s) you can see on model 2 is caused by the seam moving into the bottom of the V for a single layer only
Because the spiralized line must always travel forwards (anti-clockwise when viewed from above) and can't ever jump backwards, the start/end vertex for each layer tends to get moved backwards (clockwise) so that it is always either level with or behind the start/end vertex of the previous layer. When a layer's start/end vertex has to jump back one position depends on how the model changes from layer to layer. In the example above, the start/end vertex of the lower layers is on the right hand side of the image until the top of the /\ is reached when it has to jump back one position which then places it in the concave region and then the layer after it jumps backwards again to the left hand which it then stays with. So in this situation you are getting a single layer where the start/end vertex is in a different location to the layers above/below and this causes the visual problem. I currently don't know how to solve that.
smartavionics
on 12 Aug 2018
Sorry, I forgot to say in that last post that each layer is started from the start/end position of the lower layer and the first line is always to the 2nd vertex in the current layer which implies that the start/end vertex of the current layer must always be either level with or before the start/end vertex of the layer below.
smartavionics
on 12 Aug 2018
Good news (I think). I made some more changes and got lucky. I have printed 1/2 size versions of model and model3 and they have no visible flaws. I don't think model2 has either but it's still printing. The PETG filament is very shiny and any problems are easy to spot but they look OK so far.
Have a look at the gcode for your machine and see if there are still problems.
I don't know if the changes will be good for other models. Fingers crossed.
smartavionics
on 12 Aug 2018
FYI the model2 print was a failure but only because I forgot to use any fan and it printed badly on some of the overhangs and at the top. I could not see any slicer artifacts.
smartavionics
on 13 Aug 2018
I'm very happy and impressed by your work. It's awesome to see how the project is moving forward and is "alive".
The model 1 and 3 have visible in gcode z-hop, but that probably won't be visible in the print.
Model 1
Model 3
Model 2 has some issue, that may be caused by the fact that it the stl was exported in a way that made multiple folds in single surface.
I'm really looking forward to updates.
JasiuHimself
on 13 Aug 2018
Those z-seams on model are slightly visible but at least they are going down the full length of the surface rather than just half way like it was doing earlier. As I said before, the spiralization is always going to be an approximation and at the z-seam it has to jump from one outline to the next. Turning on the smoothing can eradicate the z-seam on a smooth model but for these models with slab sides, the smoothing causes more problems than it solves.
That little glitch in model2 I cannot see that on my printed part but I did print it 50% scale so perhaps it didn't occur. Still, even at 100% scale it's going to be hard to spot that.
Unfortunately, PRs seem to take some time before they get incorporated into Cura so you will have to be patient.
I can produce Linux Cura binaries so if you have access to a Linux box (real or a VM) then you can have my latest offering now.
smartavionics
on 13 Aug 2018
I use Ubuntu
JasiuHimself
on 13 Aug 2018
OK, I am just uploading a new archive to https://www.dropbox.com/sh/s43vqzmi4d2bqe2/AAADdYdSu9iwcKa0Knqgurm4a?dl=0
Should be finished in 20 mins or so. Just unpack and in the bin directory there is cura.sh to run. Sorry the archive is so big, I haven't been able to produce an app image so the archive is just a copy of my installation.
It identifies itself as master and should not affect any of your existing profiles for other versions.
This is what I use for all my slicing.
smartavionics
on 13 Aug 2018
The only problem left is visible in gcode z hop seam. I will print some model and let you know of the results.
You are awesome! Thanks for your help and source files;)
JasiuHimself
on 13 Aug 2018
I have tried slicing a bit different type of vase with your modified code and there is another problem occurring. The wall is distorted and there is a hole near the bottom.
JasiuHimself
on 13 Aug 2018
That model has curves you will need to use the smooth spiral option to avoid seeing the z-seam. The hole at the bottom is something else. Will think about that.
smartavionics
on 13 Aug 2018
The gap is shown in s3d but not in craftware, I'm not convinced it's really there. Only one way to find out, print it!


smartavionics
on 13 Aug 2018
Hi @JasiuHimself , I printed a 60% scale version of model 4 in shiny black PETG using smoothed spiralization and it looks lovely. I cannot discern the path of the z-seam and I cannot see any (obvious) artifacts due to the smoothing.
smartavionics
on 13 Aug 2018
I'm just printing another model. S3D shows the GCODE to be a bit messy.

We'll see how it turns out :)
JasiuHimself
on 14 Aug 2018
It turns out messy as well.
JasiuHimself
on 14 Aug 2018
At the bottom, the first spiral layer starts with the nozzle at zero height above the last layer so it's always going to squish out some plastic at the start of the spiral. I know it's ugly but at least it gives a watertight bond between the spiral and the flat layer below. You may think that the first spiral layer could be printed with variable flow that goes from 0% to 100% over the length of the wall so it would not squish out excess plastic at the start but that is unlikely to work well as most extruders cannot extrude very small amounts reliably (especially when relative extrusion mode is being used) so it would be possible that holes could appear and then the thing wouldn't be watertight.
smartavionics
on 14 Aug 2018
Hi!
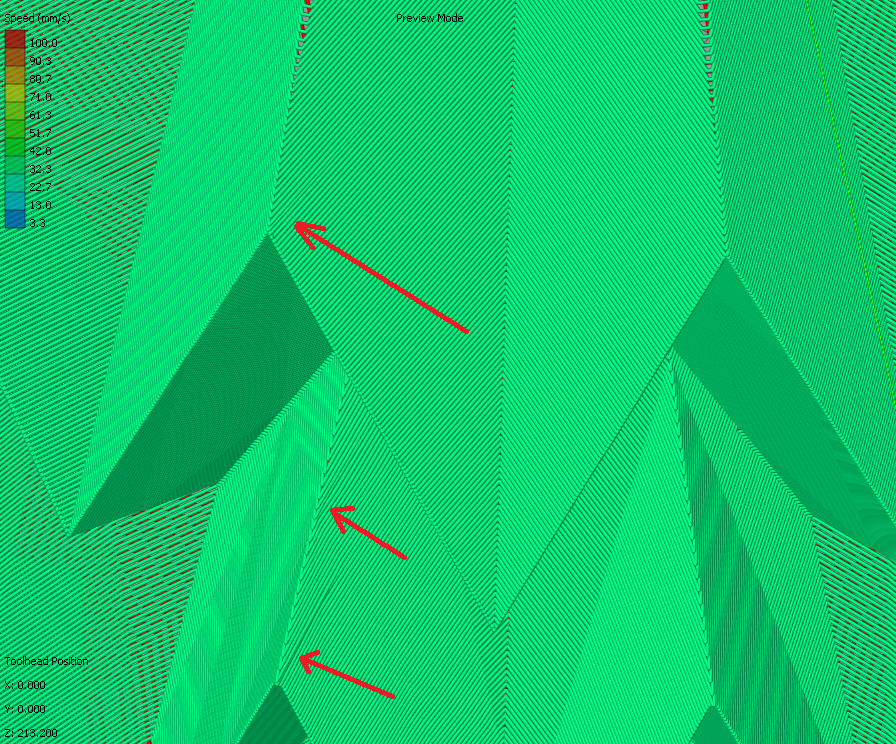
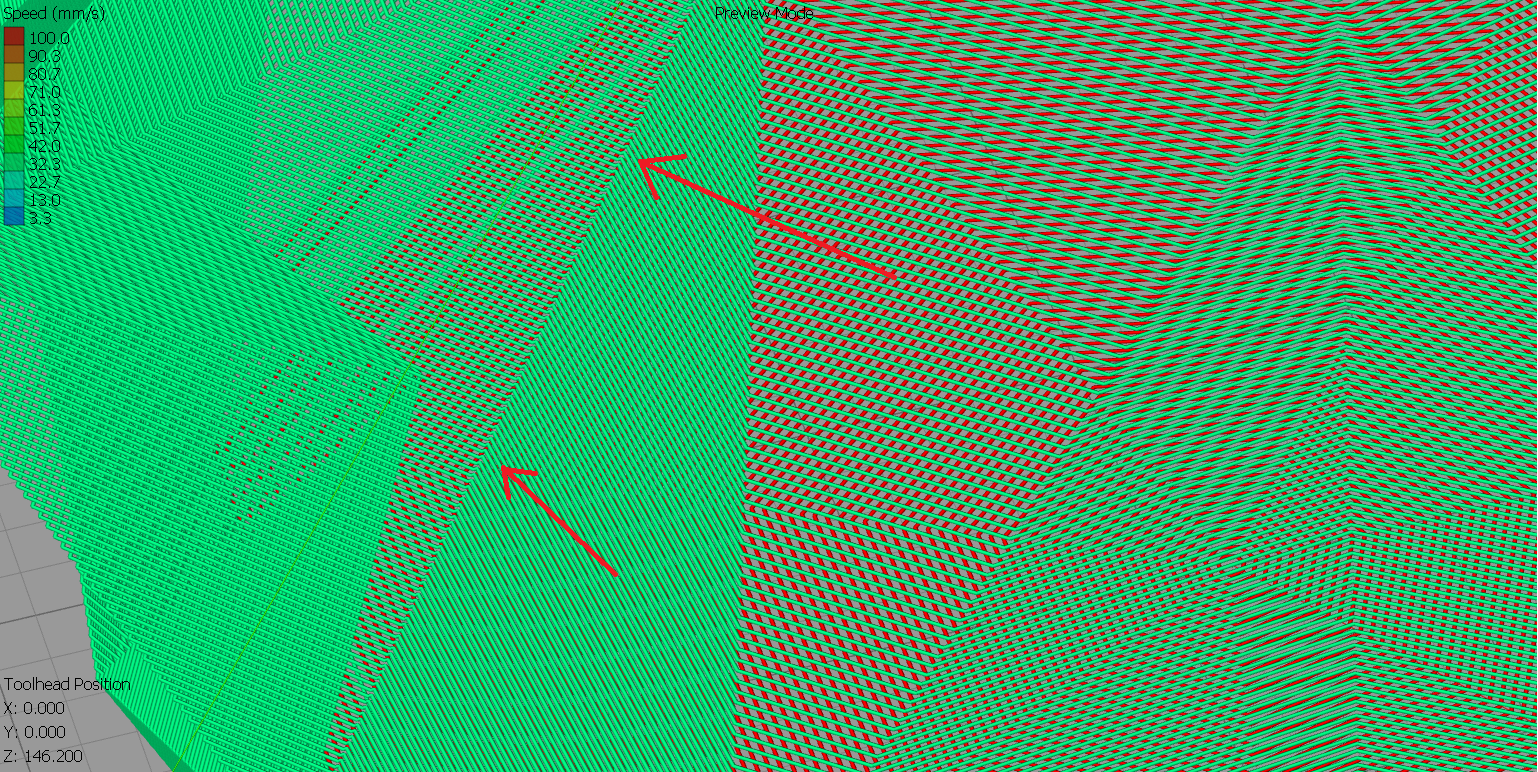
I want to add a few things that seems to be related to this issue. I get some lines that are not placed perfectly aligned with the model.
If I slice without Smooth spirals, most of them disappear. If I change to surface mode, all of them disappears! (I have not test-printed any of this yet).
The model is checked for errors in Meshmixer.
(I have also had issues with very visual Z-zeams, both in slice preview and on actual prints).
I'm using a 0.8mm nozzle which seems to be increasing the issue.
Let me know if I can provide more info or run some tests.
Using a CR10 on windows and Cura 3.4.1 but I also have access to Wanhao Di3 with 0.4 nozzle.


 printingotb
on 14 Aug 2018
printingotb
on 14 Aug 2018
Example of Z-seam on spiralize print.
printingotb
on 14 Aug 2018
Hi @printingotb , welcome to the party!
Firstly, it's worth remembering that the Cura layer view doesn't really make a good job of spiralized prints. So you can often get what looks like a bad z-seam but actually when you print it there's not much visible.
Having said that, some prints look better with smoothing and some without. Generally, slab sided models like we have been discussing in this issue are better without smoothing. Curvy models are generally better to have smoothing enabled.
I see you have just posted a picture showing a visible seam. Please could you zip up the cura project file for that and attach to this issue so I can check it out.
Cheers,
Mark
smartavionics
on 14 Aug 2018
And I would like to have a copy of the gcode that print was from, please.
smartavionics
on 14 Aug 2018
Thank you! @smartavionics
What I find really interesting is if the surface setting makes a better print. Will need to test this tomorrow, it's night here now. But let me know if I can provide anything else tomorrow.
Unfortunately, I don't have the exact settings used. I recreated the project as best I could and it shows in layer view. And in my experience, these kind of issues show up the same when printed (I have had similar issues with compensate wall overlaps, but that's another story).
I had a few g-codes saved on the SD-card. The one named "Spiralvase35" should be the one on the picture but I am not entirely sure. The one named HDtest was printed after I ran the stl in meshmixer, increasing polygon count and smoothing the surface. The results was that the seam moved to other areas.
Spiralvase.curaproject.zip
Spiralvase35.zip
SpiralVaseHDtest.zip
I attached the first project as well in case you want to take a look.
spiralD20.curaproject.zip
printingotb
on 14 Aug 2018
Thanks for the files. I have sliced that project using my current version of Cura and I believe the z-seam is less visible now than what you have been getting. I attach the gcode.
smartavionics
on 14 Aug 2018
@smartavionics Just now I realized what you have meant. The problem is not the first layer squishing, I'm already familiar with this effect. The problem occurred after establishing watertight first layers.
JasiuHimself
on 17 Aug 2018
Please attach the cura project file for exactly that print, thanks.
smartavionics
on 17 Aug 2018
I'm following this topic with great interest.
@smartavionics I made a Spiralize torture device for you ;)
If I understood earlier comments, we can either have good vases with flat faces and sharp edges or we can have good vases with only smooth sides.
This have both, will it slice well in your version of Cura?:
SpiralTest.zip
printingotb
on 17 Aug 2018
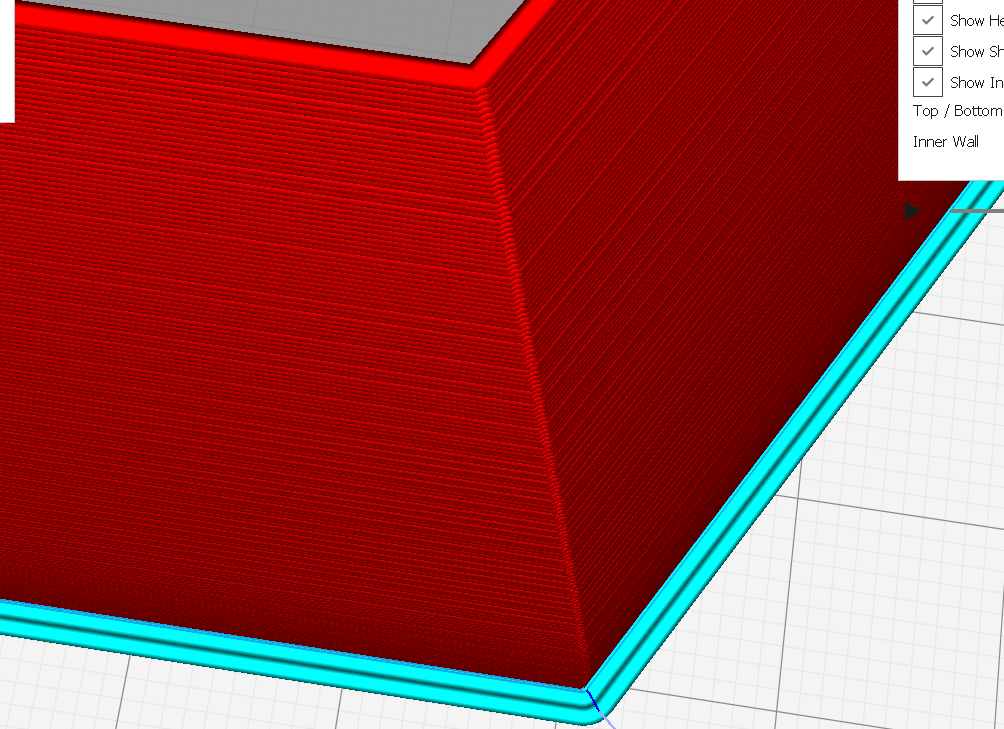
@printingotb I've sliced the model with @smartavionics version of cura. And previewed it in S3D.
With smoothing - not good idea, since there are kinks.
Without smoothing - the seam is not in the kink
JasiuHimself
on 17 Aug 2018
@JasiuHimself thank you!
In 3.4.1, I'm getting similar results with smoothing.
Without smoothing, I still get a few kinks on one of the smooth corners.
printingotb
on 17 Aug 2018
I believe that smoothing or not in this case doesn't really matter.
project.curaproject.3mf.txt
JasiuHimself
on 17 Aug 2018
That project looks perfect in my Cura, both with and without smoothing.
printingotb
on 17 Aug 2018
However, when I sliced it with my profile, issues appeared.
I had Z-seam set to shortest, changing it to sharpest corner, as in your project, removed the issues on this model.
printingotb
on 17 Aug 2018
Once the spiral starts, the z-seam setting makes no difference. But that setting does influence the start position of the spiral (I think).
smartavionics
on 17 Aug 2018
As @smartavionics said: "OK, but you should know that the Cura gcode viewer is not good." ;)
JasiuHimself
on 17 Aug 2018
Could be. I can't replicate it now.
However, if I open your project and change to my profile, issues appear in the preview (the top row, facing X-).
I have the same settings for smoothing.
Guess I'll just have to wait for an update before printing any more vases.
JonasProject.curaproject.zip
printingotb
on 17 Aug 2018
Related issues
 JRRN
·
3Comments
JRRN
·
3Comments
 tomoinn
·
3Comments
tomoinn
·
3Comments
 thopiekar
·
3Comments
thopiekar
·
3Comments
 jornada812
·
3Comments
jornada812
·
3Comments
 ferociousdiablo
·
3Comments
ferociousdiablo
·
3Comments