❓ Questions and Help
Hi there,
I followed the instruction (https://cloud.google.com/tpu/docs/tutorials/resnet-pytorch ) to start the training with v-3 TPU with the following machine
n1-highmem-96 (96 vCPUs, 624 GB memory)
Everything OK with --fake_data
However, when I tried to load ImageNet where I stored the files with
imagenet/train.pkl imagnet/val.pkl
I encounter the Error (more details see the end)
"ForkingPickler(file, protocol).dump(obj)
MemoryError11"
It might have todo with the data that I preprocess. As the following instruction is not clear.
https://cloud.google.com/tpu/docs/tutorials/resnet-pytorch#training_with_the_real_data_set
If everything looks OK using the --fake_data flag, you can try training on real data, such as ImageNet.

In general, test_train_mp_imagenet.py uses torchvision.datasets.ImageFolder so you can use any dataset that is structured properly. See the ImageFolder documentation.
Some suggested command line modifications for using real data, assuming you stored the dataset at ~/imagenet:
(torch-xla-nightly) myaccount@resnet50-tutorial:~$ python /usr/share/torch-xla-nightly/pytorch/xla/test/test_train_mp_imagenet1.py --datadir=/home/myaccount/dataset/imagenet --model=resnet50 --num_epochs=1 --num_workers=32 --batch_size=32 --log_steps=1
It gives the following issue
==> Preparing data..
==> Preparing data..
==> Preparing data..
==> Preparing data..
==> Preparing data..
==> Preparing data..
==> Preparing data..
==> Preparing data..
Blob imagenet/train.pkl downloaded to /home/myaccount/dataset/imagenet/imagenet/train.pkl.
Blob imagenet/train.pkl downloaded to /home/myaccount/dataset/imagenet/imagenet/train.pkl.
Blob imagenet/train.pkl downloaded to /home/myaccount/dataset/imagenet/imagenet/train.pkl.
Loading data from: /home/myaccount/dataset/imagenet/imagenet/train.pkl
Loading data from: /home/myaccount/dataset/imagenet/imagenet/train.pkl
Loading data from: /home/myaccount/dataset/imagenet/imagenet/train.pkl
Blob imagenet/train.pkl downloaded to /home/myaccount/dataset/imagenet/imagenet/train.pkl.
Loading data from: /home/myaccount/dataset/imagenet/imagenet/train.pkl
Blob imagenet/train.pkl downloaded to /home/myaccount/dataset/imagenet/imagenet/train.pkl.
Loading data from: /home/myaccount/dataset/imagenet/imagenet/train.pkl
Blob imagenet/train.pkl downloaded to /home/myaccount/dataset/imagenet/imagenet/train.pkl.
Loading data from: /home/myaccount/dataset/imagenet/imagenet/train.pkl
Blob imagenet/train.pkl downloaded to /home/myaccount/dataset/imagenet/imagenet/train.pkl.
Loading data from: /home/myaccount/dataset/imagenet/imagenet/train.pkl
Blob imagenet/val.pkl downloaded to /home/myaccount/dataset/imagenet/imagenet/val.pkl.
Blob imagenet/val.pkl downloaded to /home/myaccount/dataset/imagenet/imagenet/val.pkl.
Blob imagenet/val.pkl downloaded to /home/myaccount/dataset/imagenet/imagenet/val.pkl.
Blob imagenet/val.pkl downloaded to /home/myaccount/dataset/imagenet/imagenet/val.pkl.
Loading data from: /home/myaccount/dataset/imagenet/imagenet/val.pkl
Loading data from: /home/myaccount/dataset/imagenet/imagenet/val.pkl
Loading data from: /home/myaccount/dataset/imagenet/imagenet/val.pkl
Loading data from: /home/myaccount/dataset/imagenet/imagenet/val.pkl
Blob imagenet/val.pkl downloaded to /home/myaccount/dataset/imagenet/imagenet/val.pkl.
Loading data from: /home/myaccount/dataset/imagenet/imagenet/val.pkl
Blob imagenet/val.pkl downloaded to /home/myaccount/dataset/imagenet/imagenet/val.pkl.
Loading data from: /home/myaccount/dataset/imagenet/imagenet/val.pkl
Blob imagenet/val.pkl downloaded to /home/myaccount/dataset/imagenet/imagenet/val.pkl.
Loading data from: /home/myaccount/dataset/imagenet/imagenet/val.pkl
Epoch 1 train begin 19:20:05
Blob imagenet/train.pkl
downloaded to /home/myaccount/dataset/imagenet/imagenet/train.pkl.
Loading data from: /home/myaccount/dataset/imagenet/imagenet/train.pkl
Blob imagenet/val.pkl
downloaded to /home/myaccount/dataset/imagenet/imagenet/val.pkl.Loading
data from: /home/myaccount/dataset/imagenet/imagenet/val.pkl
Exception in thread Thread-1:
Traceback (most recent call last):
File "/anaconda3/envs/torch-xla-nightly/lib/python3.6/threading.py", line 916, in _bootstrap_inner
self.run()
File "/anaconda3/envs/torch-xla-nightly/lib/python3.6/threading.py", line 864, in run
self._target(self._args, *self._kwargs)
File "/anaconda3/envs/torch-xla-nightly/lib/python3.6/site-packages/torch_xla/distributed/parallel_loader.py", line 136, in _loader_worker
data_iter = enumerate(self._loader)
File "/anaconda3/envs/torch-xla-nightly/lib/python3.6/site-packages/torch/utils/data/dataloader.py", line 325, in __iter__
return _MultiProcessingDataLoaderIter(self)
File "/anaconda3/envs/torch-xla-nightly/lib/python3.6/site-packages/torch/utils/data/dataloader.py", line 777, in __init__
w.start()
File "/anaconda3/envs/torch-xla-nightly/lib/python3.6/multiprocessing/process.py", line 105, in start
self._popen = self._Popen(self)
File "/anaconda3/envs/torch-xla-nightly/lib/python3.6/multiprocessing/context.py", line 223, in _Popen
return _default_context.get_context().Process._Popen(process_obj)
File "/anaconda3/envs/torch-xla-nightly/lib/python3.6/multiprocessing/context.py", line 284, in _Popen
return Popen(process_obj)
File "/anaconda3/envs/torch-xla-nightly/lib/python3.6/multiprocessing/popen_spawn_posix.py", line 32, in __init__
super().__init__(process_obj)
File "/anaconda3/envs/torch-xla-nightly/lib/python3.6/multiprocessing/popen_fork.py", line 19, in __init__
self._launch(process_obj)
File "/anaconda3/envs/torch-xla-nightly/lib/python3.6/multiprocessing/popen_spawn_posix.py", line 47, in _launch
reduction.dump(process_obj, fp)
File "/anaconda3/envs/torch-xla-nightly/lib/python3.6/multiprocessing/reduction.py", line 60, in dump
ForkingPickler(file, protocol).dump(obj)
MemoryError
 xwuShirley
All 9 comments
This is the code I run edit from standard test_train_mp_imagenet.py and run
https://gitlab.com/xwuShirley/imagnet-pytorch-tpu/-/blob/master/test_train_mp_imagenet1.py#L155
xwuShirley
on 29 Jul 2020
It looks like you're loading the dataset here: https://gitlab.com/xwuShirley/imagnet-pytorch-tpu/-/blob/master/utils/get_data.py#L11
def get_dataset(dataset_name, data_dir, split, transform=None, imsize=None, bucket='pytorch-data', **kwargs):
if dataset_name in ['imagenet', 'cifar10', 'cifar100', 'svhn', 'mnist']:
dataset = globals()[f'get_{dataset_name}'](dataset_name, data_dir, split, transform=imsize, imsize=imsize, bucket=bucket, **kwargs)
else:
dataset = get_imageFolderDataset(dataset_name, data_dir, split, transform=imsize, imsize=imsize, bucket=bucket, **kwargs)
item = dataset.__getitem__(0)[0]
dataset.nchannels = item.size(0)
dataset.imsize = item.size(1)
return dataset
You're passing imagenet as the arg so we would be in the if and not in the else
I think this code is trying to use a global variable that holds the dataset. When you run xmp.spawn(_mp_fn, args=(FLAGS,), nprocs=FLAGS.num_cores), the code is sent to each of the TPU cores and each core will run its own copy of the code. If you have any global variables or objects that are created outside the code that runs on each core, those will be pickled (or attempted to be pickled) and sent over to the TPU core along with the code.
We recommend instead that you instantiate your dataset in the code that runs on each core. For example, you can see here that the original code was instantiating a ImageFolder that points to a directory on the VM.
I think in your case the problem might be due to the use of the global variable? Could you point me to where that gets instantiated?
 zcain117
on 29 Jul 2020
zcain117
on 29 Jul 2020
@zcain117 Thanks for the quick response!
I see. I would like to use the official code. But the instruction of download the files is confusing.
It is not clear how to process the data folder. This is the function I call https://gitlab.com/xwuShirley/imagnet-pytorch-tpu/-/blob/master/utils/get_data.py#L65 and it download the data according to this files
https://gitlab.com/xwuShirley/imagnet-pytorch-tpu/-/blob/master/utils/utils.py#L74
xwuShirley
on 29 Jul 2020
actually, I found this
https://pytorch.org/docs/1.1.0/_modules/torchvision/datasets/imagenet.html
I am switching #train_dataset = torchvision.datasets.ImageFolder
to torchvision.datasets.imagenet. Let's see!
xwuShirley
on 29 Jul 2020
Just for reference, here is how the structure looks for me:
zcain@zcain:~/ml-testing-accelerators$ ls ~/imagenet-mini
train val
zcain@zcain:~/ml-testing-accelerators$ ls ~/imagenet-mini/val
n01440764 n01986214 n02110185 n02488702 n03042490 n03662601 n04033995 n04487394
n01443537 n01990800 n02110341 n02489166 n03045698 n03666591 n04037443 n04493381
...
zcain@zcain:~/ml-testing-accelerators$ ls ~/imagenet-mini/val/n15075141/
ILSVRC2012_val_00013028.JPEG ILSVRC2012_val_00044368.JPEG ILSVRC2012_val_00049174.JPEG
ILSVRC2012_val_00038905.JPEG ILSVRC2012_val_00046353.JPEG
Hopefully the torchvision dataset works, let me know if you see any issues
zcain117
on 29 Jul 2020
Hi @zcain117 I have successfully tested it in v-3 machine. It turned out that torchvision.datasets.imagenet is no longer being used. However, we could follow the guideline here to preprocess the data.
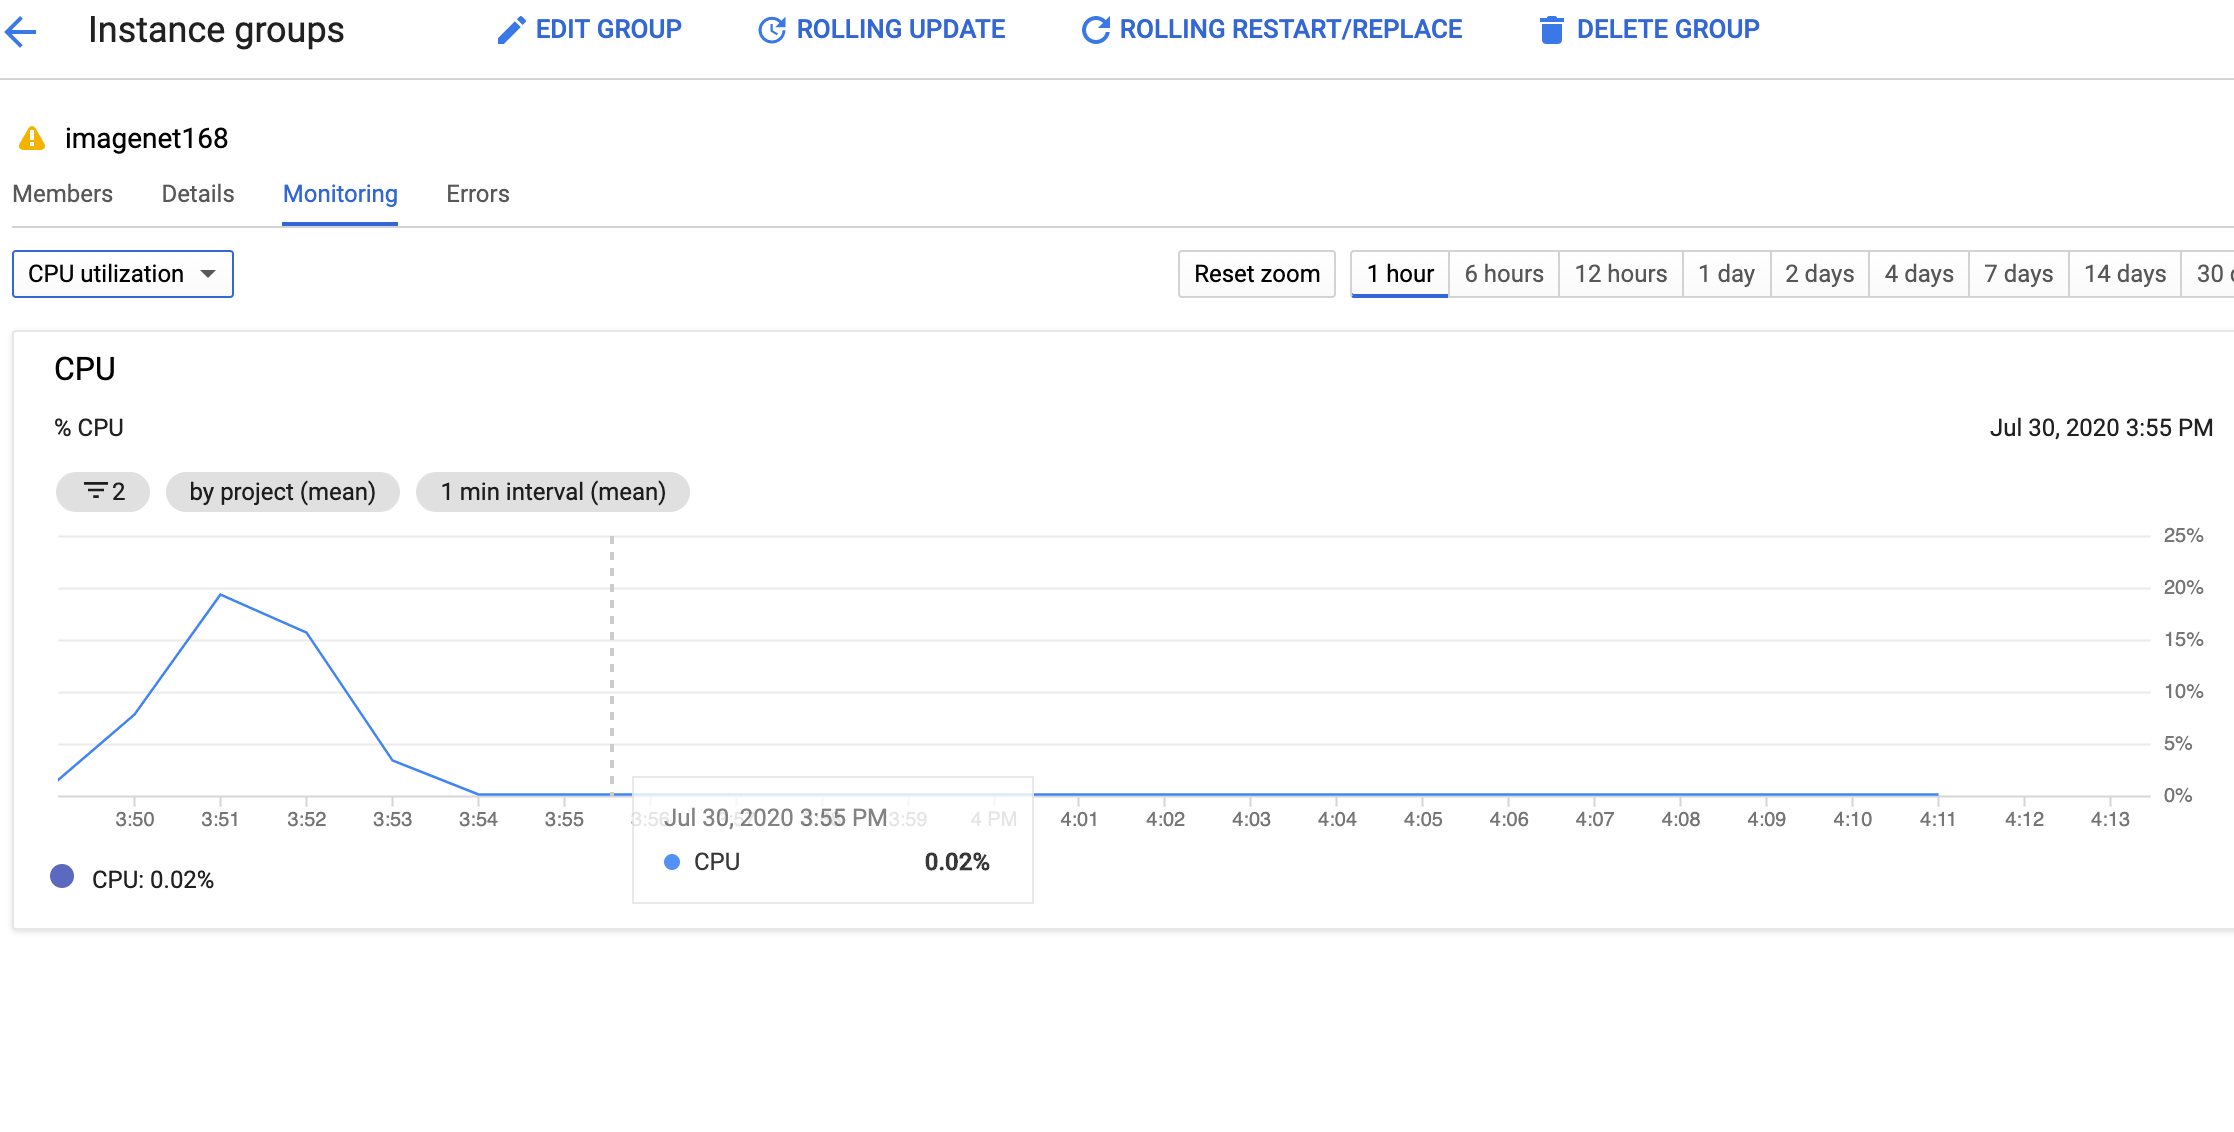
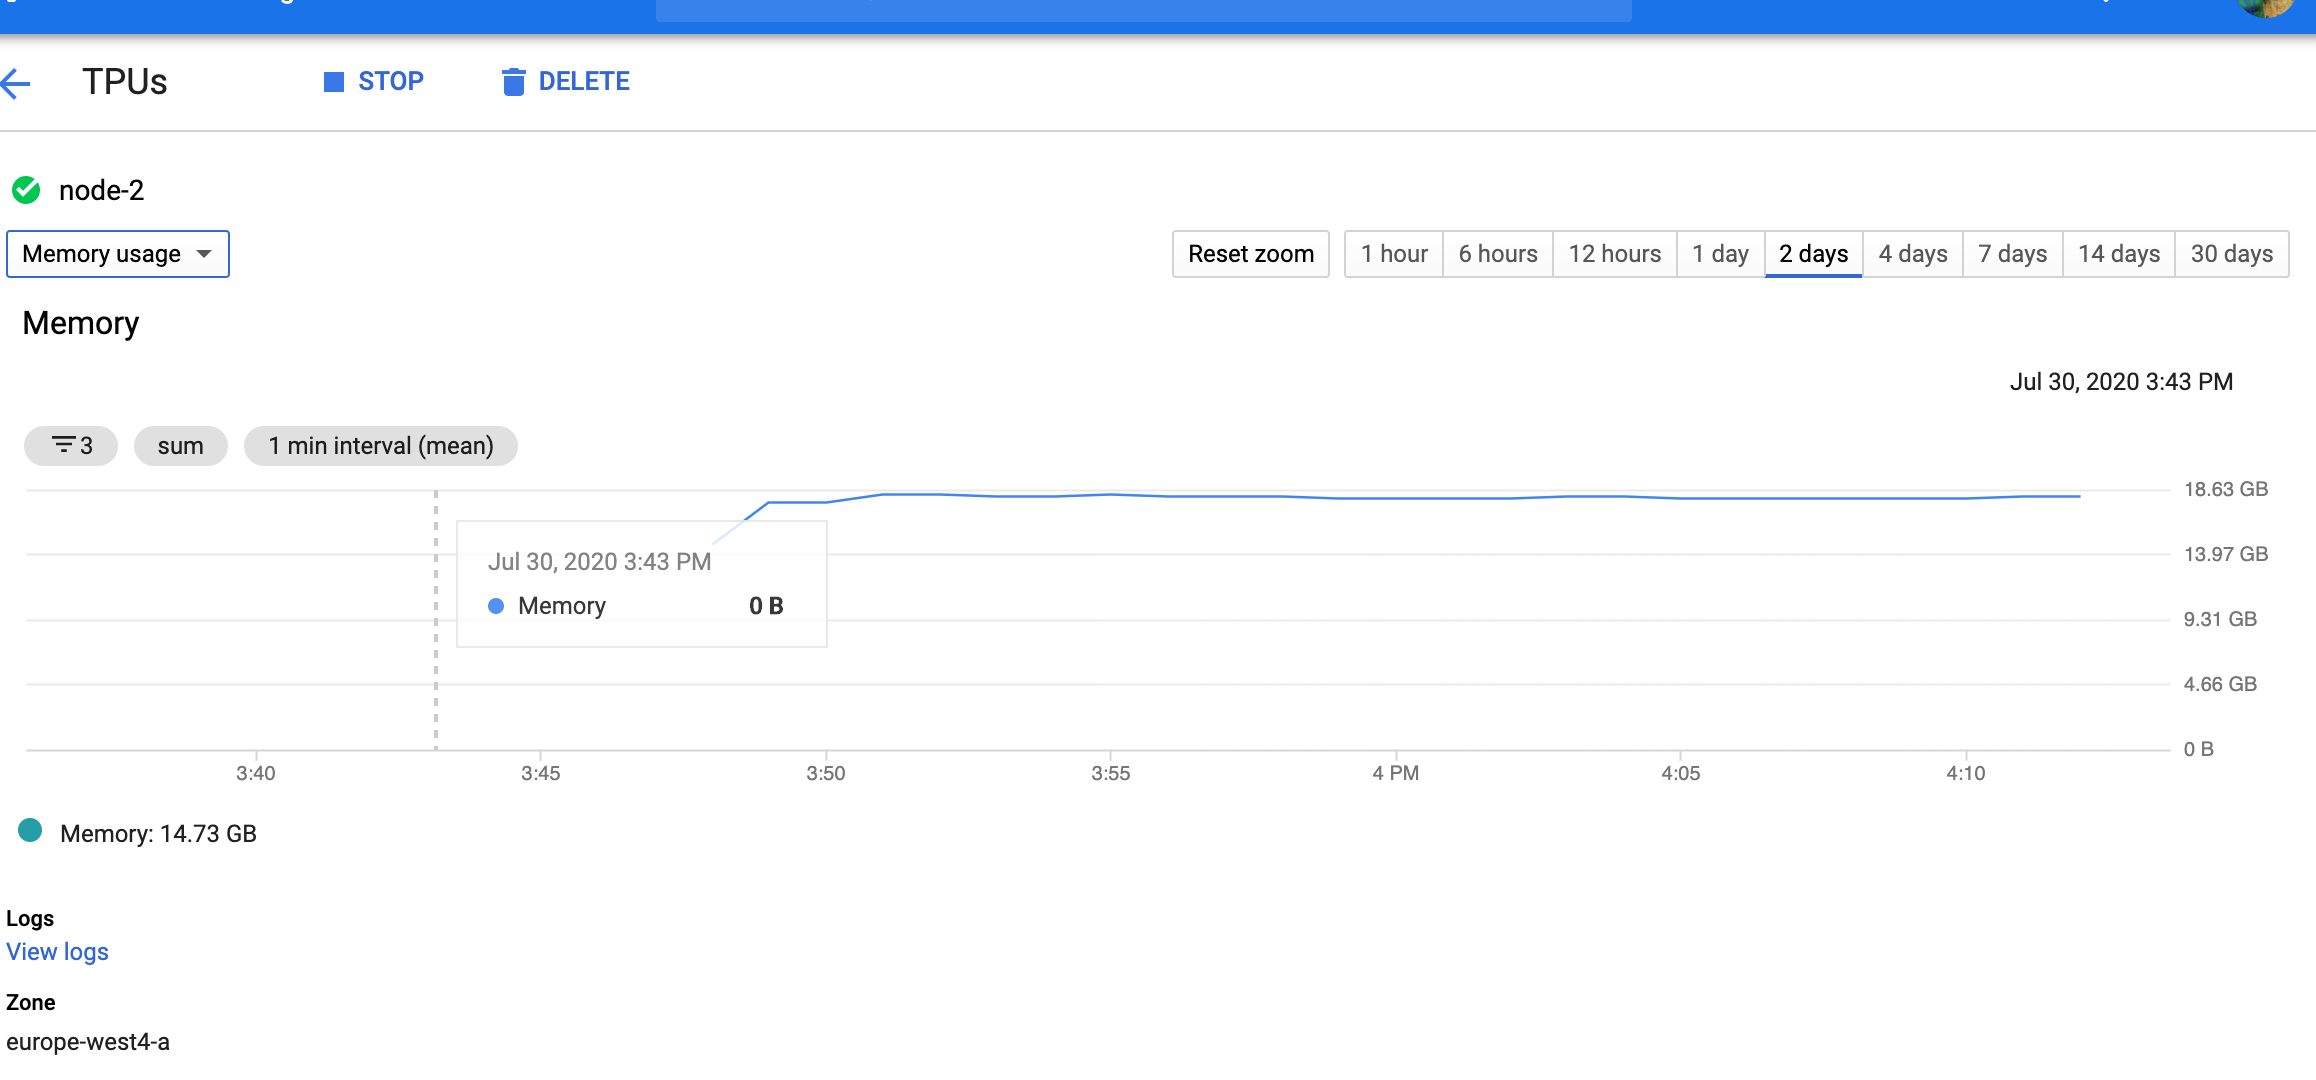
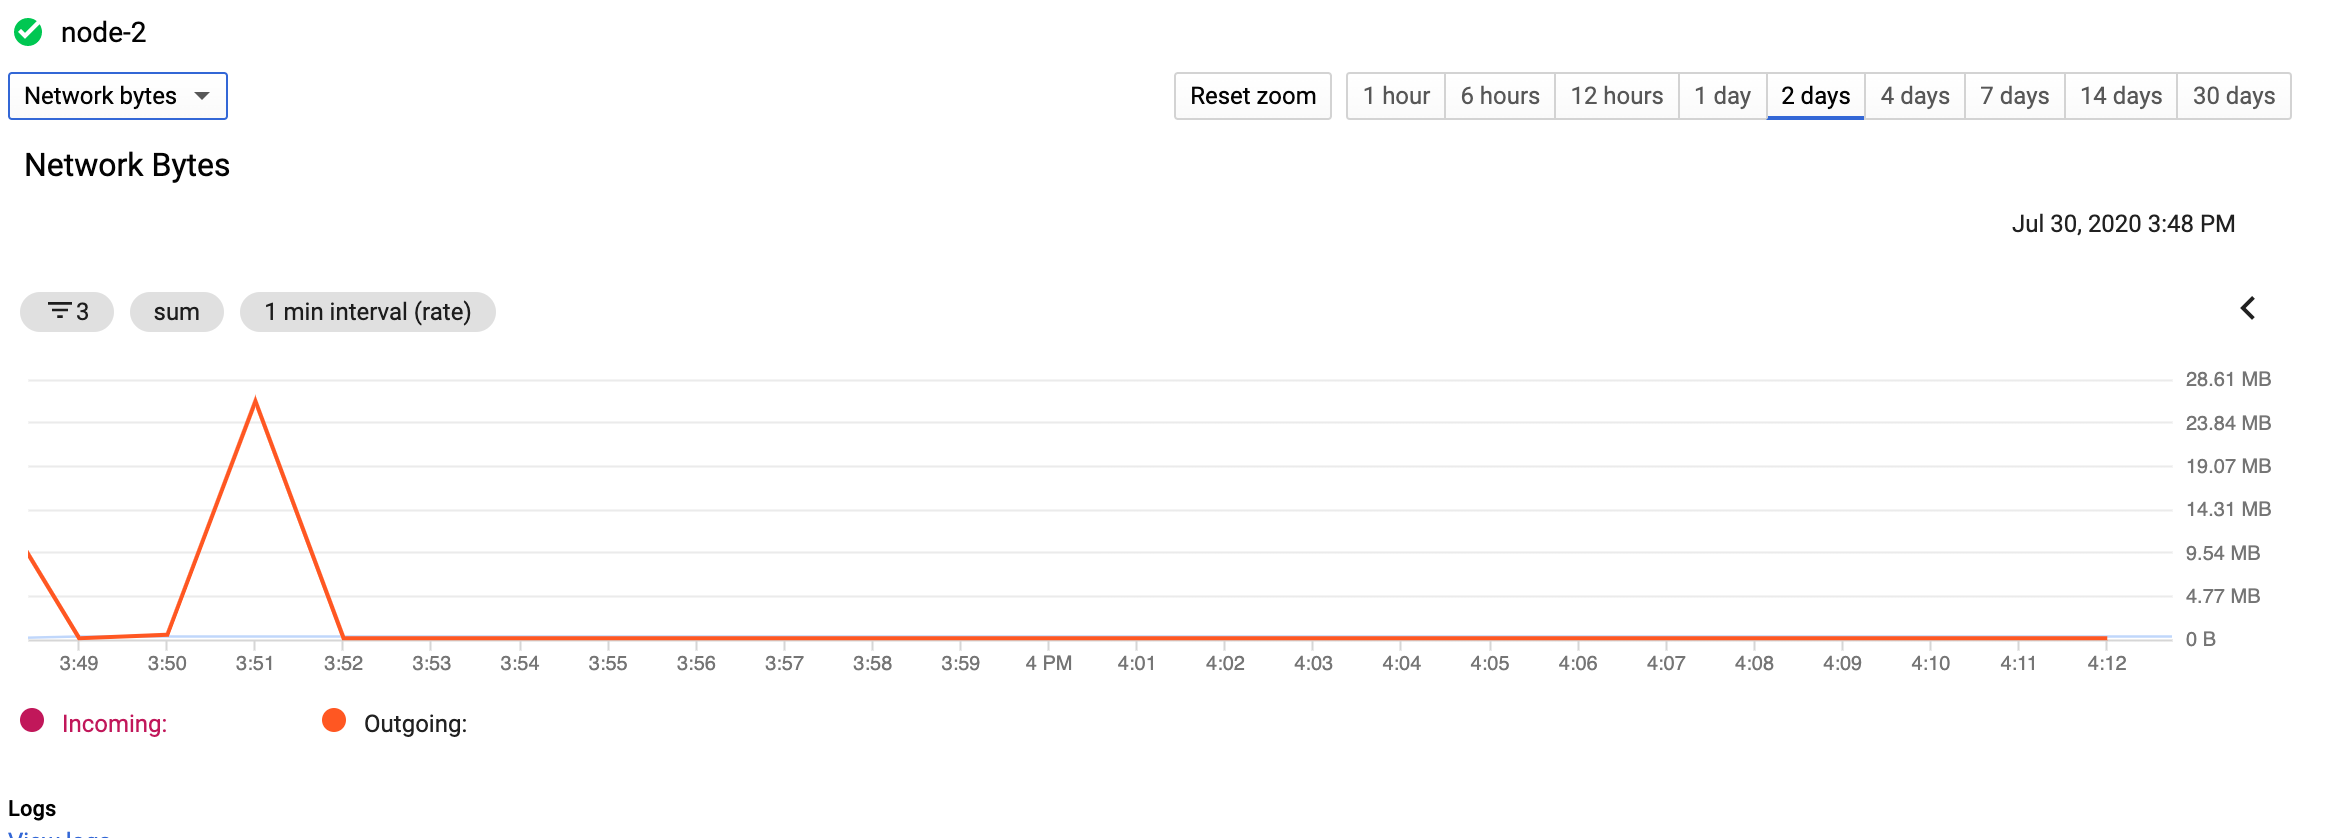
Now I am moving to the distributed setting (v3-32 with an instance-groups of 4 vms) using this guideline Training PyTorch models on Cloud TPU Pods . I have tested it with --fake_data. Everything went well. But then when I used the ImageNet dataset (which is around ~152GB). It stuck like this:

Here are some reference for the statics of the machine and TPU (Note that the time difference, the above time 20:00:00 corresponds to 3:00:00 in the VM machine and TPU)

xwuShirley
on 30 Jul 2020
Great find on those preprocessing steps, I'm glad you were able to get it working on a v3-8.
For the v3-32, what was your approach that you tried so for the dataset? Did you load a copy onto each of the 4 VMs ?
zcain117
on 30 Jul 2020
I realized it has to do with the image dateset itself. The VM machine (origin VM) used to work fo v3-8 is no longer function after I restarted it
OSError: cannot identify image file <_io.BufferedReader name='/home/xiaoxiaw/imagnet/train/n02037110/n02037110_9289.JPEG'>
So I created a bad image from that origin VM (the one that used to work well for v3 but after restart it no longer worked) ==>create an an instance template (using this bad image) ==> then instance-group
xwuShirley
on 31 Jul 2020
We were able to get the training working on v3-32. Here are the main takeaways for anyone running into similar issues:
- The
--num_workersfor multiprocessing jobs (e.g. jobs usingxmp.spawn) is the number of workers per process and generally you'll have 8 processes per VM, 1 process for each TPU core. The total number of workers should be lower than your number of CPU cores for your VM. If you set a high number like--num_workers=32, you'll have 32*8 workers running on your VM which can lead to slowness or hanging. - Use
nightlyfor your VMs andpytorch-nightlyfor your TPU (until we have a new stable release). - We recommend using a PersistentDisk to hold your dataset and then mounting that dataset on each of the VMs (in this case, 4 VMs to drive the v3-32). I'll work on updating documentation but this basic idea is this:
Create the empty persistent disk
gcloud compute disks create --size=200GB --zone=$MY-ZONE $MY-DISK-NAME --project=$MY-PROJECT
Create a VM to populate the persistent disk
- Create a VM from https://console.cloud.google.com/compute/instancesAdd?project=YOUR-PROJECT
- Add the disk that was just created to the VM. To do this: open the “Management, security, disks, …” dropdown just above the “Create” button
- Then select “Attach existing disk” and look for the disk you just created. Make sure your VM is in the same zone and same project as the disk you created
SSH into your VM and populate the persistent disk
Find your VM in this page and click “SSH” on the right side:
https://console.cloud.google.com/compute/instances?project=YOUR-PROJECT
(From your Google Cloud VM)
sudo mkfs.ext4 -m 0 -F -E lazy_itable_init=0,lazy_journal_init=0,discard /dev/sdb
sudo mkdir -p /mnt/disks/dataset
sudo mount -o discard,defaults /dev/sdb /mnt/disks/dataset
sudo chmod a+w /mnt/disks/dataset
sudo chown -R $USER /mnt/disks/dataset
<populate disk>
sudo umount /mnt/disks/dataset
exit
Do not forget the umount and exit or your Persistent Disk might end up corrupted.
Using the Persistent Disk for distributed training
Then make your VM image and instance group as outlined in the tutorial. Once that's ready mount the PD onto all of the VMs using a command like this:
COMMAND='sudo mkdir -p /mnt/disks/dataset && sudo mount -o discard,defaults /dev/sdb /mnt/disks/dataset && sudo chmod a+w /mnt/disks/dataset; df -h'; for instance in $(gcloud --project=${PROJECT_ID} compute instance-groups managed list-instances ${INST_GROUP_NAME} --zone=${ZONE} --format='value(NAME)[terminator=" "]'); do gcloud compute ssh --project=${PROJECT_ID} --zone=europe-west4-a "$instance" --command="$COMMAND" --quiet; done
Now you can begin training and refer to /mnt/disks/dataset
zcain117
on 31 Jul 2020
Related issues
 cjolivier01
·
7Comments
cjolivier01
·
7Comments
 magicknight
·
3Comments
magicknight
·
3Comments
 myleott
·
6Comments
myleott
·
6Comments
 ibeltagy
·
5Comments
ibeltagy
·
5Comments
 ogulcanogul
·
5Comments
ogulcanogul
·
5Comments
Most helpful comment
We were able to get the training working on v3-32. Here are the main takeaways for anyone running into similar issues:
--num_workersfor multiprocessing jobs (e.g. jobs usingxmp.spawn) is the number of workers per process and generally you'll have 8 processes per VM, 1 process for each TPU core. The total number of workers should be lower than your number of CPU cores for your VM. If you set a high number like--num_workers=32, you'll have 32*8 workers running on your VM which can lead to slowness or hanging.nightlyfor your VMs andpytorch-nightlyfor your TPU (until we have a new stable release).Create the empty persistent disk
Create a VM to populate the persistent disk
SSH into your VM and populate the persistent disk
Find your VM in this page and click “SSH” on the right side:
https://console.cloud.google.com/compute/instances?project=YOUR-PROJECT
(From your Google Cloud VM)
Do not forget the
umountandexitor your Persistent Disk might end up corrupted.Using the Persistent Disk for distributed training
Then make your VM image and instance group as outlined in the tutorial. Once that's ready mount the PD onto all of the VMs using a command like this:
COMMAND='sudo mkdir -p /mnt/disks/dataset && sudo mount -o discard,defaults /dev/sdb /mnt/disks/dataset && sudo chmod a+w /mnt/disks/dataset; df -h'; for instance in $(gcloud --project=${PROJECT_ID} compute instance-groups managed list-instances ${INST_GROUP_NAME} --zone=${ZONE} --format='value(NAME)[terminator=" "]'); do gcloud compute ssh --project=${PROJECT_ID} --zone=europe-west4-a "$instance" --command="$COMMAND" --quiet; doneNow you can begin training and refer to
/mnt/disks/dataset