Wp-calypso: New user setup: I want to add the items i'm selling (Add products)
Success criteria: If adding manually, user will have added a product in 5 clicks. If importing, 2 clicks.
Master Sketch file: https://www.dropbox.com/s/5gspfg0886qh3yw/add%20product.sketch?dl=0
 kellychoffman
All 9 comments
Notes from our call on Tuesday;
Testing the step-by-step flow, iterating on it. This flow is good for;
- First time user who only has a few items to sell
- When you are adding a product or two to your inventory
- Those who are uncomfortable / new to the whole selling on line and just like how this flow walks them through adding a product. They might stay with this until comfortable and graduate to another flow
It includes an escape hatch where you can view everything at once in a 'detail mode' and add all product info on a single page.
Another story: I want to add a bunch of products at once;
Has 2 entry points for the 'Import' button; Dashboard, Products list,
- CSV import
- Allow user to upload their own .csv. They can download a sample .csv to use if required.
- Explore the idea of offering a 'spreadsheet tool' bypassing the need to use excel or equivalent software. This would also provide bulk editing capabilities
- Migration
- Specify which service to migrate from
- Authorize
- Import
- If the store is empty offer to import demo products
 jameskoster
on 1 Mar 2017
jameskoster
on 1 Mar 2017
We chatted quickly today (Kelly is at a meetup) and concluded that we'd probably leave the built-in spreadsheet tool and bulk editing out of v1 because they're features aimed more at power users.
To begin with uploading a .csv manually is probably fine.
jameskoster
on 1 Mar 2017
Designs for adding a product using the full view only:
From Store new user dashboard: Click 'Add a Product'

From here, you click 'skip directly to detailed product editing':

This brings you to the full add-product view:

You fill all the information in:

You click 'Publish', and are immediately brought to view the front end of site:

If we are starting by implementing the full view, we should start with step three. cc: @justinshreve
kellychoffman
on 6 Mar 2017
Quick note; that detailed view is a little confusing as it has variation types filled in. The default state look would look like this;
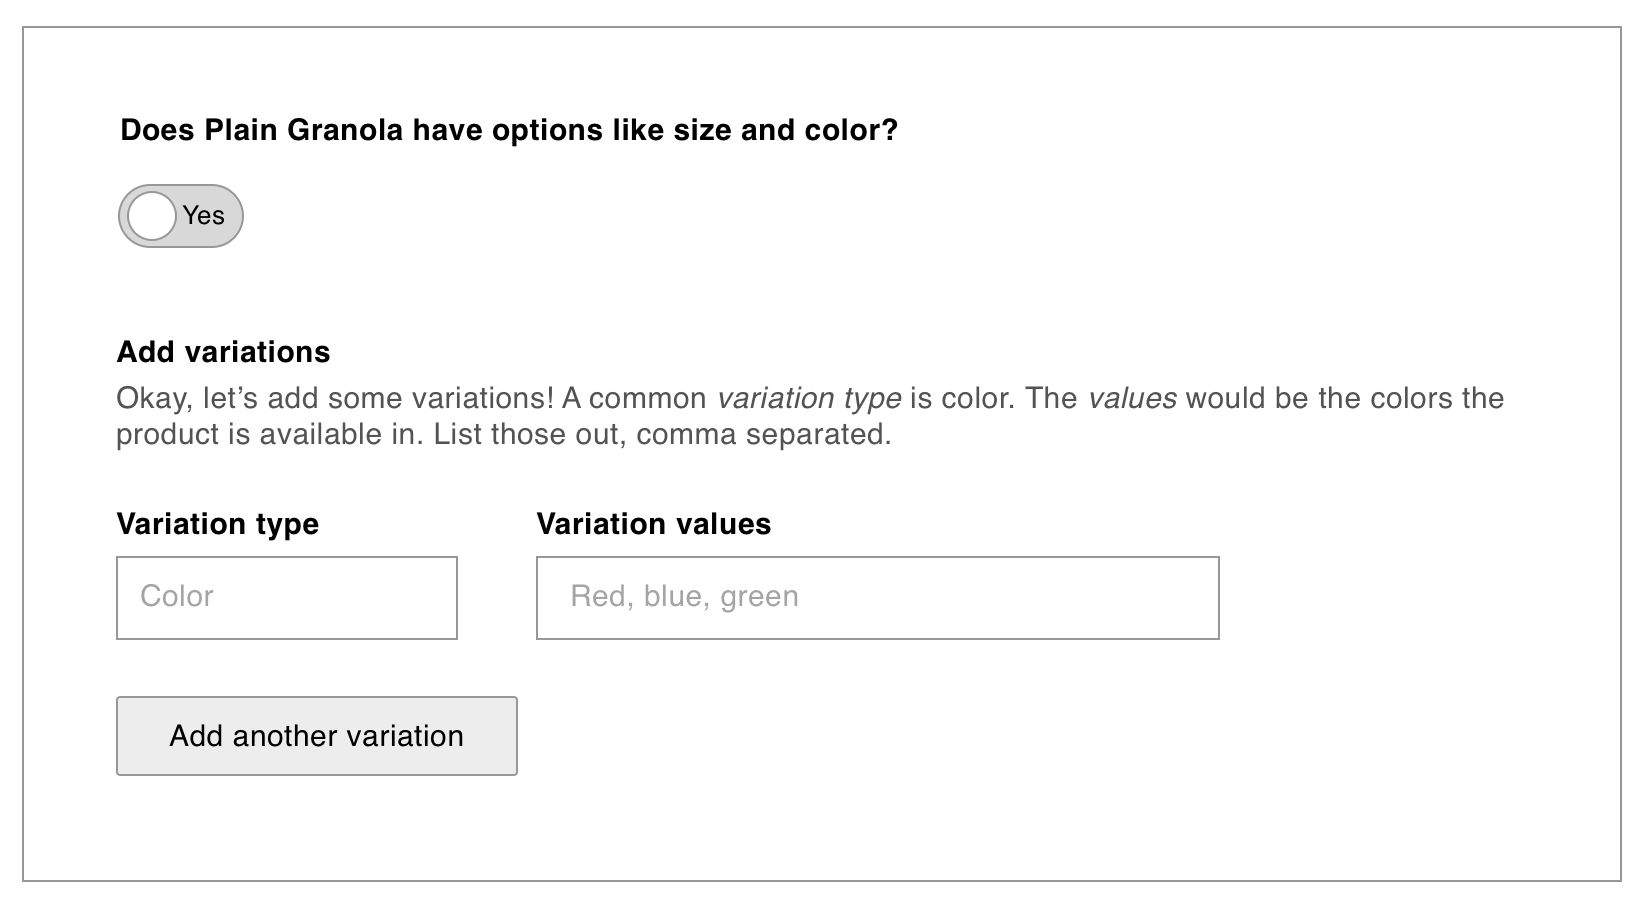
jameskoster
on 6 Mar 2017
@kellychoffman @jameskoster
How does https://cloud.githubusercontent.com/assets/5835847/23624871/79f8fae8-0264-11e7-8acb-27ae37b3c6e3.png change as more complex variations are added (i.e. something in addition to weight).
 justinshreve
on 7 Mar 2017
justinshreve
on 7 Mar 2017
@justinshreve: Here's an example of a shirt available in different sizes and colors:

kellychoffman
on 8 Mar 2017
Example @justinshreve ?
IMO the fields in that table should be kept as simple as possible. Advanced variation data is accessed via the 'advanced details' link beneath the variation name;
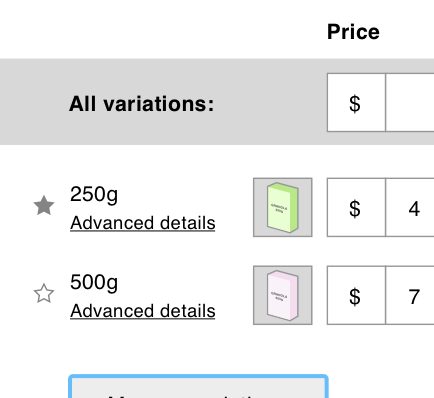
Clicking that link reveals a modal that looks something like this;
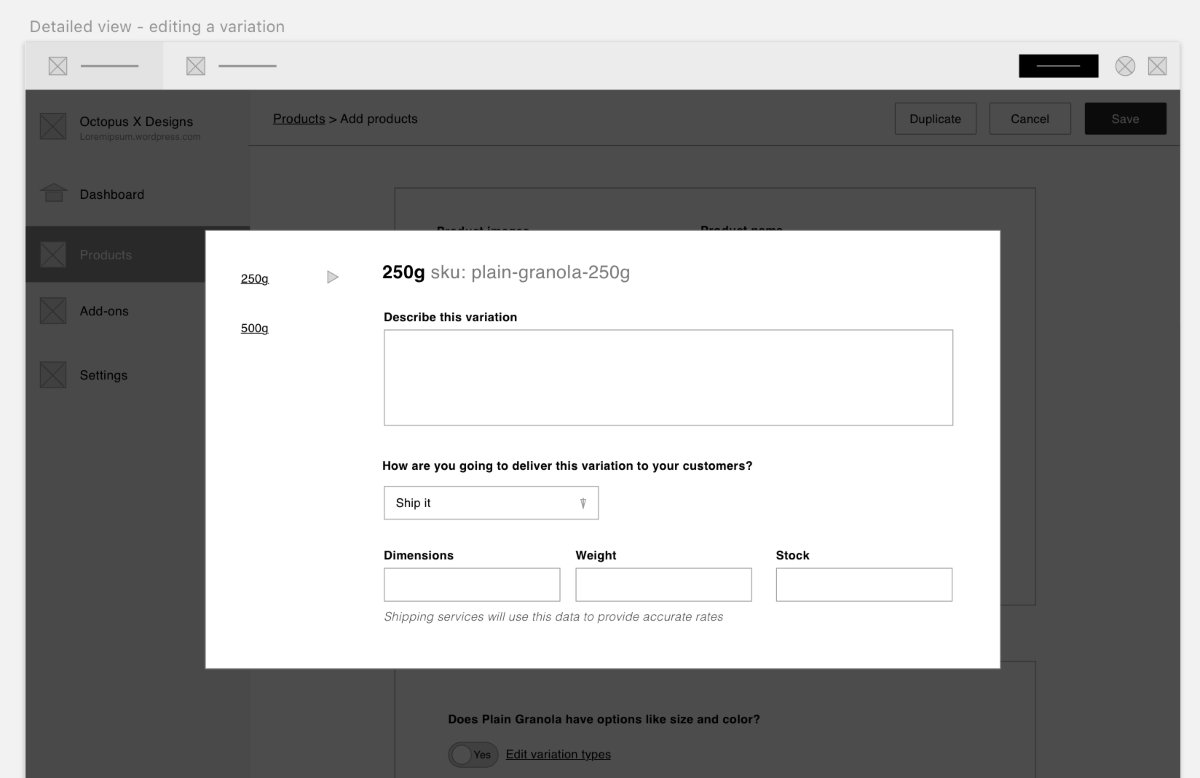
Just pretend there's a 'done' or 'save' button on that modal xD
jameskoster
on 8 Mar 2017
I was looking for what Kelly posted, but those mockups are helpful too :)
(I was looking for what we would display if we had multiple options on a product i.e. displaying a shirt that has color & size).
justinshreve
on 8 Mar 2017
Ah yeah, that's my bad for using 'weight' as an attribute in the granola product. Wasn't sure if you were referring to that or the dimensions etc.
jameskoster
on 8 Mar 2017
Related issues
 BrookeDot
·
3Comments
BrookeDot
·
3Comments
 jjchrisdiehl
·
3Comments
jjchrisdiehl
·
3Comments
 jeherve
·
3Comments
jeherve
·
3Comments
 samouri
·
3Comments
samouri
·
3Comments
 roccotripaldi
·
3Comments
roccotripaldi
·
3Comments