Vrtk: Create new example scenes and consolidate functionality into fewer scenes
There are many example scenes at the moment that repeat concepts making it unnecessary to have so many examples.
The examples could do with a redesign and rebuild to make them more effective.
 thestonefox
All 16 comments
Merging
https://github.com/thestonefox/VRTK/issues/519
https://github.com/thestonefox/VRTK/issues/215
thestonefox
on 22 Dec 2016
I don't know if this helps but I started by muting down the simple_solid_colors and putting the examples into a hierarchy. Unless there is real duplication I like having lots of simple examples as it allows me to focus on the one feature I want to use.
- Black #000000FF
- Blue #5F5F9FFF
- Cyan #5F9F9FFF
- Green #5F9F5FFF
- Red #9F5F5FFF
- Sand #FFF2CEFF
- White #FFFFFFFF
- Yellow #9F9F5FFF
1.0 General
1.1 001_CameraRig_VR_PlayArea
1.2 002_Controller_Events
1.3 025_Controls_Overview
1.4 018_CameraRig_FramesPerSecondCounter
1.5 039_CameraRig_AdaptiveQuality
1.6 011_Camera_HeadSetCollisionFading
1.7 Setup for Oculus SDK
1.8 Setup for Simulated VR
2.0 Controller
2.1 032_Controller_CustomControllerModel
2.2 030_Controls_RadialTouchpadMenu
2.3 035_Controller_OpacityAndHighlighting
2.4 015_Controller_TouchpadAxisControl
3.0 Movement
3.1 004_CameraRig_BasicTeleport
3.2 017_CameraRig_TouchpadWalking
3.3 009_Controller_BezierPointer
3.4 031_CameraRig_HeadsetGazePointer
3.5 042_CameraRig_MoveInPlace
3.6 028_CameraRig_RoomExtender
3.7 027_CameraRig_TeleportByModelVillage
3.8 007_CameraRig_HeightAdjustTeleport
3.9 010_CameraRig_TerrainTeleporting
3.10 020_CameraRig_MeshTeleporting
3.11 024_CameraRig_ExcludeTeleportLocation
3.12 033_CameraRig_TeleportingInNavMesh
3.13 038_CameraRig_CameraRig_DashTeleport
4.14 012_Controller_PointerWithAreaCollision
3.15 022_Controller_CustomBezierPointer
3.16 036_Controller_CustomCompoundPointer
3.17 037_CameraRig_ClimbingFalling
4.0 Interaction
4.1 003_Controller_SimplePointer
4.2 019_Controller_InteractingWithPointer
4.3 005_Controller_BasicObjectGrabbing
4.4 008_Controller_UsingAGrabbedObject
4.5 006_Controller_UsingADoor
4.6 021_Controller_GrabbingObjectsWithJoints
4.7 014_Controller_SnappingObjectsOnGrab
4.8 013_Controller_UsingAndGrabbingMultipleObjects
4.9 023_Controller_ChildOfControllerOnGrab
4.10 026_Controller_ForceHoldObject
4.11 016_Controller_HapticRumble
4.12 029_Controller_Tooltips
4.13 034_Controls_InteractingWithUnityUI
4.14 040_Controls_Panel_Menu
4.15 041_Controller_ObjectSnappingToDropZones
4.16 043_Controller_SecondaryControllerActions
 angarmgmt
on 6 Jan 2017
angarmgmt
on 6 Jan 2017
I like @angarmgmt 's suggestion and I agree that for example that it doesn't make sense to merge all the different teleportation or locomotion mechanics for example. Trying to put those in a single example would probably make the example more complex making it harder to understand and copy things from.
But I think the "Interaction" section could be made much smaller by having just a couple of examples. Their main difference probably being any changes you'd be making on the controllers.
As long as the controller scripts are the same you could put all the examples that use those particular controller settings into a single example. After all the only things that would be different would be the scripts on the objects themselves.
Theoretically you could just make a single big example where you could teleport between "isles" that explain a certain concept.
 quintesse
on 10 Apr 2017
quintesse
on 10 Apr 2017
From Slack Chat:
we have a main scene that is a farm, you start out the front of a farm house and the vrtk pig is your tutorial guide. the farm has a bunch of things around that you can grab, you can go into the farm house, has things like working doors, you can turn taps on and off, etc, the farm scene is basically a mish-mash of things from the toolkit that shows you a collection of what can be done. Then there is a door to a basement but behind that door is an elevator that shoots you down deep underground to a hallway of infinite doors, behind each door is a specific example scene (think of each room kinda like a portal lab) and the vrtk pig gives an overview of the example scene you're in. These example scenes are very specific to aid in teaching people how to actually use the scripts
so the farm scene is an overall fun mess about with the things in vrtk, but the example scene itself isn't gonna be great for learning from. But then each specific scene in the endless hallway is useful for understanding how to use the vrtk scripts, plus good for testing
then we don't need things like "grabbing objects by joints" example scenes, as we can just have a bunch of joint objects in the farm example scene
plus we can do something like you can choose your locomotion method in the example scene
but in the endless halls examples, you would have a teleport door, dash teleport door, move in place, touchpad walking, etc
can put things like shotguns in, fire extinguishes, do all that stuff i did in the kitchen scene, taps that turn on, working oven, just little things like that
and the pig follows you around and gives you info about what you can do with stuff and how vrtk helps
thestonefox
on 17 Apr 2017
Concepts for individual example scenes (not farm-house play area) (try and keep custom scripts to a bare minimum for these examples, custom scripts should only really exist in the play area scene)
Key:
[xCR]- Controller required for example scene (x denotes the DoF on the controller)
000 - Constructempty scene that has camera rig set up and SDK switcher, also used as the base for all other scenes with additive loading.001 - Controller Events [3CR]scene that shows how to listen for the controller events. Control objects with touchpad events (like the RC car).002 - Pointers [3CR]scene showing how to set up pointer and option of using straight pointer render or bezier pointer renderer. Also show how to use events on the pointers. Also allow the style of the pointer to be changed. And have play area cursor and direction indicator as options. Hover restrictions with policy list. Attach a pointer to a 3rd party object (like the orb)003 - Interactions [6CR]scene showing a number of different interactions demoing the grab mechanic types, showing off object snapping, precision grabbing (on all grab types). Showing off two handed grabbing. Also showing off using items. Haptics (plus audio), highlighting and custom highlighters.004 - Pointer interactions [3CR]scene showing off interacting with objects with the pointer (pointer activates use and also controller extension)005 - Rich interactions [6CR]scene showing off snap drop zones, panel menus, radial menus, controller tooltips, controller highlighting (button highlighting).006 - Teleporting [0CR]scene showing off basic teleporter, height adjust and dash teleport. Allow for teleport over terrain, mesh, standard objects, with pointer/play area cursor limit/direction indicator. Teleport restrictions with policy list and nav mesh. Destination points and destination areas. If no left controller is found then attach the teleport pointer to the headset and use hover activation to teleport around. Teleporting to specific locations by using the force teleport method (e.g. model village)007 - Controller Walking [3CR]scene showing off different types of walking locomotion using the controller (e.g. touchpad or buttons). Show off different control actions (slide, warp, rotate). Show off body physics script (with fall restrictions) and utilise headset collision fading, position rewind. Also show off that you can control any object not just the play area.
...more to come in future edit
need to cover - room extender, move in place, 3d controls, unity UI interaction, custom controller models, climbing, force object hold.
thestonefox
on 4 Aug 2017
Whats the best way to do scene additive loading?
Each scene additively loads in the construct scene?
Or you have to start from the construct scene and that has logic in it that loads in the other example scene? Then you have to go back to the construct (destroy the additive loaded scene) to load the next scene?
thestonefox
on 4 Aug 2017
I personally prefer the idea of using a singleton loader class and a prefab when I was experimenting.
For the latter idea of yours I think I remember seeing something about how to setup some editor scripting that makes it so that the play button loads a main scene instead of the current scene so it can be additively loaded.
 dantman
on 4 Aug 2017
dantman
on 4 Aug 2017
@dantman afaik (and @bddckr can confirm) the singleton loader isn't going to work with the SDK Manager
thestonefox
on 4 Aug 2017
You can use a singleton+prefab approach for the SDK Manager stuff just fine. I think what @dantman means is to have a script in each scene that loads the prefab which has all the stuff, which will work.
The Construct scene could then just show off that prefab (and allow us to easily change the prefab by changing it in that scene and hitting apply).
Tons of options to make it possible to have the generic SDK stuff only done once. I guess this becomes easier to reason about when we start understanding what each scene would differ on, settings-wise. (E.g. Do some scenes need a way to provide their own alias controllers etc.?)
This can result in us doing some changes to the way things currently work (e.g. allow alias controller changes at runtime, which kinda resolves the whole handedness idea I guess).
 bddckr
on 4 Aug 2017
bddckr
on 4 Aug 2017
@bddckr some scenes will require custom set ups i think for the SDK Manager (e.g. the one that shows custom hands will need the SDK manager customising)
thestonefox
on 4 Aug 2017
Tons of options to make it possible to have the generic SDK stuff only done once. I guess this becomes easier to reason about when we start understanding what each scene would differ on, settings-wise. (E.g. Do some scenes need a way to provide their own alias controllers etc.?)
Existing example scenes already have different interact*, pointers, teleport, ... so aliases will probably need to be per-scene even in these. Fortunately even the current example scenes no longer put the aliases under the SDK manager.
Each scene's loader script could keep a reference to the alias objects in the scene and update them in the aliases in the SDK Manager when a scene is additively loaded.
dantman
on 4 Aug 2017
Each scene's loader script could keep a reference to the alias objects in the scene and update them in the aliases in the SDK Manager when a scene is additively loaded.
Yes. The question is whether the loader script/Construct scene will have the SDK stuff turned active already or not. If we don't turn the game objects and scripts active before setting up the SDK Manager completely we won't need to add any new features like the alias-swap-at-runtime.
bddckr
on 4 Aug 2017
Example scenes will only be test scenes that test core mechanics
Any other use cases will go here https://github.com/thestonefox/VRTK/issues/1522
thestonefox
on 27 Sep 2017
OK, I'm going to have a crack at the farm idea.
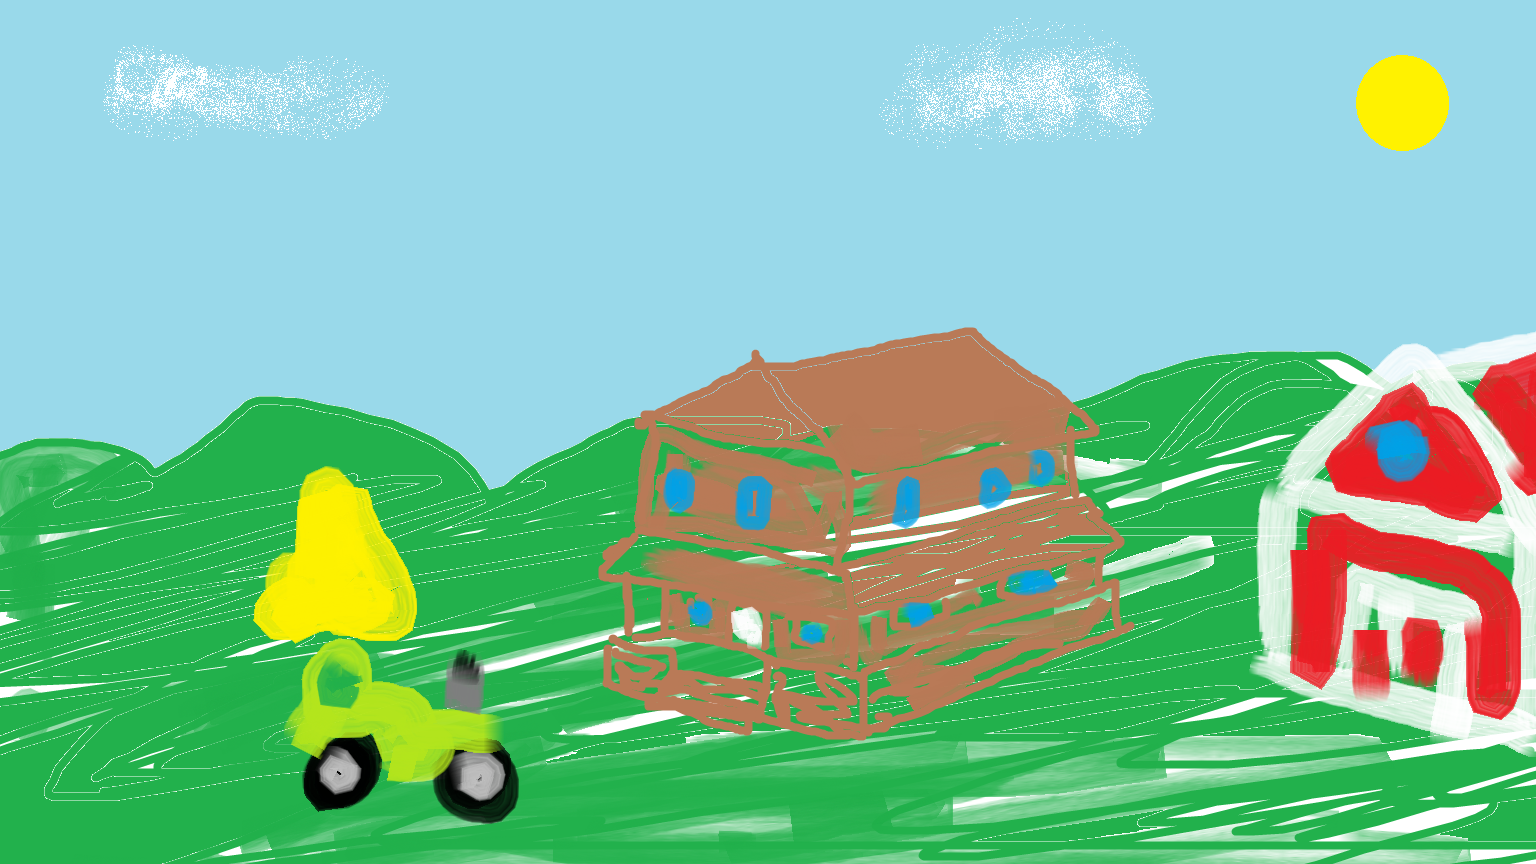
TODO:
- [x] sketch out something a little more concrete than @thestonefox's MS Paint masterpiece 😛
- [ ] draw a reference map of the outside farm area
- [ ] create/borrow a basic farm scene with Blocks
- [ ] add some interactive objects around the farm (TBC)
- [ ] create a Hamlet/Olivr pig guide (could be Hamlet outside sans headset and becomes HMD'd Olivr on the descent? 😬
That should keep me busy for a while!
Some ideas for interactive objects outside the farm:
- an apple tree: pick apples and put them in a bucket (or throw them to Hamlet?) to showcase grabbing, throwing, snap zones
- a well with a bucket that you can lower with a crank (showcase rotator)
- a garden with a hoe (grab, pick up...)
- a tractor to drive around in (levers, rotator, etc)
- a cow to milk
Looks like a lot of the work has already been done, actually! https://poly.google.com/search/farm
 gautsch
on 15 Dec 2017
gautsch
on 15 Dec 2017
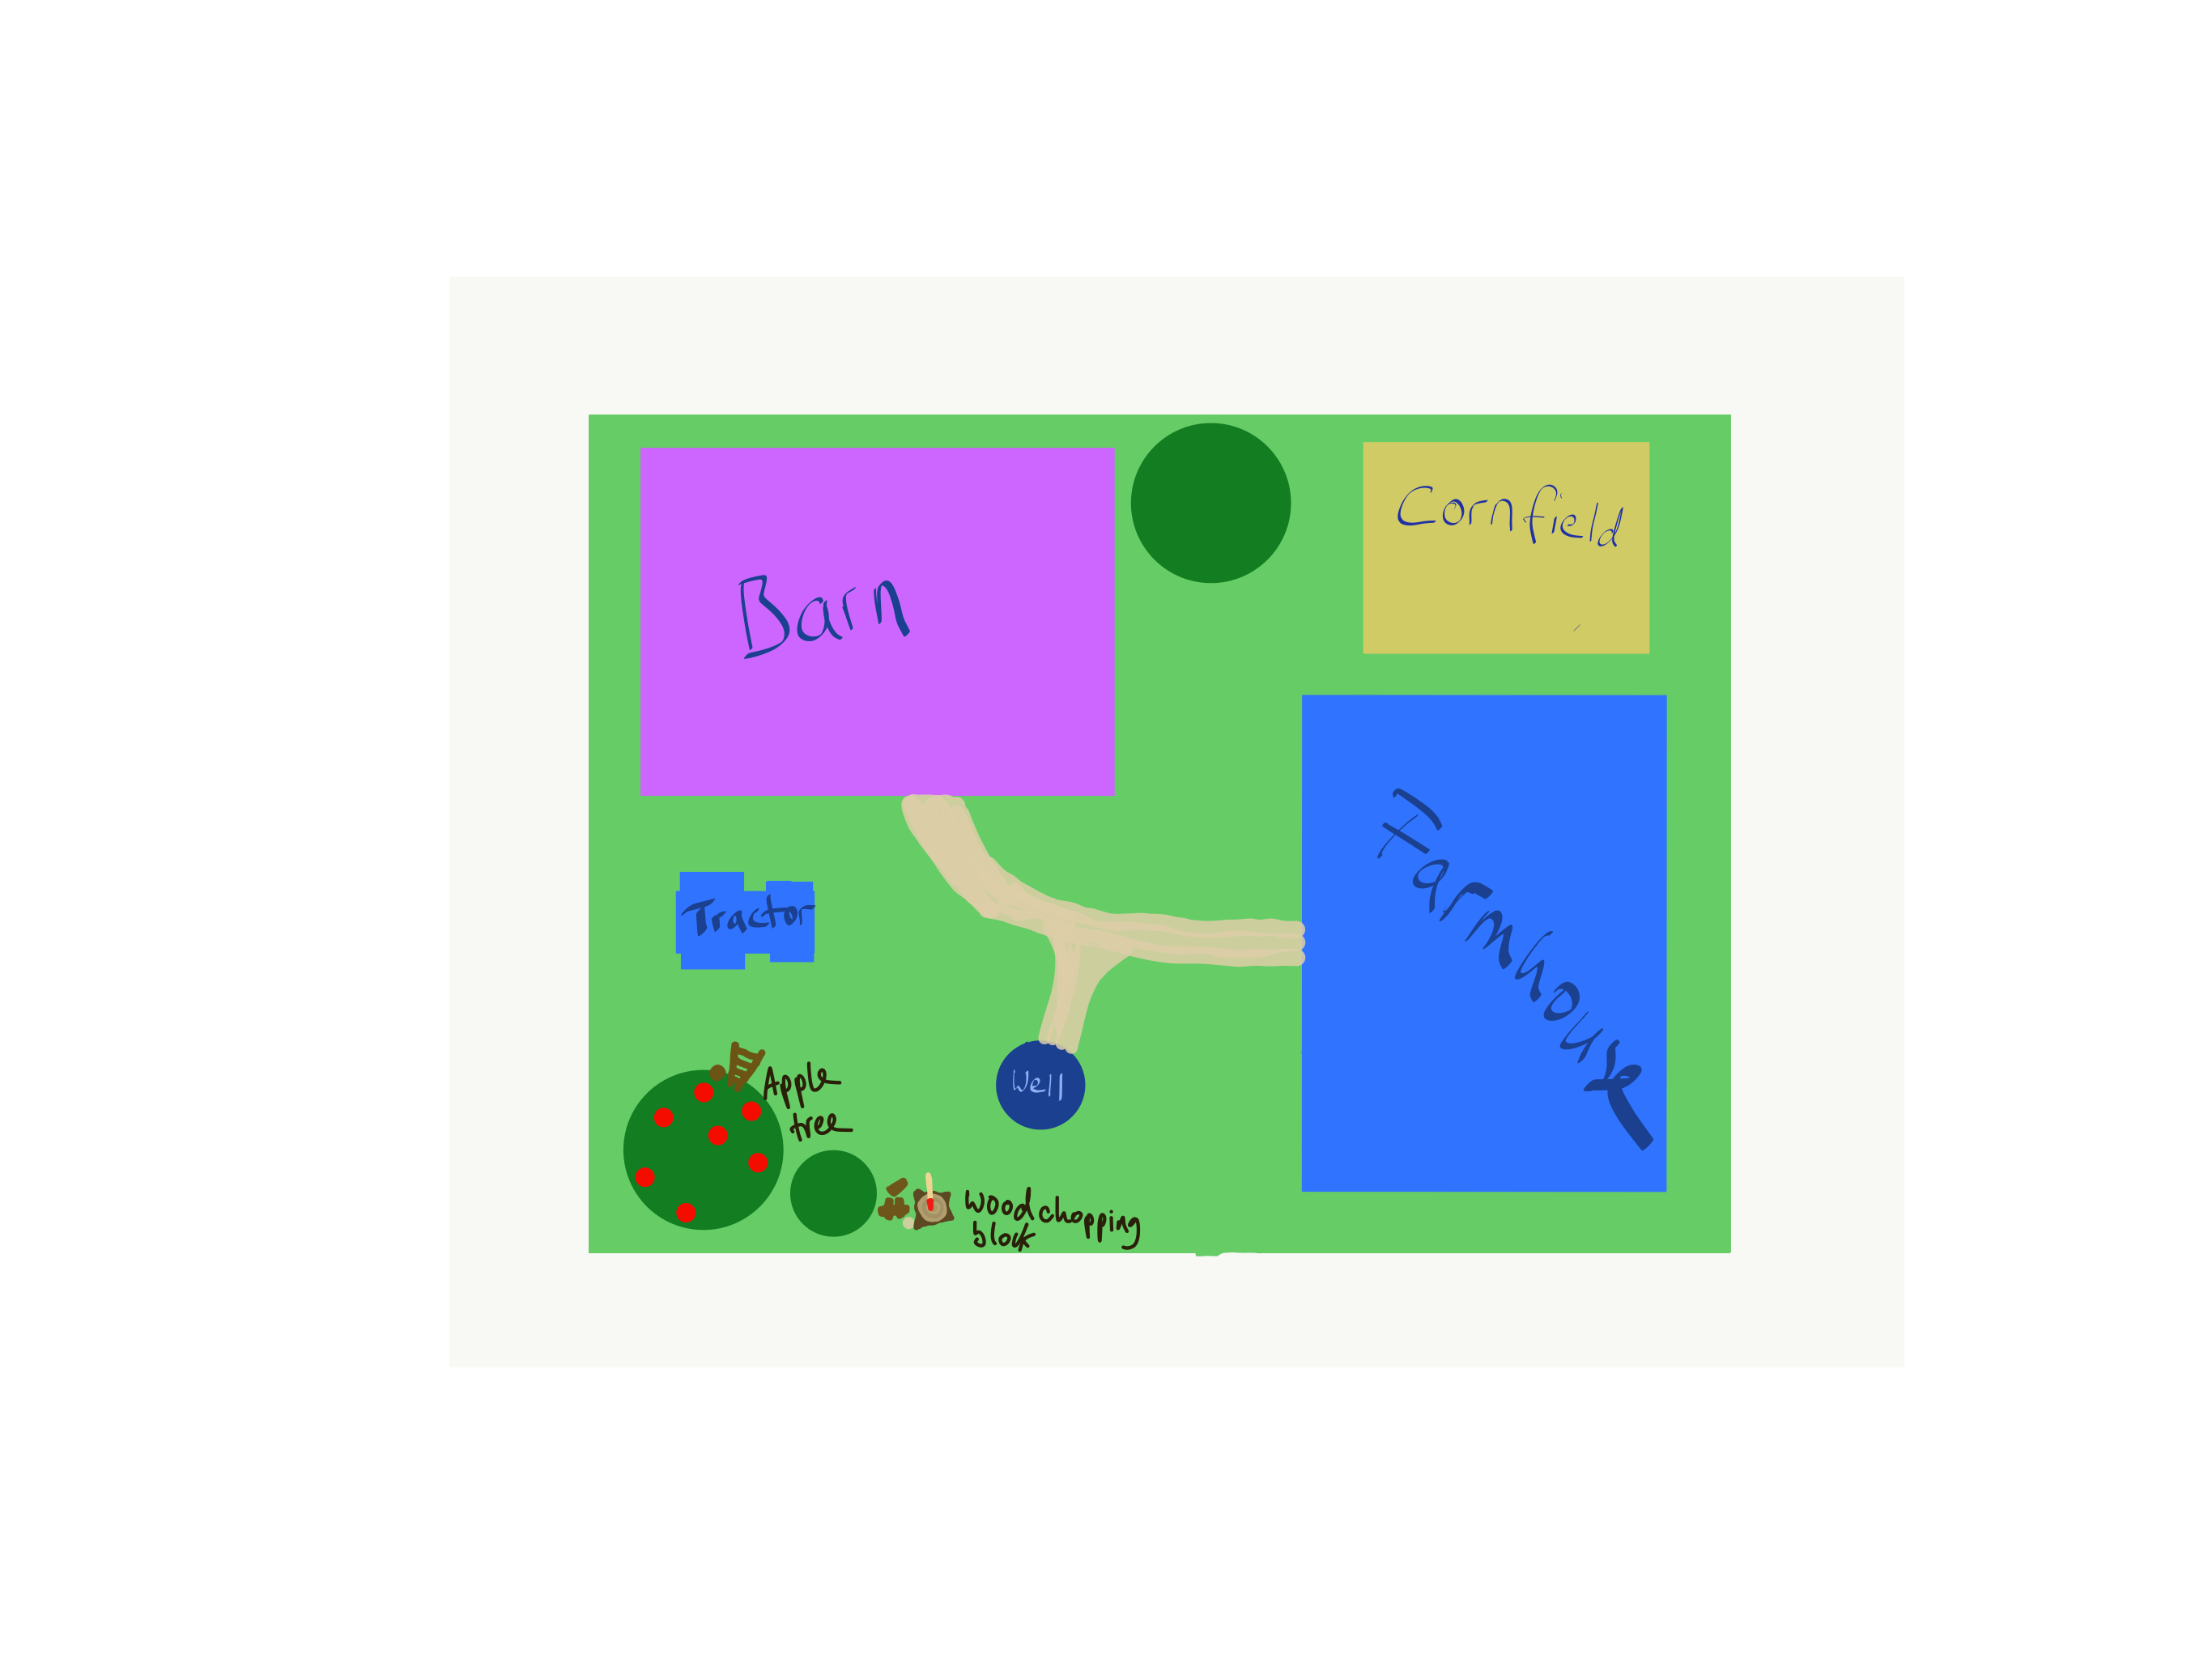
I opted for a small outside area to ensure the player goes into the house to explore further. It may be too small but I'm open to suggestions.
I added a ladder to the apple tree to showcase climbing.
The tractor would require custom scripts to be actually driveable, so I may not add it, or just have it as a prop. I'm keen to keep the outside area too VRTK scripts only if possible.
gautsch
on 28 Dec 2017
This is in v4
thestonefox
on 2 Apr 2019
Related issues
thestonefox
·
3Comments
 AzzyDude24601
·
6Comments
thestonefox
·
5Comments
AzzyDude24601
·
6Comments
thestonefox
·
5Comments
 bgr
·
8Comments
bgr
·
8Comments
 xEvoGx
·
7Comments
xEvoGx
·
7Comments
Most helpful comment
I don't know if this helps but I started by muting down the simple_solid_colors and putting the examples into a hierarchy. Unless there is real duplication I like having lots of simple examples as it allows me to focus on the one feature I want to use.
1.0 General
1.1 001_CameraRig_VR_PlayArea
1.2 002_Controller_Events
1.3 025_Controls_Overview
1.4 018_CameraRig_FramesPerSecondCounter
1.5 039_CameraRig_AdaptiveQuality
1.6 011_Camera_HeadSetCollisionFading
1.7 Setup for Oculus SDK
1.8 Setup for Simulated VR
2.0 Controller
2.1 032_Controller_CustomControllerModel
2.2 030_Controls_RadialTouchpadMenu
2.3 035_Controller_OpacityAndHighlighting
2.4 015_Controller_TouchpadAxisControl
3.0 Movement
3.1 004_CameraRig_BasicTeleport
3.2 017_CameraRig_TouchpadWalking
3.3 009_Controller_BezierPointer
3.4 031_CameraRig_HeadsetGazePointer
3.5 042_CameraRig_MoveInPlace
3.6 028_CameraRig_RoomExtender
3.7 027_CameraRig_TeleportByModelVillage
3.8 007_CameraRig_HeightAdjustTeleport
3.9 010_CameraRig_TerrainTeleporting
3.10 020_CameraRig_MeshTeleporting
3.11 024_CameraRig_ExcludeTeleportLocation
3.12 033_CameraRig_TeleportingInNavMesh
3.13 038_CameraRig_CameraRig_DashTeleport
4.14 012_Controller_PointerWithAreaCollision
3.15 022_Controller_CustomBezierPointer
3.16 036_Controller_CustomCompoundPointer
3.17 037_CameraRig_ClimbingFalling
4.0 Interaction
4.1 003_Controller_SimplePointer
4.2 019_Controller_InteractingWithPointer
4.3 005_Controller_BasicObjectGrabbing
4.4 008_Controller_UsingAGrabbedObject
4.5 006_Controller_UsingADoor
4.6 021_Controller_GrabbingObjectsWithJoints
4.7 014_Controller_SnappingObjectsOnGrab
4.8 013_Controller_UsingAndGrabbingMultipleObjects
4.9 023_Controller_ChildOfControllerOnGrab
4.10 026_Controller_ForceHoldObject
4.11 016_Controller_HapticRumble
4.12 029_Controller_Tooltips
4.13 034_Controls_InteractingWithUnityUI
4.14 040_Controls_Panel_Menu
4.15 041_Controller_ObjectSnappingToDropZones
4.16 043_Controller_SecondaryControllerActions