Pysimplegui: [question] onscreen keyboard activated when sg.Input
Type of Issues (Enhancement, Error, Bug, Question): Question
Operating System: Ubuntu Linux
Python version: 3.7.5rc1
PySimpleGUI Port and Version: '4.6.0 Released 11-Nov-2019'
I've reused the code
import PySimpleGUI as sg

# Design pattern 2 - First window remains active

layout = [[ sg.Text('Window 1'),],
          [sg.Input(do_not_clear=True)],
          [sg.Text('', key='_OUTPUT_')],
          [sg.Button('Launch 2'), sg.Button('Exit')]]

win1 = sg.Window('Window 1', layout)

win2_active = False
while True:
    ev1, vals1 = win1.Read(timeout=100)
    win1.FindElement('_OUTPUT_').Update(vals1[0])
    if ev1 is None or ev1 == 'Exit':
        break

     if not win2_active and ev1 == 'Launch 2':
        win2_active = True
        layout2 = [[sg.Text('Window 2')],
                   [sg.Button('Exit')]]

        win2 = sg.Window('Window 2', layout2)

    if win2_active:
        ev2, vals2 = win2.Read(timeout=100)
        if ev2 is None or ev2 == 'Exit':
            win2_active  = False
            win2.Close()
from the code i want to activated class https://github.com/PySimpleGUI/PySimpleGUI/blob/master/DemoPrograms/Demo_Touch_Keyboard.py when the sg.input activated because the raspi have the touchscreen display... AFAIK the tkinter button there is command, but i hardly find on the PSG docs
 cteta
cteta
All 23 comments
Hiya.... that demo code for the popup keyboard I didn't write.
You'll need to add a button to launch the keyboard window and then have that window add characters to your input element.
I'm not sure what your question is. Can you maybe restate it in the form of a specific question?
 PySimpleGUI
on 2 Dec 2019
PySimpleGUI
on 2 Dec 2019
im trying to use pattern https://pysimplegui.readthedocs.io/en/latest/#pattern-2-b-persistent-window-multiple-reads-using-an-event-loop-updates-data-in-window
- the touchscreen keyboard will pop up when box under text_1, so the input from keyboard will be printed there
- text_2 and image_1 will be updated when next button pressed, the prev button will load prev images
- test button will activated after last image loaded
on other hand how to layout the button like on the picture https://ibb.co/B48S1km... i couldn't find any sample on the cookbook
cteta
on 2 Dec 2019
just thinking that button will only set prev on the left and next on the right then test would be on the centre... im also trying to locate the image part on the right position but im lost
cteta
on 2 Dec 2019
Thank you for the picture. These make a HUGE difference in being able to help someone as it's impossible to use words alone to communicate this.
One big difference between the demo and your program's idea is that you would like the popup to show up when someone clicks on the Input element. The demo shows the popup when someone clicks a Button.
In order to generate an Event when someone clicks on the Input element, you will need to extend PySimpleGUI beyond the basic functionality. In other words, you will be doing tkinter coding. It's why I've suggested adding a button, perhaps next to the Input Element that says something like "Show keyboard".
Even with the technique outlined below, you will not get an event every time someone clicks on the Input element, but rather every time someone moves focus from outside the Input and back again. So, if someone closed the popup keyboard and the cursor was still in the Input element, you will not be able to get the keyboard to pop back up unless they click outside of the Input element and then back in again.
If you don't want this button, then you will need to use "Focus" events. There is a Advanced demo of using focus found in the demos and on Trinket. It's the only program under the "Advanced" part of the page - https://pysimplegui.trinket.io/demo-programs#/advanced/focus-events-routing-custom-events-through-window-read
You'll need to modify that program to suit your needs. This line in particualar needs to be changed:
window.TKroot.bind("<FocusIn>", window['-FOCUS-IN-'].ButtonReboundCallback)
You'll want to use
window['-IN-'].Widget
_NOTE_ - this is advanced PySimpleGUI programming and is outside the bounds of what PySimpleGUI can currently do. I can't provide support for developing and debugging this kind of feature.
I'll say one more time, your easiest and best approach will be to put a button next to the input field. Put a picture of a keyboard on it if you want.
sg.Button('⌨', key='-KEYBOARD-')
To layout the buttons as you've shown, the easiest way will be to use spaces between them. This is what I and most people do.
You may also be able use 3 Column elements in a single row with the first Column using default parameters, the second one has element_justification set to center (I think that's the name of the parameter, please see the docs). The third Column will have the justification set to right. I haven't tested this so I'm not sure. They may all just bunch together. Unless you pad the columns or make them expand by calling the expand method for each of them.
Having elements automatically shuffle themselves around when the window size changes isn't something PySimpleGUI has focused on in the past. Only recently has a little work been done on this.
It would be easier to use PySimpleGUIQt to get the buttons to do what you're looking for as it does a better job of shuffling things around.
I think that's about the best options you have for what you're trying to show.
Please understand that what _you believe is simple_ and should just work doesn't mean it's supported by PySimpleGUI nor does it mean it's simple do even in tkinter.
PySimpleGUI
on 2 Dec 2019
To get the layout where you have 2 or more elements to the left of the single Image element, you will need to put the elements on the left into a Column element. This is how differing numbers of elements can be on the same row together.
PySimpleGUI
on 2 Dec 2019
Closing this issue as I think it's addressed.
If you believe there's still a problem, feel free to re-open it.
PySimpleGUI
on 5 Dec 2019
i tried the your option given, if the keyboard button pressed i create new layout for keyboard window how to display the character from keyboard window to the main window text input ? Now there are 2 layouts; main window and the keyboard window... AFAIK i couldn't print the keyboard input from keyboard window to Text input on main window CMIIW
cteta
on 10 Dec 2019
You can operate on both windows in your event loop. Call the update method for whatever element you're wanting to change. The event loop is not restricted to 1 window, as you see in the example you posted. There are 2 windows running. You'll do the same with the keyboard one. Run both windows with a timeout, When you get an event from the keyboard window, update the other window's input element.
From what I recall, the popup keyboard example uses classes and makes it a little confusing, the execution flow is the same. It operates on 2 windows.
PySimpleGUI
on 10 Dec 2019
You will be interested in the new Element.bind capability.
It will give you the popup keyboard you are seeking! You can now generate an event when the Input Element gets focus which you can use to popup the keyboard.
import PySimpleGUI as sg

sg.change_look_and_feel('Dark Green 2')

layout = [  [sg.Text('My Window')],
            [sg.Input(key='-IN-'), sg.Text('', key='-OUT-')],
            [sg.Button('Do Something'), sg.Button('Exit')]
              ]

window = sg.Window('Window Title', layout, finalize=True)

window['-IN-'].bind("<FocusIn>", '+In')
This code will cause the event -IN-+In whenever the Input Element gets focus.
Note that you will not get this event if the input element gets the focus by default... only if it doesn't have focus and then gets the focus.
This code is released onto GitHub, but not yet to PyPI.
PySimpleGUI
on 10 Dec 2019
something are wrong on your code
let's says i want to do 3 input for UNO and S/N or other ... i want to make the keypad appear and reappear to fill all input
Here is my python puzzle code, looks like the keypad looping on its loop only ... CMIIW
import PySimpleGUI as sg
from PySimpleGUI import InputCombo, Combo, Multiline, ML, \
    MLine, Checkbox, CB, Check, \
    Button, B, Btn, ButtonMenu, \
    Canvas, Column, Col, Combo, \
    Frame, Graph, Image, InputText, \
    Input, In, Listbox, LBox, Menu, \
    Multiline, ML, MLine, OptionMenu, \
    Output, Pane, ProgressBar, Radio, \
    Slider, Spin, StatusBar, Tab, \
    TabGroup, Table, Text, Txt, T, \
    Tree, TreeData, VerticalSeparator, Window, Sizer

sg.change_look_and_feel('GreenTan')

col1 = Column([
    [Frame('Information:', [[Column([[Text('UNO:'), Input(key='-UNO-', size=(16, 1), tooltip='Insert your NO'), \
                                      Button('⌨', key='-KEYBOARD-', tooltip='Activate keyboard')],
                                     [Text('S/N:'), Input(key='-SN-', size=(16, 1), tooltip='Insert serial number of the product')],
                                     ], size=(240, 130), pad=(0, 0))]])],
], pad=(0, 0))

layout = [
    [Text('KBTest', size=(41, 1), key='text', justification='center', font=('Helvetica', 24), relief=sg.RELIEF_RIDGE)],
    [col1],
]

output = Window('Guided Test', layout, size=(400, 240)).Finalize()

keypad_active = False

while True:
    event, values = output.read()
    print(event, values)

    if not keypad_active and event == '-KEYBOARD-':
        keypad_active = True

        keypad_layout = [
            [sg.Input('', size=(10, 1), key='input')],
            [sg.Button('1'), sg.Button('2'), sg.Button('3'), sg.Button('4')],
            [sg.Button('5'), sg.Button('6'), sg.Button('7'), sg.Button('8')],
            [sg.Button('9'), sg.Button('0'), sg.Button('⏎'), sg.Button('Clear')],
            [sg.Text('', size=(15, 1), font=('Helvetica', 18),
                     text_color='red', key='out')],
        ]

        keypad = Window('Keypad', keypad_layout,
                        default_button_element_size=(5, 2),
                        auto_size_buttons=False,
                        grab_anywhere=False)

        # Loop forever reading the form's values, updating the Input field
        keys_entered = ''
        while True:
            event, values = keypad.read()  # read the form
            if event is None:  # if the X button clicked, just exit
                break
            if event == 'Clear':  # clear keys if clear button
                keys_entered = ''
            elif event in '1234567890':
                keys_entered = values['input']  # get what's been entered so far
                keys_entered += event  # add the new digit
            elif event == 'Submit':
                keys_entered = values['input']
                output['-UNO-'].update(keys_entered)  # output the final string

            # change the form to reflect current key string
            keypad['input'].update(keys_entered)
        keypad.close()

    if event is None:
        break
AFAIK on github i only found .bind( on readme_creator esp: PySimpleGUIlib.py
cteta
on 11 Dec 2019
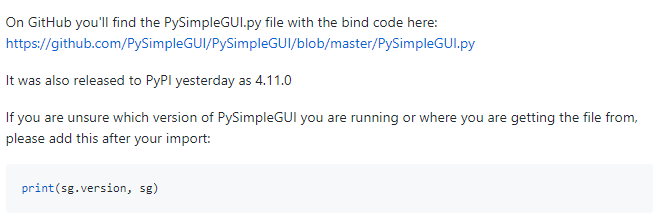
On GitHub you'll find the PySimpleGUI.py file with the bind code here:
https://github.com/PySimpleGUI/PySimpleGUI/blob/master/PySimpleGUI.py
It was also released to PyPI yesterday as 4.11.0
If you are unsure which version of PySimpleGUI you are running or where you are getting the file from, please add this after your import:
print(sg.version, sg)
I'm not sure the bind is the way to go in this case however. It's a simpler interface if you continue to use the button. Otherwise you'll have to keep track of which element has the focus versus reading it just before changing to the keyboard. It's possible to remove the button using the bind if you really want that.
If you want the keypad to fill in more than 1 field in your first window, then it will need to know what input element currently has focus. So, before showing your popup, you will want to call find_element_with_focus() on the first window and then use that in your popup code.
You were really close in your code to having it work the way you were describing. Here is your code with only a couple of changes.
import PySimpleGUI as sg
from PySimpleGUI import InputCombo, Combo, Multiline, ML, \
    MLine, Checkbox, CB, Check, \
    Button, B, Btn, ButtonMenu, \
    Canvas, Column, Col, Combo, \
    Frame, Graph, Image, InputText, \
    Input, In, Listbox, LBox, Menu, \
    Multiline, ML, MLine, OptionMenu, \
    Output, Pane, ProgressBar, Radio, \
    Slider, Spin, StatusBar, Tab, \
    TabGroup, Table, Text, Txt, T, \
    Tree, TreeData, VerticalSeparator, Window, Sizer

print(sg.version, sg)


sg.change_look_and_feel('GreenTan')

col1 = Column([
    [Frame('Information:', [[Column([[Text('UNO:'), Input(key='-UNO-', size=(16, 1), tooltip='Insert your NO'), \
                                      Button('⌨', key='-KEYBOARD-', tooltip='Activate keyboard')],
                                     [Text('S/N:'), Input(key='-SN-', size=(16, 1), tooltip='Insert serial number of the product')],
                                     ], size=(240, 130), pad=(0, 0))]])],
], pad=(0, 0))

layout = [
    [Text('KBTest', size=(41, 1), key='text', justification='center', font=('Helvetica', 24), relief=sg.RELIEF_RIDGE)],
    [col1],
]

output = Window('Guided Test', layout, size=(400, 240)).Finalize()

keypad_active = False

while True:
    event, values = output.read()
    print(event, values)
    if event is None:
        break

    if not keypad_active and event == '-KEYBOARD-':
        output_elem = output.find_element_with_focus()
        output.hide()
        keypad_active = True

        keypad_layout = [
            [sg.Input('', size=(10, 1), key='input')],
            [sg.Button('1'), sg.Button('2'), sg.Button('3'), sg.Button('4')],
            [sg.Button('5'), sg.Button('6'), sg.Button('7'), sg.Button('8')],
            [sg.Button('9'), sg.Button('0'), sg.Button('⏎', key='Submit'), sg.Button('Clear')],
            [sg.Text('', size=(15, 1), font=('Helvetica', 18),
                     text_color='red', key='out')],
        ]

        keypad = Window('Keypad', keypad_layout,
                        default_button_element_size=(5, 2),
                        auto_size_buttons=False,
                        grab_anywhere=False)

        # Loop forever reading the form's values, updating the Input field
        keys_entered = ''
        while True:
            event, values = keypad.read()  # read the form
            if event is None:  # if the X button clicked, just exit
                break
            if event == 'Clear':  # clear keys if clear button
                keys_entered = ''
            elif event in '1234567890':
                keys_entered = values['input']  # get what's been entered so far
                keys_entered += event  # add the new digit
            elif event == 'Submit':
                keys_entered = values['input']
                output_elem.update(keys_entered)  # output the final string
                break
            # change the form to reflect current key string
            keypad['input'].update(keys_entered)
        keypad.close()
        keypad_active = False
        output.un_hide()
If you do want to use the focus to popup the keypad, then this code will do that. I wanted to see what it would take as it's a little tricky. I figured a flag would be needed for when the first window got back focus which makes it a little less simple.
Here's a version without the keyboard button
import PySimpleGUI as sg
from PySimpleGUI import InputCombo, Combo, Multiline, ML, \
    MLine, Checkbox, CB, Check, \
    Button, B, Btn, ButtonMenu, \
    Canvas, Column, Col, Combo, \
    Frame, Graph, Image, InputText, \
    Input, In, Listbox, LBox, Menu, \
    Multiline, ML, MLine, OptionMenu, \
    Output, Pane, ProgressBar, Radio, \
    Slider, Spin, StatusBar, Tab, \
    TabGroup, Table, Text, Txt, T, \
    Tree, TreeData, VerticalSeparator, Window, Sizer

print(sg.version, sg)


sg.change_look_and_feel('GreenTan')

col1 = Column([
    [Frame('Information:', [[Column([[Text('UNO:'), Input(key='-UNO-', size=(16, 1), tooltip='Insert your NO')],
                                     [Text('S/N:'), Input(key='-SN-', size=(16, 1), tooltip='Insert serial number of the product')],
                                     ], size=(240, 130), pad=(0, 0))]])],
], pad=(0, 0))

layout = [
    [Text('KBTest', size=(41, 1), key='text', justification='center', font=('Helvetica', 24), relief=sg.RELIEF_RIDGE)],
    [col1],
]

output = Window('Guided Test', layout, size=(400, 240), finalize=True, use_default_focus=False)

output['-UNO-'].bind('<FocusIn>', '+FOCUS+')
output['-SN-'].bind('<FocusIn>', '+FOCUS+')

keypad_active = output_was_unhidden= False
while True:
    event, values = output.read()
    print(event, values)
    if event is None:
        break

    if output_was_unhidden and event.endswith('+FOCUS+'):
        output_was_unhidden = False
        continue

    if not keypad_active and (event == '-KEYBOARD-' or event.endswith('+FOCUS+')):
        output_elem = output.find_element_with_focus()
        output.hide()
        keypad_active = True

        keypad_layout = [
            [sg.Input('', size=(10, 1), key='input')],
            [sg.Button('1'), sg.Button('2'), sg.Button('3'), sg.Button('4')],
            [sg.Button('5'), sg.Button('6'), sg.Button('7'), sg.Button('8')],
            [sg.Button('9'), sg.Button('0'), sg.Button('⏎', key='Submit'), sg.Button('Clear')],
            [sg.Text('', size=(15, 1), font=('Helvetica', 18),
                     text_color='red', key='out')],
        ]

        keypad = Window('Keypad', keypad_layout,
                        default_button_element_size=(5, 2),
                        auto_size_buttons=False,
                        grab_anywhere=False)

        # Loop forever reading the form's values, updating the Input field
        keys_entered = ''
        while True:
            event, values = keypad.read()  # read the form
            if event is None:  # if the X button clicked, just exit
                break
            if event == 'Clear':  # clear keys if clear button
                keys_entered = ''
            elif event in '1234567890':
                keys_entered = values['input']  # get what's been entered so far
                keys_entered += event  # add the new digit
            elif event == 'Submit':
                keys_entered = values['input']
                output_elem.update(keys_entered)  # output the final string
                break
            # change the form to reflect current key string
            keypad['input'].update(keys_entered)
        keypad.close()
        keypad_active = False
        output.un_hide()
        output_was_unhidden = True
I would like to continue to work on this code some and turn it into a Demo Program if that's OK with you. It probably won't look all that similar but want to get permission before using anyone's code as a starting point.
PySimpleGUI
on 11 Dec 2019
Please go ahead
i wonder your code will give output like these below?
/usr/bin/python3.7 watch2.py
4.6.0 Released 11-Nov-2019 <module 'PySimpleGUI' from '/usr/local/lib/python3.7/dist-packages/PySimpleGUI/__init__.py'>
Traceback (most recent call last):
  File "./watch2.py", line 32, in <module>
    output['-UNO-'].bind('<FocusIn>', '+FOCUS+')
AttributeError: 'InputText' object has no attribute 'bind'

Process finished with exit code 1
Please update your version of PySimpleGUI. You're running with a very old version that is 5 versions back from the one that you need.
The reason for the print was for you to see which version you're running to compare with my instructions saying that you should be running version 4.11.0
How can I better communicate these instructions?
You added the print correctly, but seem to be missing the point (that you should be running version 4.11.0).
PySimpleGUI
on 12 Dec 2019
Thanks, got it... i did upgrade. yes, it works... . Did i miss the changelog file?
what if i am implementing the overlay keypad? i am supposed it more complex or something else...
cteta
on 12 Dec 2019
I don't understand your questions.
Changelog file? You'll find the release notes that contain what was changed at the bottom of the documentation and readme file. It doesn't display fully on the GitHub home page but it's in the readme.md file itself.
This question is confusing. I'm not able to understand what you are asking:
"what if i am implementing the overlay keypad?"
PySimpleGUI
on 12 Dec 2019
noted for the changelog
let's say im on raspi touch display .... the output window will fill all the screen
is the keypad window possible to be overlaying over the output window instead https://ibb.co/9vtRTzy ...
so first layer would be keypad window somewhere over the output window
cteta
on 12 Dec 2019
Did you notice that if we input again on the filled input the keypad will not trigger the keypad window?
cteta
on 12 Dec 2019
Yes, you can create the keypad window over the top of the other window. Create the keypad window with the parameter keep_on_top=True and it will stay on top of the other window. You can change the location of one or both windows so that they're in the positions you're desiring.
I didn't do extensive testing of the focus-in binding solution for your project. It sounds like more debugging and experimenting is needed to determine why and if there's a solution. If you can't find one, then the button approach you were using is always an option.
The best place to keep on top of what's in the latest releases is using the main documentation http://www.PySimpleGUI.org. The release notes are always added to the end. Sounds like you already found them, but for future reference this is the best place.
PySimpleGUI
on 12 Dec 2019
noted, thanks for the reference on the keep_on_true
yes i did noticed about the 'changelog'
yes thanks again for pointing about the focus-in and all options that you proposed on my problem... i will refer on pysimplegui.org to find and search
im no doubt on asking all question about my problem about implementing pysimplegui again
cteta
on 12 Dec 2019
Is there anything else you need for this issue or can I close it?
PySimpleGUI
on 13 Dec 2019
Related issues
 mozesa
·
5Comments
mozesa
·
5Comments
 thelou1s
·
4Comments
thelou1s
·
4Comments
 MikeTheWatchGuy
·
6Comments
MikeTheWatchGuy
·
6Comments
 martinmeteor
·
4Comments
martinmeteor
·
4Comments
 ECOM-Klaus
·
4Comments
ECOM-Klaus
·
4Comments
Most helpful comment
I would like to continue to work on this code some and turn it into a Demo Program if that's OK with you. It probably won't look all that similar but want to get permission before using anyone's code as a starting point.