Maptool: Token movement is jumpy on hidden and object layer
Describe the bug
When I have a token on either the hidden or object layer that is in Free Size mode and set to Snap to grid, the movement is jumpy, most notably when the token is larger than on grid cell. The mouse cursor does not end up in the same relation to the token after the movement as it does before the movement. Also, the token does not line up with the grid.
To Reproduce
Steps to reproduce the behavior:
- Open a new campaign.
- Drop a token on either the hidden or object layer.
- Set token to Free Size.
- Make sure that the token is set to Snap to grid.
- Move the token around.
Expected behavior
I expect the token to behave like it does on the token and background layers.
Video
I attached a video. I hope it illustrates the problem well enough, I had to reduce the resolution due to file size limitations.
MapTool Info
- Version: 1.6.1
- Install: Upgrade from 1.6.0
Desktop (please complete the following information):
- OS: macOS
- Version 10.5.4
Additional context
I believe there was an issue for something like this some time ago, but I couldn’t find it. Sorry for that.
 mrkwnzl
All 27 comments
I thought this got fixed in #1469? I could have sworn @Phergus and I had tested it out and it worked.
EDIT: we tested it on the background layer, but hidden and object layer have same issue.
 Merudo
on 17 Apr 2020
Merudo
on 17 Apr 2020
Thought so as well but snap-to-grid tokens with free-size on Object & Hidden are still wonky. Pointer drifts out of position.
Not snapped and they are fine.
 Phergus
on 17 Apr 2020
Phergus
on 17 Apr 2020
I checked the code and I'm confused. There are multiple instance of background / object layer specific code in StampTool related to these two methods:
isBackgroundStamp()
isObjectStamp()
Is there any rational for differentiating between the hidden, object and background layers while dragging tokens?
My intuition is that we should scrap the distinction, and change the code so everything works like the background layer.
Merudo
on 17 Apr 2020
Hidden layer came later and I admit that I pretty much never use it. I expect it to act like the Token layer but I get the impression that folks use it for both Tokens and Objects.
- Objects that are set snap-to-grid snap from the center.
- Background stamps snap to the top-left.
They are different as the Object layer was meant for set dressing objects and it was determined back in the day that _most of the time_ folks would want to snap to the center cell of an object. Stamps on the Background layer however were mostly expected to be tiles for building maps and those needed to snap to the top-left corner.
Phergus
on 17 Apr 2020
As end-user, I find that rather confusing. I expect snap to grid to function everywhere the same. If I want an object to not snap to the top left corner, I deactivate snap to grid and move it where I want.
mrkwnzl
on 17 Apr 2020
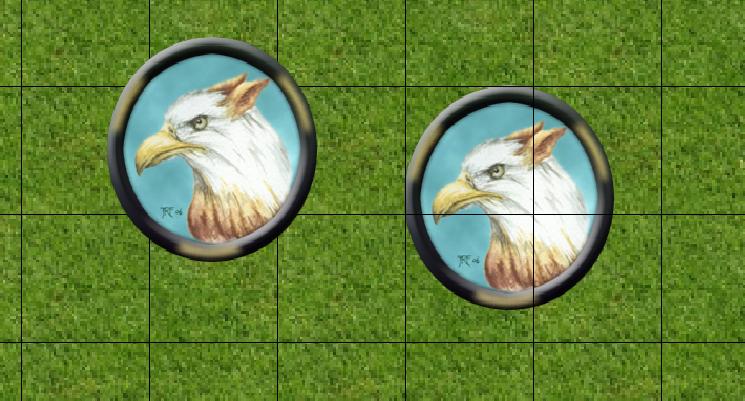
I now understand what is meant by "snap to center" and "snap to corner".
Here is an example. The first token is snapped to the center (toke/hidden/object layers), the second snapped to the corner (background layer).
Merudo
on 17 Apr 2020
You should be able to the see the snap to center in the video I uploaded. While on the background layer, the token fits perfectly in the grid. On the object layer, it doesn’t. I go around with the mouse cursor one time, to illustrate that.
mrkwnzl
on 17 Apr 2020
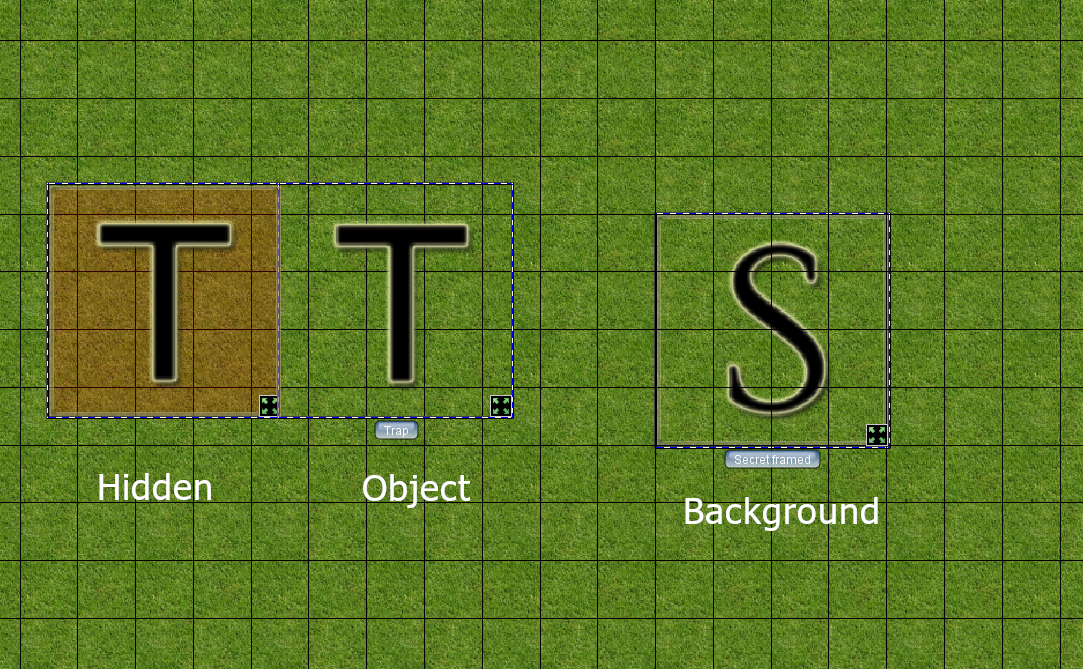
@Merudo All three of these are free-size and snap-to-ground on the respective layers.
Phergus
on 17 Apr 2020
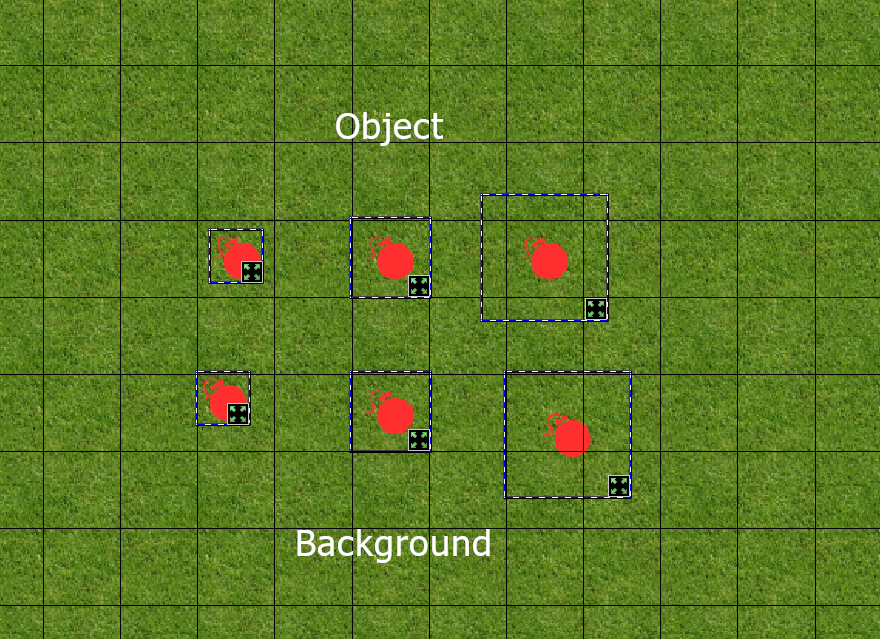
If you have a tiny bomb symbol that you want to use on the object layer and you want it snap-to-grid to indicate with no doubts about which cell it is in. Let say you found it with varying degrees of padding and you can't change it because you suck at GIMP.
Phergus
on 17 Apr 2020
Thanks for the explanation, @Phergus!
PR #1593 fixes the issue with snap-to-grid free-size tokens on the hidden and object layers.
Merudo
on 17 Apr 2020
EDIT: I was confused. Keeping this so the conversation below makes sense, but this here is rubbish.
Okay, here’s my problem: I always assumed the Hidden layer is supposed to be a kind of secret preparation layer. I put things on there that I want to reveal later. I cannot use the other layers for that in a live session, because the players will see what I do.
At some time in the game, some of those hidden tokens will go to the Token layer. Others will go to the Object layer. Which behavior should be used in the Hidden layer then? The one in the Token layer (snap to top left corner) or the one in the Object layer (snap to center)?
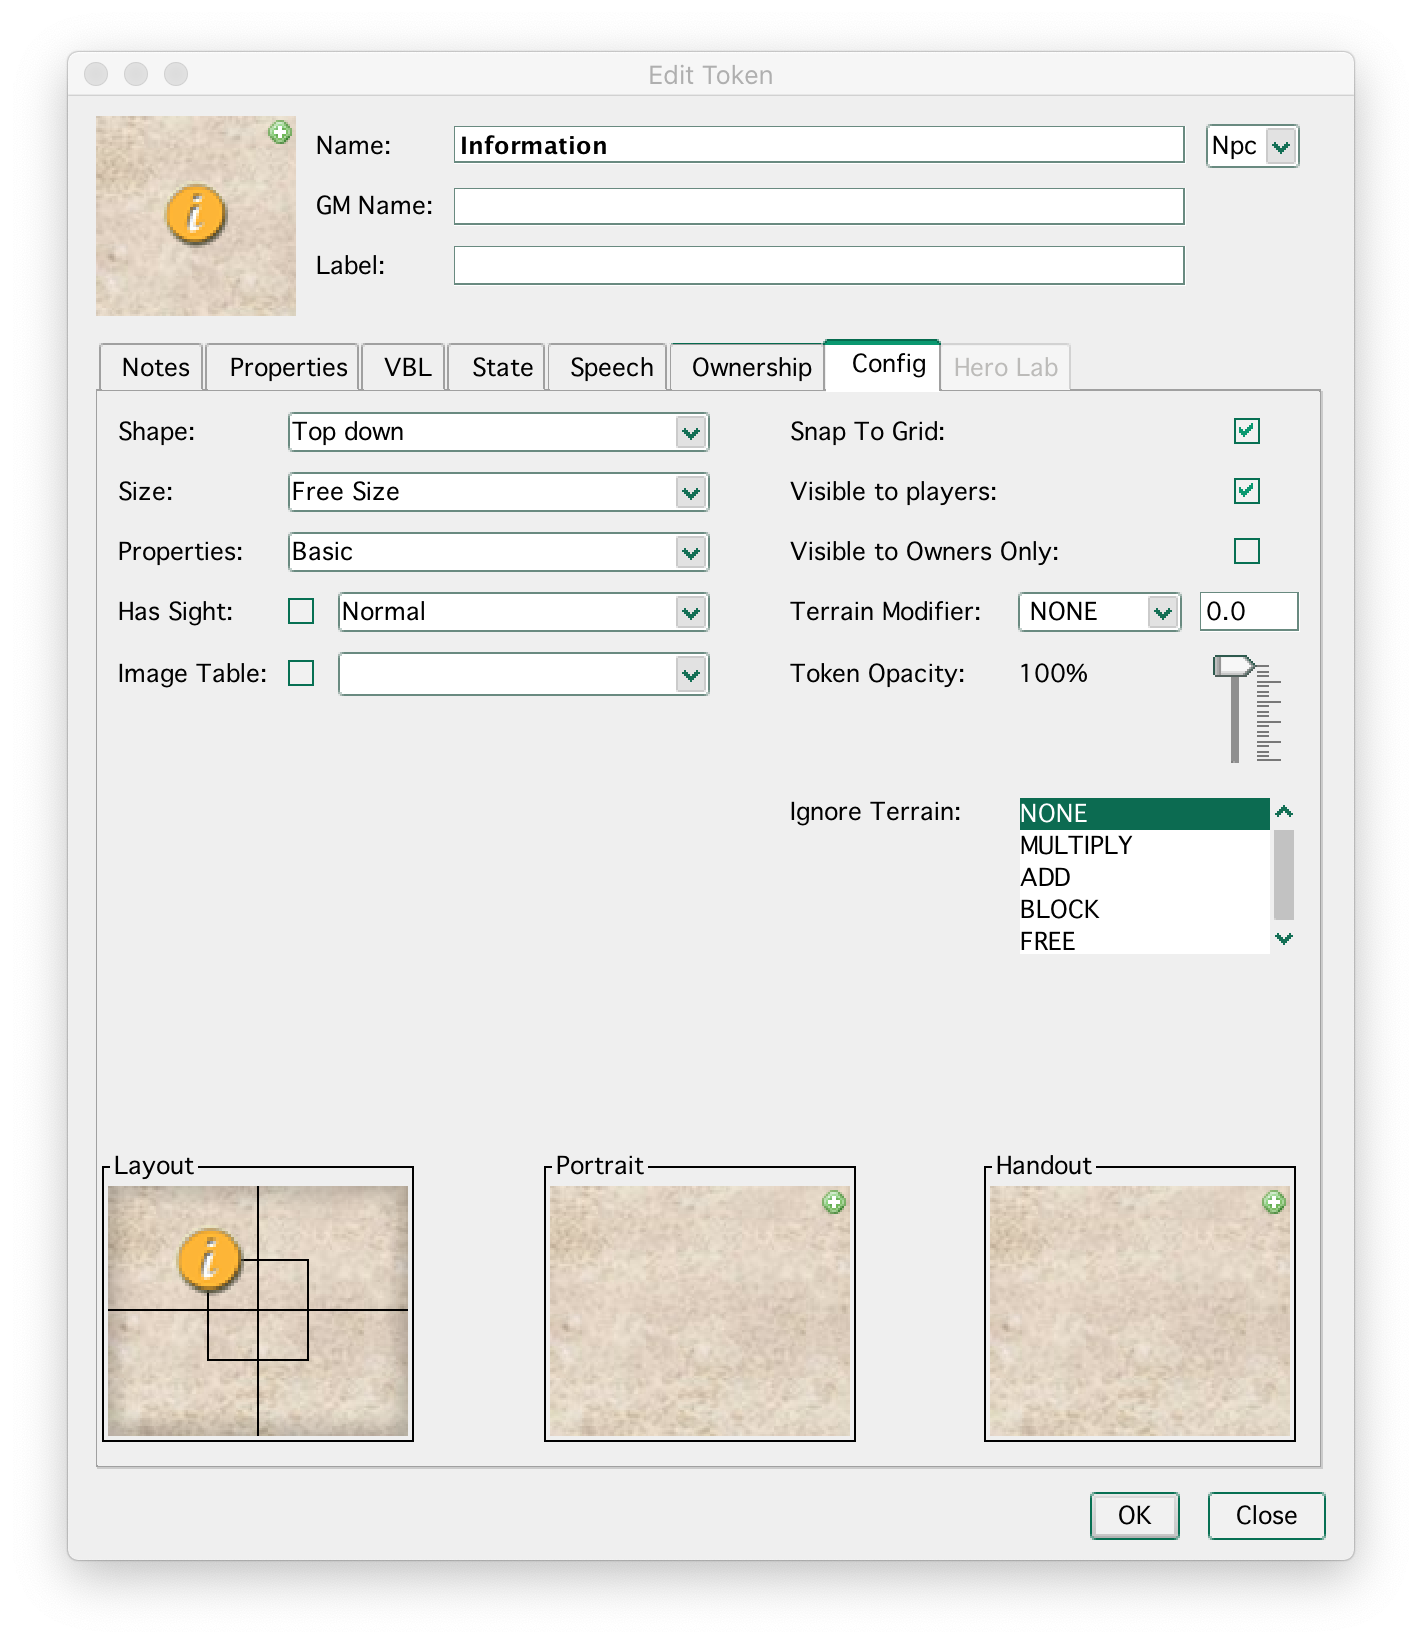
For things like the bomb, wouldn’t it suffice to deactivate snap to grid and just move it to the right place? Alternatively, one could move the bomb in the layout section of the config tab in Edit Token, which will result in the same behavior as it does now in the Object layer, like this:
I’d prefer that and have consistency across all layers.
(Or, in a more perfect world there would be a setting in the config tab, which lets it snap to grid center.)
mrkwnzl
on 17 Apr 2020
Tokens snap to center. Token, Hidden, Object all behave the same. Intentionally.
For things like the bomb, wouldn’t it suffice to deactivate snap to grid and just move it to the right place?
Same argument can be made for your usage. Turn off snap-to-grid and simply position them correctly.
I put things on there that I want to reveal later. I cannot use the other layers for that in a live session, because the players will see what I do.
You could if your preferences was set such that they weren't visible to players on drop.
There is rarely just one way to do things in MapTool.
Phergus
on 17 Apr 2020
Tokens snap to center. Token, Hidden, Object all behave the same. Intentionally.
Sorry, I seemed to have confused myself. I thought the Token layer snapped to top left corner. Disregard everything I said in my posting above. The current behavior makes sense, no change needed.
mrkwnzl
on 17 Apr 2020
Tested against new code. Dragging working as expected now for all 4 layers with free-size and snap-to-grid. Also tested free-size without snap-to-grid. No issues on all 4 layers.
Tokens set to a defined size larger than Medium on Token, Object and Hidden layers still show issue of pointer being forced to top-left cell while dragging.
Phergus
on 17 Apr 2020
Tokens set to a defined size larger than Medium on Token, Object and Hidden layers still show issue of pointer being forced to top-left cell while dragging.
Should the point be forced to the middle of the token in those cases? Or should the cursor stays at the same spot on the token.
Merudo
on 17 Apr 2020
My take is that the cursor should stay near the same point. With a snapped token it's going to jump about as you move as it transitions from cell snap to the next.
Phergus
on 17 Apr 2020
Thanks @Phergus . I think PR #1596 finally gets it right for the hidden, object, and background layers.
EDIT: I meant right for the square grid only! Oops
Merudo
on 17 Apr 2020
Both free-size and named-size tokens on the Hidden and Object layers are working as expected with snap-to-grid on or off.
Background stamps both snap and non-snap, free-size and named-size are moving correctly.
Token layer tokens that are free-size work correctly with snap on or off.
Token layer tokens that are a named size (e.g. Huge) still exhibit the jump to top-left as dragging is initiated. They just need to function the same as Hidden or Object layer items.
Now to make sure hex and iso movement is still good.
Phergus
on 18 Apr 2020
Gridless Maps
- Background stamps, free-size & named-size, snap or not - all moving correctly
- Object stamps, free-size or named size, non-snap-to-grid - working correctly
- Object stamps, free-size or named-size, snap-to-grid - get an initial jump when moving
- Hidden Layer, free-size or named size, non-snap-to-grid - working correctly
- Hidden Layer, free-size or named-size, snap-to-grid - get an initial jump when moving
- Token Layer, free-size or named size, non-snap-to-grid - working correctly
Note that size of initial jump is proportional to image size.
Phergus
on 18 Apr 2020
Thanks for the thorough testing, @Phergus. That's a lot of conditions to cover.
I wonder if the behavior on the token layer is related to the grid costs being printed on the top left cells of the token (#598).
Merudo
on 18 Apr 2020
Certainly indicative that the movement being based on the top-left cell instead of the center. Having the cost put in the bottom-right cell of the footprint would make more sense as well.
Phergus
on 18 Apr 2020
PR #1599 fixes it for all grids.
Merudo
on 18 Apr 2020
Testing latest code:
- Square Grid - Movement on all layers good.
- Gridless - Movement on all layers good.
- Hex Grid (both) - Movement on all layers good.
- Iso Grid - Movement on all layers good.
Phergus
on 18 Apr 2020
I just tested this on 1.7.0 Alpha 1. While the movement seems to work on all layers with snap to grid and off, there is still jumping around on the Token, Hidden, and Object layers when I switch to or from snap to grid on free sized tokens.
As far as I can tell, this is because the movement is based on either the center (when snap to grid is on) or the top left corner (when snap to grid is off). If I switch modes, the token jumps so that the top left corner is where the center was before. I think the movement should always be based on the center of the token on the Token, Hidden or Object layers, whether snap to grid is on or off.
Example: I have a token with snap to grid on and free sized to 7×7 squares. It’s positioned so that the top left corner is at coordinate 0,0. The center is therefore at coordinate 3,3. If I now switch snap to grid off, the token jumps around, so that the top left corner is now at coordinate 3,3, with the center at 6,6.
Of course there is some movement expected, as snap to grid, well, snaps it to the grid. But I’d expect that movement to be less than a square, as it would snap the center to the nearest square.
EDIT: I made a quick screencast of it: Screen Recording 2020-04-21 at 19.13.58.mov.zip
mrkwnzl
on 21 Apr 2020
Be careful with changing the "snap to" point. There are plenty of art packs that expect the snapping to work as it does now so that maps can be laid out one wall segment at a time and they will connect end-to-end easily.
If there are three wall segments that are snap-to-grid and they line up correctly, when snap is turned off and back on, they should still b in their original positions.
 Azhrei
on 21 Apr 2020
Azhrei
on 21 Apr 2020
I think "snap/unsnap results in jumpiness" should be it's own issue.
With 5 grid types, 2 token shape modes (free size or fixed), 2 snap-to-grid modes, and 4 layers, there is already a lot to cover for token movement. No need to lump more stuff into the issue.
Merudo
on 21 Apr 2020
I think "snap/unsnap results in jumpiness" should be it's own issue.
With 5 grid types, 2 token shape modes (free size or fixed), 2 snap-to-grid modes, and 4 layers, there is already a lot to cover for token movement. No need to lump more stuff into the issue.
You are right. Opened a new issue: #1653
mrkwnzl
on 21 Apr 2020
Related issues
 cwisniew
·
6Comments
cwisniew
·
6Comments
 nmeier
·
9Comments
Merudo
·
4Comments
mrkwnzl
·
9Comments
Merudo
·
4Comments
nmeier
·
9Comments
Merudo
·
4Comments
mrkwnzl
·
9Comments
Merudo
·
4Comments
Most helpful comment
Testing latest code: