Dietpi: Image | UEFI compatible x86_64 image
Beta:
https://dietpi.com/downloads/images/DietPi_NativePC-UEFI-x86_64-Buster.7z
- Install instructions are included in this archive.
Our current Native PC image is MBR based and relies on CSM mode for UEFI. CSM not available on some devices.
 Fourdee
All 127 comments
Z83:
Fourdee
on 8 Oct 2017
Method 1: Install any Debian OS onto device, then run DietPi PREP:
Method 2: UEFI x86_64 image:
- Based on @sal666 excellent Clonezilla install method 👍 https://github.com/Fourdee/DietPi/issues/1007#issuecomment-328102850
Step 1: Download Rufus and DietPi
- Download Rufus
- Download the DietPi ISO image (with CloneZilla bundled)
EDIT: Updated install instructions are now added as text file in the download archive, please follow those instead!
Step 2: Use Rufus to write the ISO | @sal666 Clonezilla installer
- Run Rufus
- Under
Partition scheme, selectGPT partition scheme for UEFI - Select the DietPi
.isoimage - Click start to write the DietPi image
Step 3: Install DietPi image onto device
- Power on the device with USB pen drive attached
- Enter BIOS and select USB pen drive as the 1st boot device, then save and exit BIOS.
-- Select "Install DietPi mmcblk0" (if you have an onboard EMMC chip)
-- Select "Install DietPi sda" (to install on the 1st HDD as detected by BIOS/clonezilla, unfortunately, we have no way of providing this info on screen, use with caution)
-- Please note, this will overwrite and replace any OS installed on the target device. - Once completed, the system will power off.
- Unplug the USB drive, and power on system.
Fourdee
on 13 Oct 2017
Rufus install process confirmed working by one of our users:
http://dietpi.com/phpbb/viewtopic.php?f=12&t=2452&p=9514#p9501
Outstanding issues:
- User reports no audio on device.
- Implement GPU driver install?
Fourdee
on 13 Nov 2017
Tried installing it on an Intel NUC NUC6CAYH - no emmc, just one normal ssd.
Followed the steps described above, but it didn't work. Was unable to install it in the end. Still would be nice to have a normal ISO.
 georgecarstoiu
on 22 Dec 2017
georgecarstoiu
on 22 Dec 2017
Tried on NUC NUC6CAYS (with 32GB eMMC) and the install process did not work the first time (odd error about not being able to find mmcblk0 though it had just returned messages saying it was located...
Tried again immediately and it seemed to work.
I did see a bunch of I/O errors for the eMMC during install, which was a major reason I came to dietpi from trying to run Mint on it. I will get it up and running and report back if I am having the same issues.
Thanks for all the efforts...
Would love to have audio support.
EDIT*
The system is also crashing the eMMC - causing it to revert to read only after bunch of I/O errors on the eMMC.
 nwcatalyst
on 11 Jan 2018
nwcatalyst
on 11 Jan 2018
@nwcatalyst
Thanks for testing 👍
This may be a hardware/EMMC issue (may also be related to discard fstab disabled in v6.0). Do you experience EMMC I/O errors with other OS?
It may also be worth trying our new PREP system, requires a debian installation on EMMC:
https://github.com/Fourdee/DietPi/issues/1285
Fourdee
on 11 Jan 2018
I had no issues with default W10 installation before trying various Linux distros.
I will try again.
-------- Original Message --------
On Jan 11, 2018, 2:58 AM, Dan wrote:
Thanks for testing 👍
This may be a hardware/EMMC issue (may also be related to discard fstab). Do you experience EMMC I/O errors with other OS?
It may also be worth trying our new PREP system, requires a debian installation on EMMC:
#1285—
You are receiving this because you were mentioned.
Reply to this email directly, view it on GitHub, or mute the thread.
nwcatalyst
on 11 Jan 2018
Notes to prep:
- Run prep, install both microcodes (intel/amd)
- LXDE live, resize partition + zerofree
- Clonezilla
Fourdee
on 21 Jan 2018
v6.0 EFI image for testing is there btw: http://dietpi.com/downloads/images/
@Fourdee
Is it wanted that this is in releases instead of testing?
 MichaIng
on 23 Jan 2018
MichaIng
on 23 Jan 2018
@MichaIng
Is it wanted that this is in releases instead of testing?
Yep tested it personally and ready for use (- any patching during v6.0 update), ~however, dietpi.com links are not updated yet (still using old Links to v6.0 image, as above, its fine.
Fourdee
on 23 Jan 2018
Marking as completed, image is now available, and, PREP method also:
https://github.com/Fourdee/DietPi/issues/1171#issuecomment-336522021
Fourdee
on 28 Jan 2018
Fourdee
on 8 Feb 2018
Tried to boot the x64 EFi-build on a Beelink AP34 (Apollo Lake, internal eMMC) but the machine crashes with a non-blinking cursor right after selecting the UEFI usb drive from the bootloader of the machine.
Could it be that there's a difference between the Atom and Apollo Lake-based CPUs?
In fact, the only Linux distro I've been able to get to boot on the machine is one made by Linuxium. And he always provides two different versions: One for Atom and another one for Apollo Lake.
Has anyone been able to install DietPi on an AP34?
 tomillr
on 5 Apr 2018
tomillr
on 5 Apr 2018
@tomillr
Could it be that there's a difference between the Atom and Apollo Lake-based CPUs?
Yep, appears to be an issue with either the CPU and/or device (or BIOS limitation) itself. Modifications are required:
http://rglinuxtech.com/?p=2021
I did look at the bios settings, and there would appear to be a solution, as there is an option for ‘Legacy’ boot instead of UEFI. I tried this, and it made no difference – all you see is a blank screen, with a small flickering cursor in the top left corner..
notes:
https://wiki.debian.org/UEFI#Support_for_mixed-mode_systems:_64-bit_system_with_32-bit_UEFI
Sounds like exactly the same behavior on my system.
Using the 'isorespin.sh' script I'm able to get an Ubuntu iso to boot properly on the Apollo Lake system. The process the author uses is also described on the website. LINK
Any chance of getting this fixed somehow? Maybe it's possible to adopt the method linked above to work with Debian and hence RetroPie?
tomillr
on 6 Apr 2018
@tomillr
Seems the AP34 BIOS is 32bit, hence the need for all these software changes.
Unable to find a 64bit BIOS update from beelink.
Any chance of getting this fixed somehow?
Unfortunately, Its not something I can start at the moment, and, I also lack the device for testing. The only thing I can suggest is to also try contacting Beelink for a 64bit BIOS update.
Fourdee
on 7 Apr 2018
Already tried to convince Beelink a couple of times but it doesn't seem like they are interested in support their devices.
How about a donation of 100 bucks so that you can get your hands on an Apollo Lake device?
tomillr
on 8 Apr 2018
Thanks Method#2 works fine with UP-BOARD.
RUFUS creation of GPT is very import, just flashing the ISO will not work. Performing similar steps on linux can be done by extrapolating this guide: https://tqdev.com/2016-creating-bootable-windows-10-usb-ubuntu
 emms007
on 17 Apr 2018
emms007
on 17 Apr 2018
Won't work on my system.
However, the rescue disk from AltLinux boots right away. Maybe it is possible to take a look at how they handle boot and apply this to the x86 build of DietPi? Looks like there image can boot on pretty much everything...
tomillr
on 19 Apr 2018
@tomillr
Debian Jessie (8.0) was the first Linux distribution to include full support for mixed-mode UEFI installation on these machines. The multi-arch installation media (available in netinst and DVD form) include the UEFI boot loaders necessary for both i386 and amd64
By selecting "64-bit install" from the initial boot menu, debian-installer will install a 64-bit (amd64) version of Debian. The system will automatically detect that the underlying UEFI firmware is 32-bit and will install the appropriate version of grub-efi to work with it.
Does a box standard Debian install provide the same boot issue? Reading the above, it should detect efi32 and install/configure for it automatically.
If it does function, should just be a case of us checking for efi32 in our PREP script.
Fourdee
on 20 Apr 2018
Yes, the standard Debian multiarch distro with UEFI support for mixed mode systems has the same issue.
With AltLinux or the "respun" Ubuntu images from Linuxium I can just flash the iso to a usb strick with Etcher and boot right of the stick without any problems.
tomillr
on 20 Apr 2018
This script can be used to make Ubuntu boot on either Intel Atom or Apollo Lake system:
https://drive.google.com/file/d/0B99O3A0dDe67S053UE8zN3NwM2c/edit
Looks like it's using GRUB_EFI_IA32 and applying a custom set of values to get Linux to boot.
tomillr
on 20 Apr 2018
Is there a way to change the boot loader the DietPi install medium uses to the rEFInd Boot Manager?
While GRUB won't boot, I can use the rEFInd boot manager just fine on my Apollo Lake mini pc.
EDIT: I've also tried to just install regular Debian as a base. Unfortunately, this also doesn't work:
The system just freezes instantly to a non-blinking cursor the second I select the usb drive holding the Debian install media from the UEFI boot menu.
I've already tried both the regular Debian )debian-9.4.0-amd64-netinst.iso) as well as the multi-arch (debian-9.4.0-amd64-i386-netinst.iso) images.
The iso were copied to a usb stick using Rufus (Fat32/GPT/4096 Bytes/iso & dd image modes). But I also gave Unetbootin and Etcher a try.
Also, I can boot the Debian installer from the very same usb stick on my Mac and NUC without any issues.
tomillr
on 24 Apr 2018
@tomillr
Hmm, so far within our code (not just preparation script), we assume grub being installed on x86_64 systems. Using a different bootloader will lead to unexpected errors when using dietpi-config and other scripts.
Beside that, it would be not too hard to just ignore bootloader (not install any) by commenting/removing the following lines: https://github.com/Fourdee/DietPi/blob/master/PREP_SYSTEM_FOR_DIETPI.sh#L708-L718
Did you try to manually apt install grub-efi-amd64 or if I understood right, that you need 32bit efi grub-efi-ia32 after gotten Linux/Debian run different method? Of course full rootfs/bootfs backup should be done before, if it breaks 😀.
Second try to flash the Debian installer iso via Rufus as MBR for BIOS, to let it install Debian with BIOS as well. Finally for my impression there is no real argument that marks BIOS as no-go in most cases.
€: Ah on the other hand, dd image should be right in every case and GPT/MBR should be decidable when formatting the system drive during installation (?).
For now I think it should be easier to find fixes with grub on troubling machines, than implementing a new x86 bootloader with all the additional checks and code adjustments that going along with this.
But these are rough thoughts, as I did not read deeper into the details of Apollo Lake mini pc. Let me do that tomorrow, than I hopefully have a clearer image of what can be possible 😉.
MichaIng
on 24 Apr 2018
we assume grub being installed on x86_64 systems.
As far as I was able to glean from the documentation over at Linuxium's blog, Apollo Lake chips can run a 64bit OS (like the preinstalled Windows 10) but the UEFI implementation is somehow still 32bit.
try to flash the Debian installer iso via Rufus as MBR for BIOS, to let it install Debian with BIOS as well. Finally for my impression there is no real argument that marks BIOS as no-go in most cases.
I've already tried using MBR with Rufus. Unfortunately, the legacy bios option is not available on this system. So I don't really have the option to use anything but UEFI to boot.
tomillr
on 25 Apr 2018
Anything I can do to provide some more data?
tomillr
on 2 May 2018
@tomillr
To implement to support for this, i need to obtain a device with 32bit UEFI BIOS with no CSM/legacy support. I've looked at the AP34:
https://www.gearbest.com/tv-box-mini-pc/pp_617335.html?wid=1433363
£111 + delivery + import tax
Probably looking at £150~ to cover it.
Unless I can get a device to test locally, we are basically going in here blind. I'll need the device to implement, however, its not something we have the funds for currently.
Fourdee
on 5 May 2018
@Fourdee
Is there some technical/design reason why EFI/GPT images can't just be created and flashed via rufus "DD image" like MBR/BIOS images, ready to run?
MichaIng
on 11 May 2018
@MichaIng
Is there some technical/design reason why EFI/GPT images can't just be created and flashed via rufus "DD image" like MBR/BIOS images, ready to run?
I'am not 100% clued up on UEFI, however, I believe we cant simply DD write the image, as the UEFI bios does not register it as a UEFI device.
Best guess: Clonezilla enables the UEFI bios to see the new UEFI device. I believe it generates a unique UEFI code on the system, which changes on each UEFI device. Although I could be wrong.
Either way, Rufus is required to create a UEFI capable boot device.
Fourdee
on 11 May 2018
Unfortunately, GRUB is not able to boot Apollo Lake devices.
isorespin's author Ian Morrison (AKA Linuxium), explains it well here.
In a nutshell, we need to replace GRUB with rEFInd, both in the installation pen drive and in the target device.
To prepare an installation pen drive with rEFInd follow these steps:
Create DietPi's installation pen drive. Use 'Method 2' described above, steps 1&2.
Install rEFInd to the pen drive (in a Linux machine and assuming it's mounted as /dev/sdb1):
sudo umount /dev/sdb*
wget "https://sourceforge.net/projects/refind/files/0.11.3/refind-bin-0.11.3.zip"
7z x refind-bin-0.11.3.zip
sudo refind-bin-0.11.3/refind-install --usedefault /dev/sdb1  # After execution /dev/sdb1 will remain mounted at /tmp/refind_install
mv refind-bin-0.11.3 /tmp/refind_install                      # move to the pen drive so we can install it later on the target device
Configure rEFInd
Extract this zip to /tmp/refind_install/EFI/boot:
extrafiles.zipGRUB and its config files can also be removed from the pen drive.
- Eject pen drive.
Then Install DietPi onto target device:
- Boot device with pen drive (on one of my test devices sometimes rEFInd reads a ghost keypress and runs the first boot option. In that case quickly press Ctrl+Alt+Del to reboot and try again).
- Install DietPi.
- Once completed, the system will power off.
To install rEFInd onto target device:
- Boot again with pen drive and select "Boot Clonezilla live".
- At the first menu, select "Enter_shell" and execute these commands:
  sudo su
  PART1=$(blkid --uuid CA7A-8CED)   # DietPi's first partition (usually mmcblk0p1, mmcblk1p1 or sda1)
  /lib/live/mount/medium/refind-bin-0.11.3/refind-install --usedefault $PART1
  rm -rf /tmp/refind_install/EFI/arch_grub    # not needed (maybe DietPi team can verify), and rEFInd would show it as a second boot option
  umount /tmp/refind_install
  poweroff
- Extract pen drive and boot DietPi.
- If your device is not booting into rEFInd then boot to EFI settings and reset to default settings. That will reset EFI's NVRAM entries, as explained here.
- Log in as root and run these commands to get rid of GRUB:
# Block grub and lilo packages, as they can interfere with rEFInd
printf "Package: grub: lilo:nPin: release nPin-Priority: -1n" > /etc/apt/preferences
apt purge grub # uninstall grub
apt autoremove # uninstall grub dependencies. 'efibootmgr' will be uninstalled. It's not needed, but we can install it again if we want to.
Hope it helps you all ;)
UPDATE:
I've just realized that Clonezilla is able to ask the user to select the target device when restoring an image. This way we don't need one boot option for every possible target disk (mmcblk0, mmcblk1, sda,...). I've updated the rEFInd's config file in extrafiles.zip accordingly.
Same thing can be done in the original -GRUB based- UEFI installer. In grub.cfg, the reserved word 'ask_user' can be used instead of the device name: grub.zip
 sal666
on 24 May 2018
sal666
on 24 May 2018
sal666, thanks for the nice instruction.
I've tried to follow your procedure using an Ubuntu 18.04 live version but have run in to a couple of issues:
7zip is apparently not part of the regular Ubuntu distro and I wasn't able to apt-get it either. That's why I had to manually extract the refind-bin-0.11.2.zip.
I've also copied your files from the extrafiles.zip manually to /dev/sdb1/EFI/boot.
I was able to successfully boot rEFInd from the usb stick and start the the DietPi installer. Unfortunately, the installer halted with with a couple of error messages.
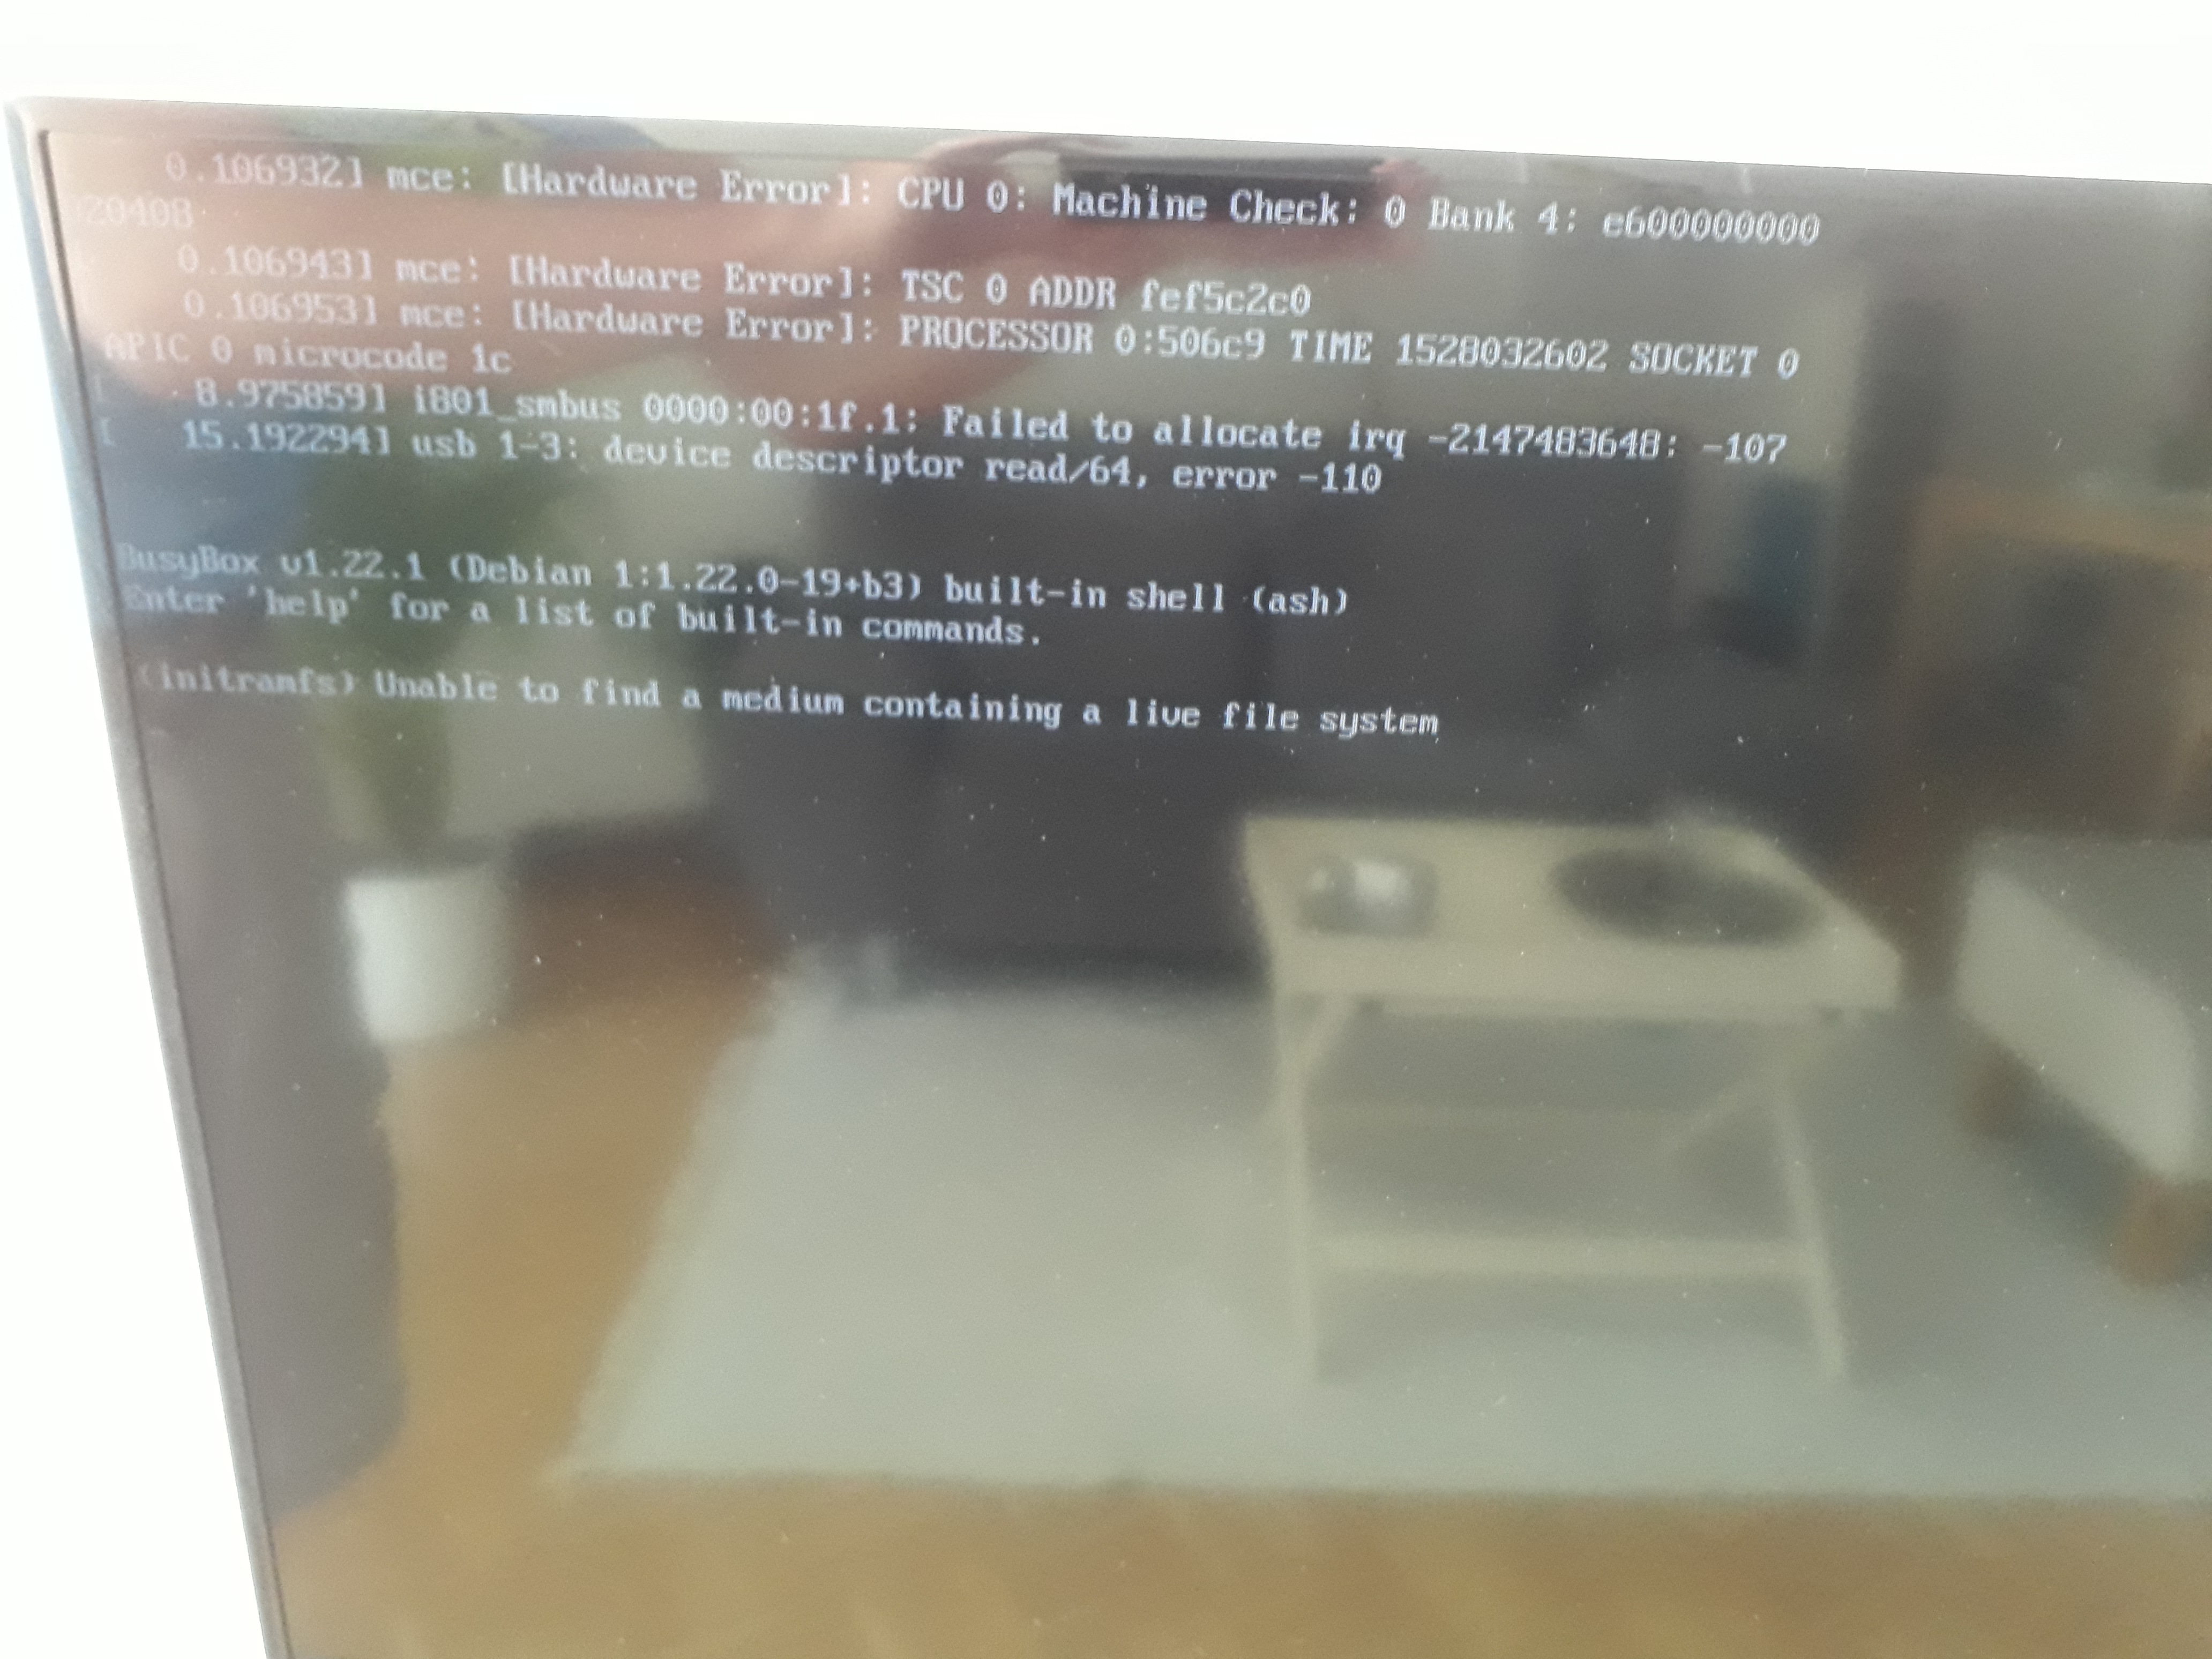
Any idea what might have gone wrong here?
EDIT: Also, how to do properly get rid of GRUB. Do you just have to delete grub.cfg in /EFI/boot and /boot/grub? Or are there additional files that need to go?
tomillr
on 3 Jun 2018
@tomillr
Hmm apt install 7zip-full does not work?? On 17.10 at least it worked.
Otherwise since it's zip, unzip refind-bin-0.11.2.zip should do the same.
The screen does not show direct DietPi-PREP error messages. At what install stage this showed up exactly? €: Ah I guess this is before DietPi-PREP even started. Seems the it could not be identified successfully as bootable live system. But sorry this is absolutely not my profession :wink:.
MichaIng
on 3 Jun 2018
The screen does not show direct DietPi-PREP error messages. At what install stage this showed up exactly?
After selecting the "Install DietPi" entry from the rEFInd boot menu the screen goes black and starts vmlinuz with a long list of loading parameters. Right after that the screen refreshes and lists the error message seen on the attached photo above.
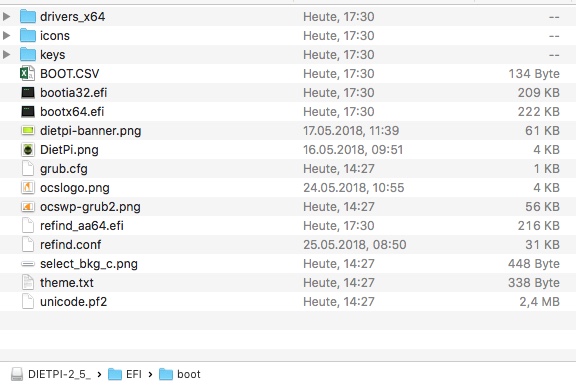
Here's what the used usb stick looks like at the moment:
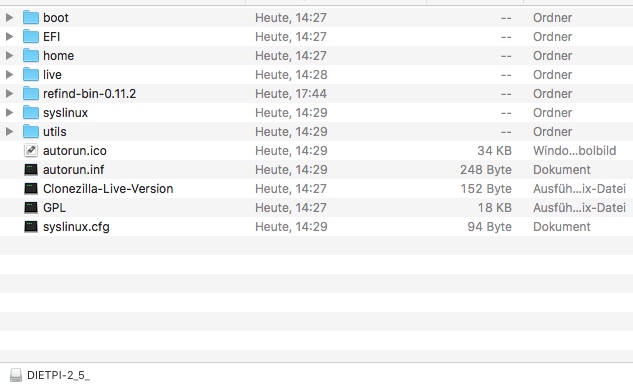
tomillr
on 3 Jun 2018
Current DietPi installer is based on Clonezilla Live, which is based on Debian.
I've prepared a new installer based on Clonezilla Live alternative, which is based on Ubuntu.
Can you test it?
Just delete all content from your pen drive (it must still be formated with GPT+FAT) and then extract there this zip. rEFInd is already installed so you can proceed directly to DietPi installation. Then install rEFInd to the target device as explained above.
sal666
on 4 Jun 2018
On the other hand, mce errors are caused by faulty hardware, so not sure if this will help.
http://www.advancedclustering.com/act_kb/what-are-machine-check-exceptions-or-mce/
http://mcelog.org/manpage.html
sal666
on 4 Jun 2018
That version won't start either. But I'm getting a new error message alongside the one pictured above which says that the EFI table couldn't be read.
Going to try again and make a new screenshot tomorrow.
Regarding the possible faulty hardware: I've been able to run Windows 10 and Ubuntu on the device without any errors pointing to a hardware defect.
tomillr
on 4 Jun 2018
Any chance of getting a 32bit version for older devices.
 DarrenRainey
on 9 Jun 2018
DarrenRainey
on 9 Jun 2018
@tomillr What device are you using? Please, post make and model. Are you sure it's capable of booting 64bit OS's?
sal666
on 11 Jun 2018
i ve flashed dietpi img/iso im a noob and there is no gui no cusror nothing, etcher confirns success but nothing can anyone help me get this sorted thanks any advice will do i know how to use the terminal ect
 leviticus1
on 20 Jul 2018
leviticus1
on 20 Jul 2018
a fat arse pi needs compiling
leviticus1
on 20 Jul 2018
@tomillr What device are you using? Please, post make and model. Are you sure it's capable of booting 64bit
I'm using a Beelink AP34 which comes pre-installed with a x64 version of Windows 10.
I'd really love to turn this nice machine into a NAS/Plex Media Server with Diet Pi because during idle on the Windows 10 desktop it draws below 3W. That's perfect for a 24/7 home user like me.
tomillr
on 5 Aug 2018
In case anyone needs the info, this works perfectly on a Beelink BT3 with 64bit UEFI Bios, Specs:
CPU: Atom z8300
Ram: 2GB DDR3
eMMC: 32GB
Network performance: Windows 10 = 49Mbs - Dietpi = 117Mbs
 Kung-Foo-Kamel
on 23 Sep 2018
Kung-Foo-Kamel
on 23 Sep 2018
This will boot into the installer on the imtel compute stick STCK1A8LFC but the installer will fail because it's not detecting a mmcblk0 if your booting from a SD card but if I can find a way to edit the file to write it i can install it don't know if the wifi will work though because it's a Ubuntu only stick with custom realtek drivers for it
Specs:
Intel atom 1.33ghz turbo boost up to 1.83ghz
1gb ram
8gb emmc
 lucario1001
on 2 Oct 2018
lucario1001
on 2 Oct 2018
@lucario1001
The problem is, that x86 images expect the rootfs the be on /dev/sda[0-9] and fstab + bootloader need to be adjusted to boot into the correct partition.
Adjusting /etc/fstab to point to the right boot+root partition is easy, but I am not sure if grub (bootloader) can be easily manually patched. Usually there are some steps on the running system needed, including chroot into the destination root partition, and using update-grub command 🤔.
Perhaps this helps: https://forums.linuxmint.com/viewtopic.php?t=228540
- Best would be to do all that from the actual device. It should be possible to install DietPi (x86 UEFI) image to a USB drive/stick and boot from it, as then the pre-configured boot and root partitions should match.
- Install it as well on the SDcard and plug it, but boot from USB stick.
mkdir /mnt/chroot- mount the rootfs from SDcard to /mnt/chroot and edit fstab inside.
- To keep the partition scheme, it should be only needed to replace all
/dev/sdaentries by/dev/mmcblk0. - Then to be sure, mount all other SDcard partitions into /mnt/chroot, the exact way it is represented by the fstab.
- Mount system drives, the command within the link actually looks good for this:
for i in /dev /dev/pts /proc /sys /run; do mount -B $i /mnt/chroot$i; done
Not sure if the dirs need to be pre-created for this bind (-B) mounts. chroot /mnt/chrootupdate-initramfs -uupdate-grubexit# Exit chroot
This should be it. Now boot from SDcard, perhaps unplug USB drive/stick first.
MichaIng
on 2 Oct 2018
i mean it there is a emmc inside of it its only 8gb and there is only 1 usb port on it so the only way to install it is thru a micro sd card slot but it does boot into the clonezilla installer but it does not detect the mmcblk0 because its on another location (ie mmcblk1) and the sd card is emmcblk2
lucario1001
on 2 Oct 2018
@lucario1001
Ahh, sorry, jep totally forgot that UEFI image is clonezilla installer 😅.
Hmm hope someone has more knowledge about Clonezilla and how to change the target drive, at least I couldn't find some related config file or such. I just see the iso \DietPi_v6.0_NativePC-EFI-x86_64-Stretch.iso\home\partimag\DietPi\ containing image files that are named mmcblk0. Not sure if this mean that it can only be installed to this drive...
Also the problem with wrong fstab/grub would theoretically stay. Not sure if Clinezilla adjusts this automatically in case?
MichaIng
on 2 Oct 2018
@lucario1001
Clonezilla can be tuned so that it will ask for the target device.
Take a look at my final update to this comment: https://github.com/Fourdee/DietPi/issues/1171#issuecomment-391682301
sal666
on 3 Oct 2018
@sal666
Clonezilla can be tuned so that it will ask for the target device.
This is great. We should have this by default in our UEFI image.
Where exactly this "ask_user" needs to be added? I couldn't find any cfg file with boot device issue in our iso. Also your grub.cfg does not contain any boot device info, at least I could not find it.
MichaIng
on 3 Oct 2018
"ask_user" replaces the name of the target device.
If you use an installation media based on rEFInd as described above, the command to start Clonezilla is at refind.conf, but it's already patched to ask the use for the target device. Try following the described procedure to create a bootable pen drive and to perform the installation itself.
"grub.cfg" it's not used in this case. It's used in the classic installer based on Grub.
sal666
on 3 Oct 2018
ok so good news bad news so good news it booted and asked me to where to install it
bad news it wont install becuase the destination is too small 7.6 gb emmc
disk image size is 31gb 😭
lucario1001
on 3 Oct 2018
Try this:
http://www.clonezilla.org/clonezilla-live/doc/02_Restore_disk_image/advanced/09-advanced-param.php
sal666
on 3 Oct 2018
so it skips the error message but it still wont flash the image
Failed to create a partition table on this disk: /dev/mmcblk1
    Is this disk too small: /dev/mmcblk1?
lucario1001
on 3 Oct 2018
Use -k1 to create partition table proportionally.
I've updated config files posted at the procedure shared above.
sal666
on 3 Oct 2018
still does not work after with the new config file gives me the same error i re-did the usb also
lucario1001
on 3 Oct 2018
Seems like a bug in Clonezilla to me. I've also been trying and only works with destination drives of at least 16GB. It doesn't make sense because it fits in less than 1GB.
After restoring to a 16GB pen drive I've been able to reduce partitions and copying them to a 1GB pen drive using gparted. Not sure yet if it will work. If it does maybe tomorrow I'll be able to upload a new image.
sal666
on 3 Oct 2018
any news yet? @sal666
lucario1001
on 8 Oct 2018
I reopen the issue:
- Maybe we can create a new official UEFI image, based on tweaked Clonezilla to allow target drive selection.
- Hopefully include a fix to allow install on at least 4GB drives. Should be possible, by reducing to included DietPi image first via e.g. zerofree and reducing partition size to minimum?
- However I have really no experience with Clonezilla sadly.
MichaIng
on 8 Oct 2018
@MichaIng
Good idea.
I've managed to create an image that is restorable to a drive as small as 1GB. It's just a question of taking the image from a smaller drive. It seems that Clonezilla is able to resize target partitions, but limits this to target drives not smaller than one half the source drive.
I was trying to upload an updated v6.16 image, but I don't know how to sysprep DietPi after updating and before making a new image.
Anyhow, tomorrow I could upload a v6.0 version with rEFInd instead of grub and restorable to small drives.
sal666
on 8 Oct 2018
@lucario1001
To change from mmcblk0 to mmcblk1.
Write the image to USB stick/SD, before powering on.
- Edit
/EFI/boot/grub.cfg
-- Change all occurrences ofmmcblk0tommcblk1 - Edit
/syslinux/syslinux.cfgand do the same as above.
Now when you select mmcblk1 from menu, it will install to mmcblk1.
Outside of changing those entries (or we simply add more of sdX and mmcblkX), unsure how to get clonezilla to detect current drives and prompt to select.
Fourdee
on 9 Oct 2018
This is the image I've prepared:
https://ufile.io/yp04k
To install just unzip to an empty pendrive and then boot from it on target machine.
Basically it's this image with this changes/additions:
- Restorable on small disks (tested successfully on 1GB pen drives).
- Destination drive is chosen by the user.
- Grub replaced by rEFInd, so it will boot on Apollo Lake and similar x64 devices with x32 EFI.
After booting and upgrading remember to uninstall grub:
apt purge grub*
apt autoremove
sal666
on 9 Oct 2018
@sal666
This is the image I've prepared:
Many thanks for this, and, apologies for the delay 👍
Grub replaced by rEFInd,
We need to update this image, and be able to replicate rEFInd install and configuration if we are to switch. Are you able to share how you converted this image from grub to rEFInd?
Fourdee
on 18 Oct 2018
@Fourdee
Hi, instructions to convert the image from grub to rEFInd are here.
Good news is that grub have already been patched to support Intel SoC systems (i.e. Apollo Lake, where grub was not able to boot and only showed a single underscore on the top left of the screen and freeze).
Clonezilla live have already been updated, so now we can use it out of the box. No need to put rEFInd on installation disk any more.
On the other hand, for the DietPi image to work properly on these devices we need it to provide updated grub2 and kernel. I've tried to upgrade from v6.0 to v6.16, with these results:
- Grub2 is not upgraded, it stays in 2.02 beta3-5. Grub 2.02 (not beta) should be ok. It's the version used now in Clonezilla, but maybe they just back ported the patch.
- The kernel stays in v4.9.0-5, although v4.18 is in the repos and can be installed manually.
Can you provide an updated image so I can test it on my Apollo Lake device? Once this works fine preparing the Clonezilla installer is quite straightforward.
sal666
on 19 Oct 2018
Could this lead to an official DietPi-Image that runs on Apollo Lake-based devices out of the box?
In that case I'd be willing to help out with testing on a Beelink AP34.
tomillr
on 20 Oct 2018
@sal666
Clonezilla live have already been updated, so now we can use it out of the box. No need to put rEFInd on installation disk any more.
🥂
Can you provide an updated image so I can test it on my Apollo Lake device? Once this works fine preparing the Clonezilla installer is quite straightforward.
Yep, leave it with me, may be a few days until I can get round to it mind.
Fourdee
on 22 Oct 2018
@sal666
Can you provide an updated image so I can test it on my Apollo Lake device? Once this works fine preparing the Clonezilla installer is quite straightforward.
Apologies for the delay, below is the latest DietPi (v6.16) native PC UEFI clone using Clonezilla:
https://dietpi.com/downloads/testing/DietPi-UEFI-v6.16_clonezilla.7z
Fourdee
on 24 Oct 2018
@sal666
Can you provide an updated image so I can test it on my Apollo Lake device? Once this works fine preparing the Clonezilla installer is quite straightforward.
Apologies for the delay, below is the latest DietPi (v6.16) native PC UEFI clone using Clonezilla:
https://dietpi.com/downloads/testing/DietPi-UEFI-v6.16_clonezilla.7z
Should that image work on Apollo Lake devices right out of the box? Or you first have to manually edit the iso?
tomillr
on 24 Oct 2018
@tomillr
Should do, using the latest version of clonezilla. Although, might be best to wait for @sal666 so we can update our image write process, else, you'll need to use pure clonezilla.
Fourdee
on 24 Oct 2018
@Fourdee
Thank you. I'll test it.
sal666
on 25 Oct 2018
@Fourdee
Hi. sorry for the delay but it's been a hell of a messy testing process.
I've been experiencing many errors and still I'm not 100% sure of the causes.
Anyway, this is the installer I've prepared. Just follow this instructions:
- Download Clonezilla alternative stable - 20180812-bionic and unzip to a clean GPT+FAT pen drive.
- Unzip this file to the pen drive at /boot/grub. 'grub.cfg' must be overwritten.
- Copy DietPi image to /home/partimag.
This bootable pen drive has this capabilities:
- Three installation options, with different graphics cards profile.
- Main menu now offers an extra option to run Clonezilla. Useful for advanced users and manual installations. May come in handy if/when the default methods fails.
- When installing DietPi, the user can choose the language and keyboard layout used during the process (but not for DietPi itself, that's done at first boot).
- If desired, more than one image can be placed at /home/partimage. The user is asked to choose the image to restore.
- The user can choose the target drive to install DietPi.
During testing your last image this is what I've found:
- GRUB is still v2.02 beta 3 (which is 3 years old). It's not working on my Apollo Lake device. GRUB just shows an underscore and does not boot. This version of grub is not patched to work with Intel SoC devices.
- Kernel is still v4.9, even after upgrading to DietPi v6.17.12. Is this the expected behaviour, isn't the kernel supposed to be updated with the rest of the system? v4.18 is the repos but it does not install with the rest of the updates.
- DietPi is v6.15. After first boot it upgraded to v.6.17.12.
So, current image should be OK for standard Intel devices, but not for Apollo Lake and SoC like Intel devices.
I've faced many errors during image restoration that I that are related to the size of the second partition. This causes the restoration to fail on drives smaller than 32GB.
In my view, the way forward should be to generate a new image that meets this requirements:
- image generated with Clonezilla alternative, that is the version that is Ubuntu-based. According to the note on the Clonezilla Live download page that is the one needed for UEFI systems.
- image with grub patched for Intel SoC Systems.
- the source drive should be as small as possible because that is limiting the size of target drives.
- the second partition should be reduced before making the image. This also is limiting the size of target drives.
- ideally, the first partition can also be reduced. Now it's size is 512M but can be reduced to 64M or less. it just makes sense when the target systems are supposed to be mini computers with limited storage capabilities.
- kernel upgraded to latest available. Only recent versions have support for Intel SoC hardware.
sal666
on 31 Oct 2018
@Fourdee
Regarding grub, I think it won't be fixed for Stretch. Next stable version -Buster, now in testing phase- currently packs grub 2.02+dfsg1-7 which should work fine. On my Apollo Lake laptop I'm currently running Lubuntu 18.10 with grub 2.02+dfsg1-5 and I works flawlessly.
Using stretch-backports could be an option, but grub is not backported :(
So the only viable options are:
- manually installing grub packages from testing branch.
- using rEFInd until grub is patched for Stretch or Buster is released as stable.
What's your view on this?
sal666
on 2 Nov 2018
@sal666
Thanks for looking into this.
Kernel is still v4.9, even after upgrading to DietPi v6.17.12. Is this the expected behaviour, isn't the kernel supposed to be updated with the rest of the system? v4.18 is the repos but it does not install with the rest of the updates.
We use the stock kernel as installed by debian. 4.9 is also LTS.
Regarding grub, I think it won't be fixed for Stretch. Next stable version -Buster, now in testing phase- currently packs grub 2.02+dfsg1-7 which should work fine. On my Apollo Lake laptop I'm currently running Lubuntu 18.10 with grub 2.02+dfsg1-5 and I works flawlessly.
We can do another image based on Buster I believe. Thanks to @MichaIng Buster is pretty much solid on VM, so should be fine here also.
With your help, the Buster image can then be used for testing + offer a install option for 32bit BIOS systems?
Fourdee
on 8 Nov 2018
Sounds great. Just note that not yet all software installs will work. In some cases, when we check for Stretch/Jessie explicitely to catch the right download, it might simply not install anything, in other cases Stretch compatible downloads will be used for Buster as well, which might not work in all cases.
But having this as additional testing image, we should be able to either resolv fast or actively disable it for Buster, if no appropriate install candidate yet or more work to get it running.
MichaIng
on 8 Nov 2018
@Fourdee
Sure, I can test it. Share the link to the image and I'll give it a try.
Please, when making that image take into account these indications:
- image generated with Clonezilla alternative, that's the version based on Ubuntu. According to a note on the Clonezilla Live download page that's the one needed for UEFI systems. When restoring previous images UEFI's NVRAM was not updated with a new boot option for the new OS and I suspect that the reason was that the images were taken with the standard version of Clonezilla.
- the source drive should be as small as possible because that is limiting the size of target drives.
- the second partition should be reduced before making the image. This also is limiting the size of target drives.
sal666
on 8 Nov 2018
@sal666
Share the link to the image and I'll give it a try.
Will create a Buster image and upload in next few days (hopefully). Will let you know when its ready.
- Clonezilla alternative Ubuntu
- 8GB USB stick for install
Fourdee
on 9 Nov 2018
Guys, "where" are we? What boot manager are we using?
I have downloaded the image, and installed it (method 2) into my Alfawise Z83V (it's like the Beelink), it's x5-z8350, 64-bits UEFI. I've installed it into a 64 GB USB drive, and now trying to use it with an external HDD drive. I'm having troubles with the EFI boot question.
If I boot Windows from eMMC having the USB drive connected, it's OK; but if the USB drive is not there, when I connect it again, the UEFI entry is disappeared and I cannot boot it again. I've tried to restore it using a live USB Ubuntu drive, with efibootmgr, no way.
If I try to install it directly, from the beginning, to my external HDD, it sometimes boots, not always, and it sometimes, after booting, gets freezed.
I see the problem is UEFI-related, it seems the NVRAM entry is what's lost, although we could have more issues on it.
If I try to clone it with Clonezilla, from the USB drive to the HDD, it seems Clonezilla doesn't create the EFI entry in the NVRAM, so it doesn't boot.
Now, I think rEFInd can be the solution, but I've read you are on it, so, any results?
Thank you very much, I can be a TESTER if you need me to test!
 oscarstv
on 13 Dec 2018
oscarstv
on 13 Dec 2018
Hi. guys.
SOLVED.
I installed rEFInd in a USB drive. It is detected by the computer's UEFI. I select it to boot as 1st option. When it boots, I can select Dietpi or Windows, both cases work. And that's all!
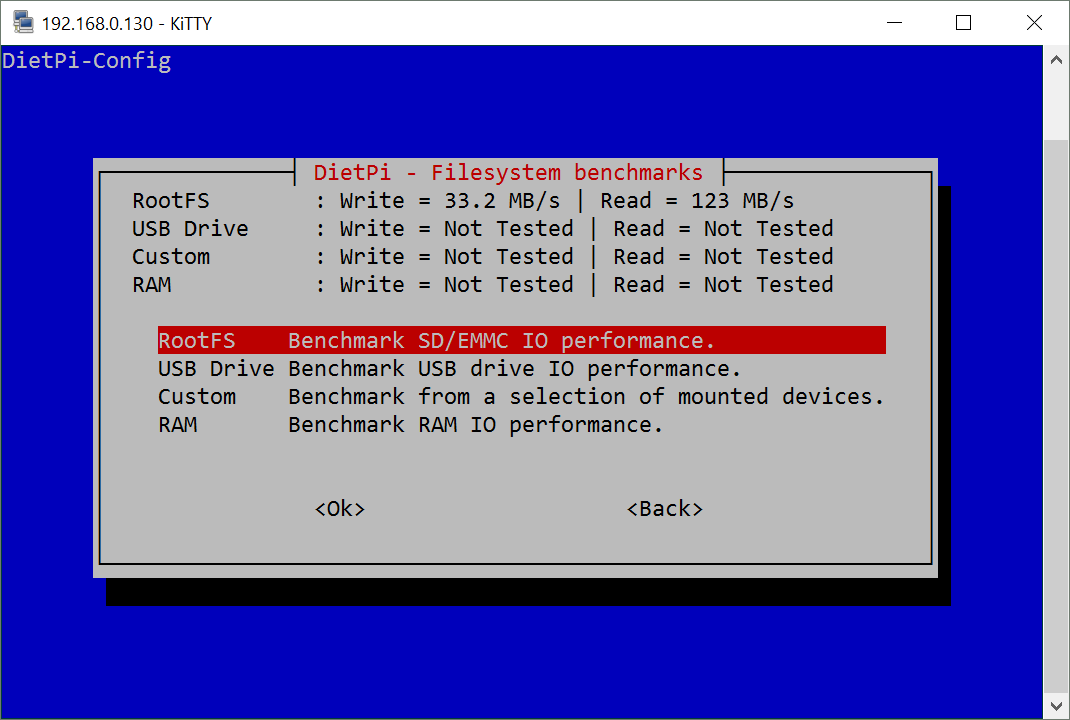
This z5-8350 has a performance very close to my Odroid C2; the main difference is the USB 3.0 port, that gives me 100/67 Mbps R/W speeds, when I benchmark with 100 MB. With 1000 MB dietpi's benchmark, it gives me 107/105 MB sequential speeds. It's supposed with an SSD it could get 300/400/500 MB speeds. So, I'm happy of giving a chance to Intel's Atom architecture.
Power consumption is like the Odroid C2, not more.
The handicap of my Odroid C2 are USB 2.0 ports, and, because I have the v02 of this SoC, I need a powered hub to have my HDD "on the road".
oscarstv
on 15 Dec 2018
Perhaps something to have a look at: https://dietpi.com/phpbb/viewtopic.php?f=11&t=5316
Related: https://bbs.archlinux.org/viewtopic.php?pid=1678446#p1678446
MichaIng
on 23 Dec 2018
Any progress integrating a compatible bootloader into the official image?
tomillr
on 20 Jan 2019
Hey guys, I forward an install issue on 24G drive, I guess this will be solved with the new image?
https://dietpi.com/phpbb/viewtopic.php?p=16334#p16334
Are there any workarounds to solve this with the current image? Sorry I am still a bid overstrained with the UEFI/Clonezilla stuff, which there would be a way to simply dd the size-minimized image onto the target drive directly 😢.
MichaIng
on 29 Jan 2019
A heads-up just doesn't seem to work with the Odroid N2. When booting it just flashes the cursor.
 LexiconCode
on 31 Jan 2019
LexiconCode
on 31 Jan 2019
@LexiconCode
try @oscarstv approach: install rEFInd to a pen drive. You'll be able to boot DietPi from it while keeping intact the original installation. The day GRUB gets patched you'll be able to boot from your HDD.
sal666
on 31 Jan 2019
I appreciate that sal666. rEFInd is complicated and definitely not user-friendly. I've made multiple attempts since your post and have been unable to get it to work.
LexiconCode
on 17 Feb 2019
Hi, rEFInd is easy!
1- Download: https://sourceforge.net/projects/refind/files/0.11.4/refind-cd-0.11.4.zip/download
2- Unzip it and burn it into a USB drive, I did it with Etcher from my Mac; you can use Rufus, I'm sure.
3- Plug it into your miniPC and when it boots press ESC. You'll find rEFInd there, select it in your UEFI and save changes.
4- rEFInd will boot and you will be able to select DietPi from there, and boot it from there.
5- Next time you reboot, all will happen automatically, because rEFInd automatically boots the last OS you booted.
6- In brief, You'll be able to select from the rEFInd menu Windows or DietPi.
IMPORTANT: Plug your rEFInd USB drive into a USB2 port, maybe it will not boot from the USB3 port (the blue one).
oscarstv
on 17 Feb 2019
Hi, rEFInd is easy!
1- Download: https://sourceforge.net/projects/refind/files/0.11.4/refind-cd-0.11.4.zip/download
2- Unzip it and burn it into a USB drive, I did it with Etcher from my Mac; you can use Rufus, I'm sure.
3- Plug it into your miniPC and when it boots press ESC. You'll find rEFInd there, select it in your UEFI and save changes.
4- rEFInd will boot and you will be able to select DietPi from there, and boot it from there.
5- Next time you reboot, all will happen automatically, because rEFInd automatically boots the last OS you booted.
6- In brief, You'll be able to select from the rEFInd menu Windows or DietPi.
IMPORTANT: Plug your rEFInd USB drive into a USB2 port, maybe it will not boot from the USB3 port (the blue one).
Just try you advise and i can boot into dietpi. And after boot into dietpi and updated the grub, the boot issue has been fixed.
However, it will be a /dev/sda1 is mounted or /boot/efi busy error every time i boot into dietpi. Any idea to fix?
 mirokymac
on 25 Mar 2019
mirokymac
on 25 Mar 2019
Hi, rEFInd is easy!
1- Download: https://sourceforge.net/projects/refind/files/0.11.4/refind-cd-0.11.4.zip/download
2- Unzip it and burn it into a USB drive, I did it with Etcher from my Mac; you can use Rufus, I'm sure.
3- Plug it into your miniPC and when it boots press ESC. You'll find rEFInd there, select it in your UEFI and save changes.
4- rEFInd will boot and you will be able to select DietPi from there, and boot it from there.
5- Next time you reboot, all will happen automatically, because rEFInd automatically boots the last OS you booted.
6- In brief, You'll be able to select from the rEFInd menu Windows or DietPi.
IMPORTANT: Plug your rEFInd USB drive into a USB2 port, maybe it will not boot from the USB3 port (the blue one).Just try you advise and i can boot into dietpi. And after boot into dietpi and updated the grub, the boot issue has been fixed.
However, it will be a/dev/sda1 is mounted or /boot/efi busyerror every time i boot into dietpi. Any idea to fix?
Sorry, I've not updated grub, so I don't know why it's happening or how to solve it. I'm using rEFInd and booting from it in this very moment.
oscarstv
on 26 Mar 2019
Hi;
I installed few DietPi in the cloud and as VM under KVM and Proxmox
and I would like to share how I did it
1. most of them I simply run into a rescue mode and/or with a live-cd
like GRML which CloneZilla is also a good alternative
Download the DietPi ISO image (with CloneZilla bundled)
2. than prepare the remote machine for a ssh connection as root
by editing /etc/ssh/sshd
PermitRootLogin yes
PasswordAuthentication yes
than restart ssh daemon
systemctl restart ssh
3. dd through ssh
be sure to choose the right destination such as : /dev/sda or /dev/vda
where _12.24.42.84_ is the IP of your target
dd if=Downloads/DietPi_NativePC-BIOS-x86_64-Stretch.img | ssh root@_12.24.42.84_ "dd of=/dev/**v**da"
4. than on the remote machine it won't hurt to run
sync
than reboot
 JOduMonT
on 3 May 2019
JOduMonT
on 3 May 2019
The latest Debian testing release (Buster RC 1) is now able to boot on my Apollo-Lake-based device. So it looks like the devs have finally updated GRUB.
Any change you can incorporate that change right into the DietPI x86_64 build?
tomillr
on 27 May 2019
@tomillr
Is it the UEFI install that works or BIOS?
I anyway wanted to create a NativePC BIOS Buster image, but I have no experience about how to create the UEFI image.
MichaIng
on 27 May 2019
Since the legacy-bios is basically broken on my particular Beelink mini-PC, is surely has to be UEFI.
tomillr
on 27 May 2019
Did some more testing and I can confirm that the new Debian build is indeed booting through UEFI on my system.
I was also able to install the latest release of openmediavault. They've just included support for UEFI in May. While OMV wasn't able to boot on my system, the installation now works fine.
tomillr
on 30 May 2019
Any change of getting a ready-made x64 build that is based on the lasted Debian version that is able to utilize UEFI?
tomillr
on 5 Jun 2019
Err, why is the source img so big in file size (it says it requires 31 GB free storage space, which is quite a lot for dietpi? My sbc is quite weak :-P)? Is it possible to still somehow install it?
 samolego
on 13 Jul 2019
samolego
on 13 Jul 2019
@samolego
Hmm most likely it was created from a 32 GiB drive without having the partition size minimised before creating the image 🤔. Reading through the posts about I think this is the known issue. @sal666 created some new images, but the links are not live anymore. So AFAIK the image can currently only be installed on 32+ GiB drives, but the used disk space of the running system will be <1 GiB (+swapfile, in case). The remaining parts are empty disk space.
@sal666
I hope you find some time to create a new Buster-based UEFI image with me?
- I hope the Buster GRUB version can boot Apollo Lake: https://packages.debian.org/buster/grub-efi-amd64
- Since DietPi scripts expect GRUB to be the bootloader. Some configs will not work or prompt errors if this is not the case.
- Would be simply good to have things as similar as possible between images.
- Kernel 4.19: https://packages.debian.org/buster/linux-image-amd64
What I would do:
- Fresh Debian Buster install on UEFI x86_64 system.
- DietPi-PREP => DietPi
- DietPi-Imager to reduce root partition size to minimum: https://github.com/MichaIng/DietPi/blob/dietpi-imager/.meta/dietpi-imager
- This should allow installing the image on <1 GiB drives/cards.
Since I still miss experience with Linux EFI images and rEFInd, I hope you find time to create the final installer image:
- I would keep it as simple as possible: A single DietPi image to select, but allow to choose target drive.
- Additional languages/locales/keyboard layouts not required if arrow keys and return is all that is needed?
I am still not 100% sure to understand why it is not possible to have ready-to-boot EFI-based OS images and skip the (e.g. Clonezilla) installer:
- If an installer is able to be booted on any EFI system, why can't the same generic EFI partition/files be used to boot the final OS without any install process?
- I guess usually bootloader initrd and EFI partition is tailored to match the hardware, including drive/partition setup. However perhaps it is somehow possible to have this initially created a generic way, so it will boot on any hardware and regardless the dev name of the drive/partition it is booted from, like any OS installer does. Future kernel upgrades will overwrite everything to targeted match the system, which could be also triggered on first boot.
- On the other hand, for internal drives an installer is quite handy, instead of having the need to plug e.g. an SATA drive into another system for flashing it. So best would be to have both options (as well for BIOS images), a ready-to-boot image which can be flashed onto the target drive directly and an installer image which can be flashed onto a USB flash drive to plug into the target system and install the OS from.
MichaIng
on 14 Jul 2019
@MichaIng
I'll give it a try. Currently I'm quite short of spare time. Probably will be able to do something next Friday
sal666
on 14 Jul 2019
@sal666
Okay would be great. I will create the OS image and you simply do with it when you find time. Perhaps I also find time meanwhile to look into it and try to create the installer myself. Will keep you updated here of course if I make some progress.
MichaIng
on 14 Jul 2019
@MichaIng thanks for fast reply! I have flashed the img on 8GB installation usb stick, but the problem was still there. So I went with DietPi PREP(which is wonderful btw :D). I'm now running that.
samolego
on 14 Jul 2019
@samolego
Jep DietPi-PREP is the alternative then e.g. after running the Debian installer.
MichaIng
on 14 Jul 2019
@MichaIng
Hi. I seem to be unable to find a buster PC UEFI image. Any hint as where to find it?
sal666
on 19 Jul 2019
@sal666
Sorry for the delay. I just uploaded the x86_64 UEFI image: https://dietpi.com/downloads/images/testing/DietPi_NativePC-UEFI-x86_64-Buster.7z
Creation procedure: https://github.com/MichaIng/DietPi/wiki/How-to-create-a-DietPi-image-for-x86_64-PCs-(UEFI)
- Used DietPi-PREP from dev branch, which includes the new secure boot compatibility packages that are available since Debian Buster: https://packages.debian.org/buster/grub-efi-amd64-signed
- Used DietPi-Imager from PR which fixes the automated GPT partition fix: https://github.com/MichaIng/DietPi/blob/dietpi-imager/.meta/dietpi-imager
- Already in the past, when reading the GPT partition table,
partedrecognises an error in the "backup GPT patition" while the "primary" table is okay. Simply running gdisk to read and write back the partition table fixes it. Not sure where this comes from, but this fix was already part of the years old image creation script from @Fourdee .
- Already in the past, when reading the GPT partition table,
I could not yet test this image on the machine where the OS was initially installed to. I guess it should work on this particular machine with drive attached to same slot? But since I only have a single UEFI-capable machine, I needed to switch drives back to have VMs for image creation available 😄.
The first partition is the EFI partition, mounted to /boot/efi by fstab via UUID. Not sure if this will be or needs to be rewritten for the final (CloneZilla) installer?
MichaIng
on 23 Jul 2019
Hi,
here! is the installer (download link will expire after 30 days). I've already tested it on a i5 PC. Will report back after testing on Apollo Lake.
*UPDATED link
sal666
on 30 Jul 2019
@sal666
Awesome, many thanks for this! I will upload it to our server and download page as testing image.
Let me know if there is anything that could/should be done better/different for the raw OS drive image. And of you find time, you could add the installer creation steps to the Wiki: https://github.com/MichaIng/DietPi/wiki/How-to-create-a-DietPi-image-for-x86_64-PCs-(UEFI)#packing-image-with-clonezilla-installer
MichaIng
on 30 Jul 2019
@MichaIng
You'r welcome.
Regarding the OS image, I've found gpt errors that needed to be fixed with gdisk. I see that DietPi-Imager already runs gdisk after shrinking, maybe it should be run again after truncating the image file?
I think that DietPi-Imager can be extended to also generating a Clonezilla image. Let me make some test and I can PR extra code to it
sal666
on 30 Jul 2019
@sal666
I see that DietPi-Imager already runs gdisk after shrinking, maybe it should be run again after truncating the image file?
The second gdisk in the script seems to be not required at that place, parted just ran into that error once at the start during my test, which is strange since partition-wise this is a fresh Debian install then, DietPi-PREP does not touch anything about the partition table, as long as there are no APT installs that do that outside of our control.
For this image, I did not truncate the final file, but dd stopped writing it (from raw disk) after that last partition end + some failsafe KiBs have been reached.
On next GPT image creation I will verify, but I think the error is not present after writing or truncating the image file, but introduced when writing the image to a disk afterwards. The same error is also produced by our old installer (http://dietpi.com/downloads/images/DietPi_v6.0_NativePC-EFI-x86_64-Stretch.iso), but it is fixed (or at least ignored) there automatically as well.
Btw I was attaching the old installer image as virtual ROM to a VM (VirtualBox with EFI enabled) and tried to install on that main drive. When trying to boot after install has finished, it just shows something like "Error EFI partition". You did not try those on VM once, did you? Would make things much easier for me to review/test/debug EFI-specific issues.
I will re-try with this new image and additional, in case of same failure, run some fsck from another VM, who knows...
MichaIng
on 30 Jul 2019
Sorry, previous uploaded file had errors. I have updated the link with a new one.
It's tested to be working with Apollo Lake.
sal666
on 30 Jul 2019
@MichaIng
Btw I was attaching the old installer image as virtual ROM to a VM (VirtualBox with EFI enabled) and tried to install on that main drive. When trying to boot after install has finished, it just shows something like "Error EFI partition". You did not try those on VM once, did you? Would make things much easier for me to review/test/debug EFI-specific issues.
I think I also run into this same error with the old installer, but I'm not sure. Should try again and see what happens.
sal666
on 31 Jul 2019
@MichaIng
I'm trying to generate a fresh installation on a VM following your guide: https://github.com/MichaIng/DietPi/wiki/How-to-create-a-DietPi-image-for-x86_64-PCs-(UEFI).
I found that this VM won't boot unless I answer 'yes' to 'Force GRUB installation to the EFI removable media path?', witch your guide says should be a 'No'. Is this normal?
Btw, I completed the guide with a more detailed list of the steps as they are shown by the Debian installer.
sal666
on 31 Jul 2019
@sal666
In my case on PC it boots fine without this. The installer itself was loaded in EFI mode and I created according to the howto a 100M EFI partition. AFAIK this option is only required if the system somehow is not able to start the bootloader from the internal EFI partition.
However yeah perhaps indeed the VM exactly can't do that, for whatever reason.
I never tried this option. Where exactly is the bootloader installed to then? You need an additional drive for this "removable media path", right? How is it formatted and which file system?
Btw, I completed the guide with a more detailed list of the steps as they are show by the Debian installer.
Many thanks for this!
MichaIng
on 31 Jul 2019
@MichaIng
I never tried this option. Where exactly is the bootloader installed to then? You need an additional drive for this "removable media path", right? How is it formatted and which file system?
It's installed to the NVRAM of the VM:

Well, EFI itself is installed to sda1, but then a 'hook' is installed to NVRAM.
For me it also should have worked the other way. Sounds like a bug in VirtualBox.
sal666
on 31 Jul 2019
@sal666
Okay I read some more info about this, especially the initial bug report on Debian that led to the option to move the bootloader to the removable media path: https://bugs.debian.org/cgi-bin/bugreport.cgi?bug=746662
The "removable media path" seem to be the default location for EFI bootloaders, on x86_64 systems: /EFI/boot/bootx64.efi on the ESP (EFI system partition)
On our UEFI image, only /EFI/debian/*.efi files exist.
Usually proper UEFI implementations are able to scan all EFI partitions for EFI bootloaders, also on non-default paths, so was the system I created the image on, obviously. However some (in the bug report called "broken") implementations seem to require a bootloader at the default path.
In case of OS installers (e.g. the Debian mini.iso), it makes sense to not copy the bootloader to this path by default, if other OSes are installed already, to not override the existing default bootloader that worked before, e.g. created during an earlier OS install. Windows installs its bootloader to this path by default, which is why usually when one installs Windows besides some Linux dist, the bootloader will not list the Linux distro to boot at first anymore.
Actually best would be, on GRUB install, to check if a bootloader is already stored on that path and, if not, copy it there by default. On the other hand not all systems require this, so this could be further checked, as suggested in the bug report above as well. However currently there is not even checked if the installer was even booted via EFI, before offering to install GRUB to the removable media path 😉.
But as we create whole drive images, including the ESP, it indeed makes sense to copy the bootloader there as well, for compatibility reasons. The 100M partition is much larger than required anyway.
And for VirtualBox it simply seems to be required. I will try to install the UEFI image onto the VM again, but before booting renaming or copying /EFI/debian to /EFI/boot + shimx64.efi to bootx64.efi, which is the secure boot capable loader of GRUB (although not required for VM most likely).
Just a quick question:
The image you uploaded has .7z format, but to be able to flash it via usual tools (e.g. Rufus) it should be either .img or .iso. This also allows us to wrap that image file with hashes and readme into a .7z. Perhaps you can do that faster from the original drive, however I am now doing this by extracting to GPT FAT partition, setting boot flag and creating .img via dd on VM. Lets see if this works.
MichaIng
on 31 Jul 2019
@MichaIng
Just a quick question:
The image you uploaded has.7zformat, but to be able to flash it via usual tools (e.g. Rufus) it should be either.imgor.iso.
My .7z is not an image. It's a compilation of Clonezilla Live + a system image taken with Clonezilla.
To create the bootable media you just need to uncompress it to an empty FAT32 pendrive.
sal666
on 31 Jul 2019
@sal666
Yeah this is what I thought. However to make it easier for end users and keep the above guide valid, an image file is more familiar?
MichaIng
on 31 Jul 2019
@MichaIng
Yes it can be distributed as an .iso file. Then it can be dumped with Rufus (to an empty pendrive) or extracted with 7zip (does not format the pendrive).
sal666
on 31 Jul 2019
@sal666
Another benefit is that an iso can be easily mounted to any VM while e.g. I cannot see a possibility to boot from a physical pen drive on VirtualBox.
And btw, you were right, after creating the image via dd (and stopping after partition end has been reached) or truncating an existing image file, the GPT partition table needs to be fixed via gdisk. I will adjust DietPi-Imager accordingly to run gdisk as very last step right before hashing.
MichaIng
on 31 Jul 2019
@MichaIng
ISO files are way easier to mount on a VM, but you can also mount physical devices. Try:
VBoxManage internalcommands createrawvmdk -filename "</path/to/file>.vmdk" -rawdisk /dev/sdb
sal666
on 1 Aug 2019
@sal666
Ah yeah that's true, I use the same to mount SDcards to the VMs.
However I created now an iso from it and wrap it together with hashes, the DietPi README.md and install instructions. So we don't need to link users to this issue anymore as all required info is contained in the download archive.
The new installer btw works like a charm 👍. That one can choose the target drive is a great enhancement.
Language and keyboard layout selection is perhaps a bid overkill, where only up+down+return is required 😉, however I guess this is fix part of Clonezilla.
I also managed to boot it on VM now. Indeed copying the grub bootloader to the removable media path (cp -a EFI/debian EFI/boot && cp -a EFI/boot/shimx64.efi EFI/boot/bootx64.efi) was the solution. I will change the HowTo for UEFI image creation, to let the Debian installer do this. However the image is not aimed for VMs, IMO there is really no point in using UEFI on VMs, besides for testing/dev reasons.
MichaIng
on 1 Aug 2019
Okay installer + system tested on two PCs and one VM and works pretty well. Nice job!
Uploaded to server: https://dietpi.com/downloads/images/DietPi_NativePC-UEFI-x86_64-Buster.7z
Linked as default download for Native PC UEFI: https://dietpi.com/#download
MichaIng
on 1 Aug 2019
@MichaIng
Language and keyboard layout selection is perhaps a bid overkill, where only up+down+return is required , however I guess this is fix part of Clonezilla.
In fact no, it could be fixed to one language and keyboard and thus avoid asking the user. It's pretty easy, I'll do it when I'll update dietpi-imager.
sal666
on 1 Aug 2019
@sal666
Nice, but really not an issue. Can be simply remembered the next time an image update is required.
MichaIng
on 1 Aug 2019
@sal666
Btw, it would be great if you could add the CloneZilla packaging steps to the HowTo, when you find time: https://github.com/MichaIng/DietPi/wiki/How-to-create-a-DietPi-image-for-x86_64-PCs-(UEFI)#packing-image-with-clonezilla-installer
Probably we could add those steps to DietPi-Imager to be done automatically for EFI images and skip archiving of the raw .img file instead.
For NanoPC T4 we currently offer an AndroidTool based method to write the image to the internal eMMC. But I guess using a CloneZilla bundle, writing to SDcard (or USB flash), booting it from NanoPi and flash to internal eMMC from there, should work as well? So we'd have a shared method for EFI images, also in case other ARMs start to require EFI boot.
MichaIng
on 11 Aug 2019
@MichaIng
I'm already working on it. Here you'll find a modification to DietPi-Imager to add the generation of the Clonezilla based installer. It's almost finished, but I need to fix the command for the iso file generation and do some testing.
Regarding eMMC, yes Clonezilla can handle it, both for cloning and restoring. I've already done it with my Apollo Lake laptop, which uses eMMC as main storage device.
sal666
on 11 Aug 2019
@MichaIng
I've completed my changes to dietpi-imager. Can you test it before I submit any PR?
Now the installer is only valid for UEFI machines, but it could be extended to also install the BIOS/CSM version.
The code is here.
sal666
on 14 Aug 2019
@sal666
Btw. always do changes against the "dev" branch code. It contains some changes that might conflict. However we should be able to resolve.
indeed strange with the missing partimage on Buster. Bullseye again has it: https://packages.debian.org/bullseye/partimage
- Perhaps we can pull and install the Bullseye package, or the one from Stretch.
Currently you basically do all steps in a separate loop. Perhaps we can merge everything in a way that avoids doubled code. However most importantly it works.
Actually since GPT images require an Installer in general, we could go the Clonezilla path automatically if a GPT partition table is detected?
Optionally adding the option to create Clonzilla images as well for BIOS/CSM images is a nice idea as well, which allows easier deployment on eMMC, e.g. if user lacks an adapter.
However all of this is finetuning that can be done when we find time. I will run a test over the weekend.
MichaIng
on 16 Aug 2019
Btw. always do changes against the "dev" branch code. It contains some changes that might conflict. However we should be able to resolve.
You're right. Will change branch.
indeed strange with the missing partimage on Buster. Bullseye again has it: https://packages.debian.org/bullseye/partimage
- Perhaps we can pull and install the Bullseye package, or the one from Stretch.
Doesn't worth the effort. Now it's working without it because Clonezilla uses partclone as first cloning method. Then partimage and then dd. I've already reported the missing package to the maintainer, hope it gets fixed soon.
Currently you basically do all steps in a separate loop. Perhaps we can merge everything in a way that avoids doubled code. However most importantly it works.
Since they don't share that much code, I was thinking of a separate script, something like dietpi-clonezilla-imager.
Actually since GPT images require an Installer in general, we could go the Clonezilla path automatically if a GPT partition table is detected?
Optionally adding the option to create Clonzilla images as well for BIOS/CSM images is a nice idea as well, which allows easier deployment on eMMC, e.g. if user lacks an adapter.
The resulting iso file is bootable both in UEFI and BIOS/CSM systems. Once completed the BIOS part of the script you'll be able to use it on any of these systems without further checks, just assign the proper name to the image.
sal666
on 18 Aug 2019
@sal666
Doesn't worth the effort. Now it's working without it because Clonezilla uses partclone as first cloning method.
Okay indeed does not make sense then, we just pull partclone and good.
Since they don't share that much code, I was thinking of a separate script, something like dietpi-clonezilla-imager.
I will probably switch to shared code by times, where possible. But as said, nothing important. Good to have it in one script IMO to keep it simple.
The resulting iso file is bootable both in UEFI and BIOS/CSM systems. Once completed the BIOS part of the script you'll be able to use it on any of these systems without further checks, just assign the proper name to the image.
Ah okay, that is great. The only thing that limits this, is that the grub-efi needs to be installed for UEFI images, while grub-pc is required for BIOS/CSM images. But it looks like theoretically both can be installed in parallel, so we could create an installer that works on both. But as I like it lightweight, and would go with two separate installer images for now.
Btw I added you to the active contributors list, felt like your regular work on these images needs to be mentioned/honored somewhere: https://github.com/MichaIng/DietPi/blob/dev/README.md#sal666
Feel free to open a PR for the DietPi-Imager Clonezilla support.
MichaIng
on 28 Aug 2019
Hi, is it me or is the link for the Native PC (UEFI) link on dietpi.com -> download wrong?
Both Bios and UEFI seem to link to https://dietpi.com/downloads/images/DietPi_NativePC-BIOS-x86_64-Buster.7z.
In case of UEFI (Z83-II mini pc with emmc in my case) shoudnt it be https://dietpi.com/downloads/images/DietPi_NativePC-UEFI-x86_64-Buster.7z?
(ps. Great work on DietPi in general, absolutely love it so thank you for all the hard work)
 GvY85
on 30 Aug 2019
GvY85
on 30 Aug 2019
@GvY85
You are right, something went wrong there. I just fixed it, many thanks for reporting!!
MichaIng
on 2 Sep 2019
I mark this issue as closed now. New image works pretty well.
We'll handle the Clonezilla integration into DietPi-Imager in a separate issue or PR directly.
MichaIng
on 3 Sep 2019
Related issues
 Invictaz
·
3Comments
Fourdee
·
3Comments
Invictaz
·
3Comments
Fourdee
·
3Comments
 bhaveshgohel
·
3Comments
bhaveshgohel
·
3Comments
 k-plan
·
3Comments
k-plan
·
3Comments
 and09
·
3Comments
and09
·
3Comments
Most helpful comment
@Fourdee
Thank you. I'll test it.