Cura: temporary support technology 3D printer limited in geometries that can be printed
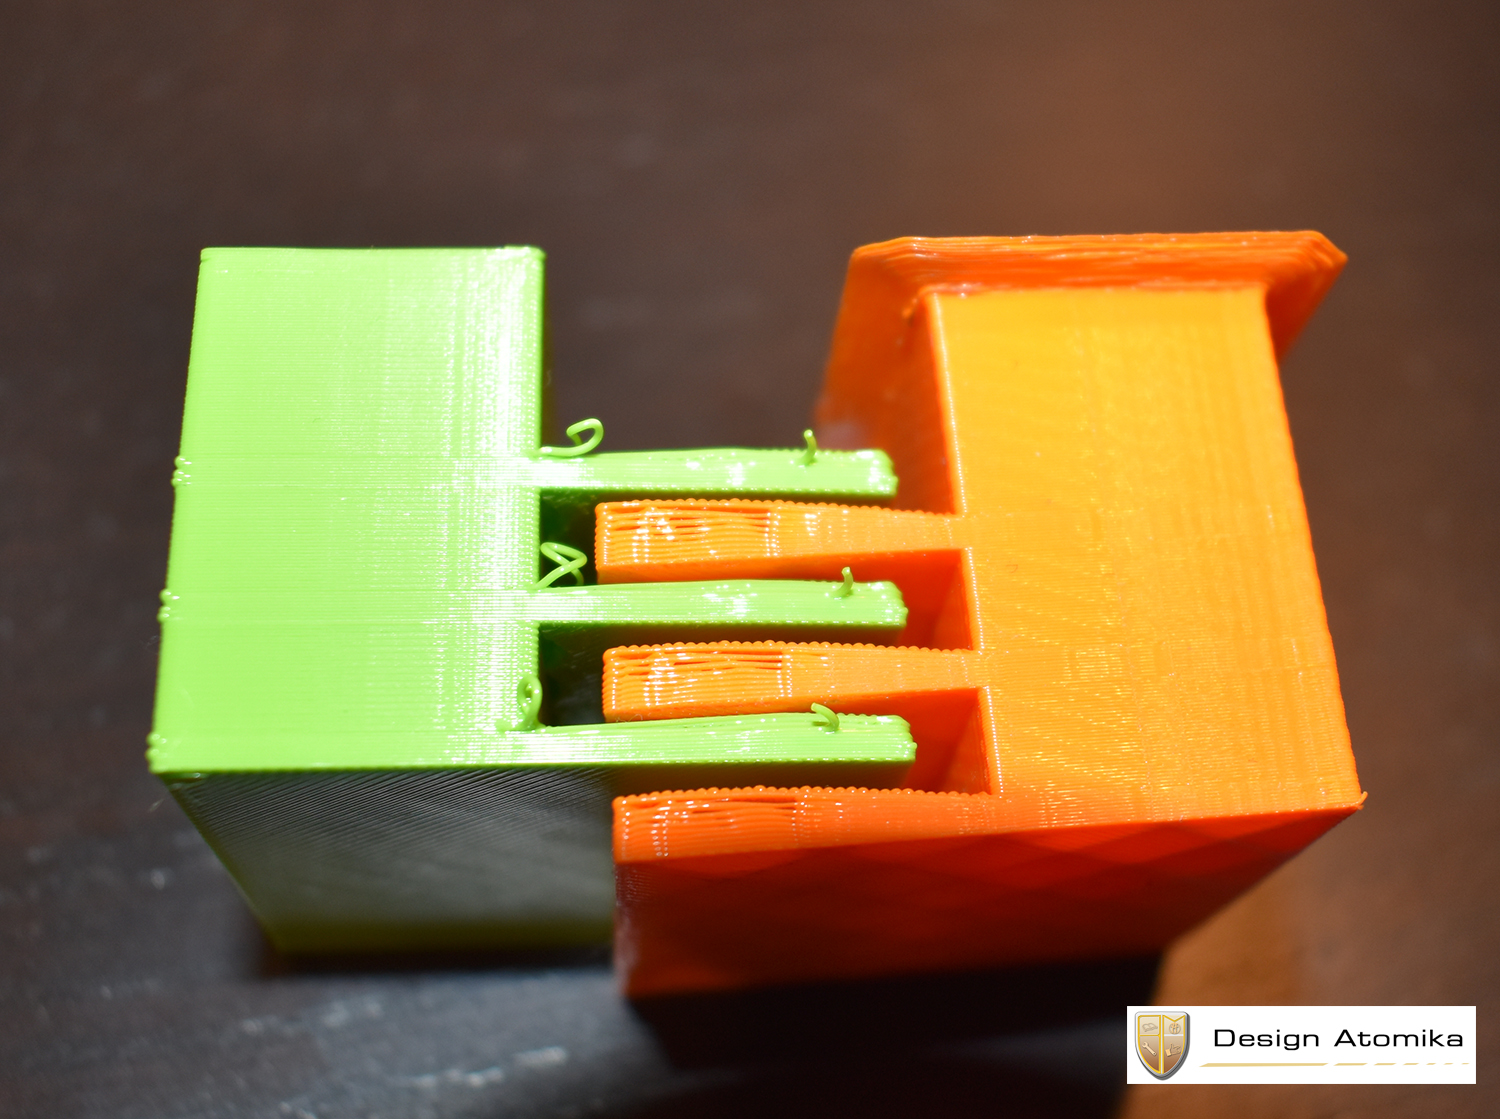
Temporary support technology is a concept in which there is no waste of material in achieving 90-degree overhangs, right now the geometries it can print are limited because when the slicers makes the tool path on the overhang like in the sample below it starts from the exterior perimeter of the model, right now the tool path can only be changed by setting many shells and inside out set making the part solid and thus wasting to much material and time.

 designatomika
All 27 comments
New sample
designatomika
on 20 Aug 2017
Seems impressive. Could you provide details about the strategy or how this GCode was generated?
 nickthetait
on 22 Aug 2017
nickthetait
on 22 Aug 2017
The G code was generated with S3D, some new settings came out and I was able to do the orange sample. Some artificial settings were used to make it print with the new hardware. A lot of capability is locked in the software side, for example the strings that you see on the orange sample are because it does the outline first and then the infill, it should be the other way around for this method.
designatomika
on 23 Aug 2017
@designatomika Can you please be more specific?
What is 'temporary support technology'? How does it work? What does the printer do?
What new S3D settings did you use?
What do you mean by 'some artificial settings'?
Your end results seem impressive. Which features do you need in Cura to get such results?
 BagelOrb
on 23 Aug 2017
BagelOrb
on 23 Aug 2017
Might help if you can capture a video of it in operation
nickthetait
on 23 Aug 2017
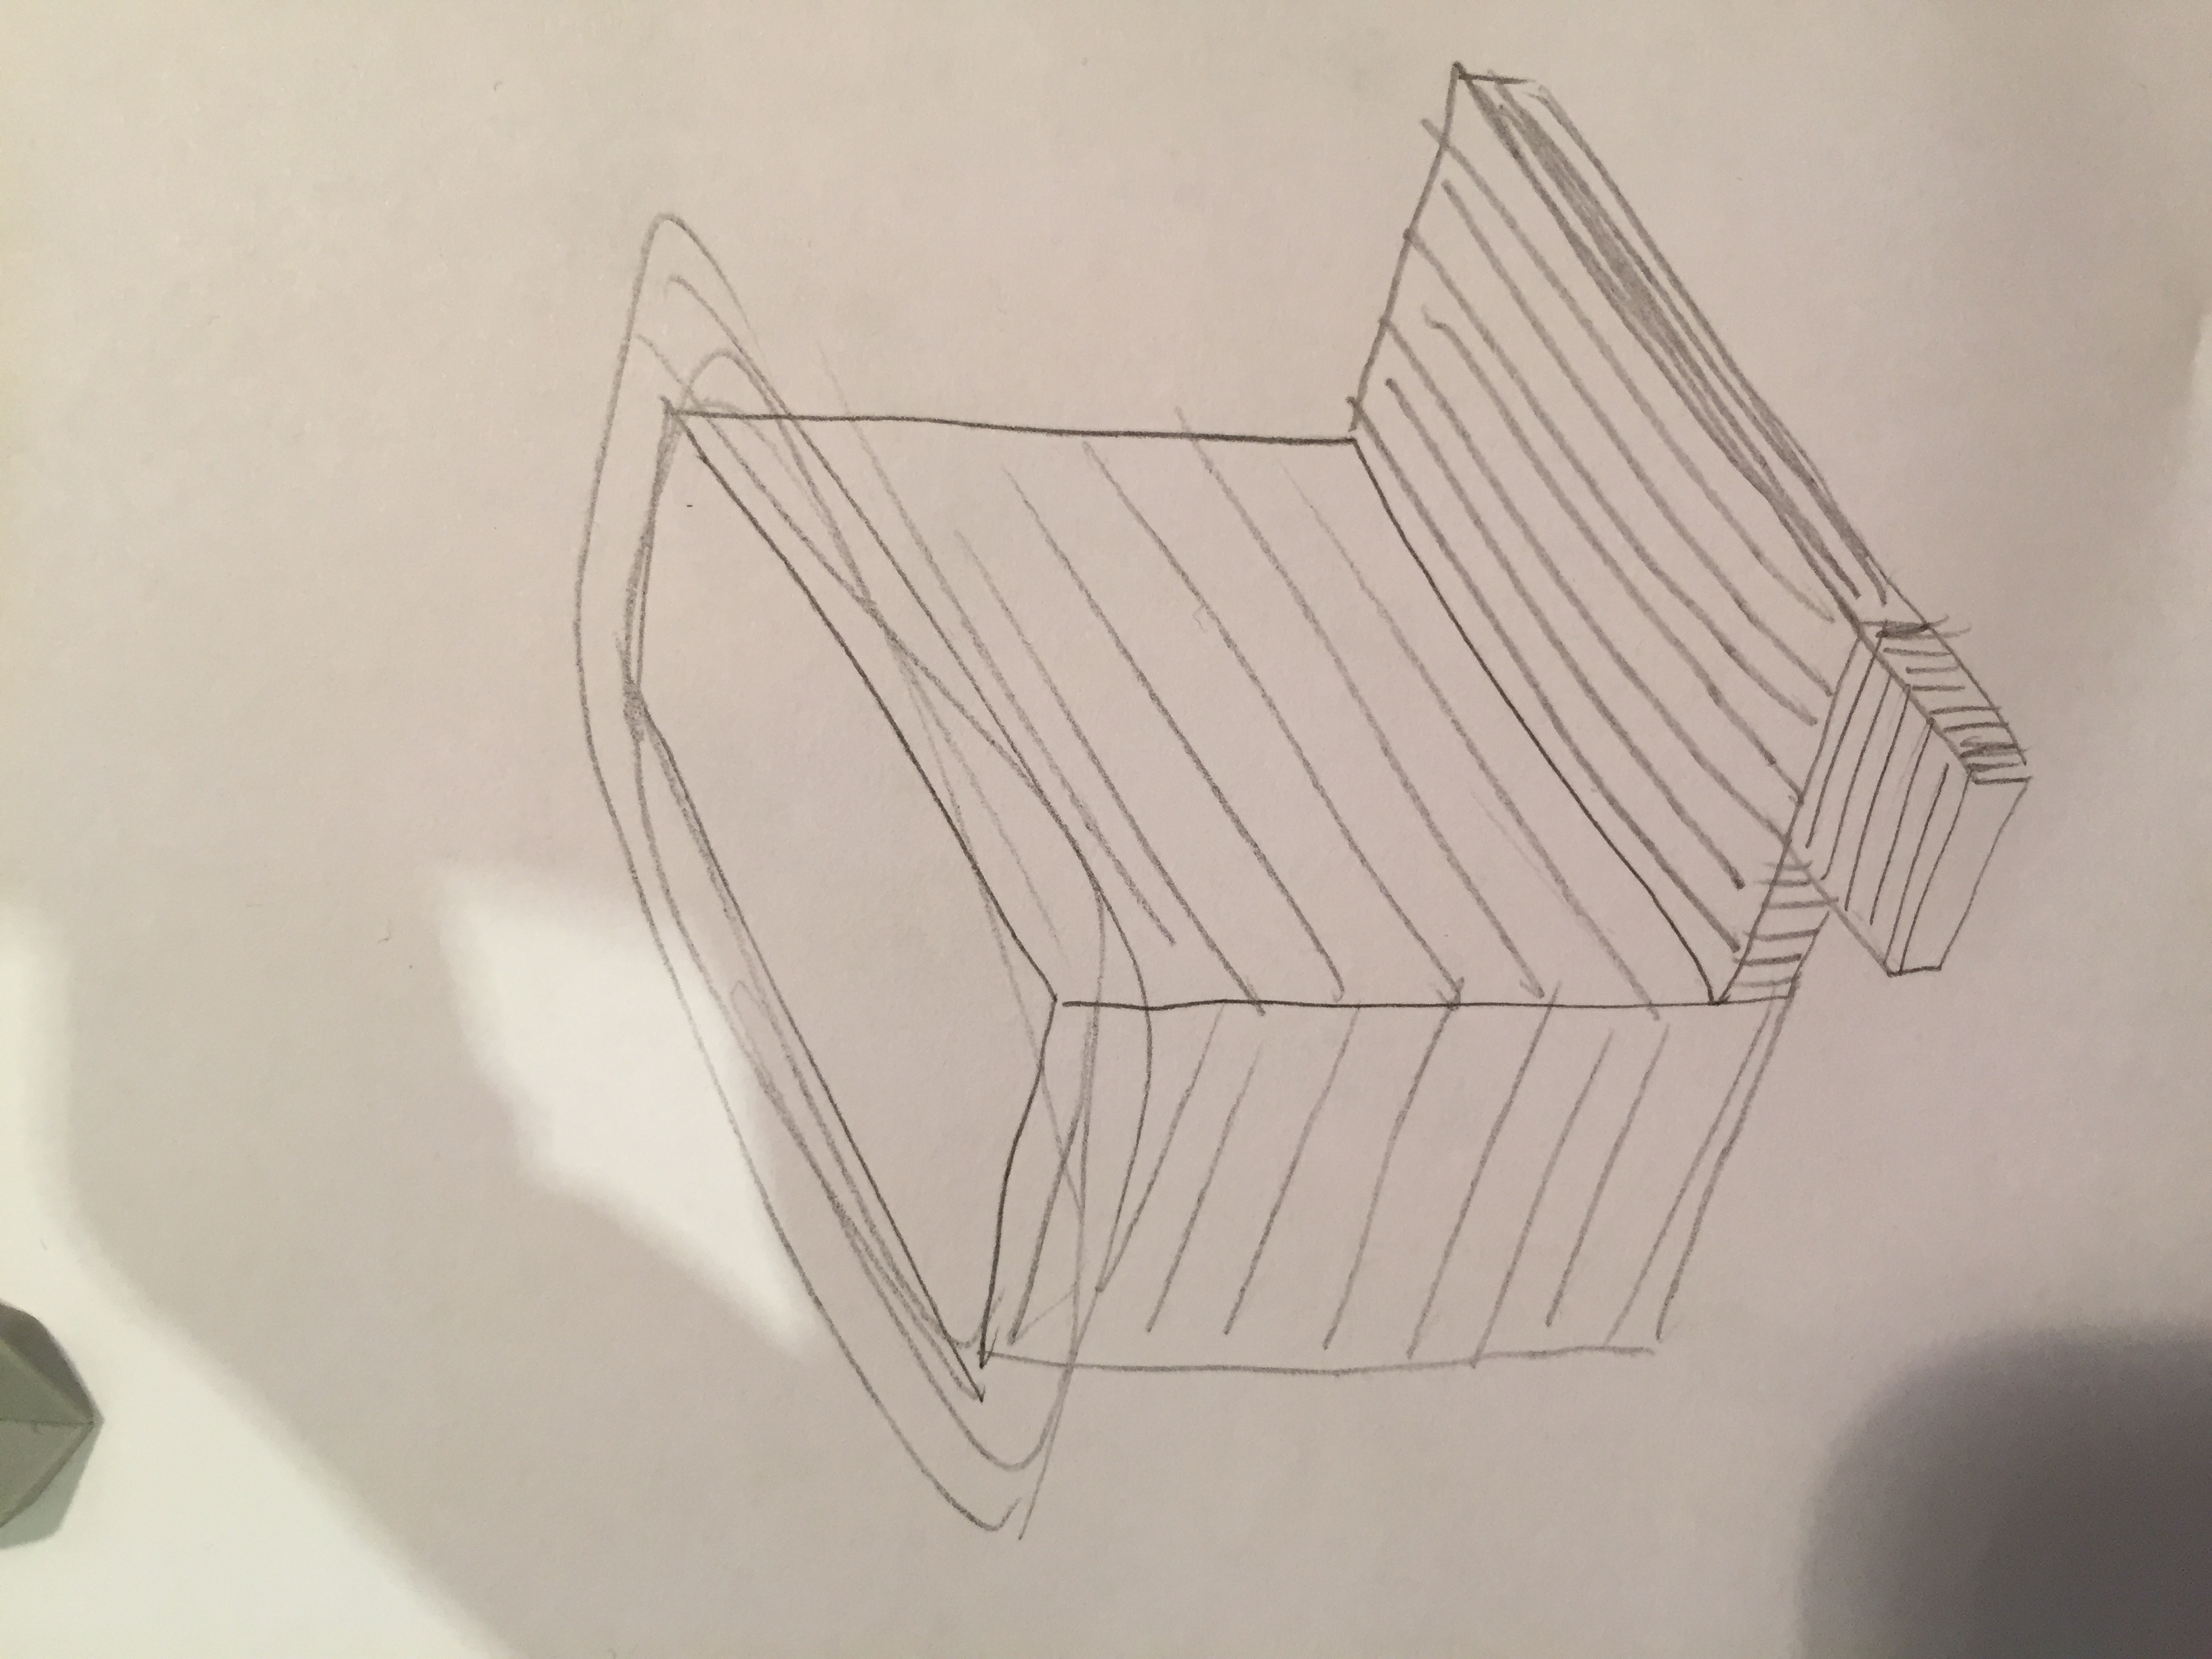
Temporary support technology works by printing upside down and with a modified print head. It has plate flush to the nozzle that has small holes for cooling and preventing friction. Right now the test rig is a cheap china printer, but I just invested in a ultimaker original + kit that needs to be assembled and then I will modify it. On the software side I need the slicer to make tighter packed lines when it does a overhang and the lines to be paralel to the interior edge of the overhang. For more complex overhangs, for example if I want to add to the orange sample a hook it needs to compose the directions like in the drawing below.
designatomika
on 23 Aug 2017
I think the name 'temporary support technology' is a bit odd. There is no support at all, so also no temporary support - if I understand you correctly.
I think this technology is rather interesting, but I don't think Ultimaker will be going to sell modified printers which support this type of upside down printing.
I therefore don't think we will spend time on implementing features for this type of printing.
However, you are free to contribute to Cura by writing code for the features you need and making a pull request.
If you are willing to write code for such features I would be glad to help you in the right direction.
Regards,
Tim
BagelOrb
on 24 Aug 2017
No it's not just upside down printing. You have a physical support fixed around the nozzle that constantly moves with the nozzle.
I have a programmer with hue I am trying to figure out how to modify cura if you could help it would be awesome.
Thanks.
Mihai
designatomika
on 24 Aug 2017
Well, adjusting the walls such that there will be no walls surrounding the overhang seems to be the first step. Let's focus on that issue first and discuss other issues afterwards.
I think you need to introduce a new area feature in sliceDataStorage.h::SliceLayer
Something like Polygons overhang;
You need to compute these areas by subtracting two layers from each other somewhere in FffPolygonGenerator.cpp before createLayerParts is called.
You need to do it before that stage because the overhang you will be removing from the parts might split a part into two parts. (It is possible to do it after createLayerParts is called, but at the cost of a computational penalty because we would then be applying the splitIntoParts function multiple times..)
After this first step you might want to refactor your implementation. Instead of storing overhang directly in SliceLayer, you could split those areas into parts (see Polygons::splitIntoParts) and save those parts separately:
class SliceLayer
{
...
   std::vector<OverhangPart> overhang_parts;
};

class OverhangPart
{
    PolygonsPart outlines;
};
I hope this helps you to get started!
BagelOrb
on 24 Aug 2017
Once you have done the above you should be able to use the generated areas at a later stage in FffGcodeWriter. There we need to actually generate the print moves to fill up those areas.
BagelOrb
on 24 Aug 2017
Before we jump in can I have a shot to show ultimaker a video of how the sample was made so that we could maybe merge teams ? And is it ok if I PM you with a link to the video on wetransfer I don't know what's ultimaker policy on this...
Thanks
designatomika
on 24 Aug 2017
Yes please!
You can just post the video here, but if you want to keep it private you
could also send it to [email protected].
I can't say anything about teaming up, though. I mostly do programming ;)
Let's see the video first.
BagelOrb
on 24 Aug 2017
I tried sending to the address you specified and I get an error. Anyway, here is the link https://drive.google.com/file/d/0B7894RuMIF8sRzAyTjlHaFdDMHc/view?usp=sharing
designatomika
on 25 Aug 2017
Awesome, thanks!
I'll show this to a number of people in the company ;)
BagelOrb
on 25 Aug 2017
Cool, the quality is still low till google processes it.
designatomika
on 25 Aug 2017
Very clever!
Actually one of the first things I did with a 3D printer was hold it upside down and it printed surprisingly well (just a thin wall). Better than sideways. :)
That was just for fun, but the support platform makes it practical. The advantage becomes visible after 3 minutes in the film. But also a disadvantage, namely really bad layer adhesion for the first layers. Maybe print at a lower speed with the fans full on? Or acutally, no fans blowing through the holes in the support platform, because that makes it worse. Or will the print then stick to the platform?
And how is layer adhesion elsewhere, such as in the solid block, compared to normal printing?
Overhangs larger than 90° would be a bigger problem because that would create islands and you'd have to start printing in thin air. That might be solved with a sort of horizontal support structure, as an anchor to keep the printed roads in place. That might only be needed for the first layer, so much less material than for a complete support tower (as with upside up printing).
How do you modify the printer? Just add the support platform and then place the printer upside down?
 DDDirk
on 26 Aug 2017
DDDirk
on 26 Aug 2017
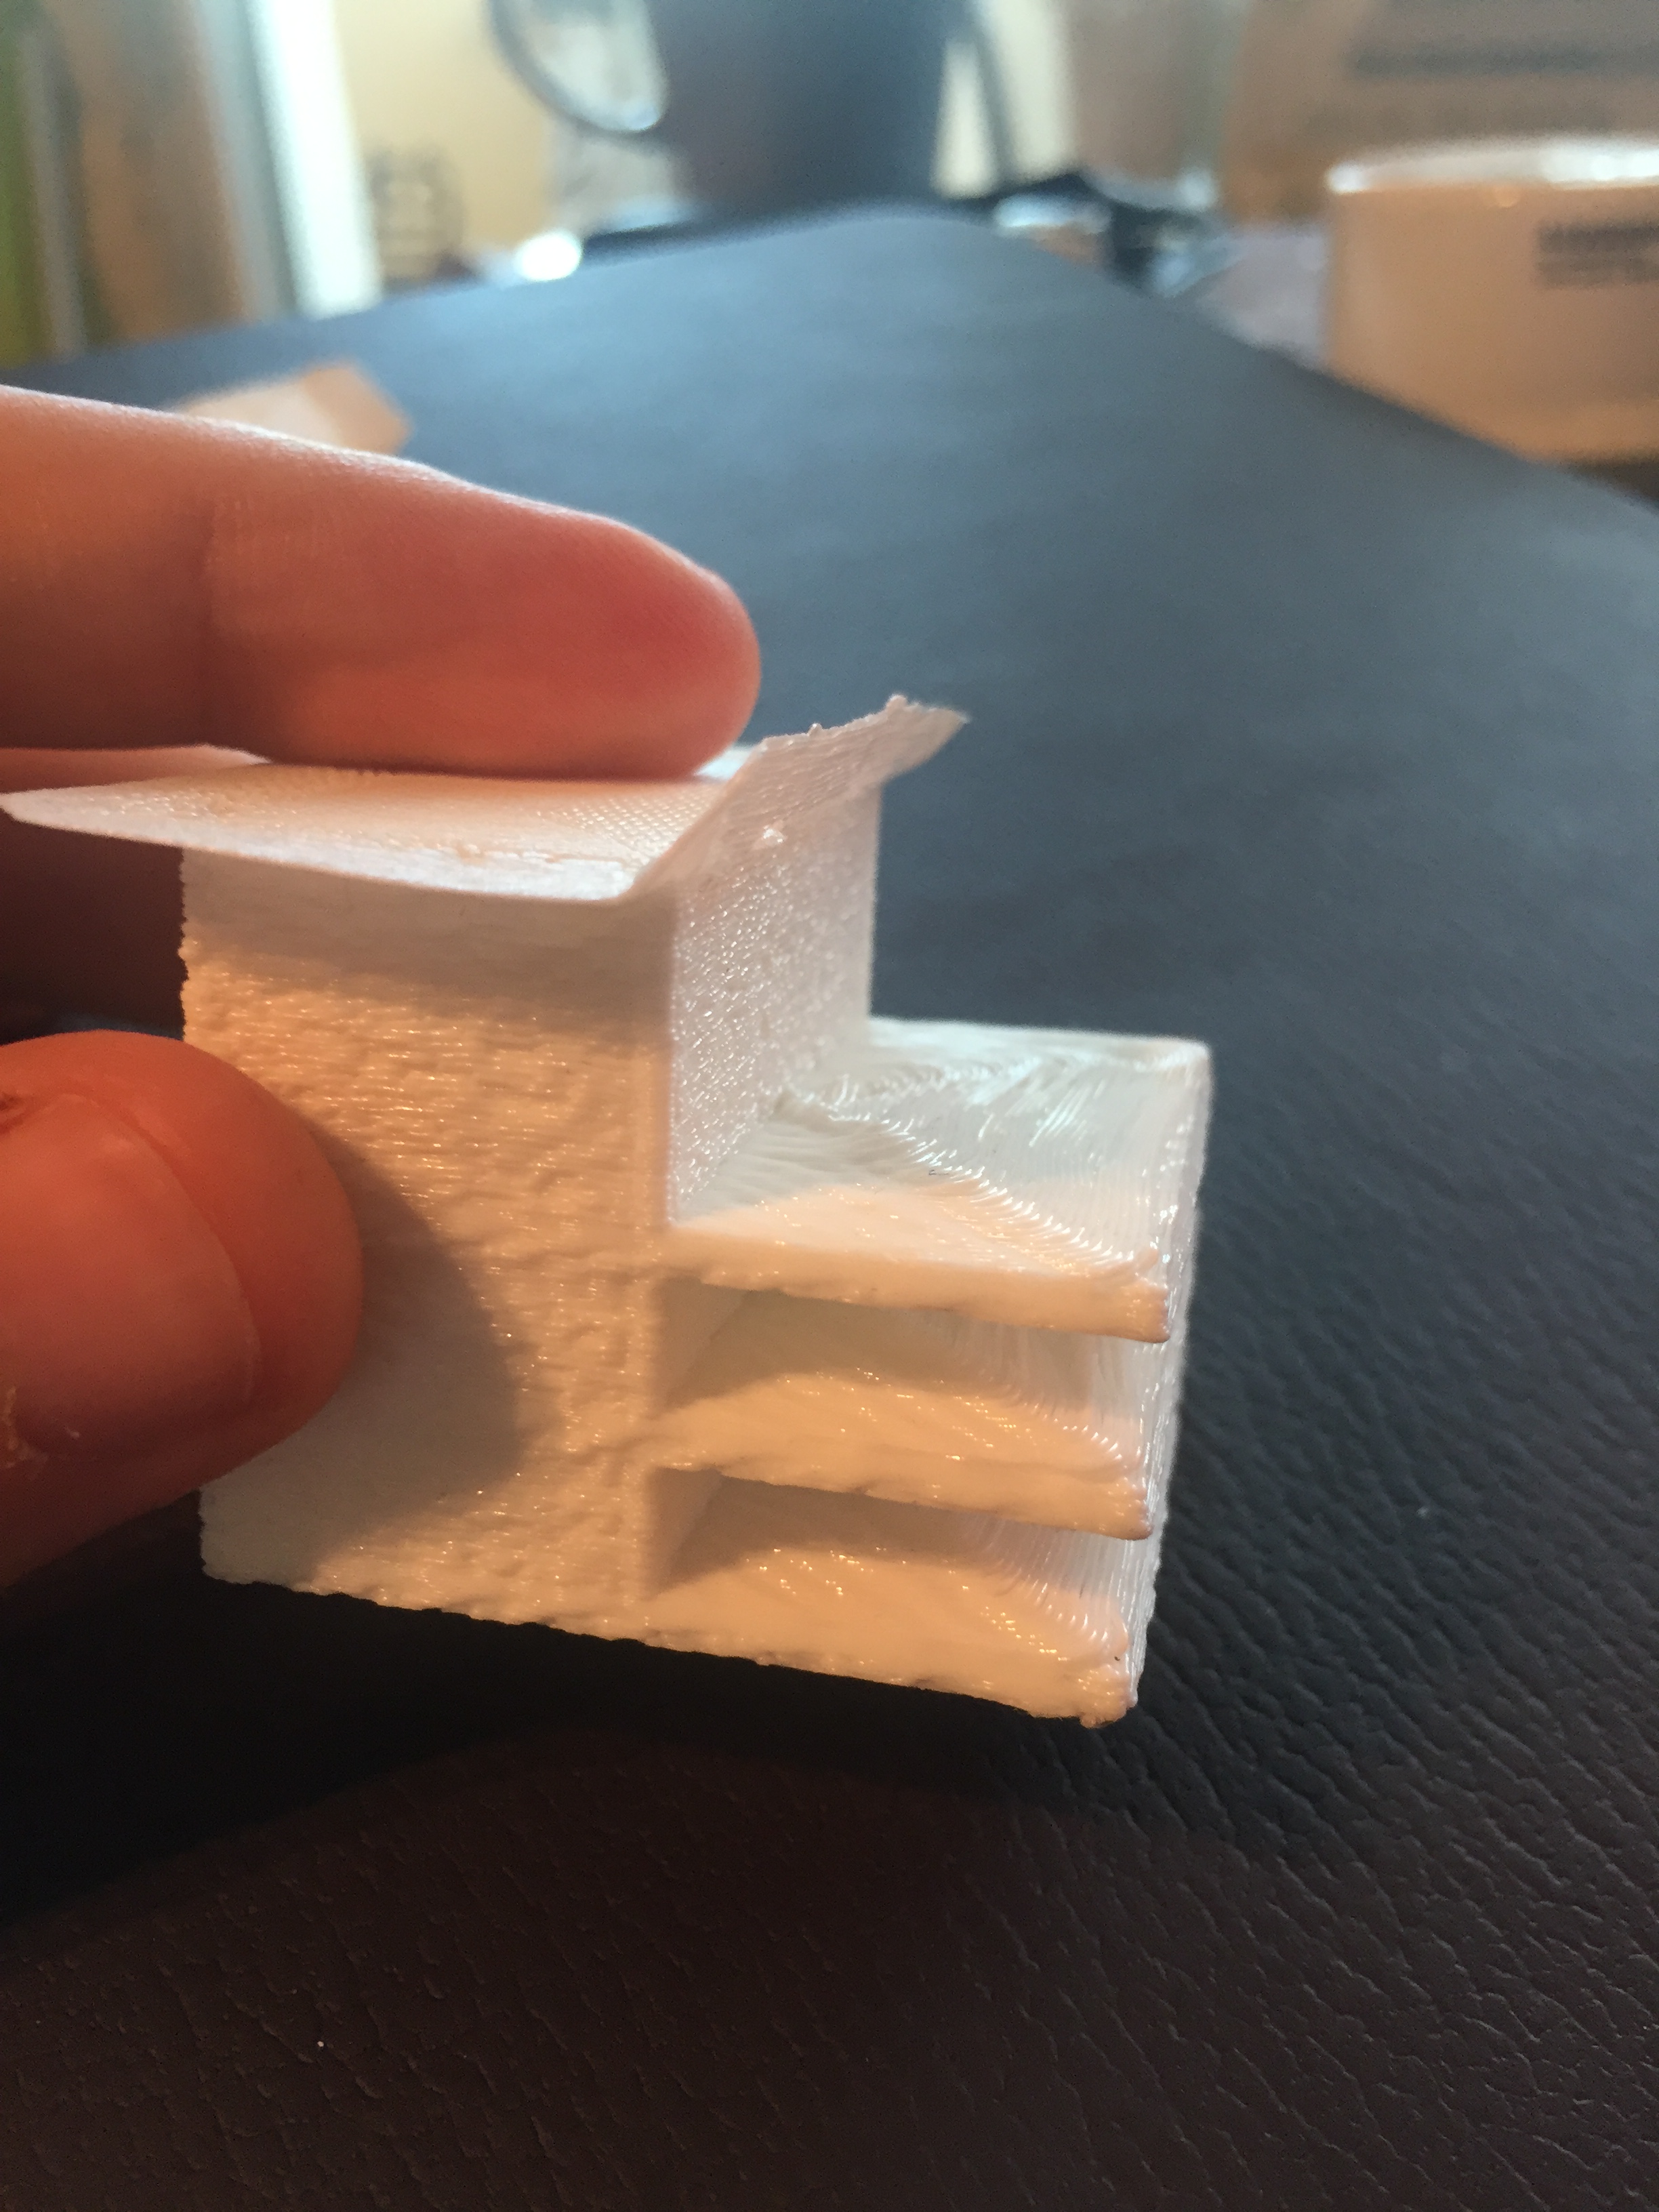
I have two other samples that don't have that adhesion problem seems to be influenced by hardware and software modifications. The cooling seems to be a problem on the test rig right now and on the software side it's starting from the corner not the inner edge of the overhang
designatomika
on 26 Aug 2017
In the first picture sample the white one, has better compression of the layers because the starting point is from the center, you can see in video 3:43 what I mean.
designatomika
on 26 Aug 2017
For the modification of the printer I had to reverse engineer some parts and it was a pain, so I moved to a ultimaker original kit, found a assambled model of the print head that I will use to make a proper design. A lot of room left for improving it.
designatomika
on 26 Aug 2017
Guys, it's now on youtube https://www.youtube.com/watch?v=qnEgSlP3F2Q
I also added a link in the description where I will be posting updates
designatomika
on 15 Sep 2017
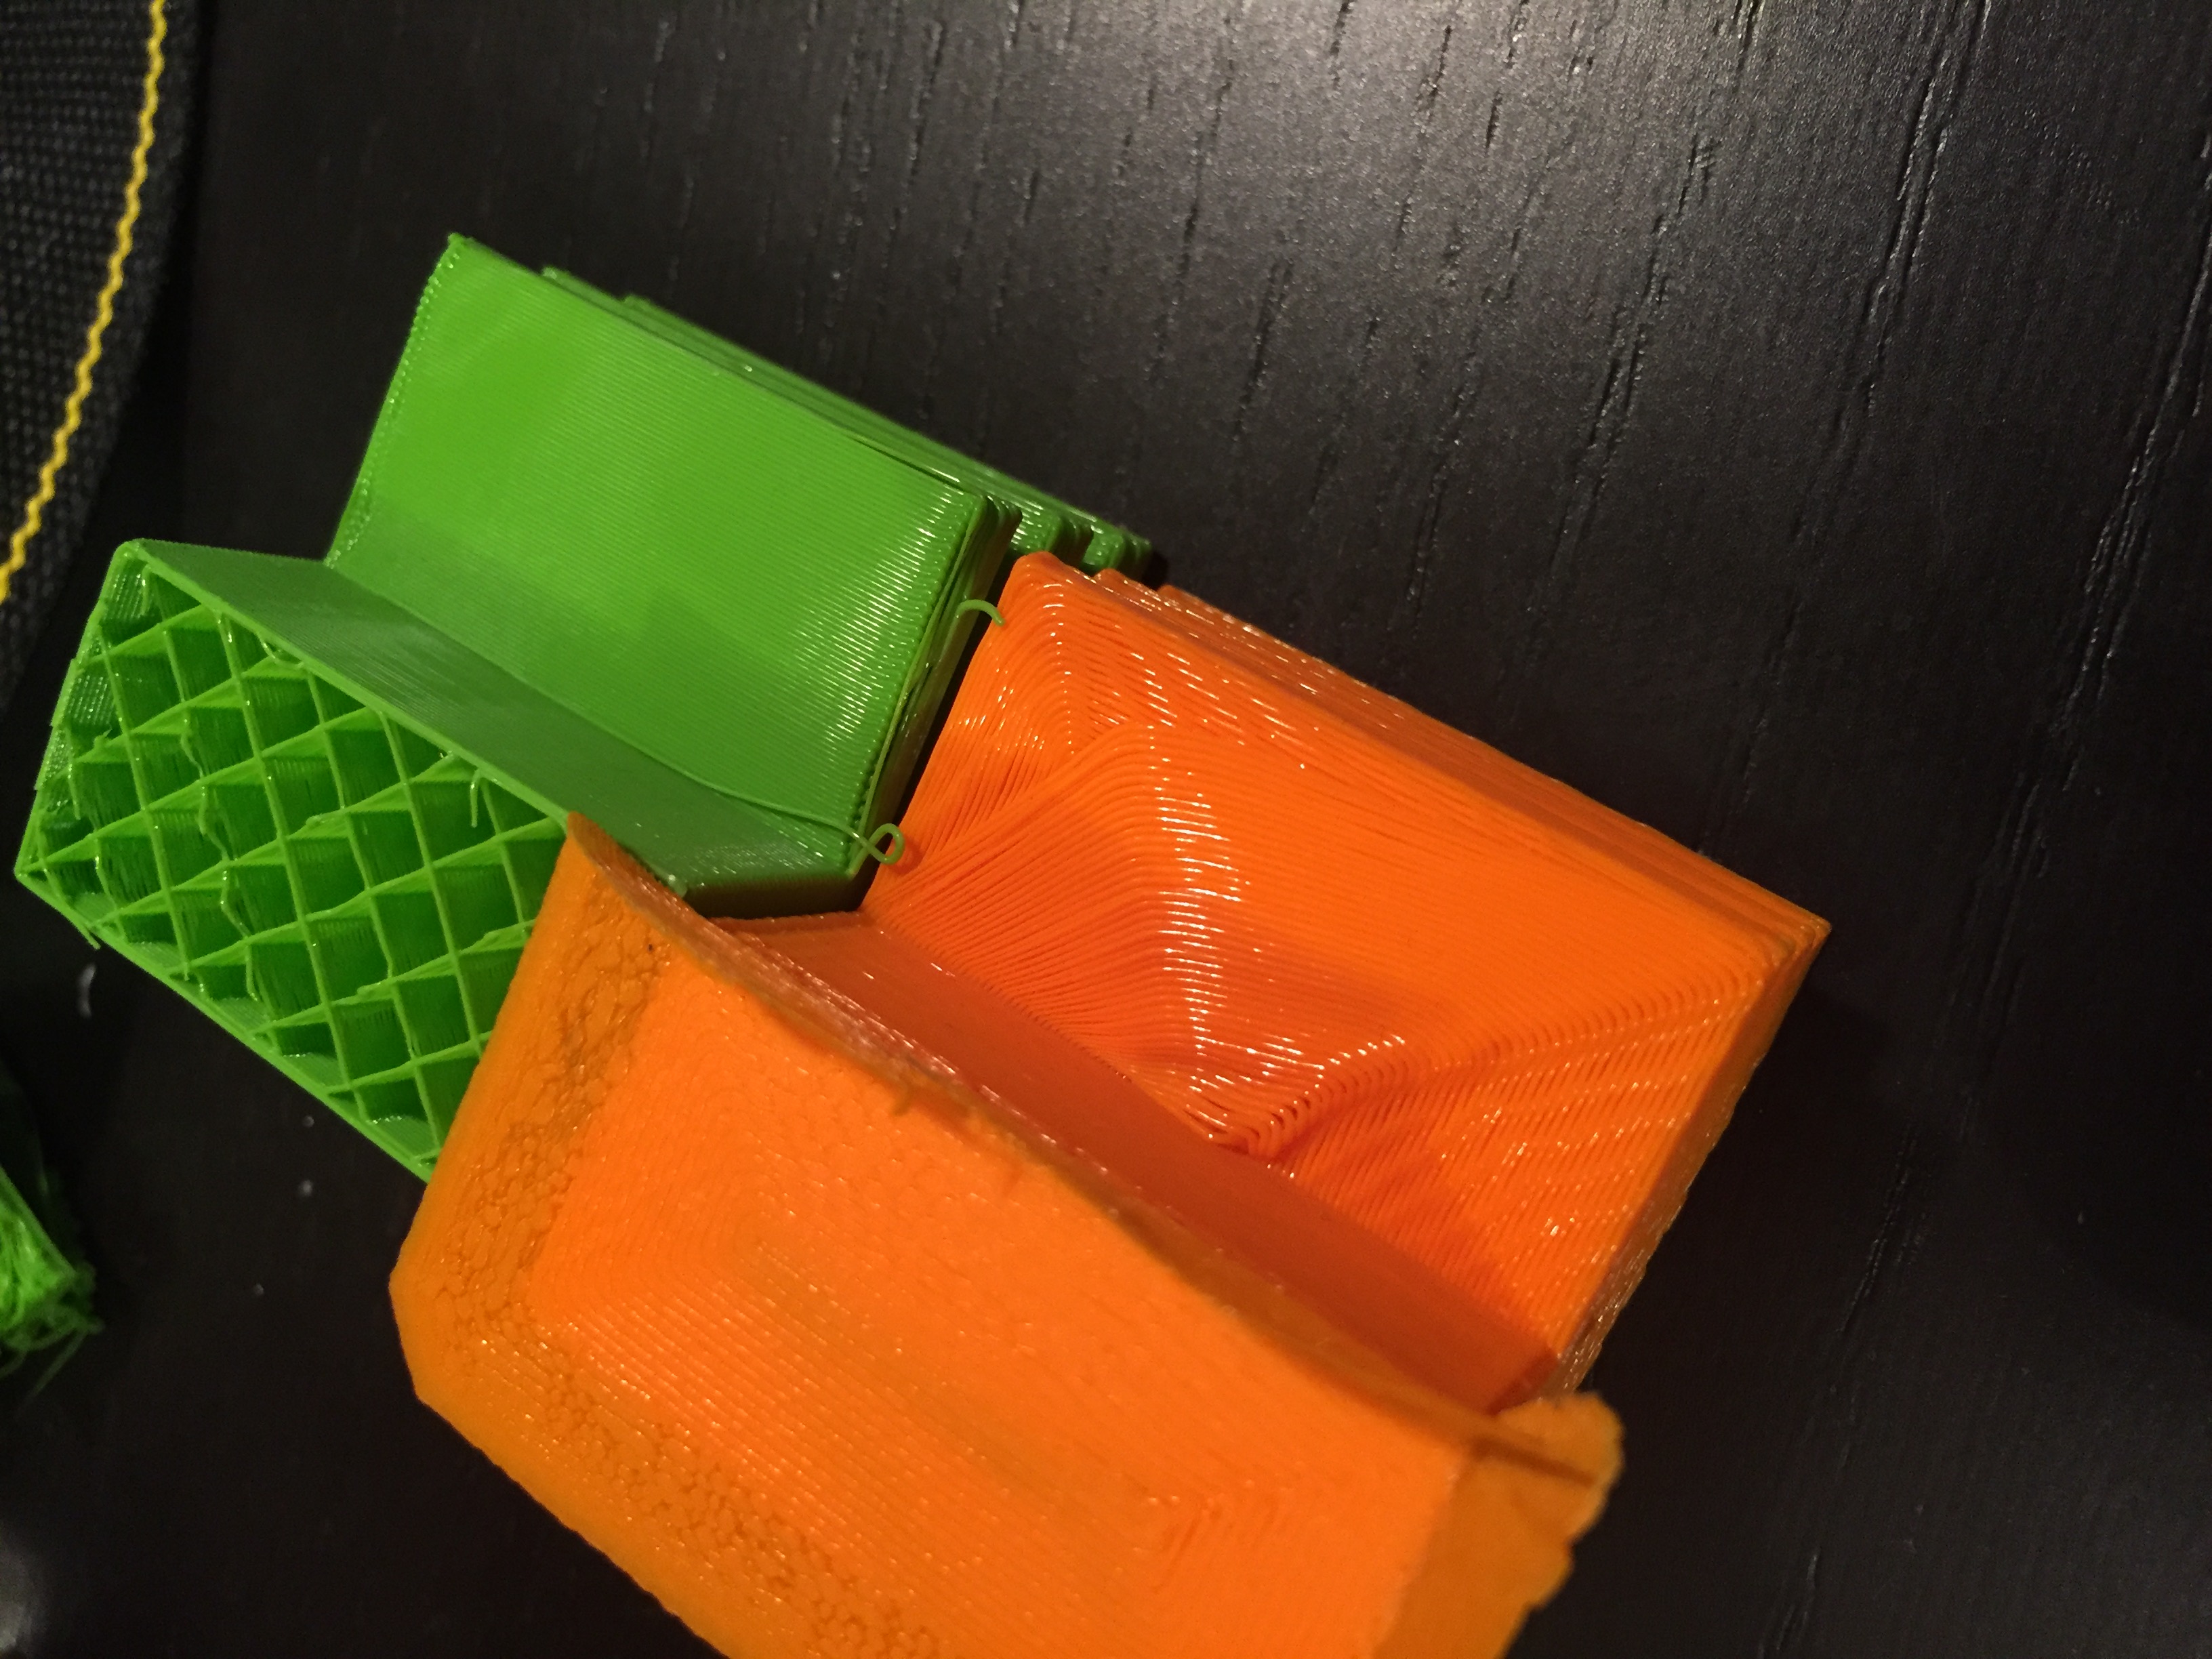
I don't know if there is any interest from ultimaker in this tech, but I uploaded some new results done on a modified ultimaker original. The green part is on the UMO+.
Best regards,

designatomika
on 14 Nov 2017
Woah, that is pretty cool. There seems to be a bit of sagging though. Do you think that can be remedied?
 nallath
on 15 Nov 2017
nallath
on 15 Nov 2017
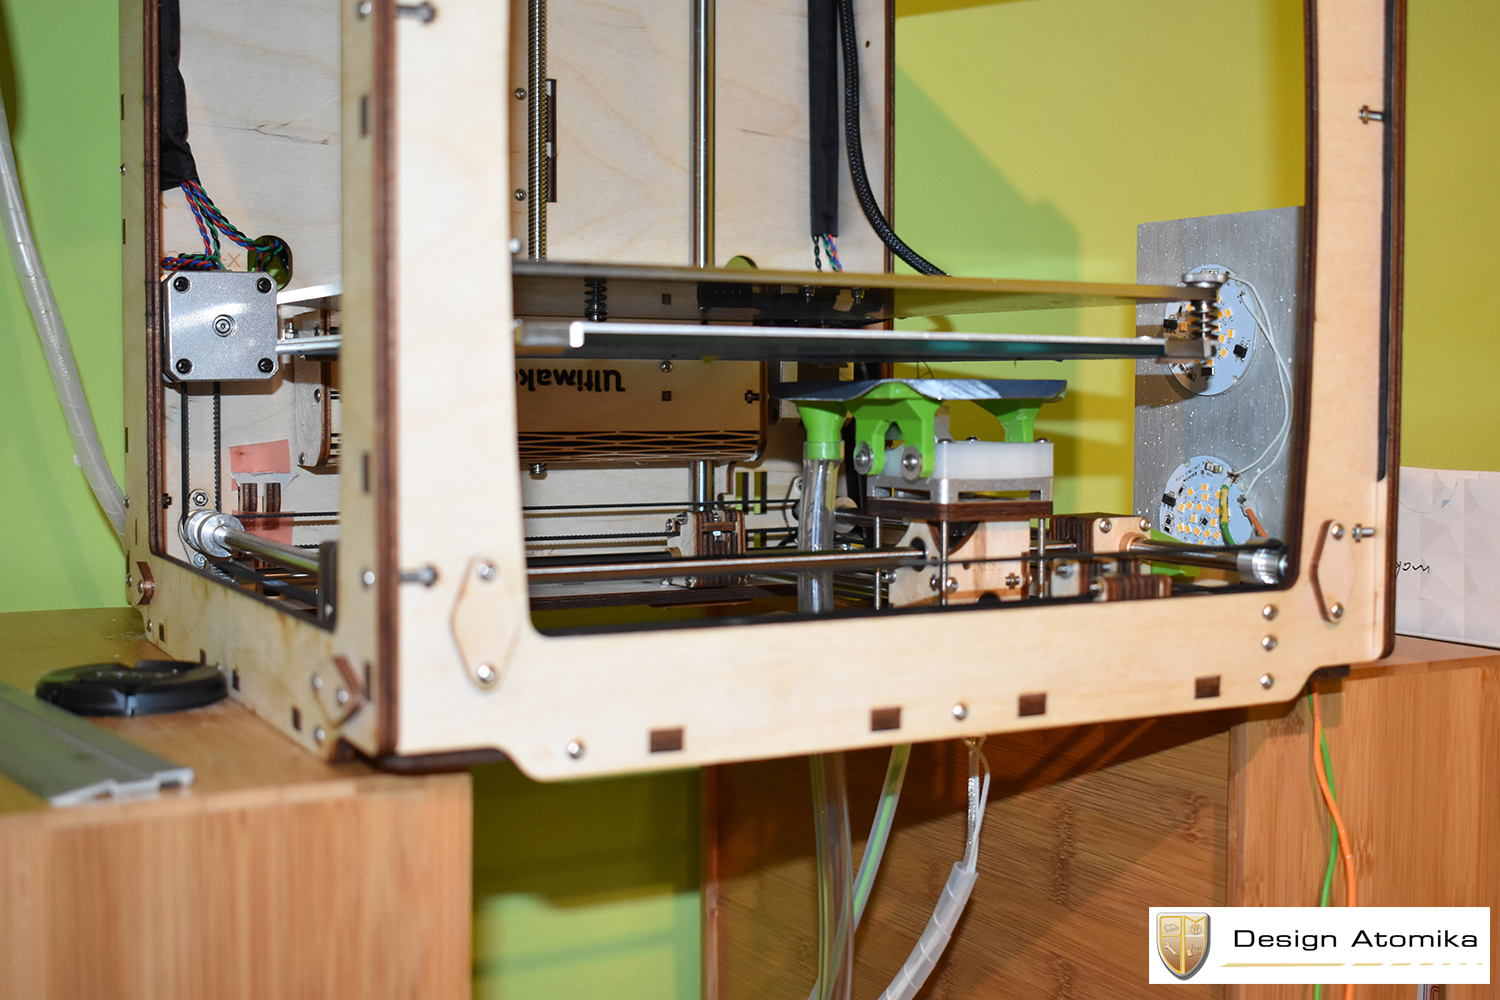
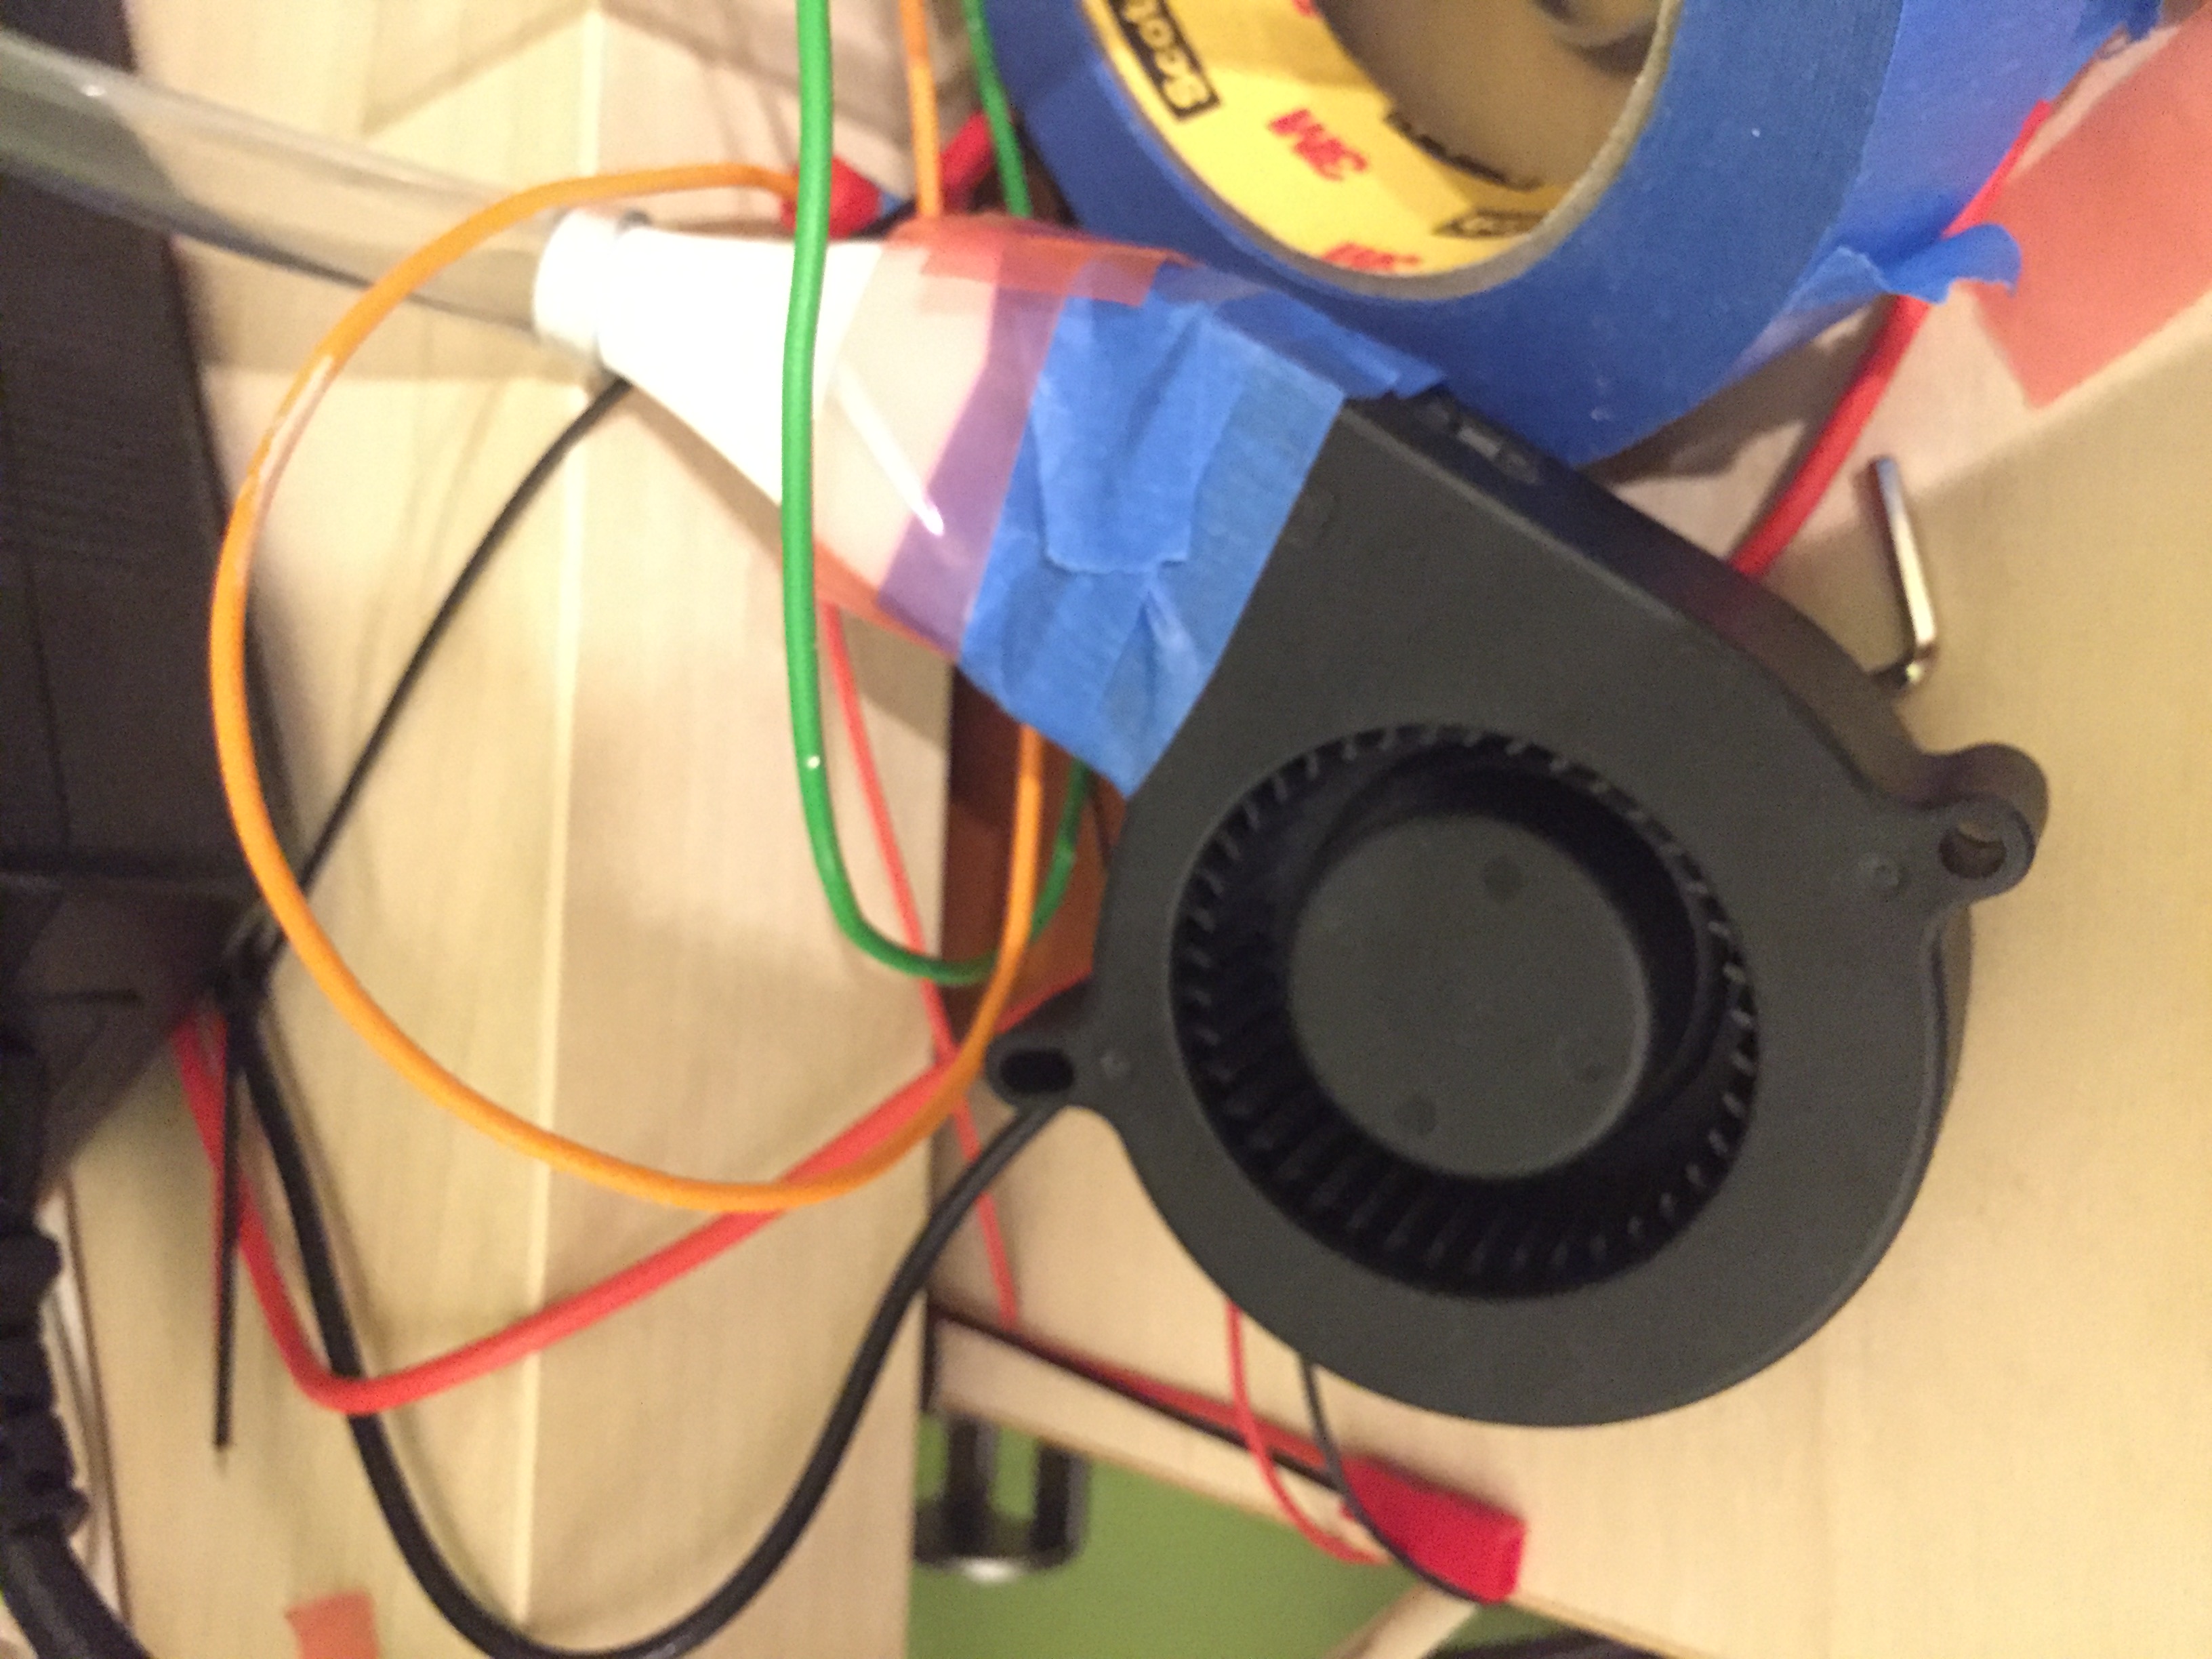
Yes, the software side right now is the biggest challenge, when it does the second layer of the overhang it starts from the outermost corner of the overhang pushing it up when the first layer of the overhang is still hot, I 'm thinking of getting a air pump to force the air thrue the tube to compensate this, right now you don't feel any breeze near the nozzle at all.
designatomika
on 15 Nov 2017
This is the cooling right now
designatomika
on 15 Nov 2017
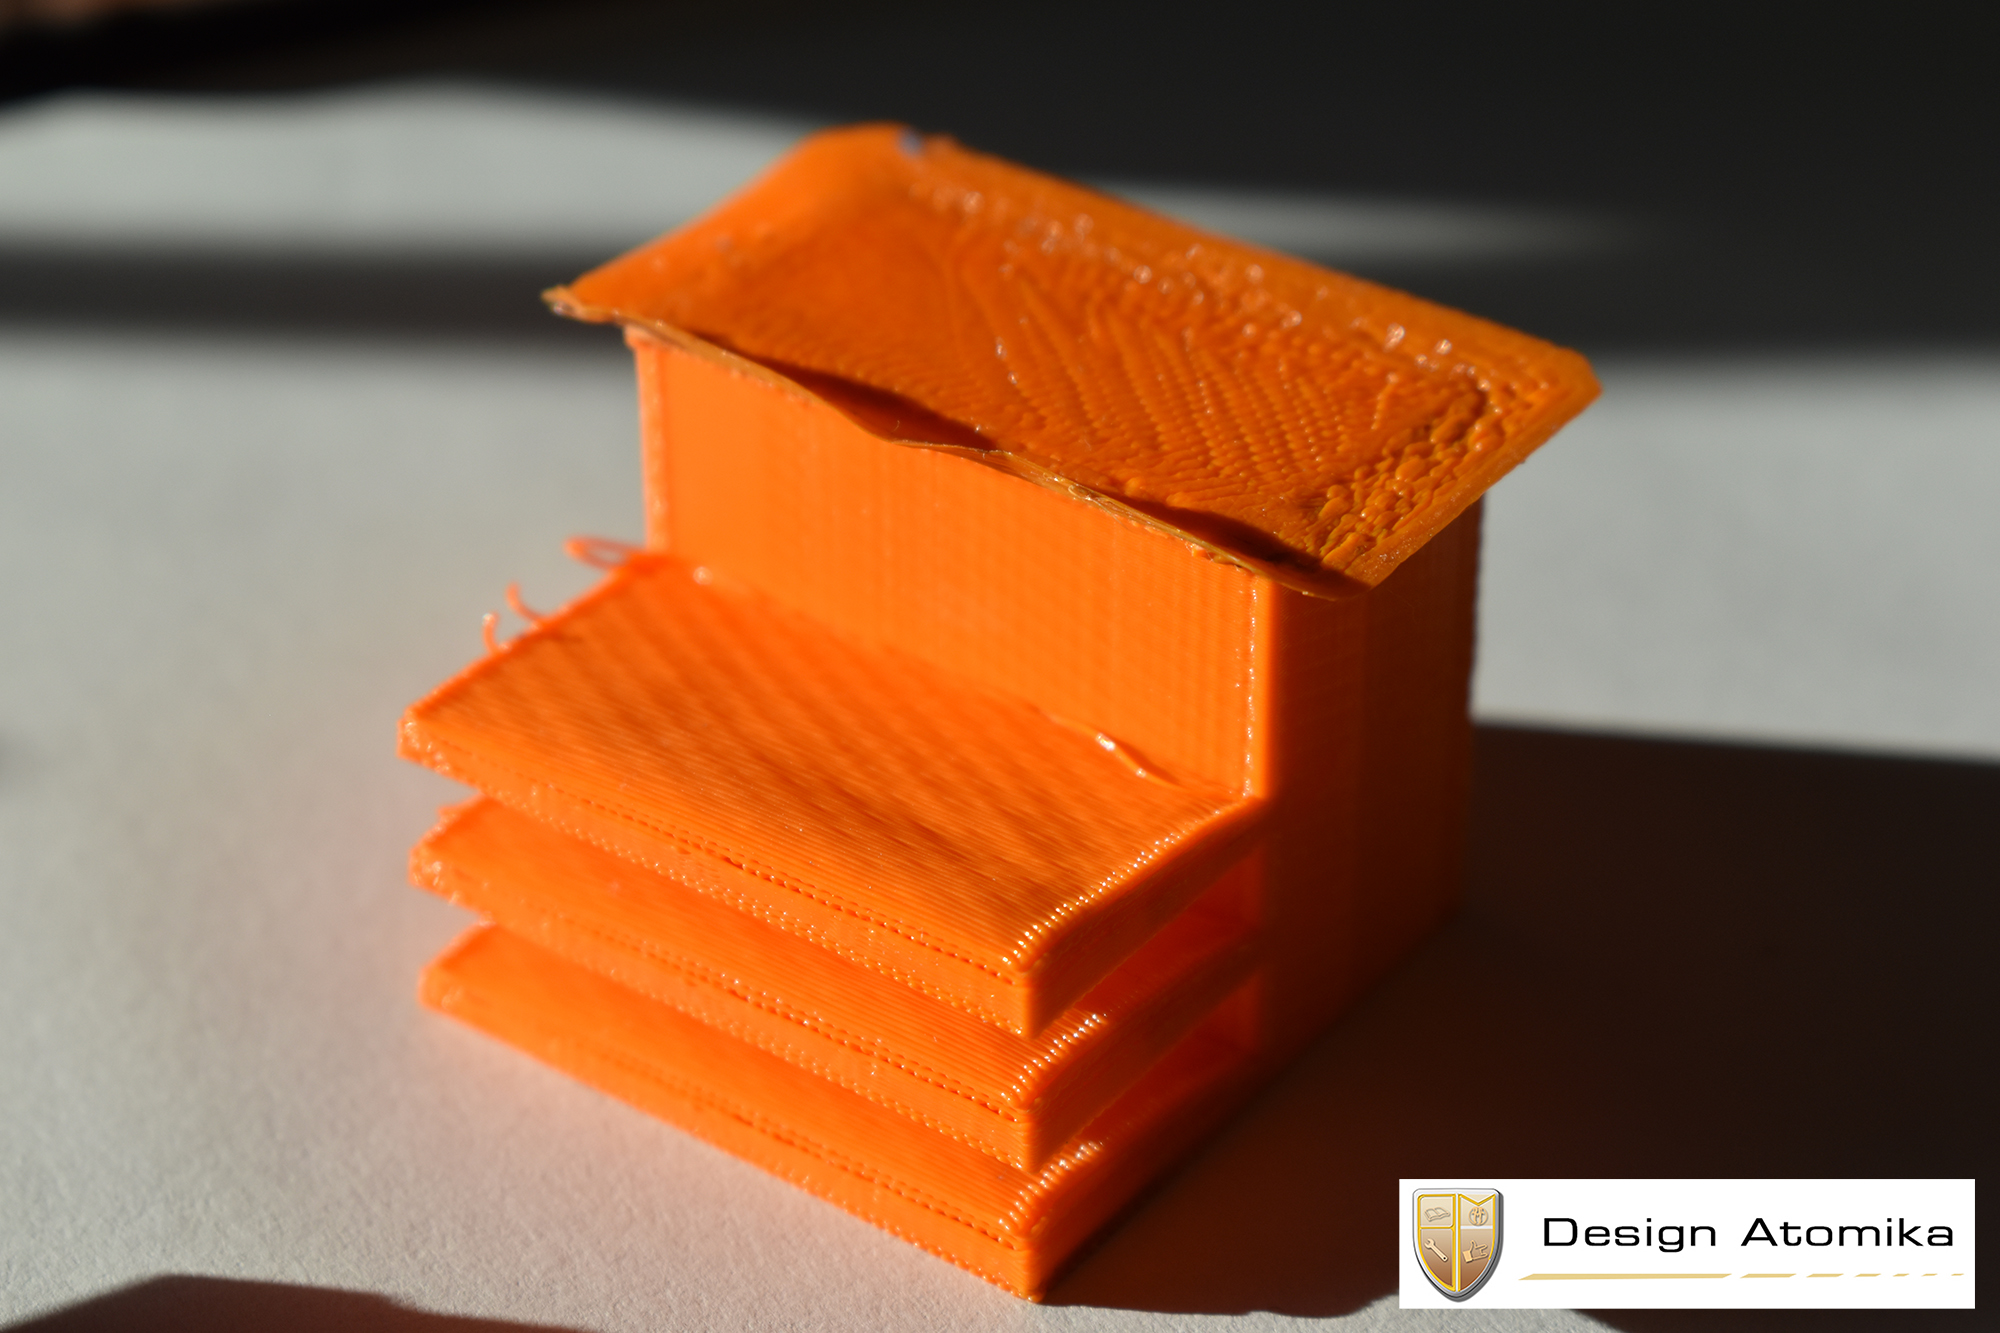
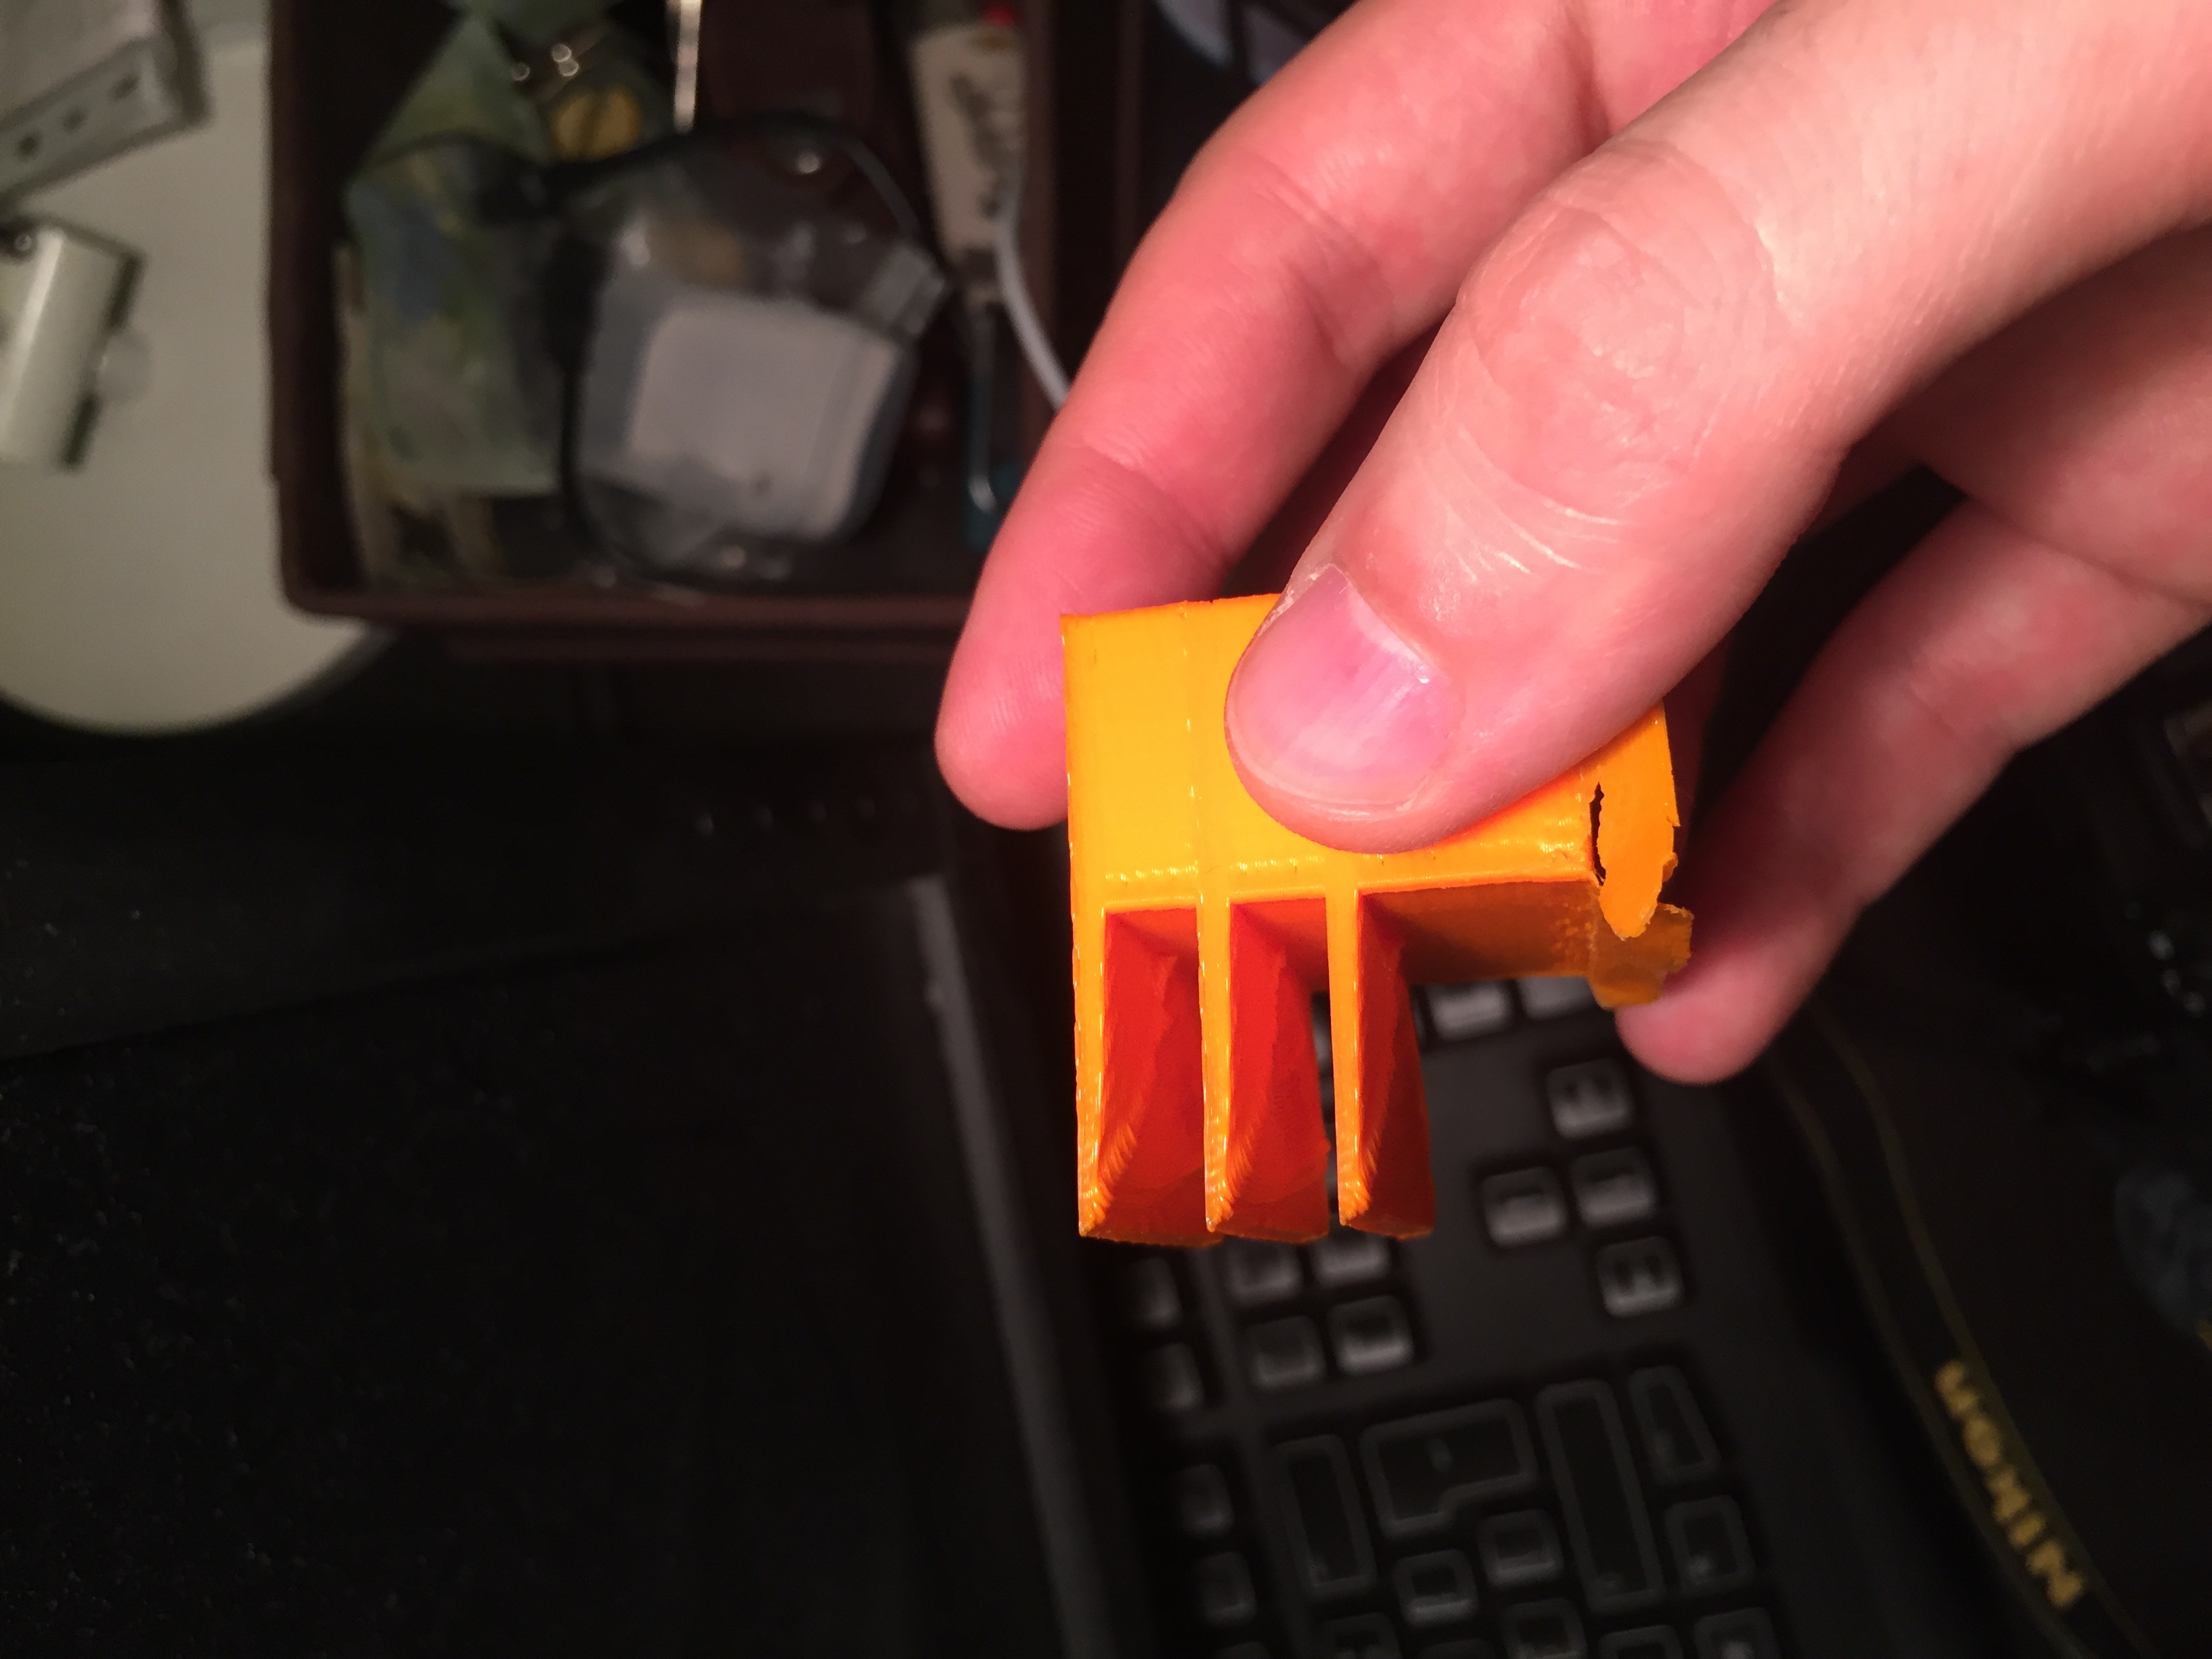
For example this piece was done with different pattern of the bottom layer that gave enough time for cooling, image bellow.
designatomika
on 15 Nov 2017
You see in comparison with green sample the finish is inferior. The problem is that I can't set orange piece with the circular tool path to print just the overhang region with higher overlap like on the green piece to get better finish and a piece that has fill, right now orange piece is full solid out 50 shell setting in slicer. I don't know if it's clear. :)
designatomika
on 15 Nov 2017
Closing because it's most likely not something we'll add to mainline Cura (since it involves modifying the printer). Feel free to further discuss about it here though.
 ChrisTerBeke
on 2 Mar 2018
ChrisTerBeke
on 2 Mar 2018
Related issues
 Liger0
·
3Comments
Liger0
·
3Comments
 jornada812
·
3Comments
jornada812
·
3Comments
 rudowinger
·
3Comments
rudowinger
·
3Comments
 mubarak111nsu
·
3Comments
mubarak111nsu
·
3Comments
 konvoj
·
3Comments
konvoj
·
3Comments
Most helpful comment
I tried sending to the address you specified and I get an error. Anyway, here is the link https://drive.google.com/file/d/0B7894RuMIF8sRzAyTjlHaFdDMHc/view?usp=sharing