Ckeditor5: Introduce a manual test with simple box
Like http://sdk.ckeditor.com/samples/simplebox.html.
Simple box is a sample widget which we always used to showcase widgets. Being able to see how it looks in CKE5 would be nice.
 Reinmar
All 9 comments
Hi @Reinmar! Great work on the alpha releases and I'm quite grateful for the docs that the team has had time to create. Is this simple box example of the widget API somewhere in the docs I'm missing?
 rjsteinert
on 31 Oct 2017
rjsteinert
on 31 Oct 2017
Hi @rjsteinert!
Thanks for the comment. You're right - there is no simple box example in the docs for now. In fact, closing this ticket will be a good foundation for creating such topic in the docs.
Currently we're under big engine refactoring, and after that we'll surely get back to this issue. So please stay tuned.
In meantime I encourage you to take a look at highlighting manual test sources, where You can find the simplest widget implementation.
 szymonkups
on 2 Nov 2017
szymonkups
on 2 Nov 2017
Thanks a lot @szymonkups for the link to the highlighting manual test sources - this was very helpful in getting an understanding of a basic widget.
I'm working on a more complicated widget and I am stuck on some basic issues. Some background: I'm working on a content management system that uses polymer web components for display. I'm hoping to use ckeditor5 to provide widgets that can generate the code for these components. Here is a sample of the code that I would like ckeditor5 to generate:
    <p>Text description...</p>
    <acasi intro-src="assets/sounds/5.mp3" name="lessonIntro">
        <paper-radio-button name="form_selection" value="never"><img src="assets/images/never.png"/></paper-radio-button>
        <paper-radio-button name="form_selection" value="once"><img src="assets/images/once.png"/></paper-radio-button>
        <paper-radio-button name="form_selection" value="few"><img src="assets/images/few.png"/></paper-radio-button>
        <paper-radio-button name="form_selection" value="many"><img src="assets/images/many.png"/></paper-radio-button>
    </acasi>
Initially, I'd like to create a simple widget that generates the following code:
<acasi>
  <img src="assets/images/never.png"/>
  <img src="assets/images/once.png"/>
  <img src="assets/images/few.png"/>
  <img src="assets/images/many.png"/>
</acasi>
(It would be super cool to have some pop-up toolbars to enable setting of image names and alt tabs similar to what the Image plugin offers, but for now, outputting the basic code would be fine.)
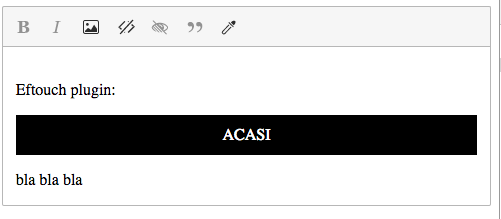
In my index.html file, I hard-coded a tag for my widget, called 'acasi', to see if I could understand how buildModelConverter works:
    <p>Eftouch plugin:</p>
    <acasi></acasi>
    <p>bla bla bla</p>
It renders as a widget using the following code:
    // Build converter from model to view for editing pipeline.
    buildModelConverter().for( data.modelToView, editing.modelToView )
      .fromElement( 'acasi' )
      .toElement( () => {
        const widgetElement = new ViewContainerElement( 'figure', { class: 'fancy-widget', contenteditable: 'true' }, new ViewText( 'ACASI' ) );
        const widget = toWidget( widgetElement );
        widget.setAttribute( 'contenteditable', true );
        return widget;
      } );

    // Build converter from view element to model element for data pipeline.
    buildViewConverter().for( data.viewToModel )
      .fromElement( 'acasi' )
      .toElement( () => new ModelElement( 'acasi' ) );
So far, so good. Next step: Create a new instance of the widget in the editor using a button in the toolbar. First I tested out the process for getting an image to display after clicking a button on the toolbar. I've got my command wired up to the toolbar here:
      // Execute command.
      view.on( 'execute', () => {
      // this.listenTo( view, 'execute', () => {
        const imageUrl = prompt( 'Sound URL' );

        editor.document.enqueueChanges( () => {
          const imageUrl = 'babycat.jpg';
          const imageElement = new ModelElement( 'image', {
            src: imageUrl
          } );
           // I'm creating an image here, just to confirm that this is working properly.
          // But when I try to create an element of type 'acasi', it does not render anything.
          const widgetElement = new ModelElement('figure', { class: 'fancy-widget' },imageElement)
          editor.data.insertContent( widgetElement, editor.document.selection );
        } );
      });
      return view;
    });
Screenshot of result:
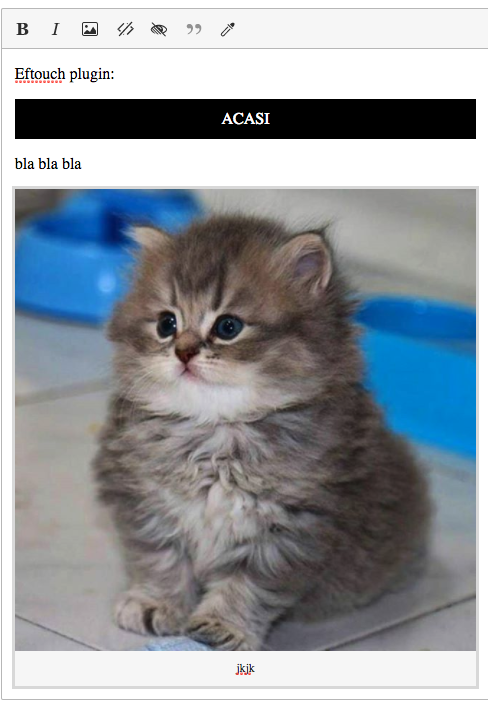
Creating an image works fine; however, I'm unsure how to create an instance of my 'acasi' widget. When I try to create a widgetElement as follows, it does not render:
const widgetElement = new ModelElement( 'figure', { class: 'fancy-widget' }, new ViewText( 'ACASI' ) );
Is it a problem with my schema definitions?
    // Configure schema.
    schema.registerItem( 'acasi' );
    schema.allow( { name: 'acasi', inside: '$root' } );
    schema.allow( { name: '$inline', inside: '$root' } );
    schema.allow( { name: '$inline', inside: 'acasi' } );
    schema.objects.add( 'acasi' );
The code for the above example is here: https://github.com/chrisekelley/ckeditor5-eftouch/blob/master/src/eftouchwidget.js#L92
Lastly, how can I configure the output so that it outputs to html as
<acasi>nested elements here</acasi>
instead of the code generated in the view:
<figure class="fancy-widget ck-widget" contenteditable="true">ACASI</figure><p>bla bla bla</p><figure class="image"><img src="babycat.jpg" alt="kjkj"><figcaption>jkjk</figcaption></figure>
I'm using polymer web components in my app, thus the custom tag 'acasi'.
This code to output the html is here: https://github.com/chrisekelley/ckeditor5-eftouch/blob/master/app.js#L72
let htmlText = Tangy.editor.getData();
console.log("html output: " + htmlText)
By the way, I've created a ckeditor5 polymer web component that uses the shady dom here: polymer-ckeditor5
 chrisekelley
on 3 Nov 2017
chrisekelley
on 3 Nov 2017
Hello @chrisekelley, it's super cool that you're messing with widgets already.
So far, so good. Next step: Create a new instance of the widget in the editor using a button in the toolbar. First I tested out the process for getting an image to display after clicking a button on the toolbar
From what I see you're trying to insert your element by using following code:
// I'm creating an image here, just to confirm that this is working properly.
// But when I try to create an element of type 'acasi', it does not render anything.
const widgetElement = new ModelElement('figure', { class: 'fancy-widget' },imageElement)
editor.data.insertContent( widgetElement, editor.document.selection );
There is a little mistake here and you got lucky that image is displayed ;). You created figure element with image element inside and inserted it to the model. There is no figure element defined in the model - it is used in the view only. So in this situation figure element is not even moved to model and image element is probably hoisted and displayed. Proper way to insert image will be:
const imageUrl = 'babycat.jpg';
const imageElement = new ModelElement( 'image', {
    src: imageUrl,
    alt: 'alternative text'
} );
editor.data.insertContent( imageElement, editor.document.selection );
... and to insert your acasi element:
const acasi = new ModelElement( 'acasi' );
editor.data.insertContent( acasi, editor.document.selection );
Look at this issue for more info about inserting images: https://github.com/ckeditor/ckeditor5/issues/555.
Lastly, how can I configure the output so that it outputs to html as
You need to define a different converter for the data pipeline, now both converters looks the same:
buildModelConverter().for( data.modelToView, editing.modelToView )
    .fromElement( 'acasi' )
    .toElement( () => {
        const widgetElement = new ViewContainerElement( 'figure', { class: 'fancy-widget', contenteditable: 'true' }, new ViewText( 'ACASI' ) );
        const widget = toWidget( widgetElement );
        widget.setAttribute( 'contenteditable', true );
        return widget;
    } );
So the output data looks the same as editing view. You should write different/simpler converter for data.modelToView, something like:
buildModelConverter().for( data.modelToView )
    .fromElement( 'acasi' )
    .toElement( 'acasi');
Hope this helps!
BTW: I encourage you to ask questions on our Gitter Channel or StackOverflow in the future. We are checking those quite often and they're better suited for this kind of questions.
szymonkups
on 5 Nov 2017
Thanks so much @szymonkups - this was extremely helpful. I just committed the changes you suggested here: https://github.com/chrisekelley/ckeditor5-eftouch/commit/b8571d2fdf641c8c4c30d8f2934d66322105c9e0
I made one alteration - I created a separate buildModelConverter for editing.modelToView so that it would render in the editor:
    buildModelConverter().for( editing.modelToView )
      .fromElement( 'acasi' )
      .toElement( () => {
        const widgetElement = new ViewContainerElement( 'figure', { class: 'fancy-widget', contenteditable: 'true' }, new ViewText( 'ACASI' ) );
        const widget = toWidget( widgetElement );
        widget.setAttribute( 'contenteditable', true );
        return widget;
      } );
Here's my current understanding of how widgets work:
You must first register the widget in the schema and define where is can be allowed and (if necessary) what can be present inside it.
    schema.registerItem( 'acasi' );
    schema.allow( { name: 'acasi', inside: '$root' } );
    schema.allow( { name: '$inline', inside: '$root' } );
    schema.allow( { name: '$inline', inside: 'acasi' } );
    schema.objects.add( 'acasi' );
Create a buildModelConverter for each step in the pipeline:
- data.modelToView - to render the getData output for the widget when you create new Elements in the editor.
- editing.modelToView - to render the widget in the editing view (in ckeditor)
- data.viewToModel - When the editor is consuming html, recognize your widget and put it in the model so that editing.modelToView can then render it in the editing view
- editing.viewToModel - Not sure if there is a use for this.
To create new instances of the widget, create a new ModelElement():
      // Execute command.
      view.on( 'execute', () => {
        editor.document.enqueueChanges( () => {
          const yourWidget = new ModelElement( 'yourWidget' );
          editor.data.insertContent( yourWidget, editor.document.selection );
        } );
      });
Does this sound correct?
Thanks a lot for the tips re: Gitter and StackOverflow!
chrisekelley
on 6 Nov 2017
You must first register the widget in the schema and define where is can be allowed and (if necessary) what can be present inside it.
That's correct. We just don't call elements in the model "widgets". Widgets are only view representation of given element from model (you write a converter that converts model element to widget). So you can say it that way:
You must first register your custom element in the schema and define where it can be allowed and (if necessary) what can be present inside it. Then you write a converter that converts this model element to view widget.
You're also right about pipelines. There is no editing.viewToModel as you assumed :) - you make changes in the model and those changes are reflected in the editing view, so there is no need for conversion from editing view to model.
To create new instances of the widget, create a new ModelElement():
As I mentioned before - you're inserting your custom element to the model and then it is converted to the widget in the view using converter you defined.
szymonkups
on 6 Nov 2017
Like http://sdk.ckeditor.com/samples/simplebox.html.
Simple box is a sample widget which we always used to showcase widgets. Being able to see how it looks in CKE5 would be nice.
+1
 Nuranto
on 3 Aug 2018
Nuranto
on 3 Aug 2018
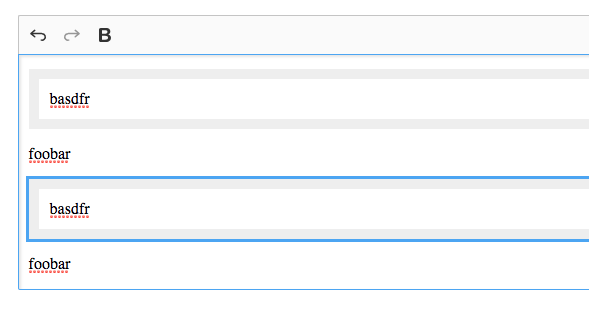
It turns out that we created a similar test in the meantime: https://github.com/ckeditor/ckeditor5-widget/blob/master/tests/manual/widget-with-nestededitable.js
It adds support for the following model structure:
<widget>
    <nested>Foo</nested>
</widget>
The <widget> is rendered as <div class=widget> in the view (and since toWidget() is used on it, it behaves as a widget). Similarly, the <nested> model element is rendered to <div class=nested> and since toWidgetEditable() is used on it, it behaves as a nested editable element.
We'll be extending this in the documentation, but the above may be a good start for simple widgets.
Reinmar
on 11 Sep 2018
Covered with https://ckeditor.com/docs/ckeditor5/latest/framework/guides/tutorials/implementing-a-block-widget.html too.
Reinmar
on 22 Jul 2019
Related issues
Reinmar
·
3Comments
 pomek
·
3Comments
pomek
·
3Comments
 pandora-iuz
·
3Comments
Reinmar
·
3Comments
pandora-iuz
·
3Comments
Reinmar
·
3Comments
 oleq
·
3Comments
oleq
·
3Comments
Most helpful comment
Hi @rjsteinert!
Thanks for the comment. You're right - there is no simple box example in the docs for now. In fact, closing this ticket will be a good foundation for creating such topic in the docs.
Currently we're under big engine refactoring, and after that we'll surely get back to this issue. So please stay tuned.
In meantime I encourage you to take a look at highlighting manual test sources, where You can find the simplest widget implementation.